Build branded landing pages, for collections, categories, seasonal sales, and product launches, directly from your WizCommerce admin. Pick a product source, choose a template, customize it, and publish. No developer involvement needed.
Platform: WizShop | Who is this for: Administrators
To Get There: WordPress admin > Landing Pages
Table Of Content
Before You Begin
- You must have Admin access to WordPress admin.
- Make sure the collection or category you want to bind the page to already exists and has products assigned to it
- Have your page name, URL slug, and SEO copy (meta title, meta description) ready before you start.
- For visual customization (hero banners, images, videos, copy), you will use the Elementor editor in the final step.
A. How Landing Pages Work
Every landing page in WizShop is made up of two stacked zones:
| Zone | Built With | What It's For |
| Top: Marketing zone | Elementor (full editor freedom) |
Hero banners, CTAs, promotional copy, lifestyle imagery, countdown timers |
| Bottom: Product listing zone | Standard WizShop product listing |
Automatically shows products from the bound category or collection |
In WizShop, the marketing zone is designed once in Elementor. The product listing zone is managed automatically, simply select the category or collection to bind the page to, and WizShop pulls in the matching products.
The product listing stays in sync automatically. Any products added to or removed from the bound category or collection are reflected on the landing page without any manual updates required.
B. Create a New Landing Page
- Sign in to your WizCommerce WordPress admin.
- In the left sidebar, click Landing Pages. The All Pages view opens, showing every landing page in your account.
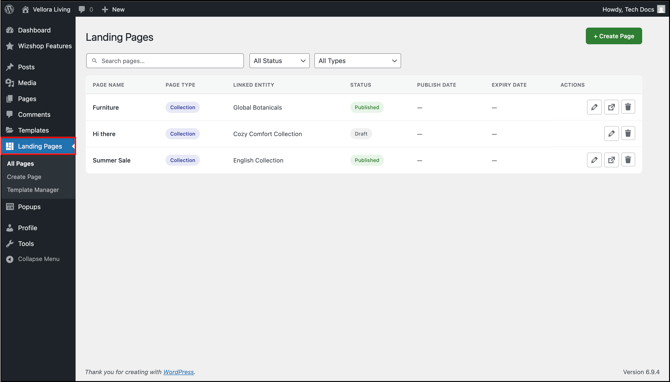
- From this view, you can:
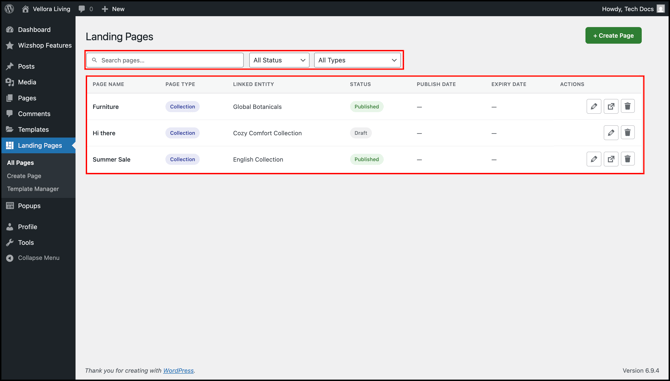
- Search: Find a page by name using the search bar at the top
- Filter by status: Published, Draft, or Expired
- Filter by page type : Collection, Category, and so on
- Edit, preview, or delete an existing page using the icons in the Actions column
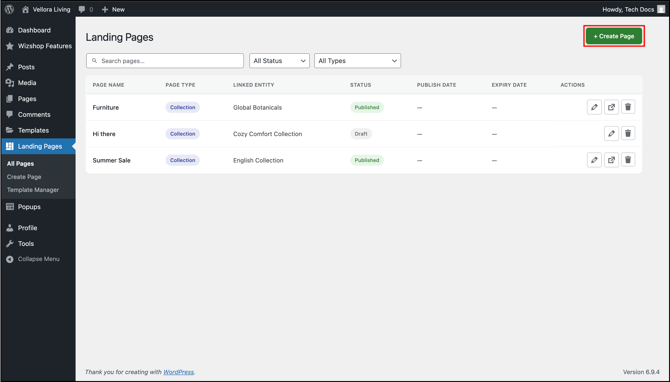
- Click + Create Page in the top right corner. The New Page form opens.
C. Set Up the Page
This is where you give the page its identity, what it is, what products show up on it, in what order, and where it lives on your domain.
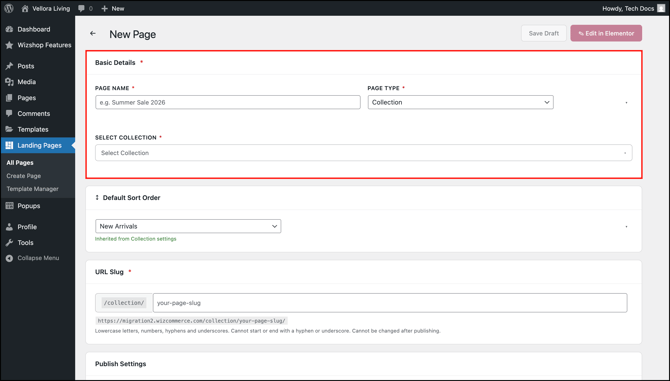
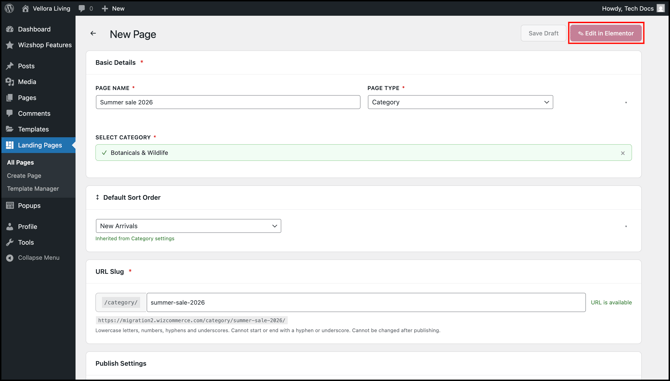
- Enter a Page Name. This is what shows up in your All Pages list.
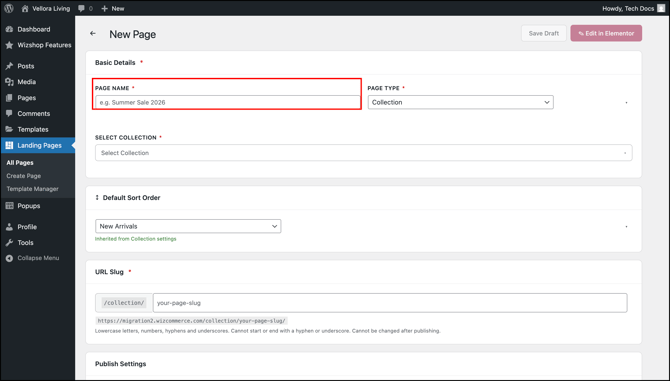
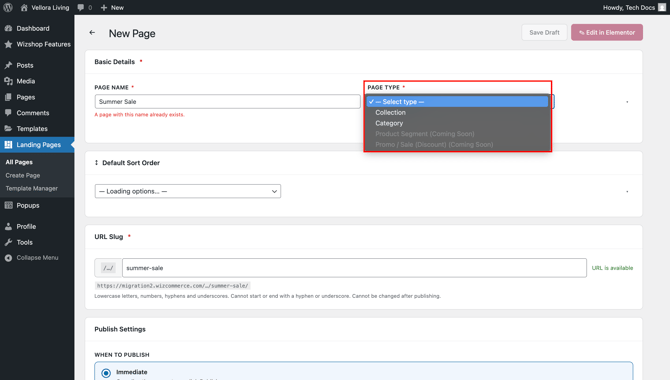
- Choose a Page Type:
- Collection: Auto-populates the page with products from a collection you select
- Category: Auto-populates the page with products from a category you select
- Based on the page type, a second field appears:
- For Collection, select the collection from the Select Collection dropdown. Each collection shows its product count next to its name (for example, Cozy Comfort Collection — 42 products).
- For Category, select the category from the Select Category dropdown.
- Set the Default Sort Order this controls how products appear when a buyer first lands on the page:
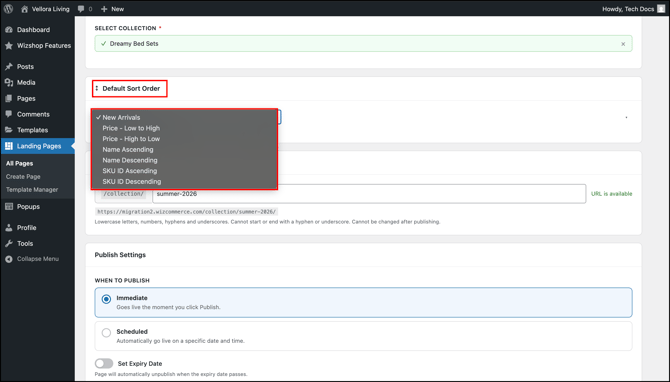
- New Arrivals: Most recently added products first
- Price — Low to High: Cheapest first, building up to the most expensive
- Price — High to Low: Most expensive first, ending with the cheapest
- Name Ascending: Product names A to Z
- Name Descending: Product names Z to A
- SKU ID Ascending: SKU IDs in ascending order (0–9, then A–Z)
- SKU ID Descending : SKU IDs in descending order (Z–A, then 9–0)
- Enter your URL Slug: the part of the web address that comes after your domain. For example, summer-sale in
https://yourstore.com/collection/summer-sale/. Use lowercase letters, numbers, hyphens, and underscores only. Slugs cannot start or end with a hyphen or underscore.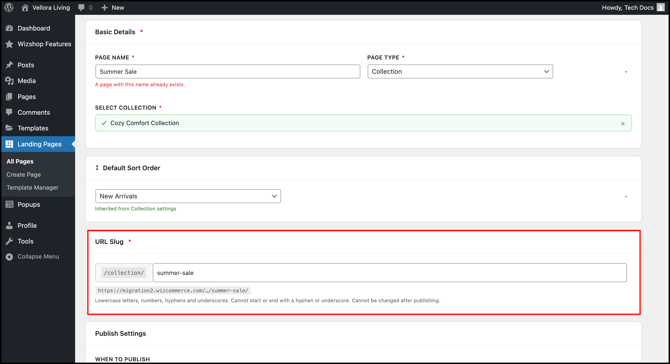
Note: Product Segment and Promo / Sale (Discount) are listed as page types but are not available yet. These are coming in a later release.
D. Schedule, Style, and Optimize Your Landing Page
Now you decide when the page goes live, what it looks like, and how it shows up in search and on social media.
- Under Publish Settings, choose when to publish:
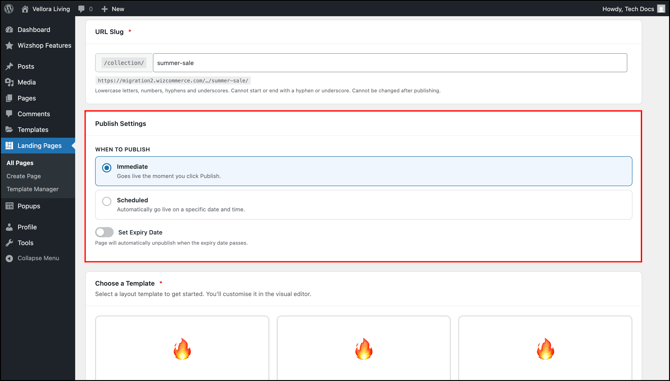
- Immediate: The page goes live the moment you click Publish
- Scheduled: The page goes live on a specific date and time you set
- (Optional) Toggle Set Expiry Date on if you want the page to automatically unpublish on a specific date, useful for time-bound campaigns like seasonal sales.
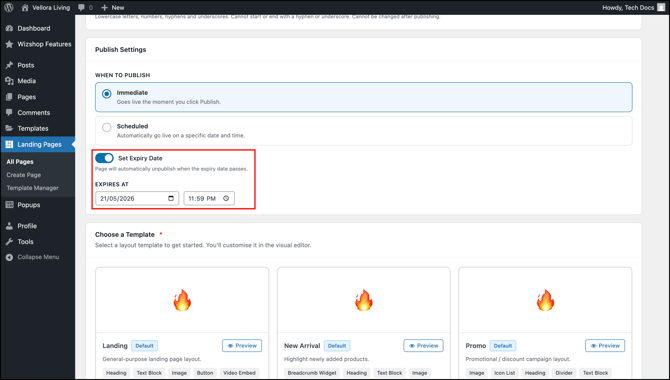
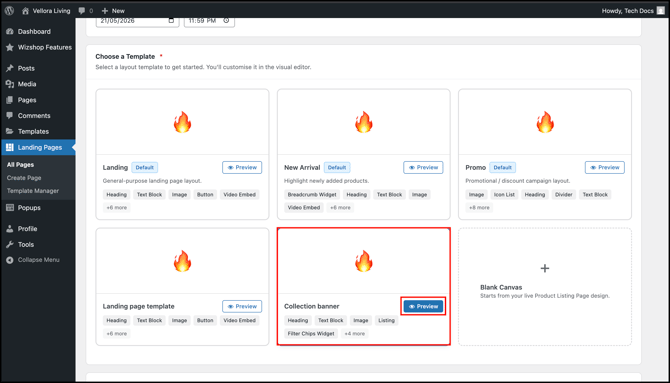
- Under Choose a Template, pick a starting layout. You can customize everything afterward in Elementor.

- Landing: General-purpose landing page layout
- New Arrival: Highlights newly added products
- Promo: Promotional or discount campaign layout
- Landing page template: Alternate landing layout
- Collection banner: Collection-focused layout with a hero banner and product listing
- Blank Canvas: Starts from your live Product Listing Page design, no pre-built sections
- Click Preview on any template to see what it looks like before selecting.
- Scroll to SEO & Sharing and fill in:

- Meta Title: The headline in Google search results. 70 characters maximum.
- Meta Description: The snippet under the headline in search results. 160 characters maximum.
- Link Preview Image: Click Upload to add an image that displays when the page is shared on social media. Recommended size: 1200 × 630 pixels. If you skip this, the system uses the page's hero banner image.
NOTE: Product Segment and Promo / Sale (Discount) are listed as page types but are under development. They are not available yet.
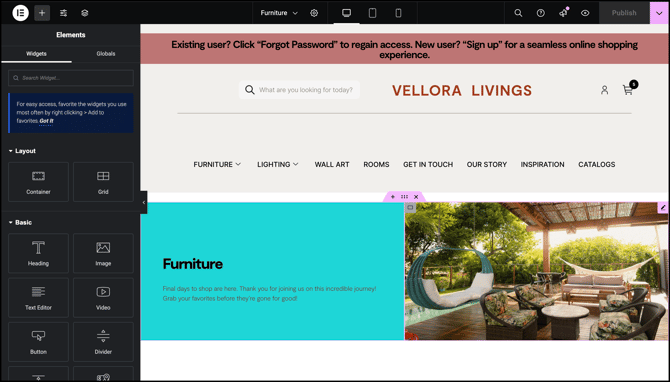
E. Customize and Publish the Page in Elementor
The form covers the page's structure, source data, and metadata. Visual customization, images, videos, banners, headings, marketing copy, and layout edits, happens in Elementor.
- At the top of the New Page form, click Edit in Elementor.
- The Elementor editor opens with your selected template loaded. Edit the marketing zone at the top of the page, add your hero banner, CTAs, promotional copy, and imagery here. The product listing zone below is handled automatically.
- Once you are done, choose how to save:
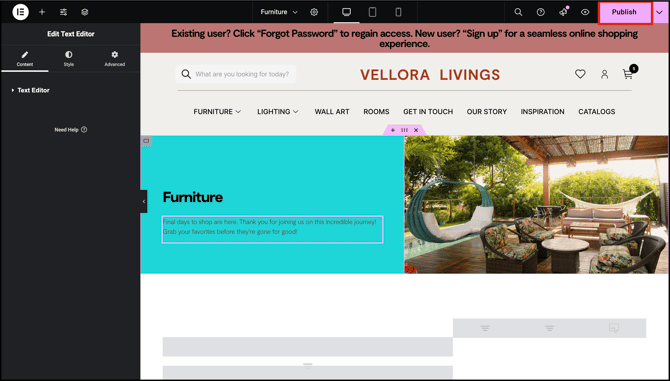
- Save Draft: Saves the page without publishing it. Drafts appear in your All Pages list with a Draft status and can be edited and published later.
- Publish: Makes the page live. If you set a scheduled publish date earlier, the page goes live at that date and time instead of right away.
F. Manage an Existing Page
Once a page exists, you can update, preview, or remove it from the All Pages view.
- Go to Landing Pages.
- Find the page you want to manage, use search or filters if needed.
- In the Actions column on the right, click:
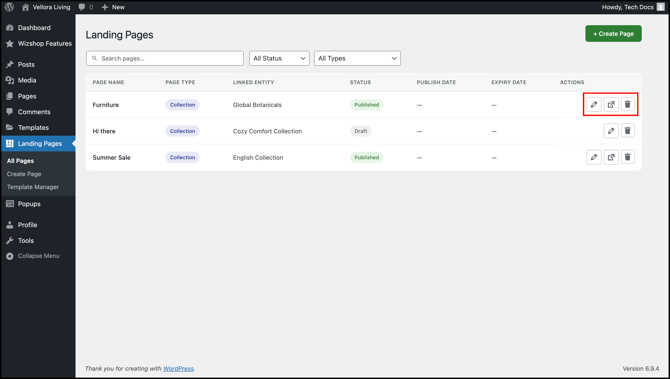
- The edit icon to open the page and update its details
- The external link icon to preview the live page in a new tab
- The trash icon to delete the page
Note: Deleting a page is permanent. The URL slug is reserved and cannot be reused for a new page.
G. Understanding Page Status
Every landing page moves through up to three statuses:
|
Status |
What it means |
|---|---|
|
Draft |
Work-in-progress. Not visible on your storefront. Safe to edit anytime. |
|
Published |
Live on your storefront. Buyers can access it via its URL. |
|
Expired |
No longer live. The page is preserved in your All Pages list but is not served to buyers. Useful for archiving past campaigns. |
You move a page between statuses manually. Use the Expiry Date setting (Section D, Step 2) to automatically move a page from Published to Expired on a specific date.
FAQs
1. Can I change the URL slug after publishing the page?
A. Not directly. To change the slug, move the page back to Draft first, the URL slug field becomes editable again in Draft status. Update it and republish when you are done.
2. What is the difference between a Collection page and a Category page?
A. A Collection page pulls products from a specific collection you have built in WizCommerce. A Category page pulls products from a category. Use whichever matches how you have grouped your products.
3. Do I have to use a template, or can I start from scratch?
A. You can start from scratch, choose Blank Canvas in the Choose a Template section. Blank Canvas starts from your live Product Listing Page design, so the page inherits your existing storefront styling and you customize from there in Elementor.
3. If I add or remove products from the bound category or collection, do I need to update the landing page?
A. No. The product listing zone is bound to the entity and stays in sync automatically. Any changes to the category or collection are reflected on the landing page without any action from you.
Still need help? Reach out to our support team at help@wizcommerce.com.