
Bulk Lifestyle lets you create lifestyle images for a set of similar products using one common scene. You set the direction once on a single product, then apply it to the rest, so you don’t have to rebuild the scene and prompts for every product.
This article covers when to use Bulk Lifestyle, how to upload and stage your products, set up and refine a scene, apply it to all products, and review your results, along with credits and best practices.
Platform: WizStudio | Who is this for: Designers & Admins
To Get There: WizStudio → Bulk Lifestyle
Table of Contents
» Before You Begin
- Bulk Lifestyle is available on all WizStudio plans except the Starter plan.
- Every user gets 2 free Bulk Lifestyle projects.
- You can add up to 50 products in one batch.
- Use clear product images with one product per image. Images with clean backgrounds give the best results.
- If you plan to add dimensions, have each product’s measurements ready in Length × Width × Height format.
A. When to Use Bulk Lifestyle
Use Bulk Lifestyle when one scene vibe needs to work across many similar products. A typical fit is a collection of sofas, a range of lamps, or a set of rugs that should all feel like part of the same brand story, for example, a warm, modern living room in soft morning light.
It is a weaker fit when your products are very different from each other and each one needs its own scene. For those, use the Lifestyle Generator to create images one product at a time.
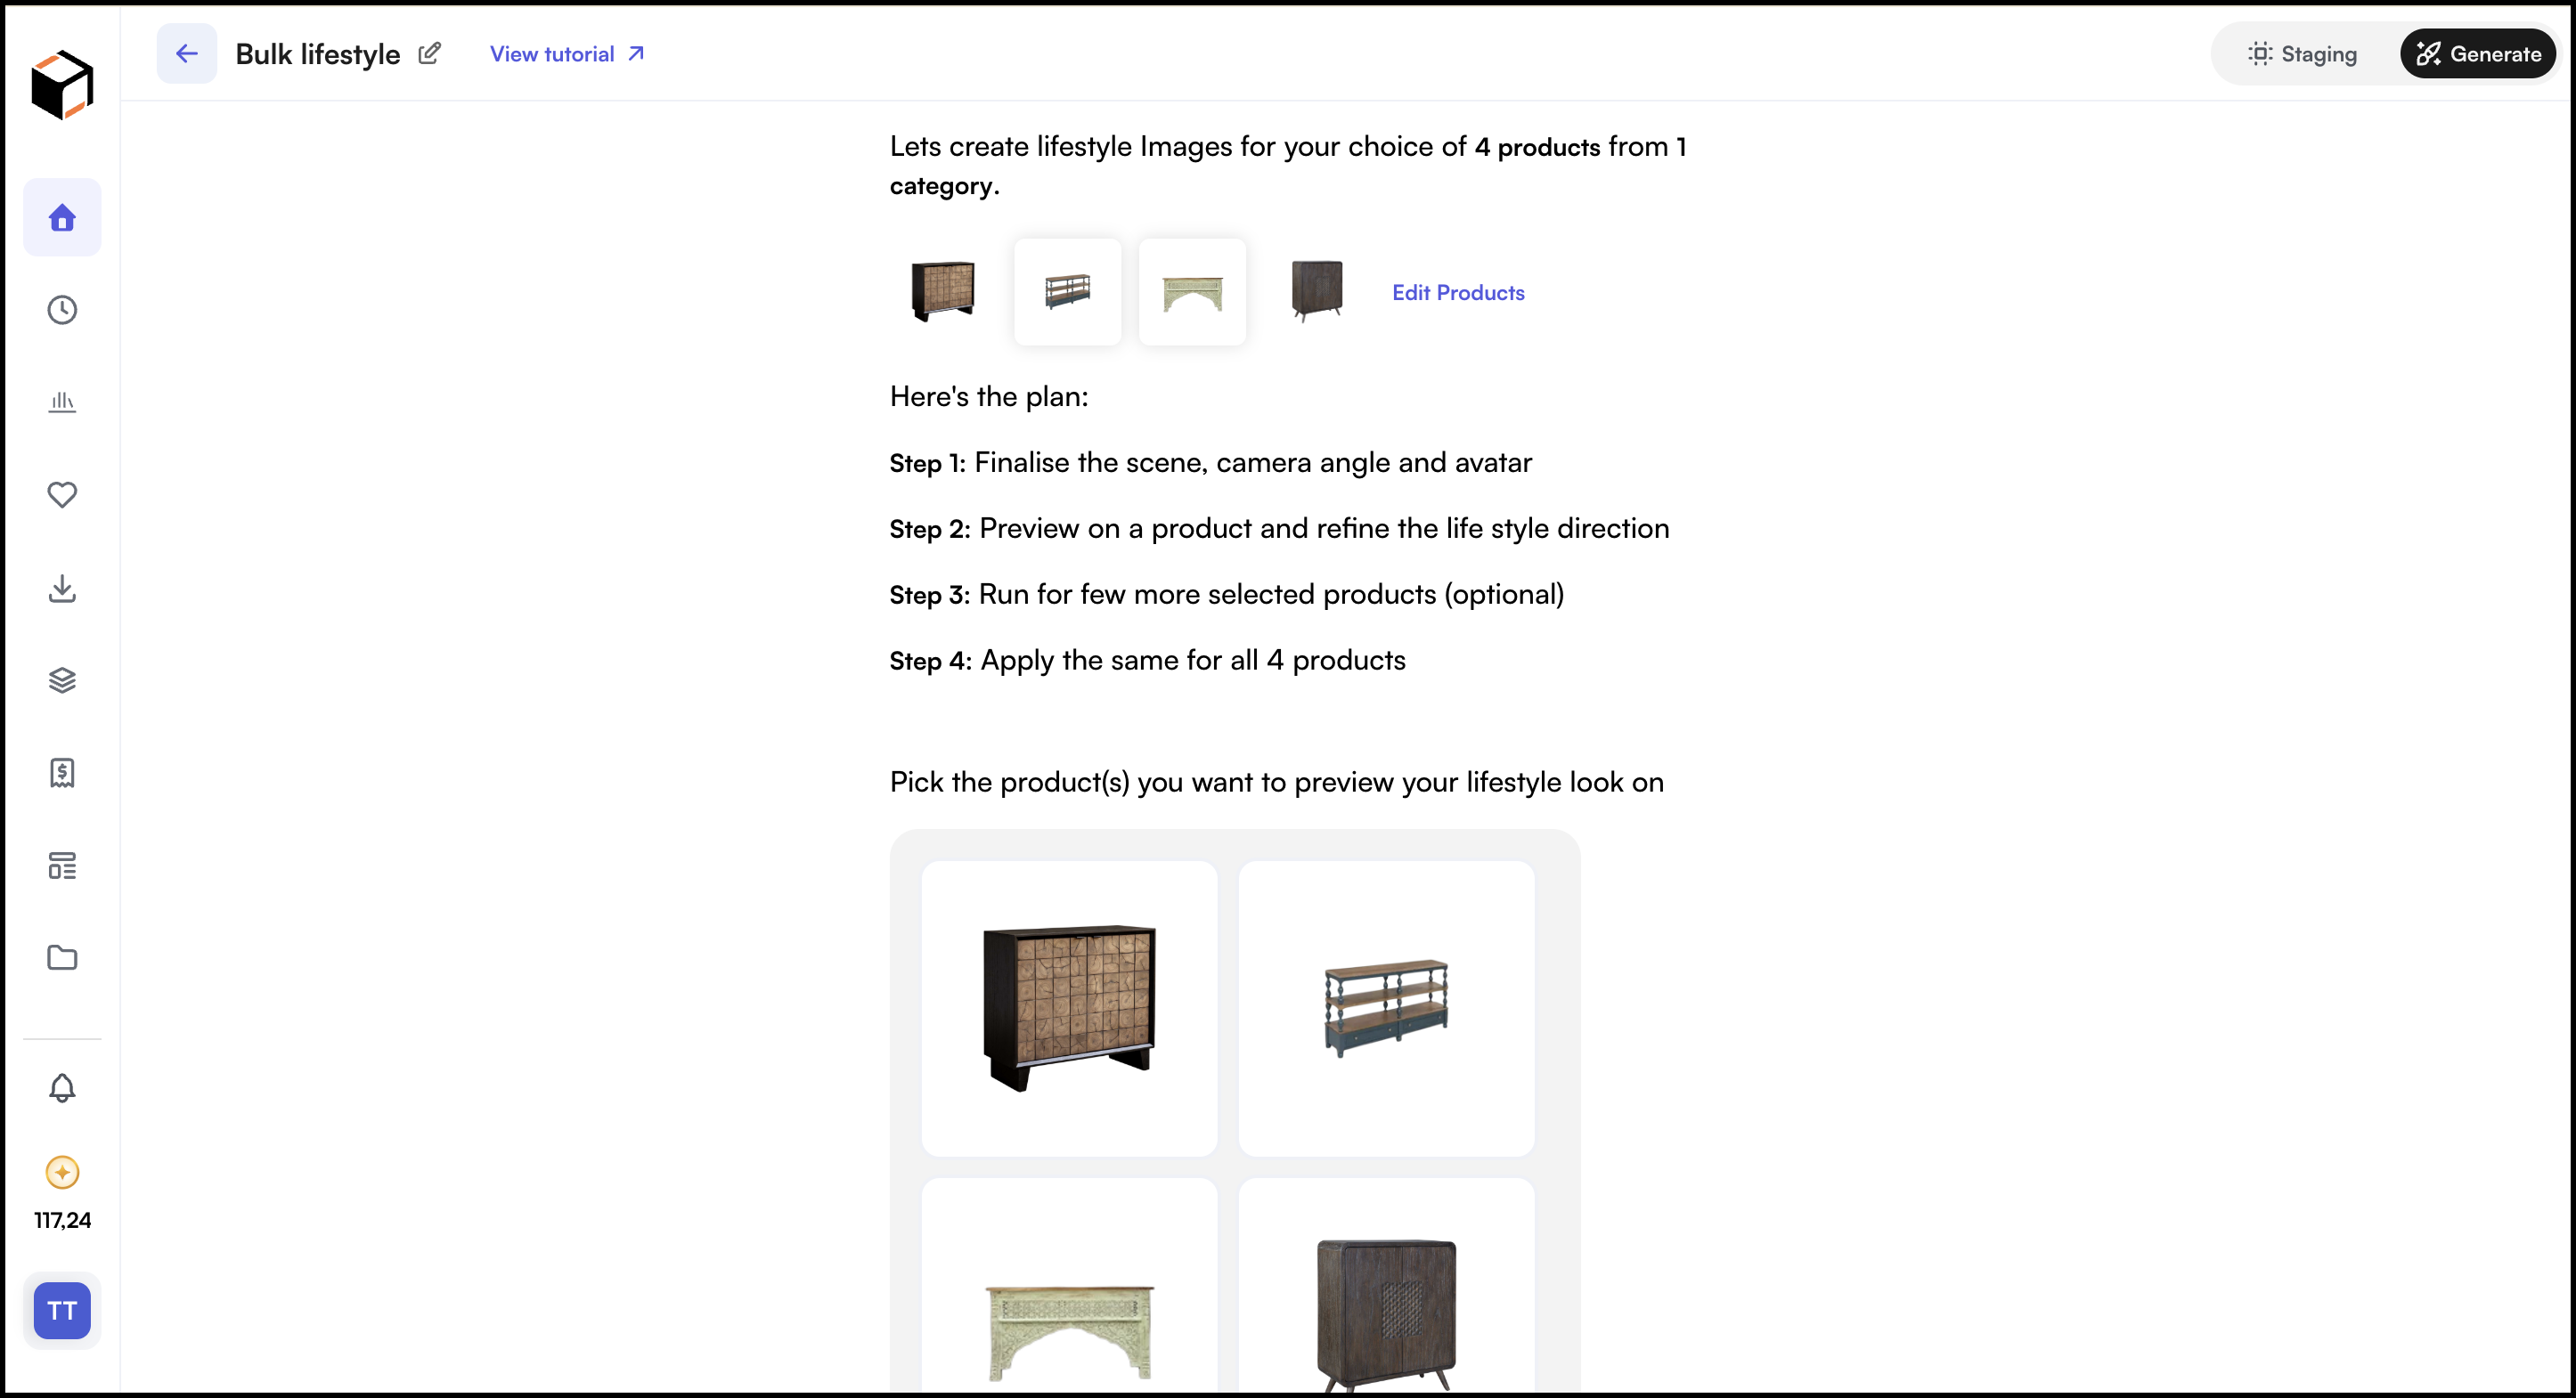
The flow is simple:
- Set the look: choose the scene, camera angle, and model.
- Preview on one product and refine until it feels right.
- Optionally, run a few more selected products to test the look.
- Apply the final direction to all products.
B. Upload Your Products
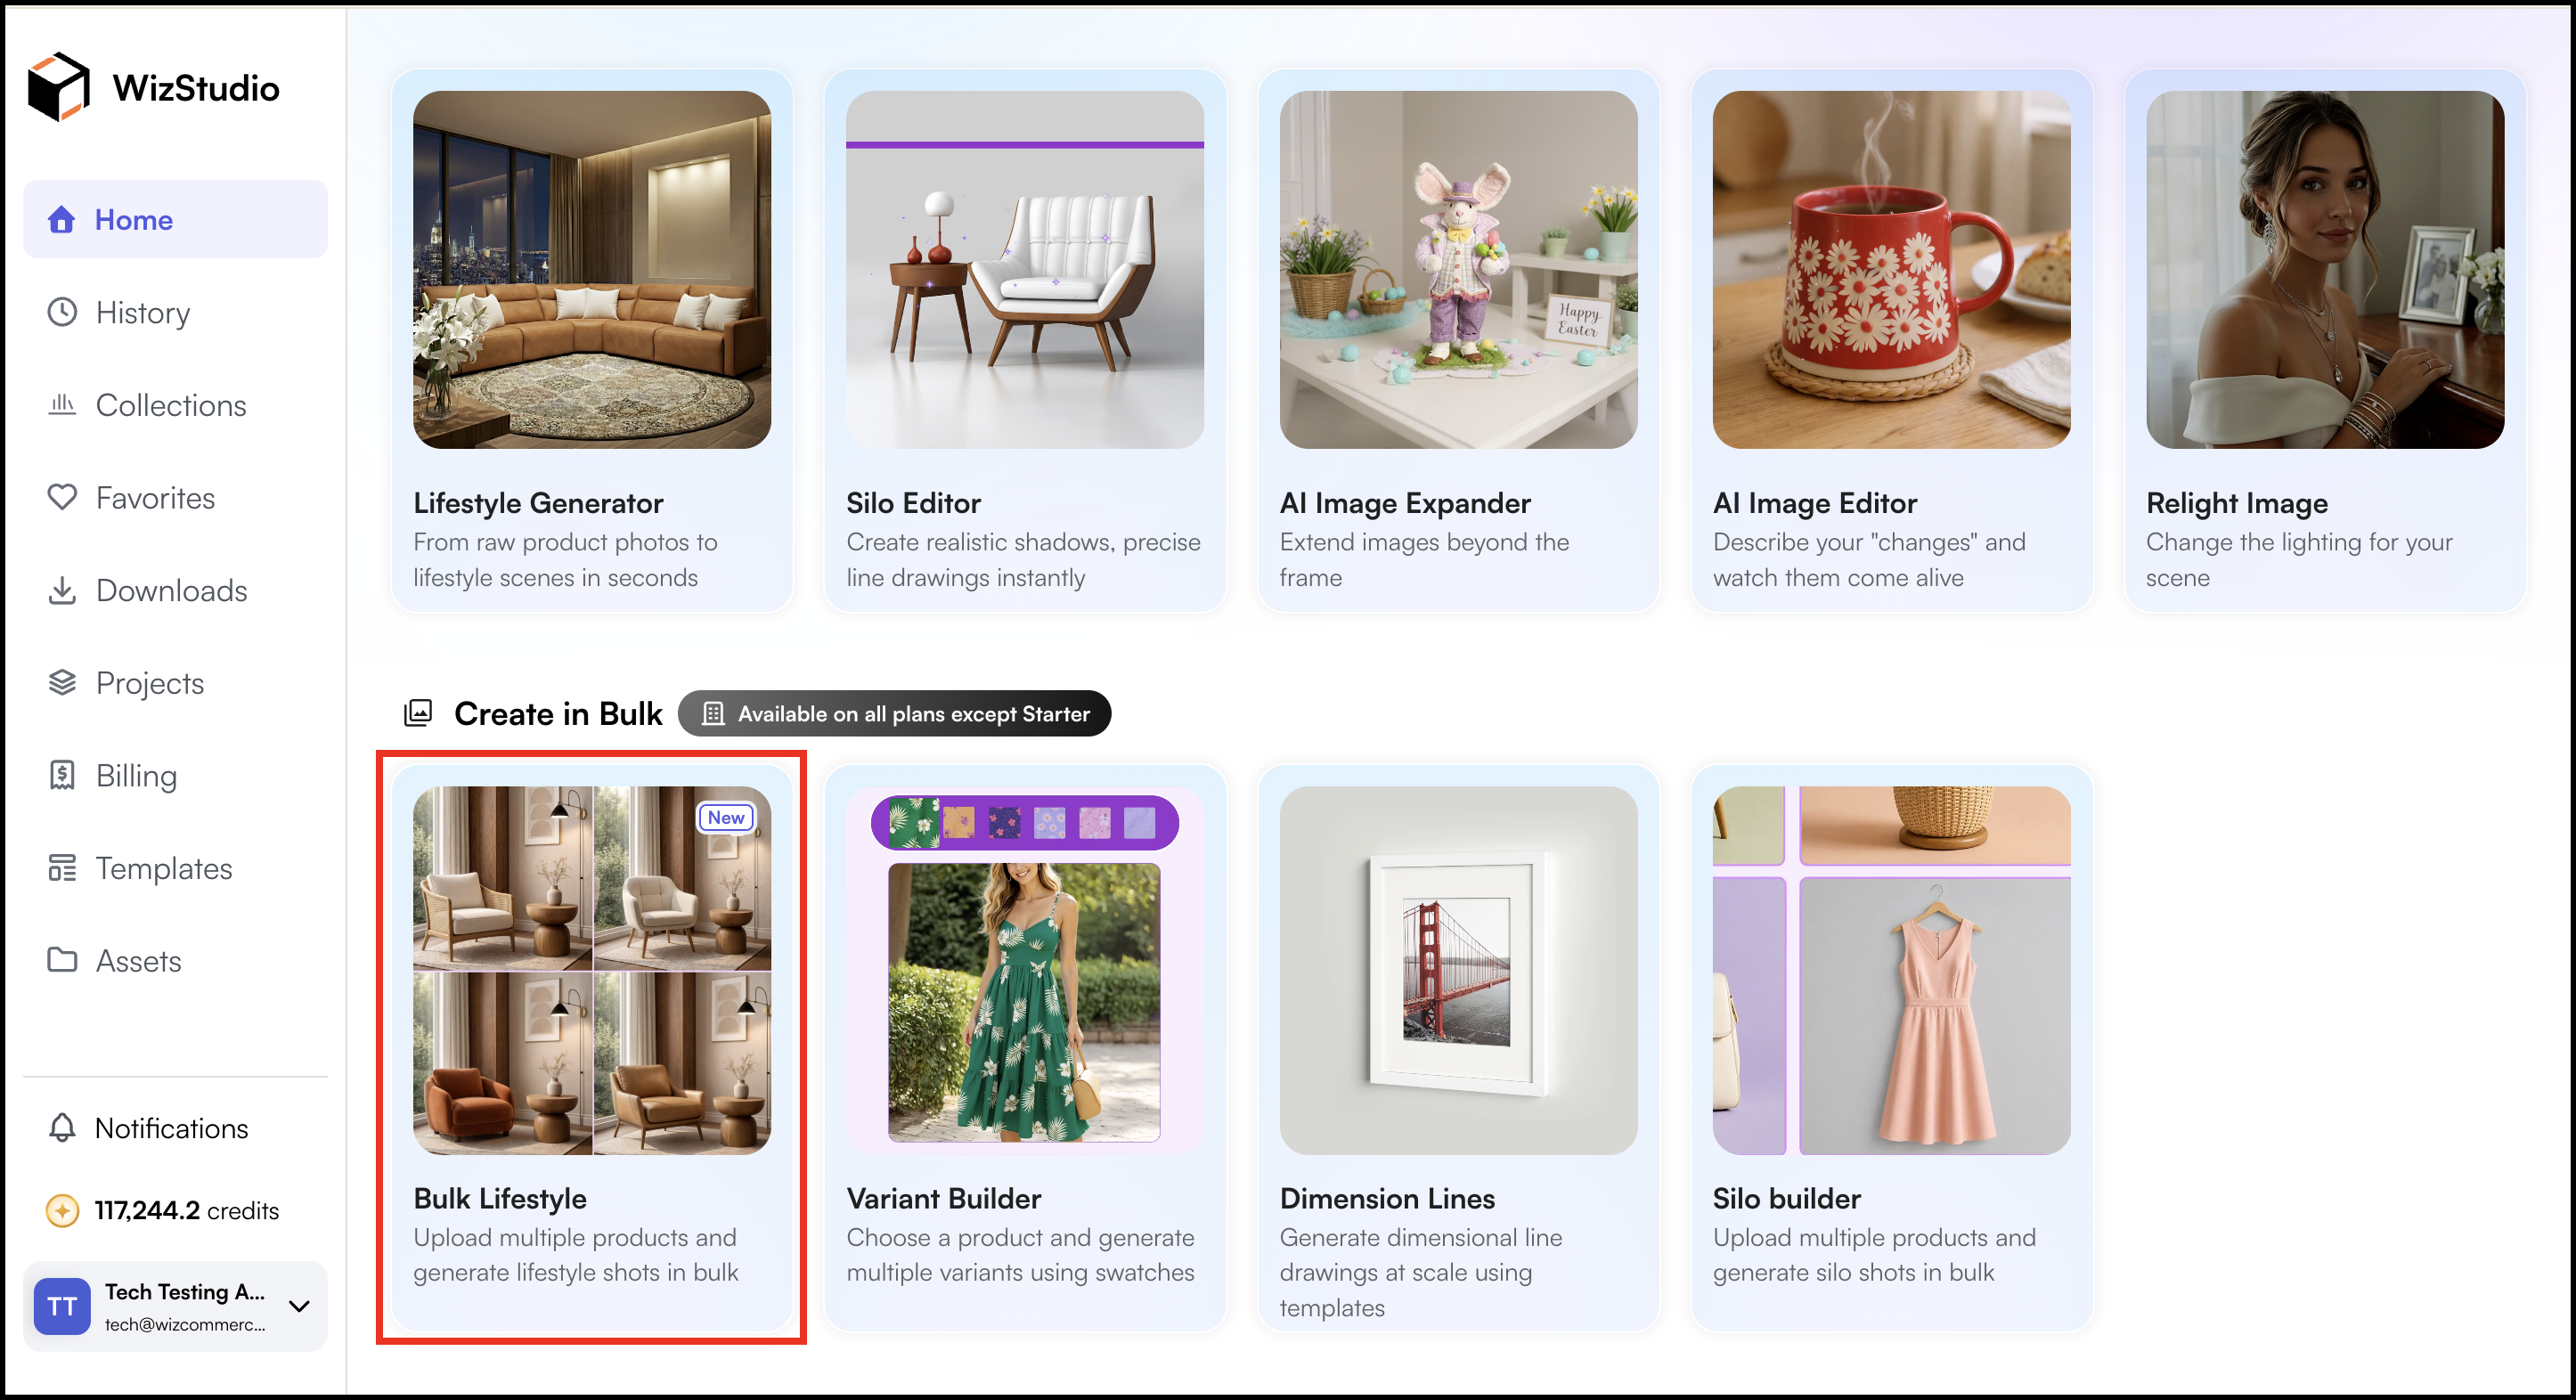
- On the WizStudio home page and click Bulk Lifestyle.
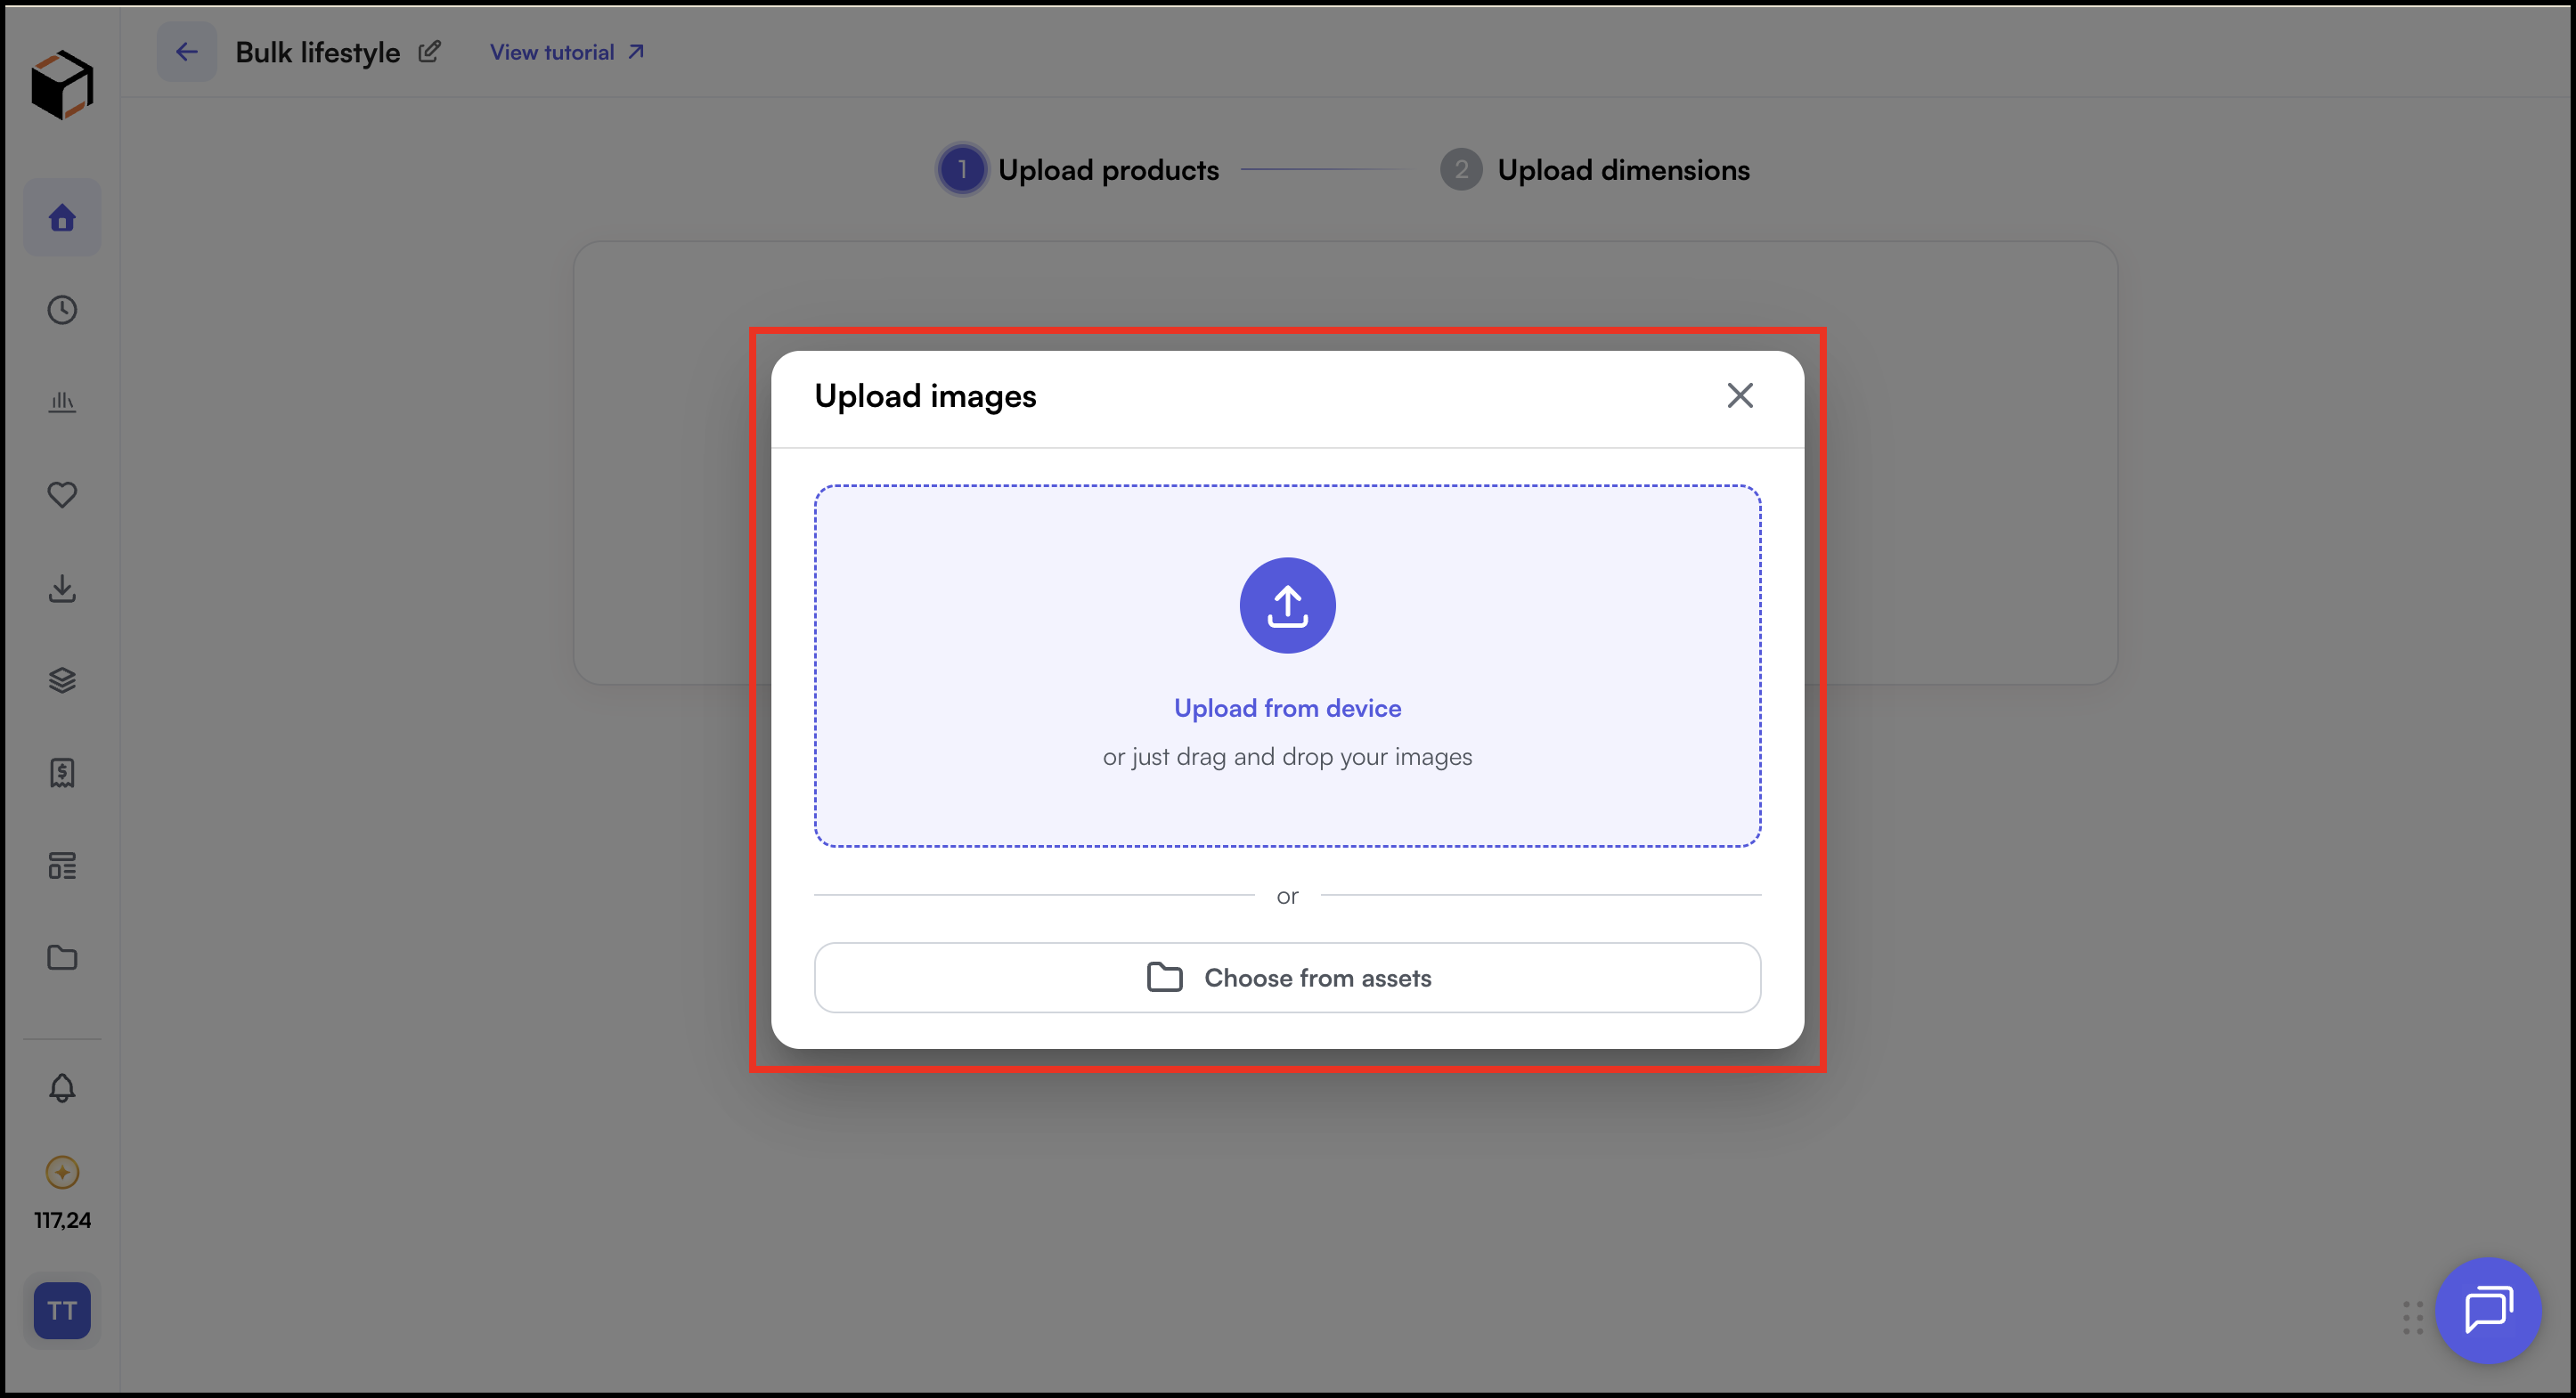
- Upload a product image from device or choose from assets.
- You can select multiple images at once, up to 50.
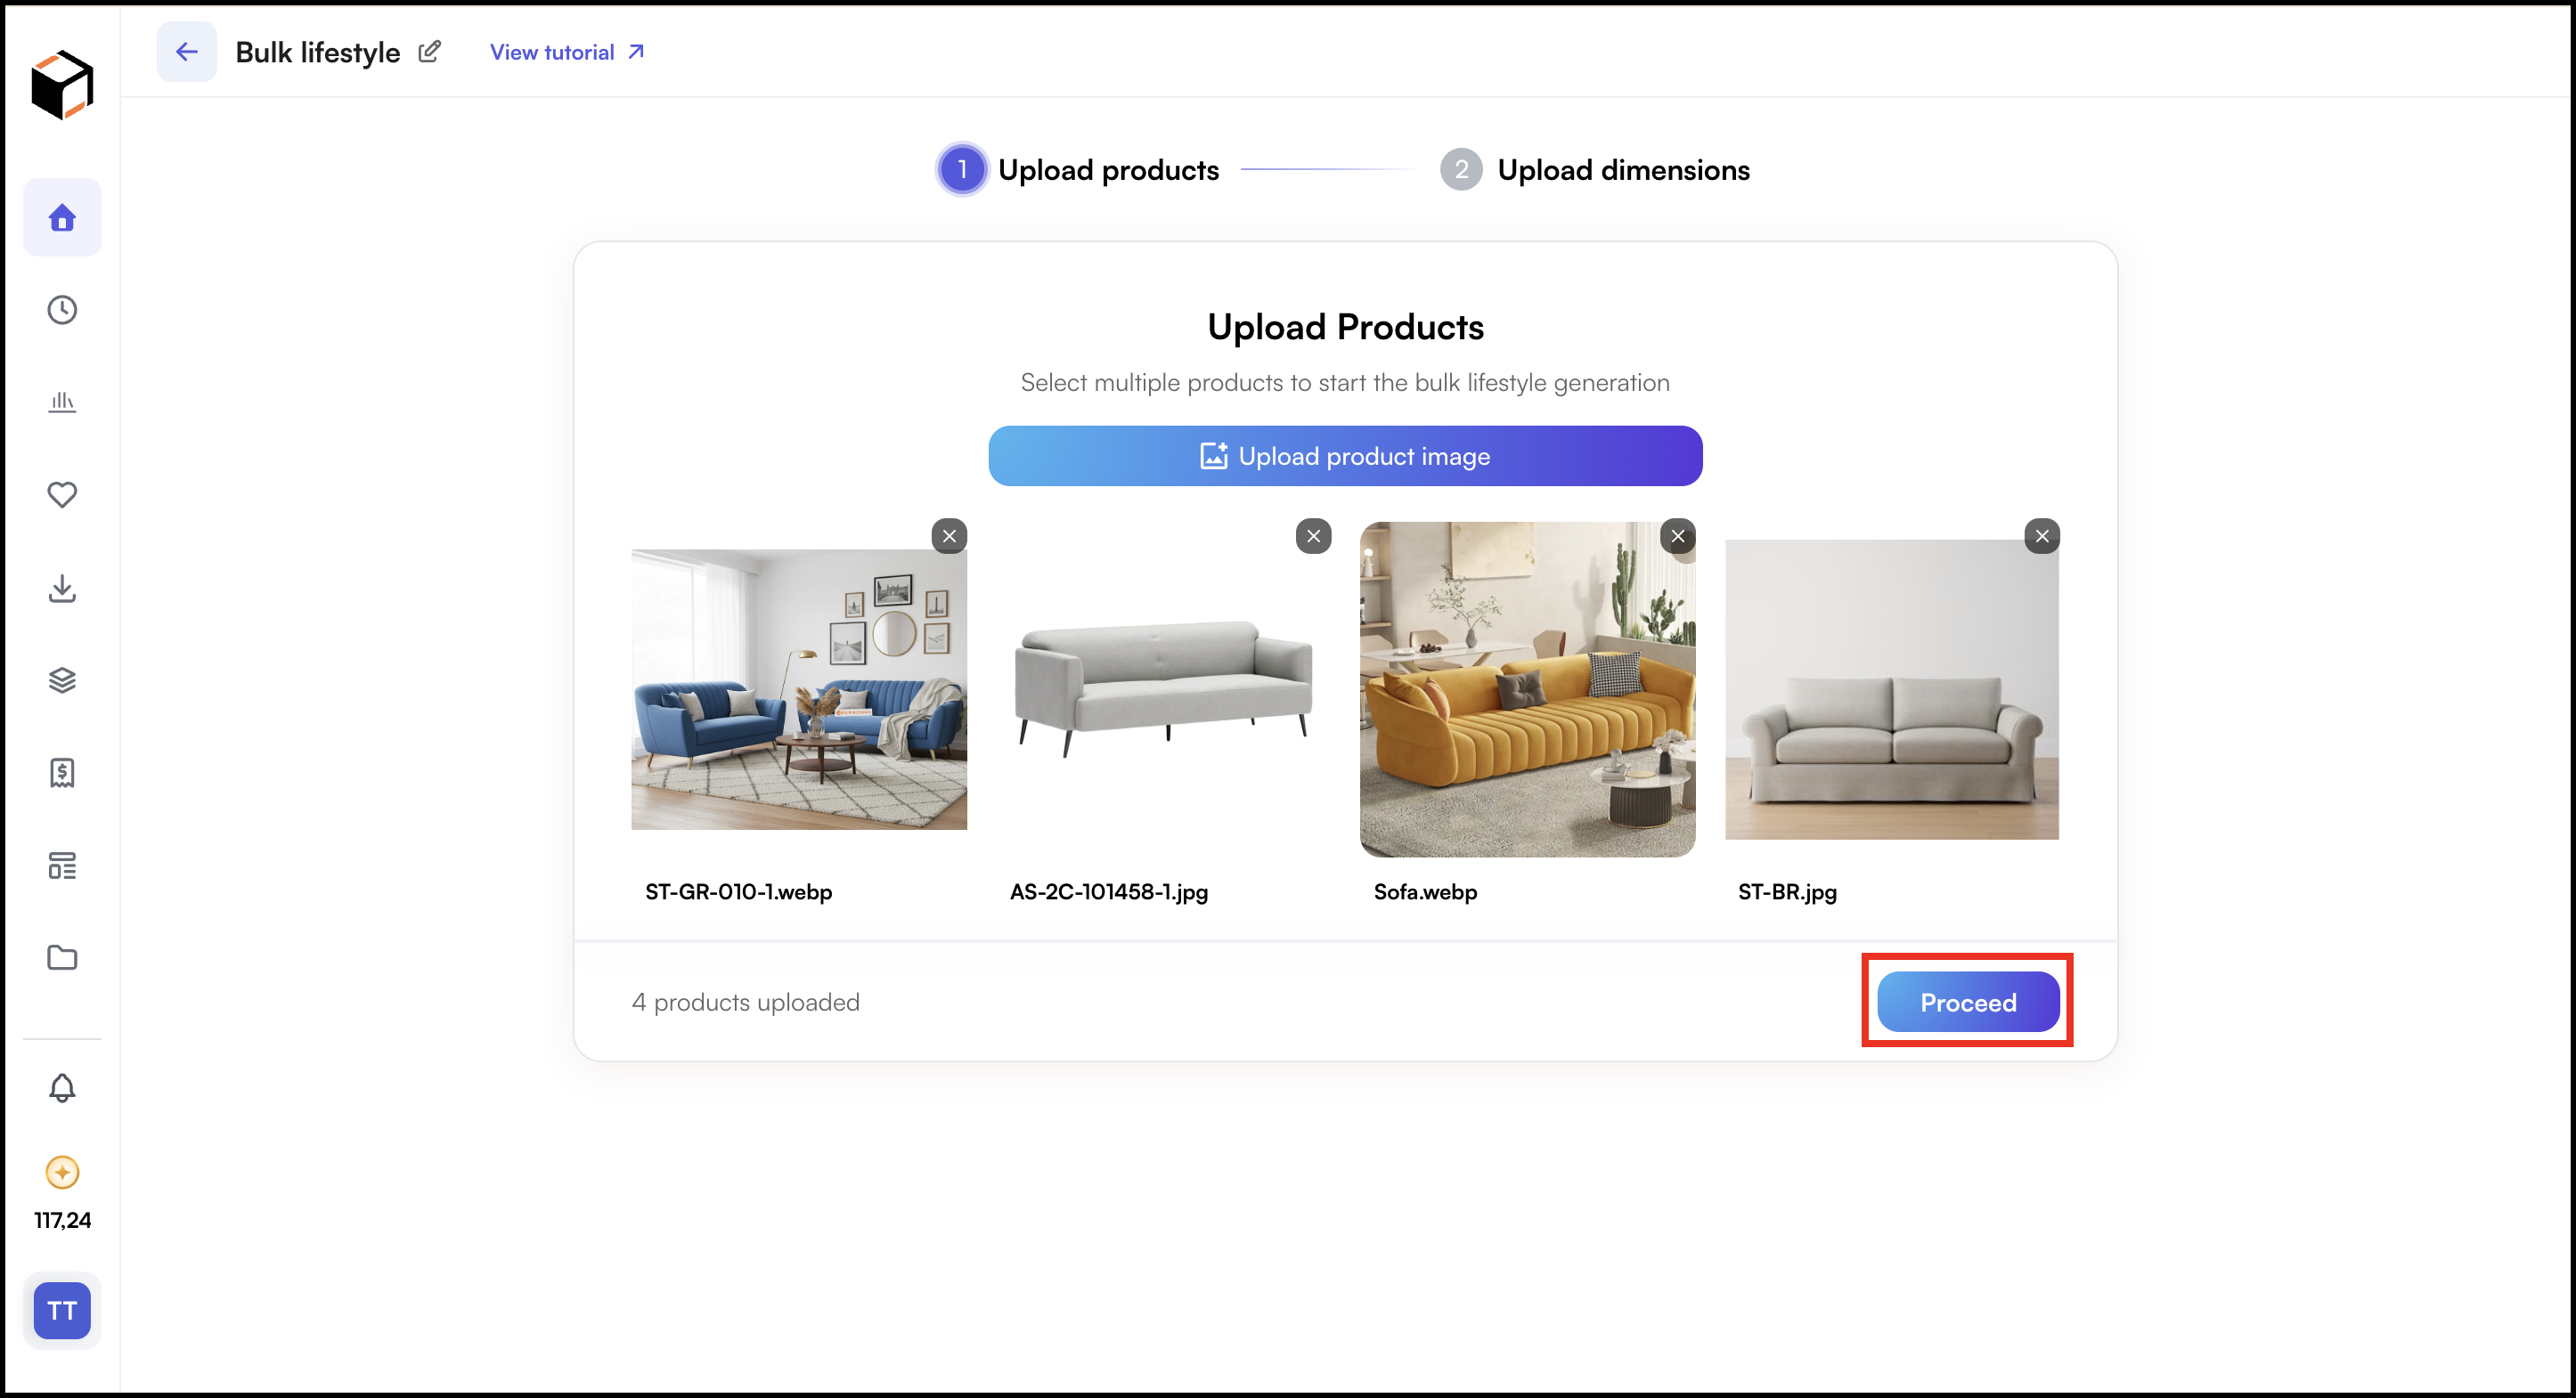
- Wait for the images to finish uploading and click Proceed.
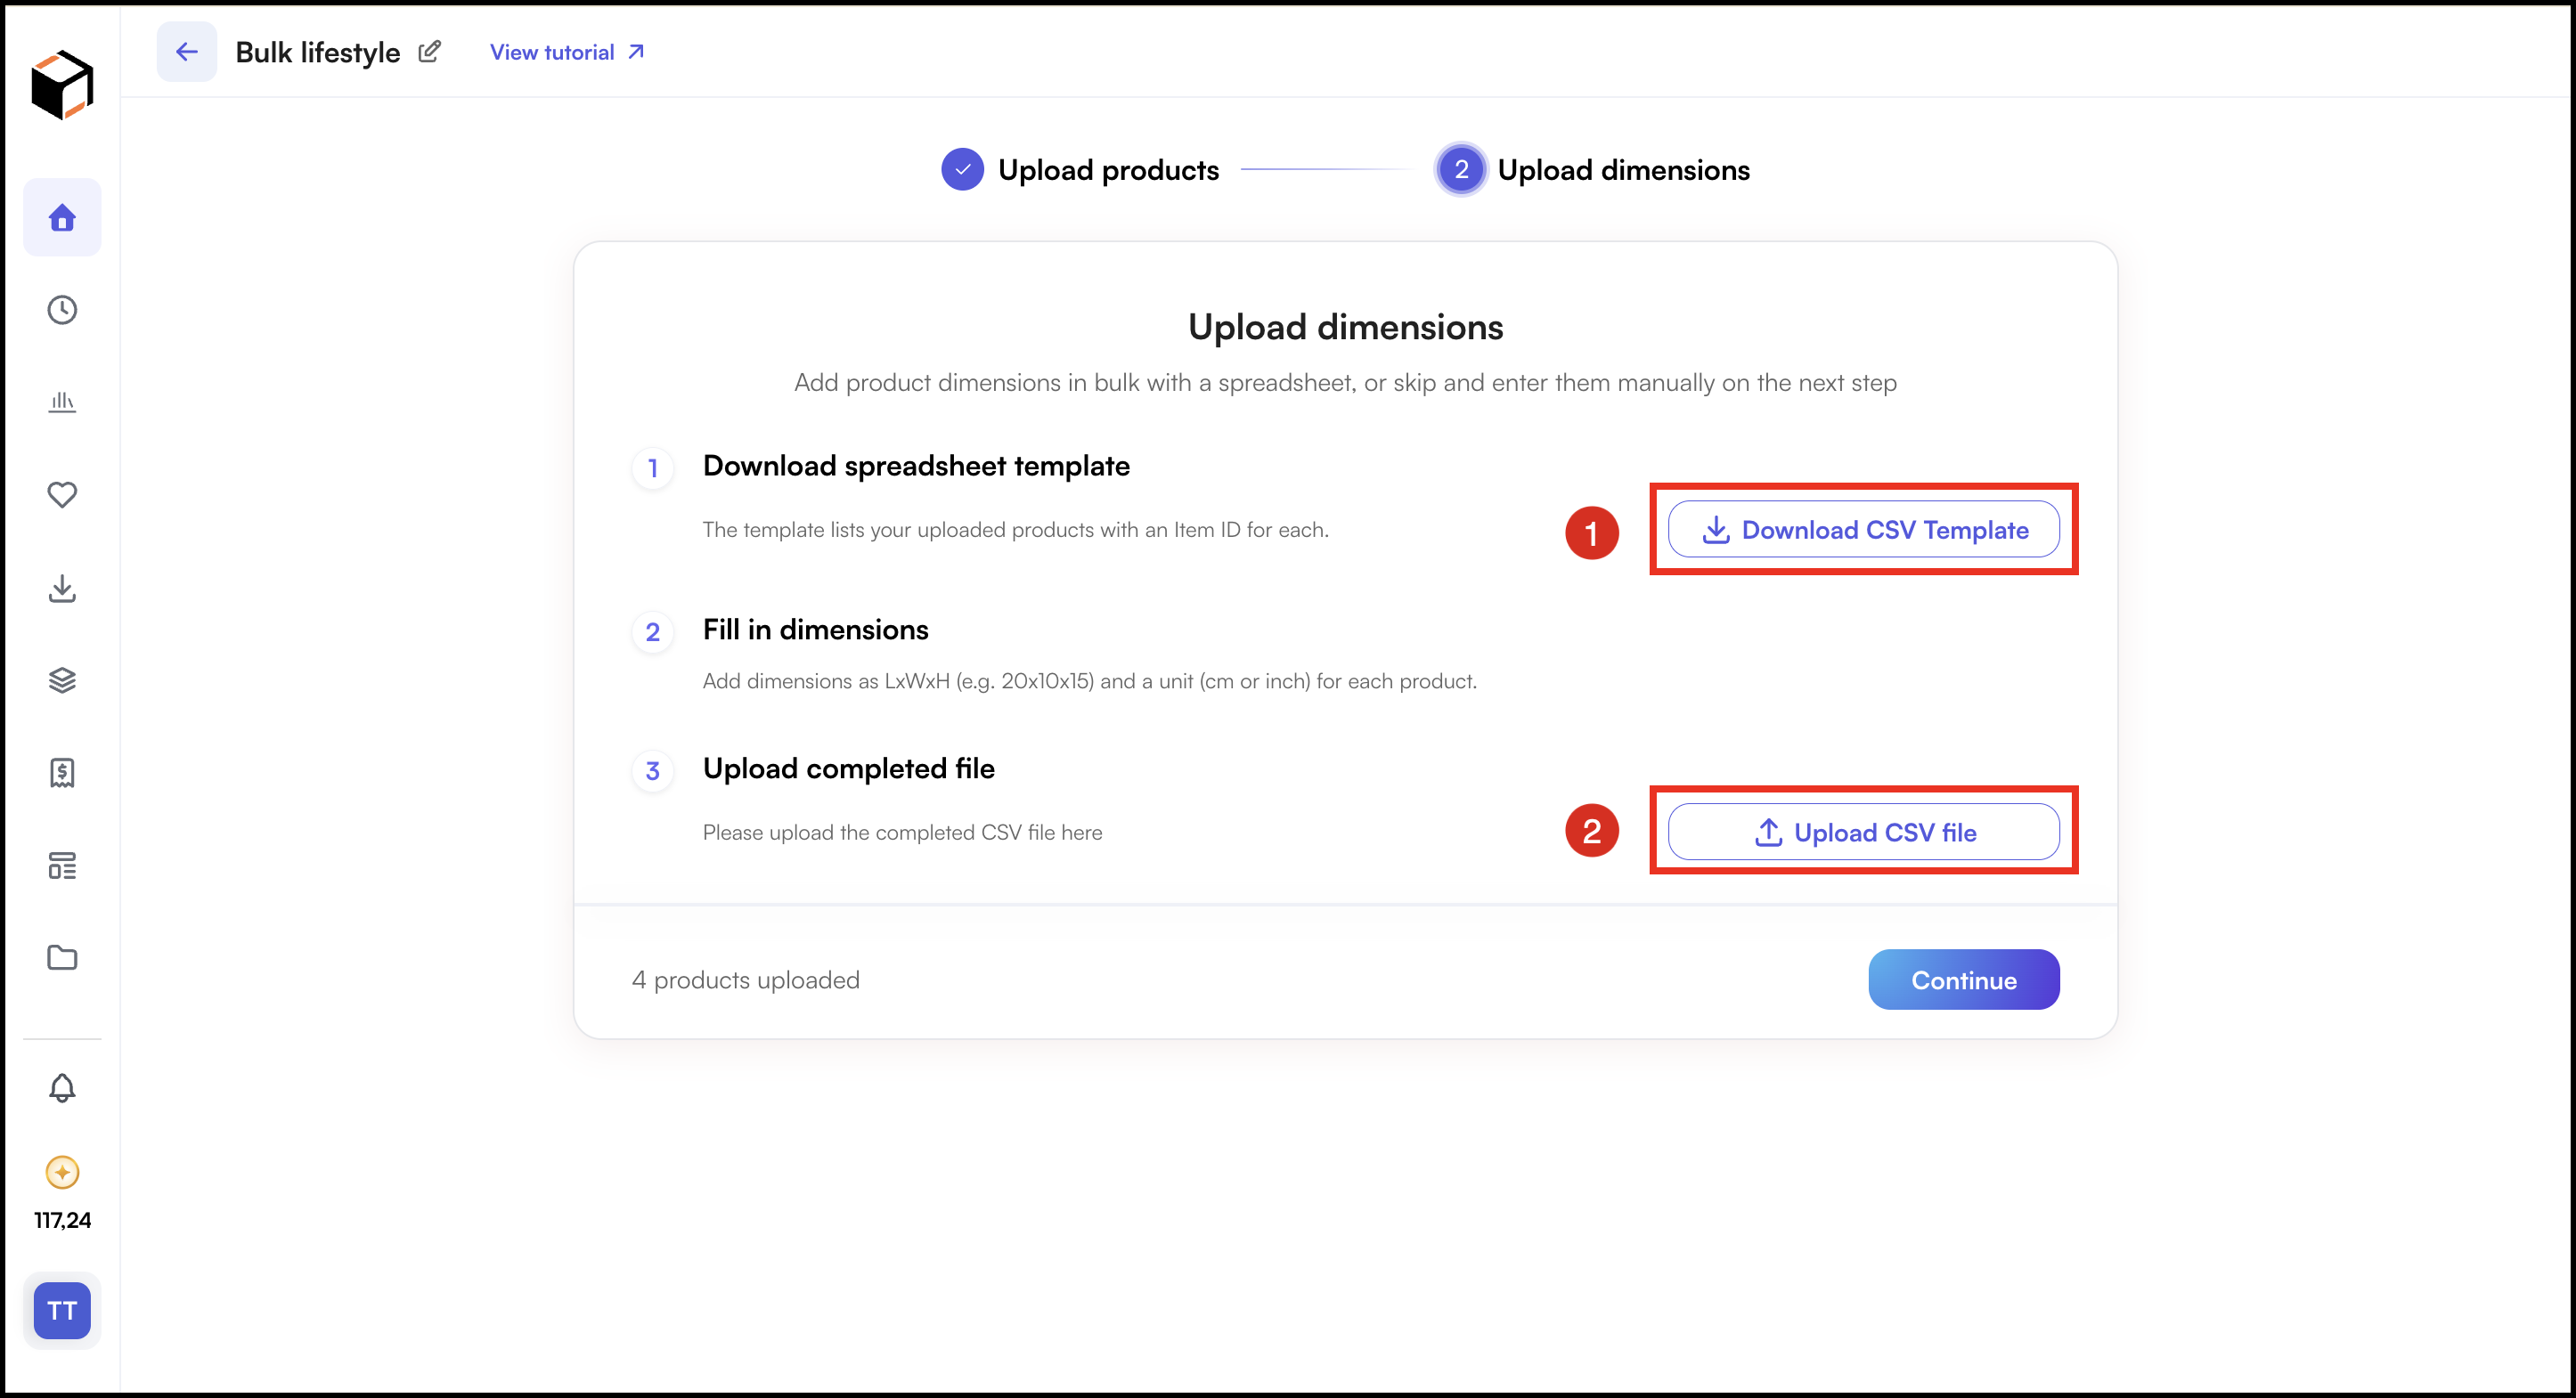
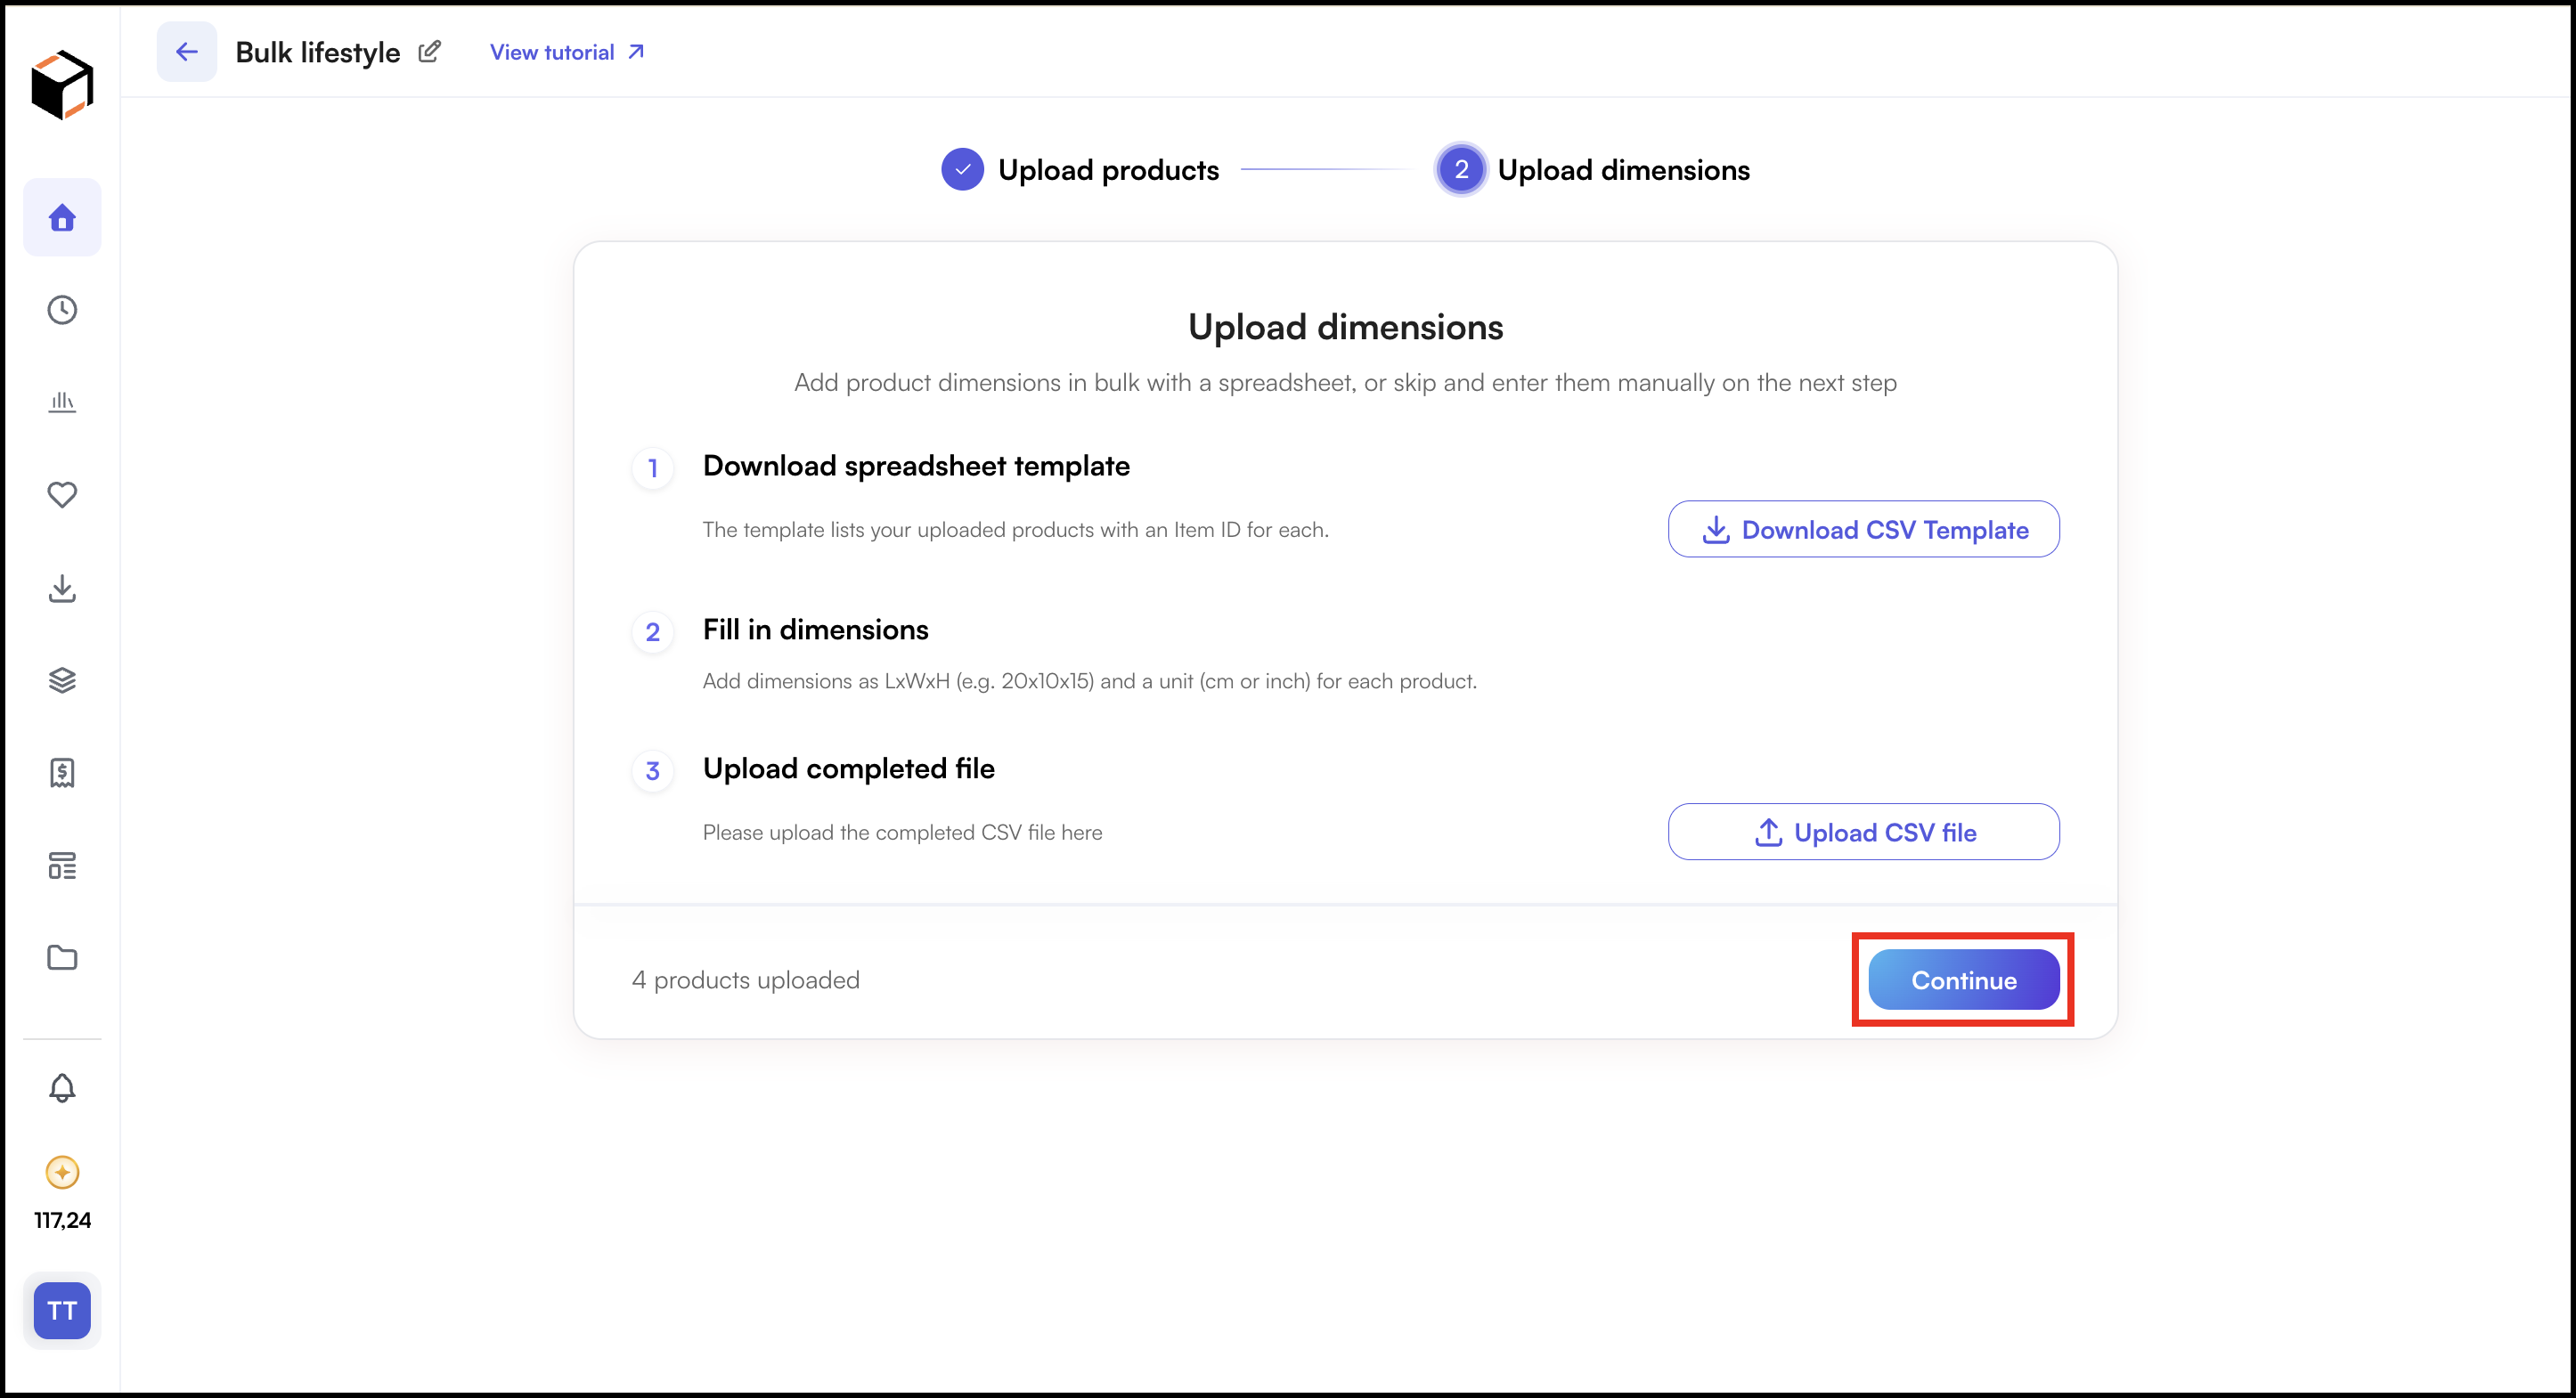
- Add product dimensions in bulk with a spreadsheet.
- Click Download CSV Template. The file lists every uploaded product with an Item ID.
- Open the file and enter the dimensions for each product as LxWxH (for example, 20x10x15) and add the unit, cm or inch.
- Save the file and click Upload CSV file.
- Click Continue.
- Click Continue to skip it. You can still add or edit dimensions for individual products in the next step.
- The Product Staging screen opens, where you can view and manage all the products you have uploaded.
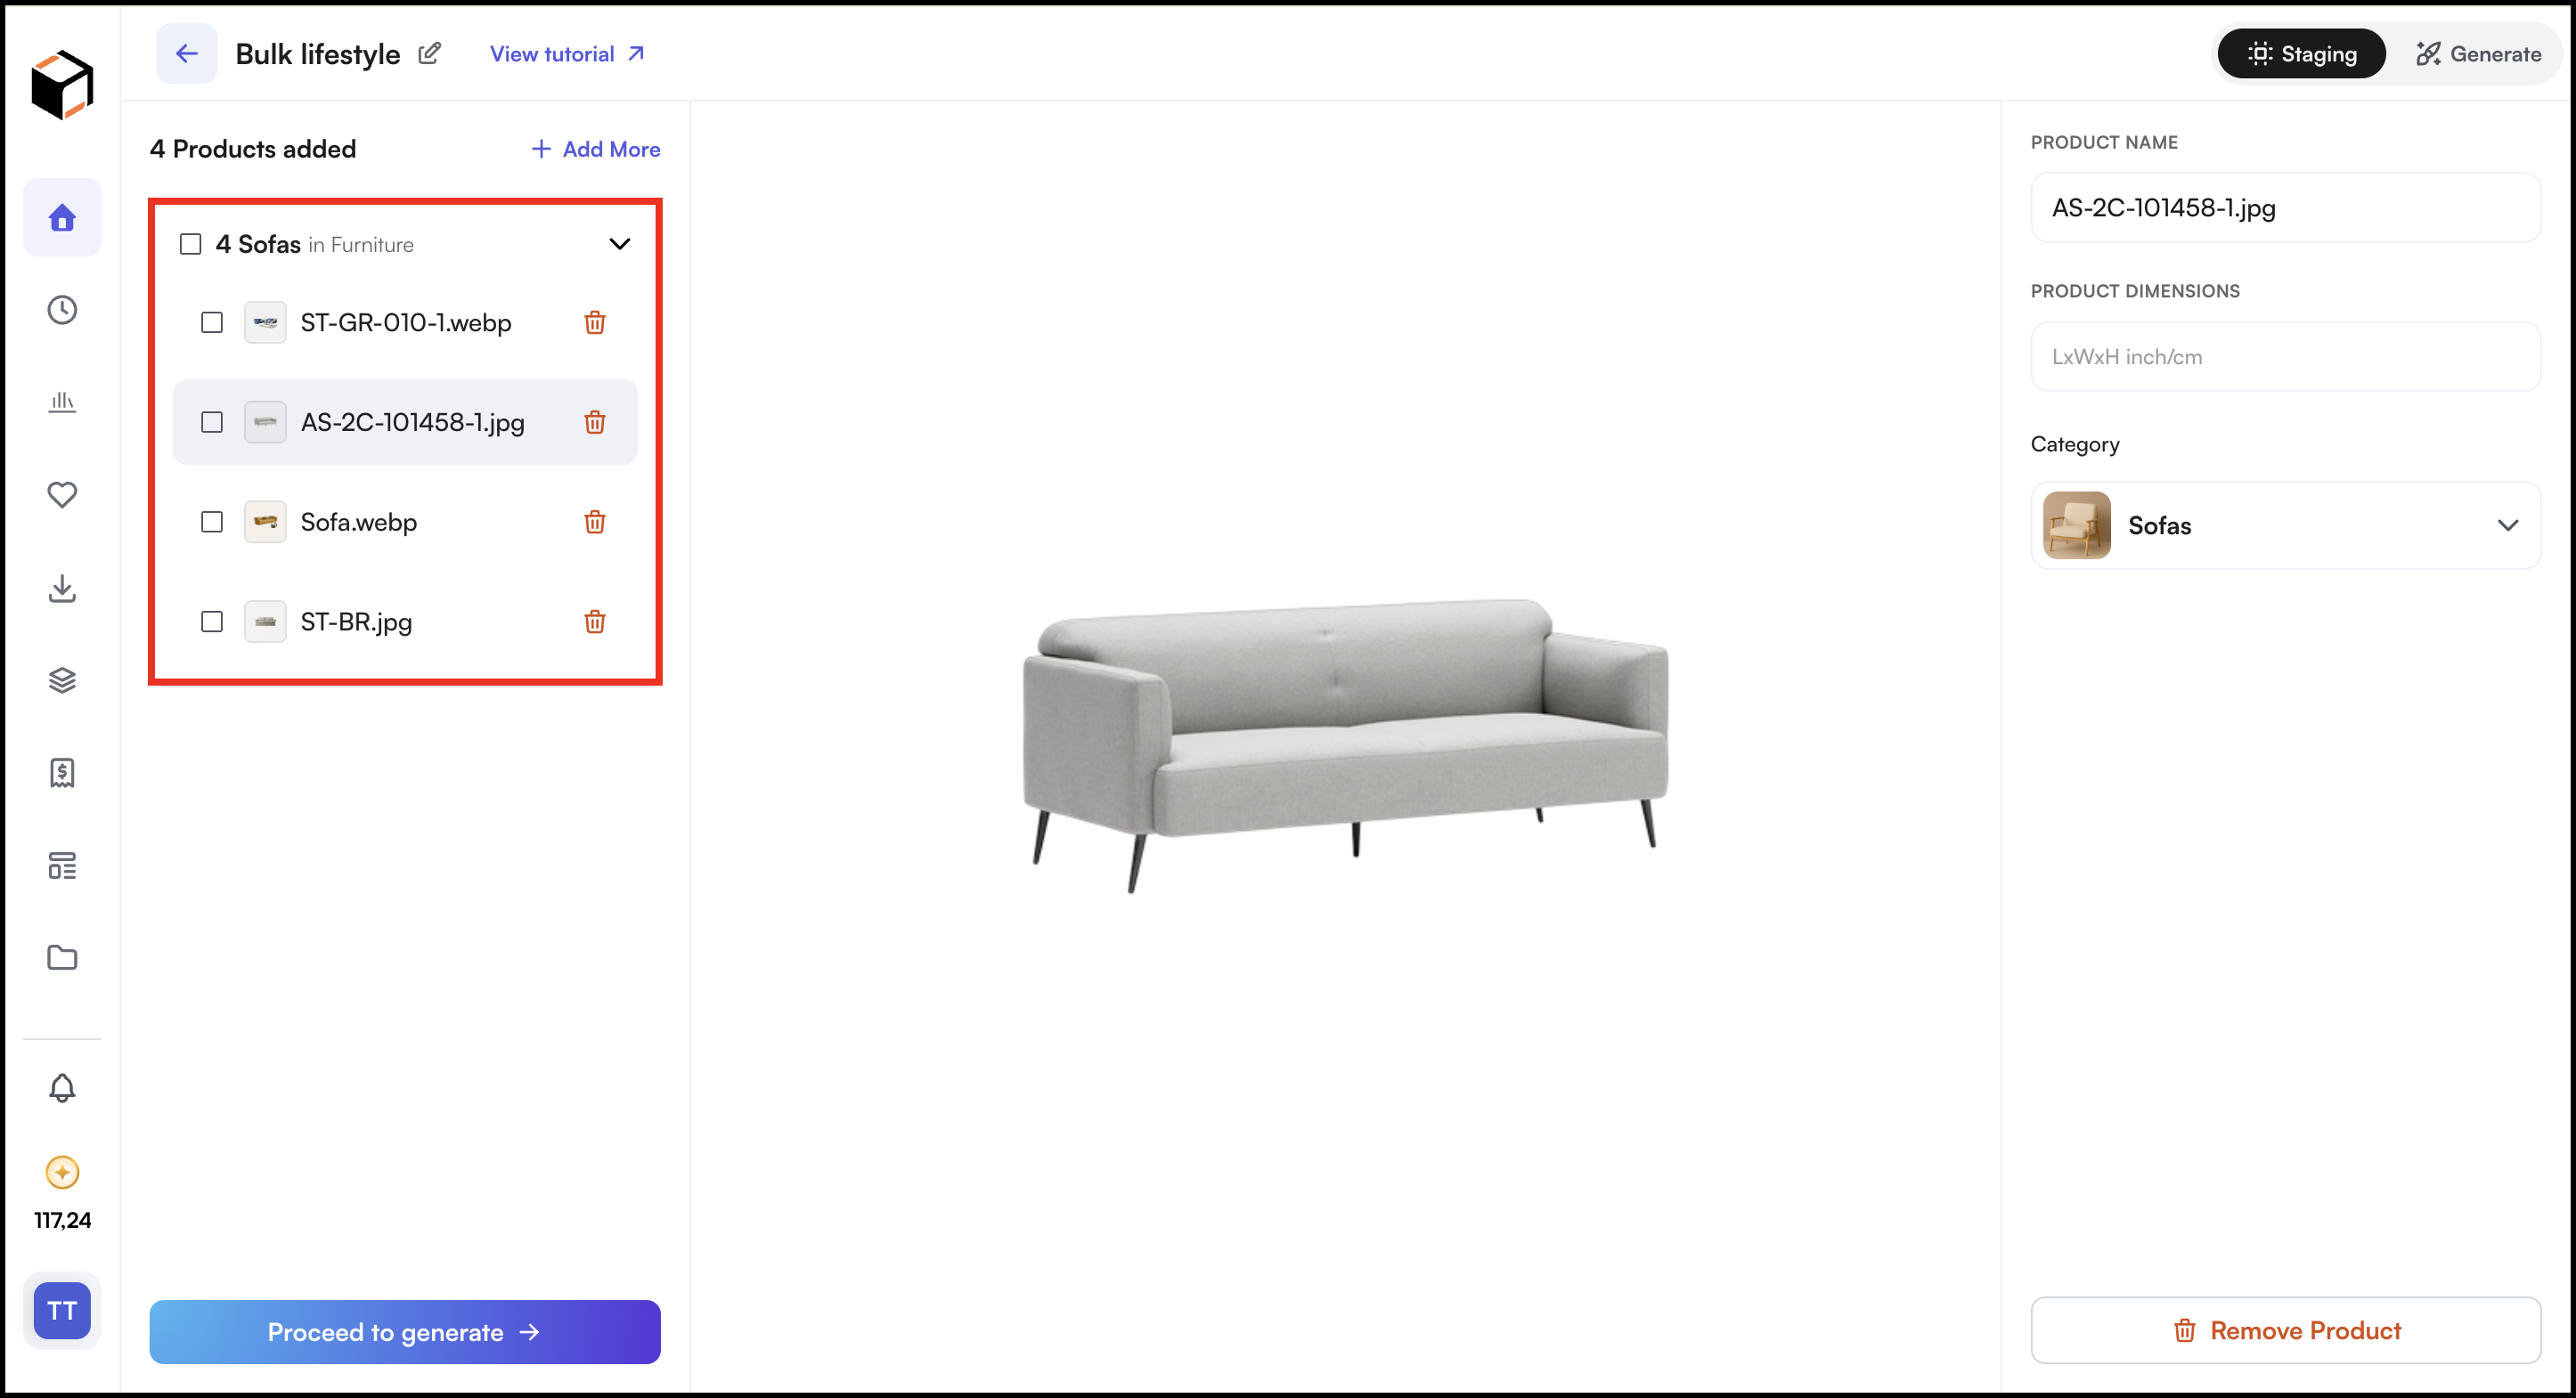
C. Review Products in Staging
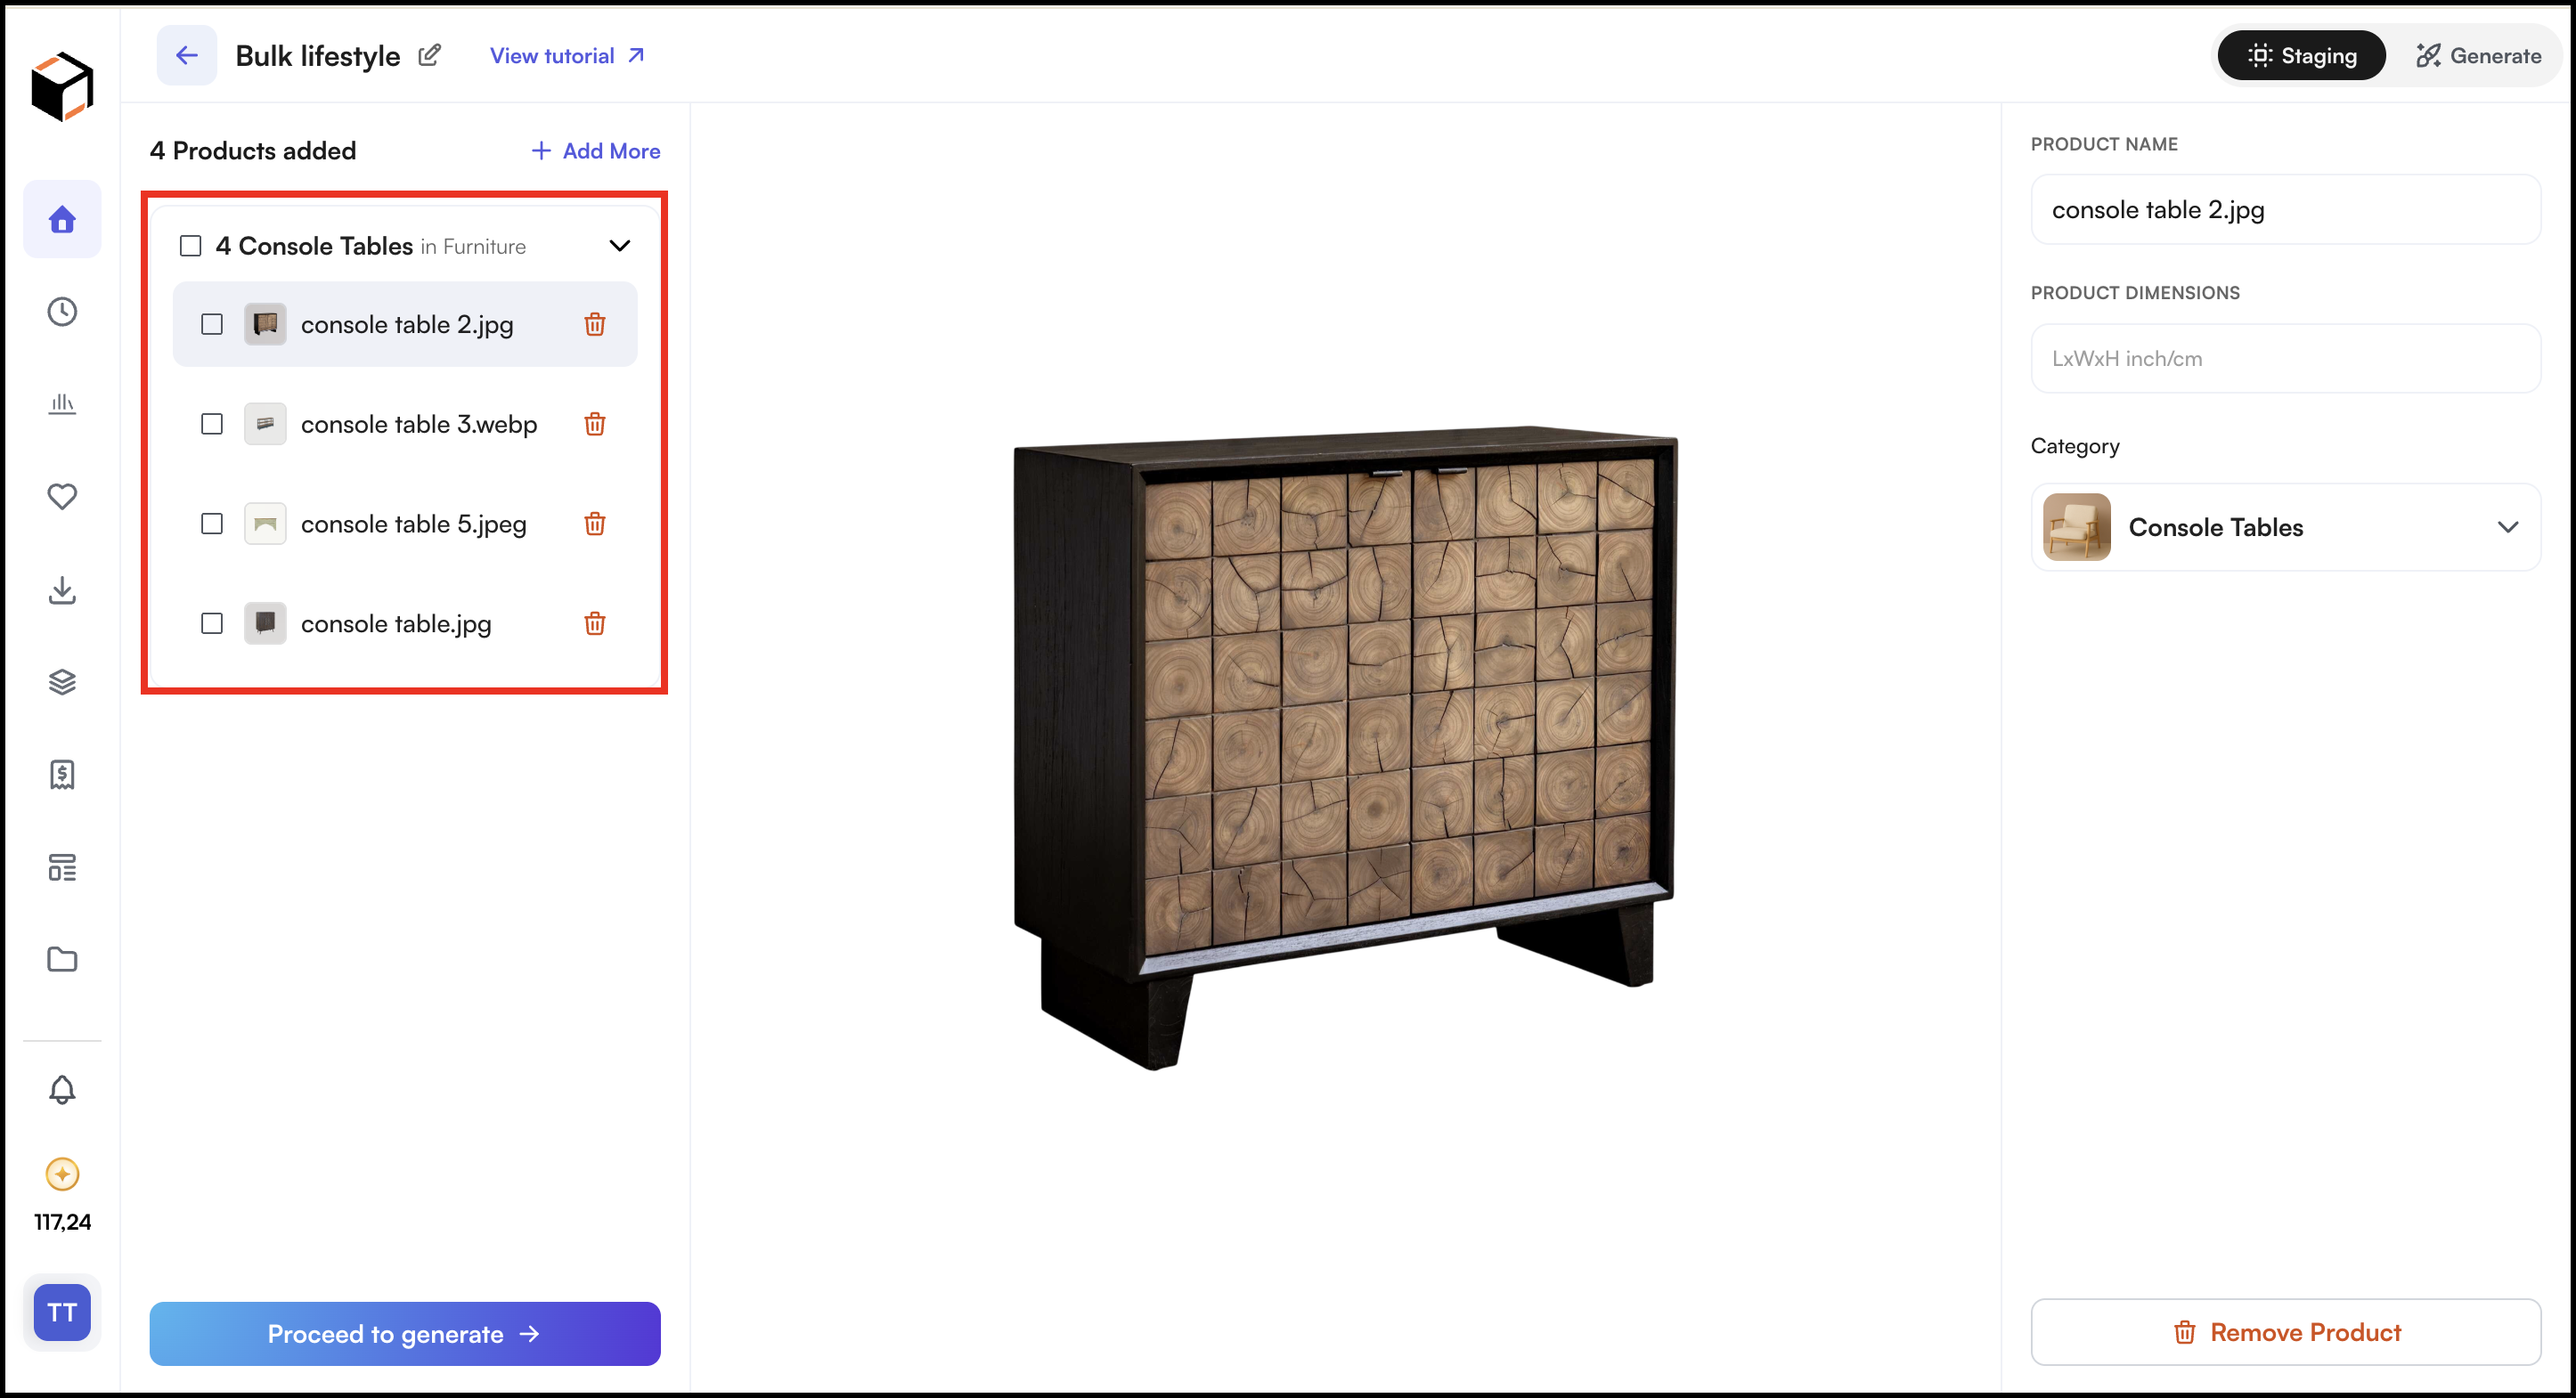
The Staging tab shows all your products grouped by the category WizStudio assigned to them. Use this step to fix anything before you generate.
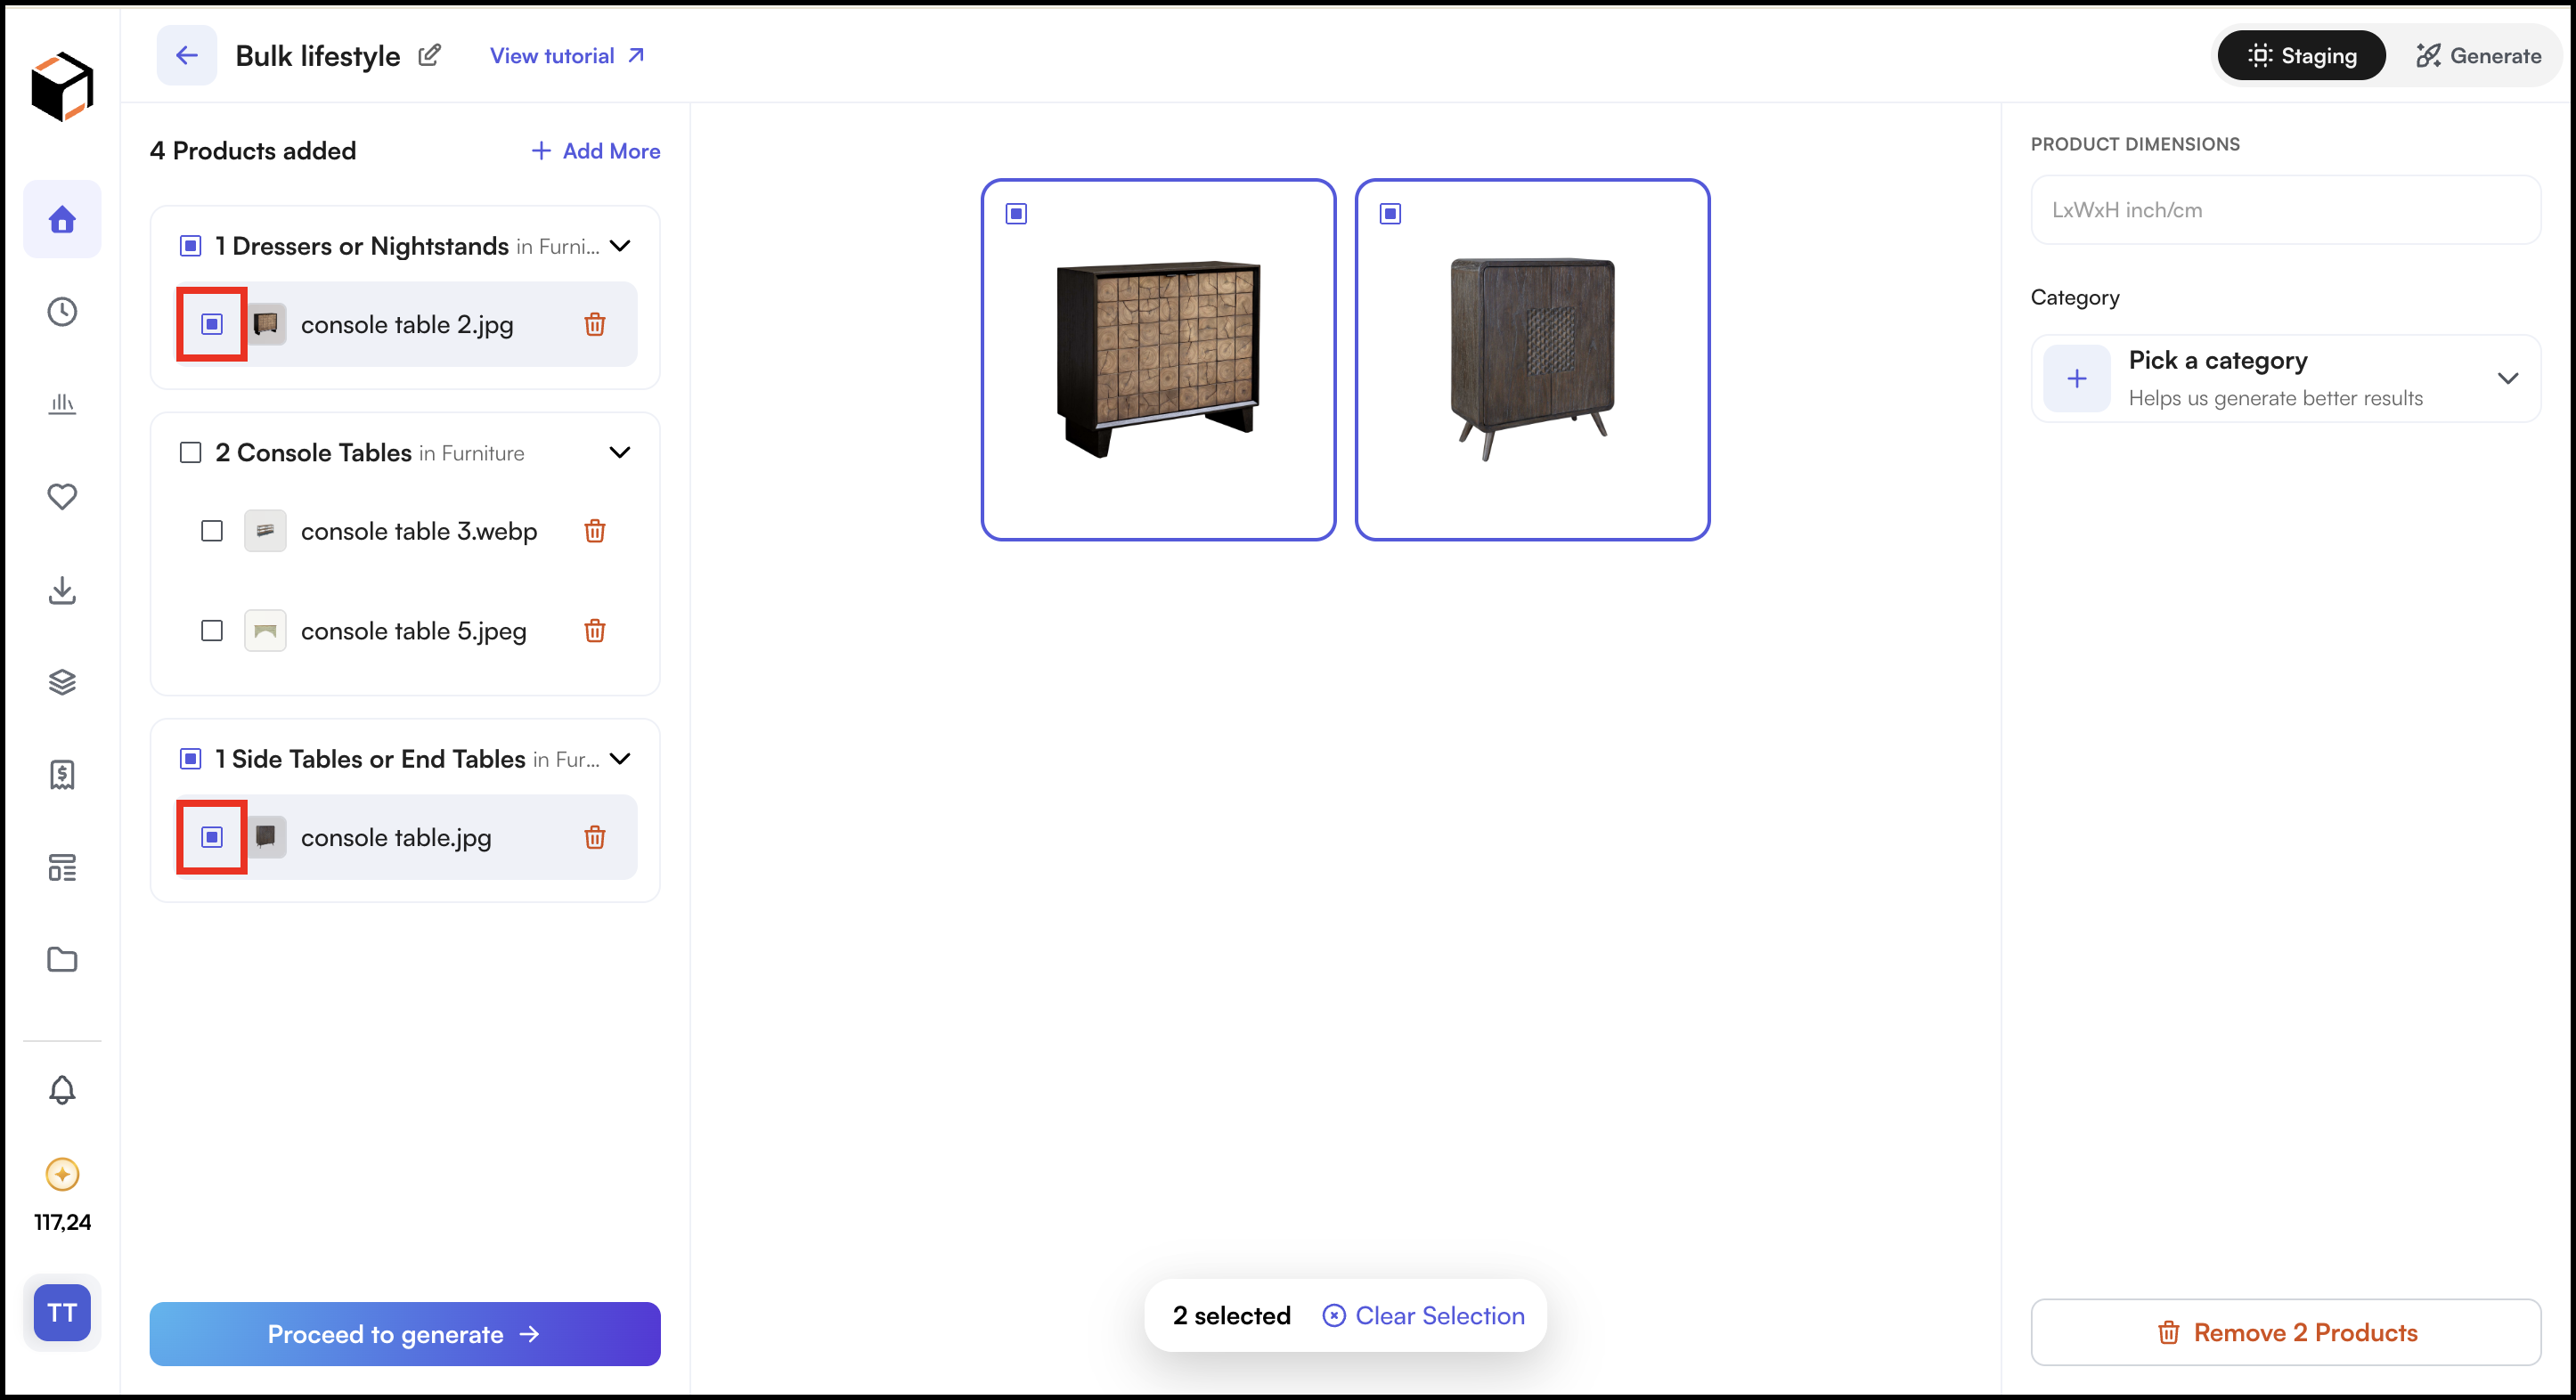
» Change the category for one or more products:
- Select the checkbox next to each product you want to update. You can select several products at once.
- In the Category field on the right, search for the correct category (for example, console tables).
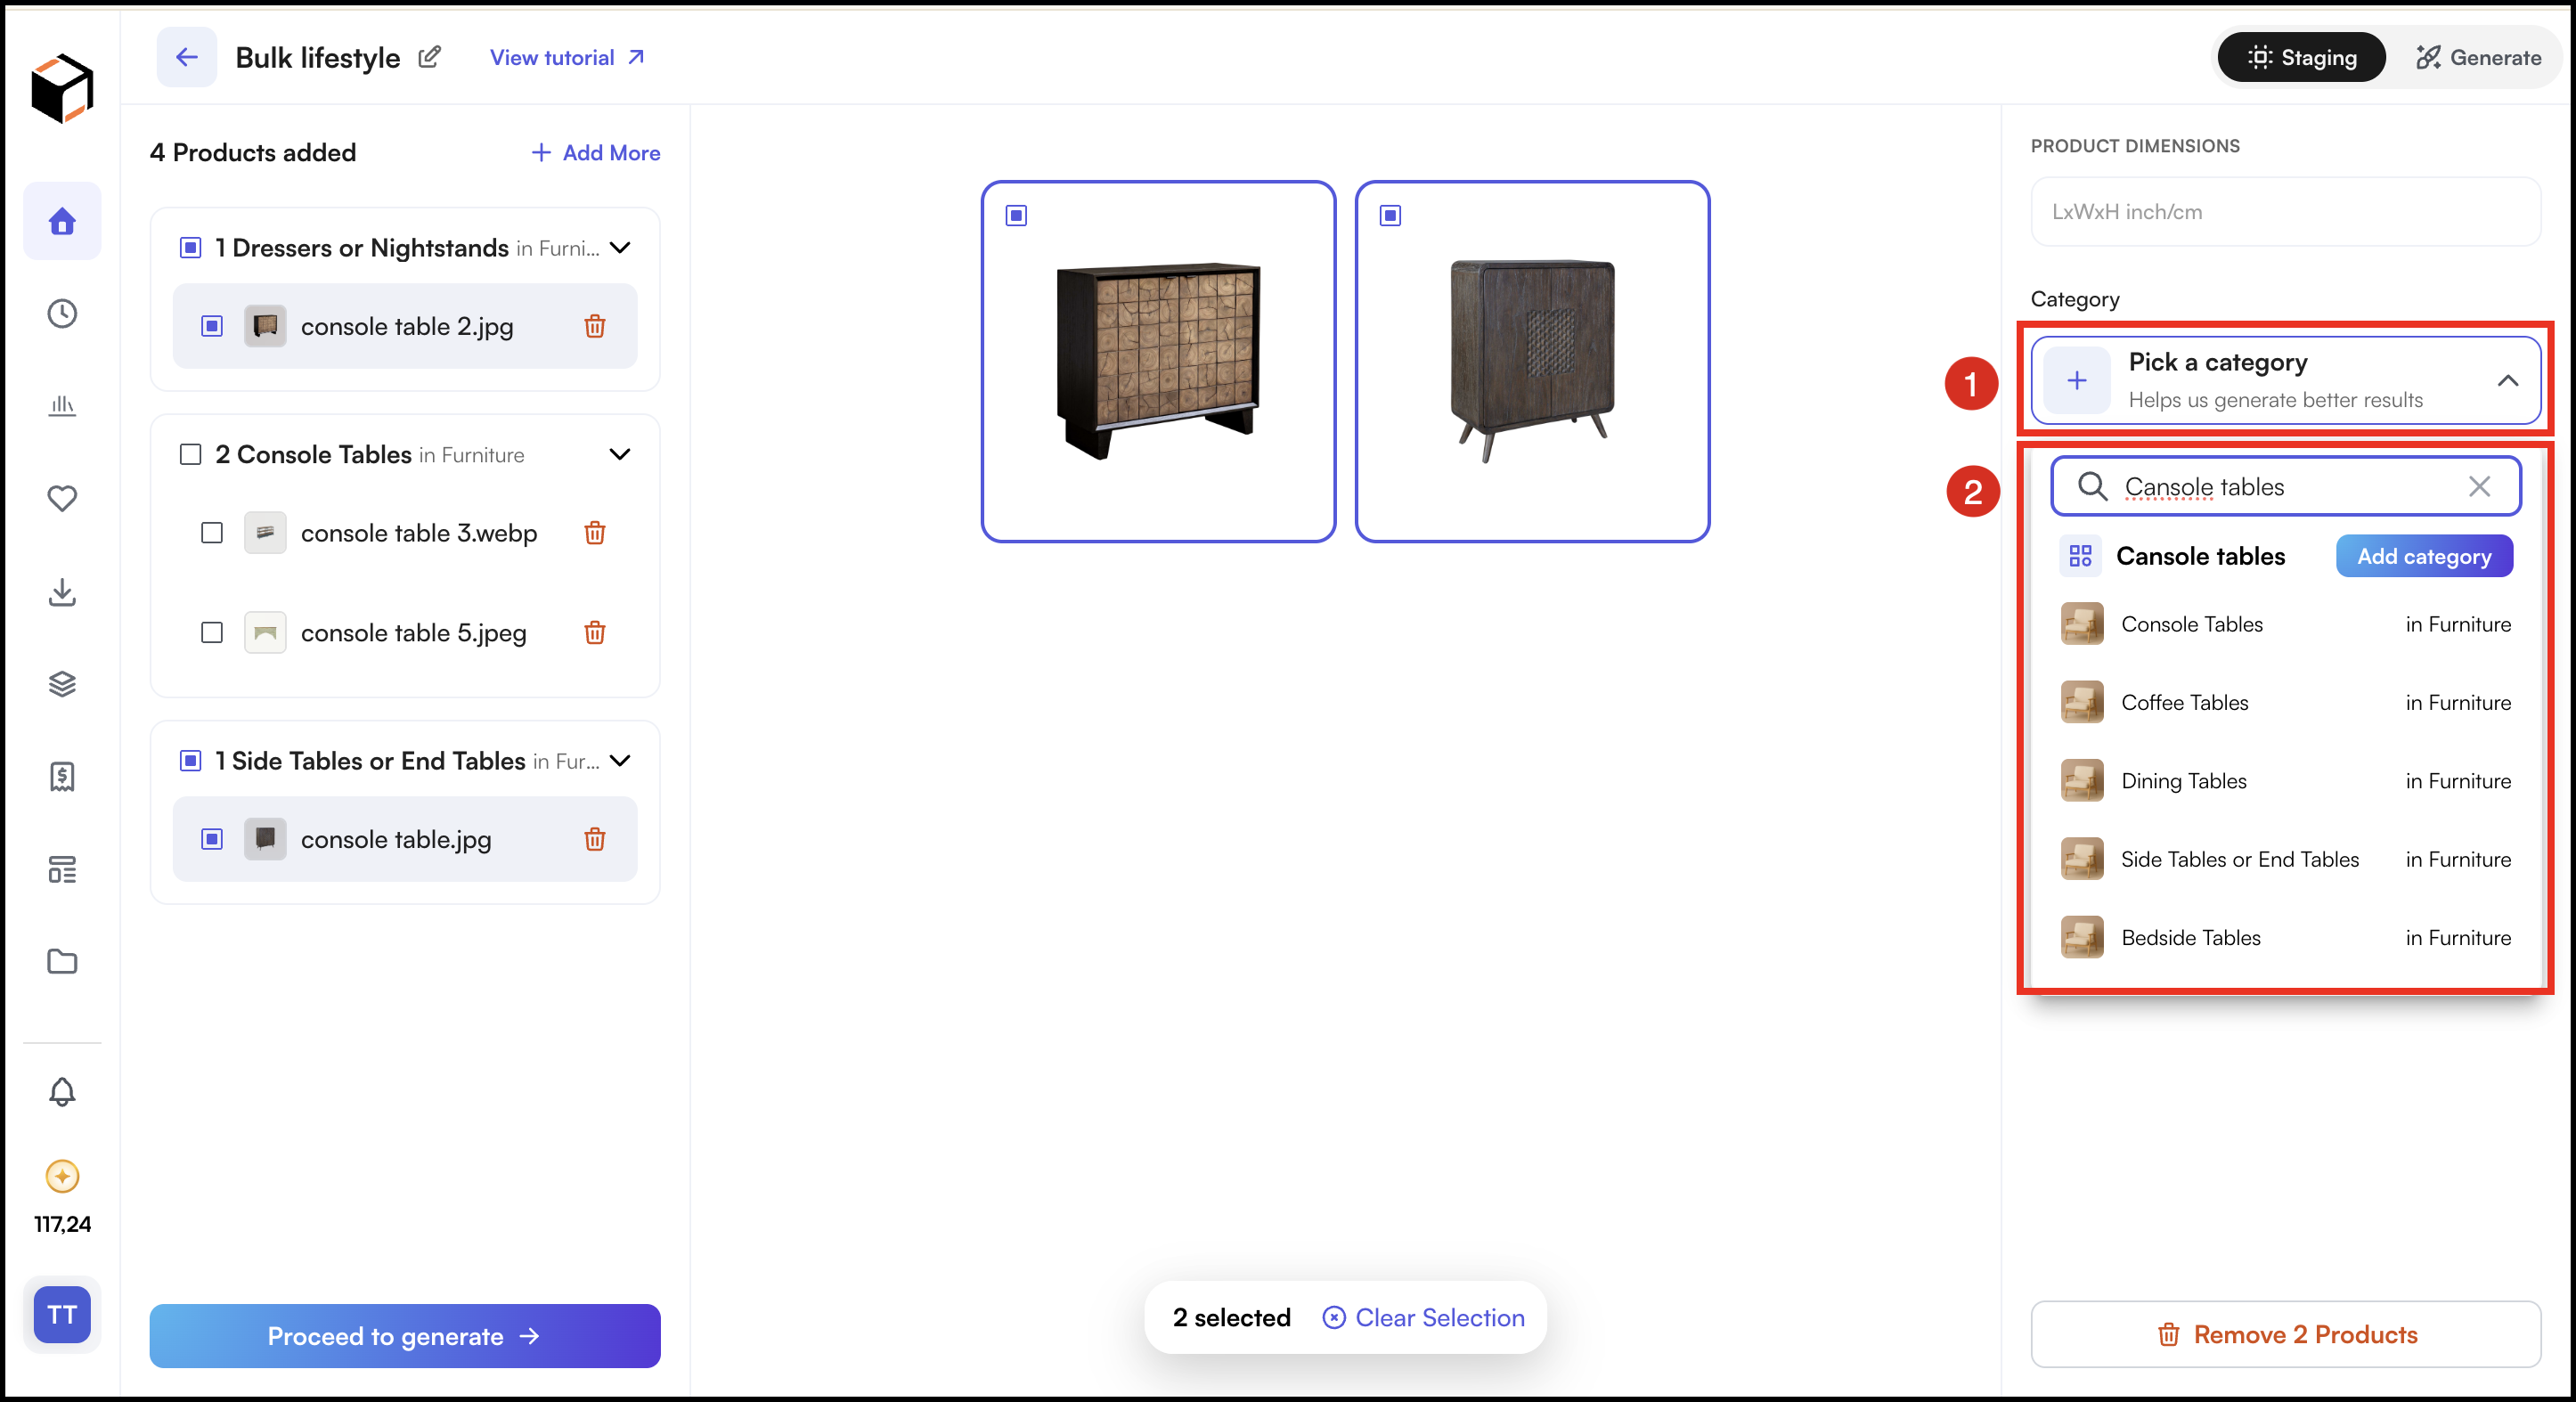
- Select the category from the results. All selected products move into that category group.
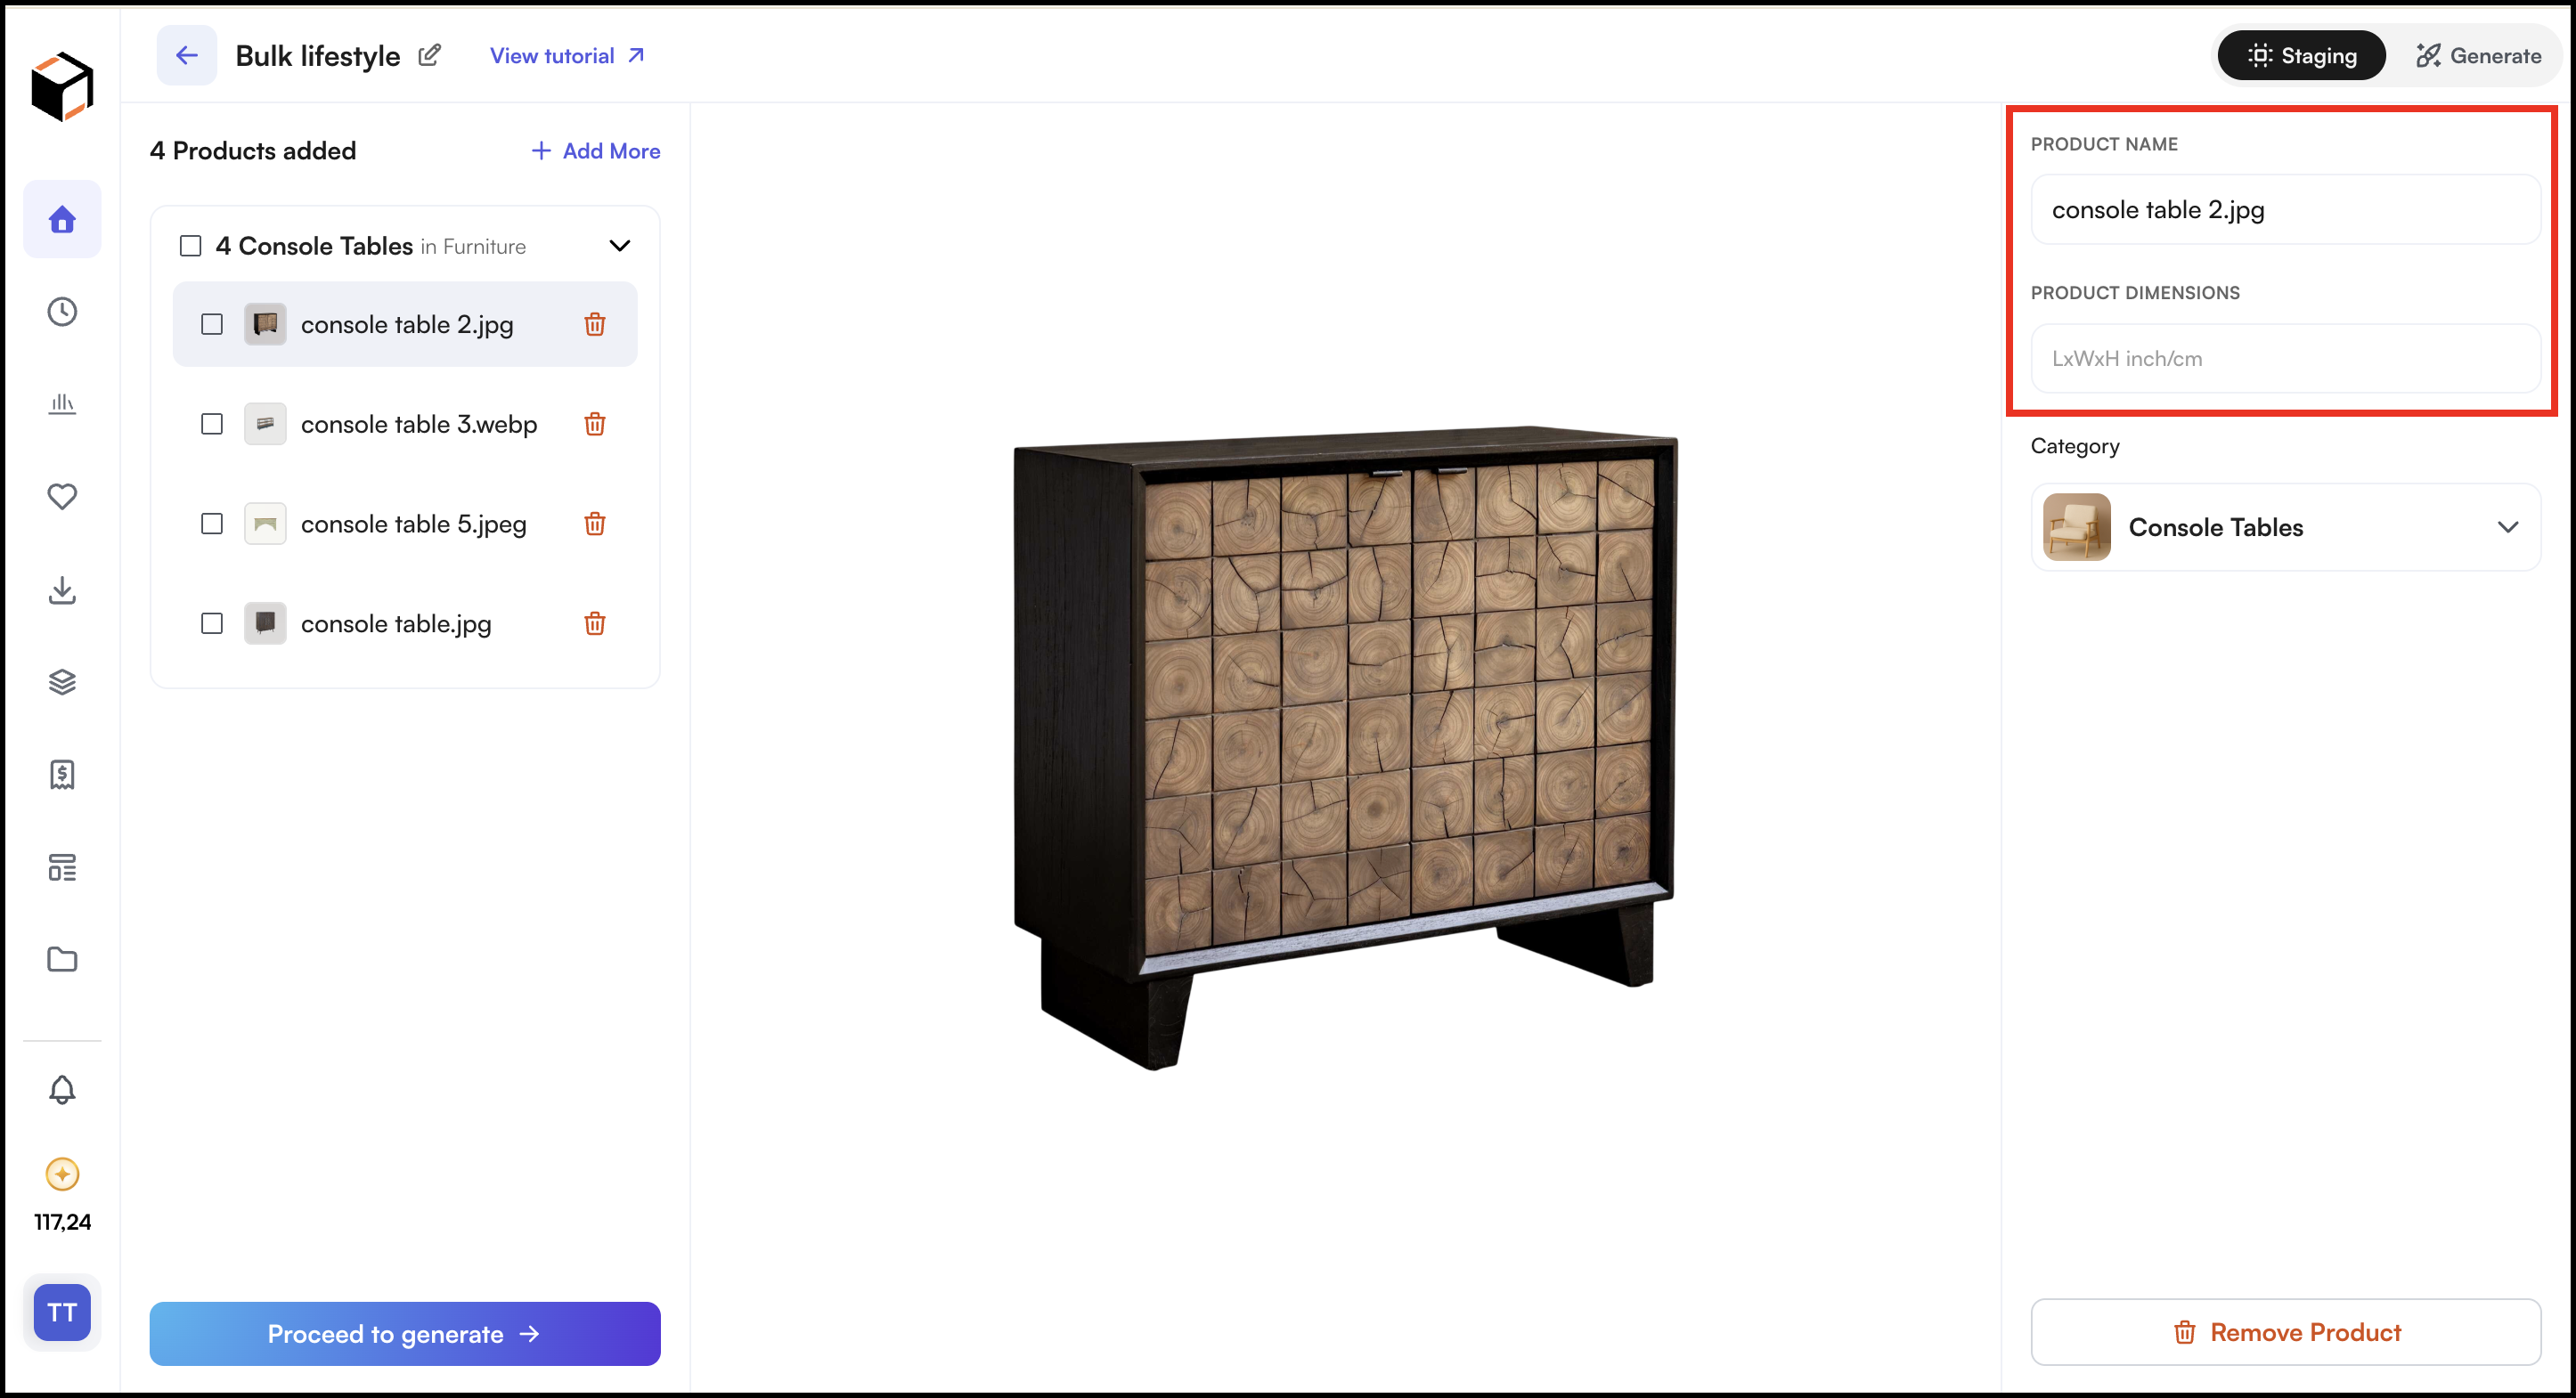
» Edit a product’s name or dimensions
- Click the product in the list.
- Update the Product Name or Product Dimensions fields on the right.
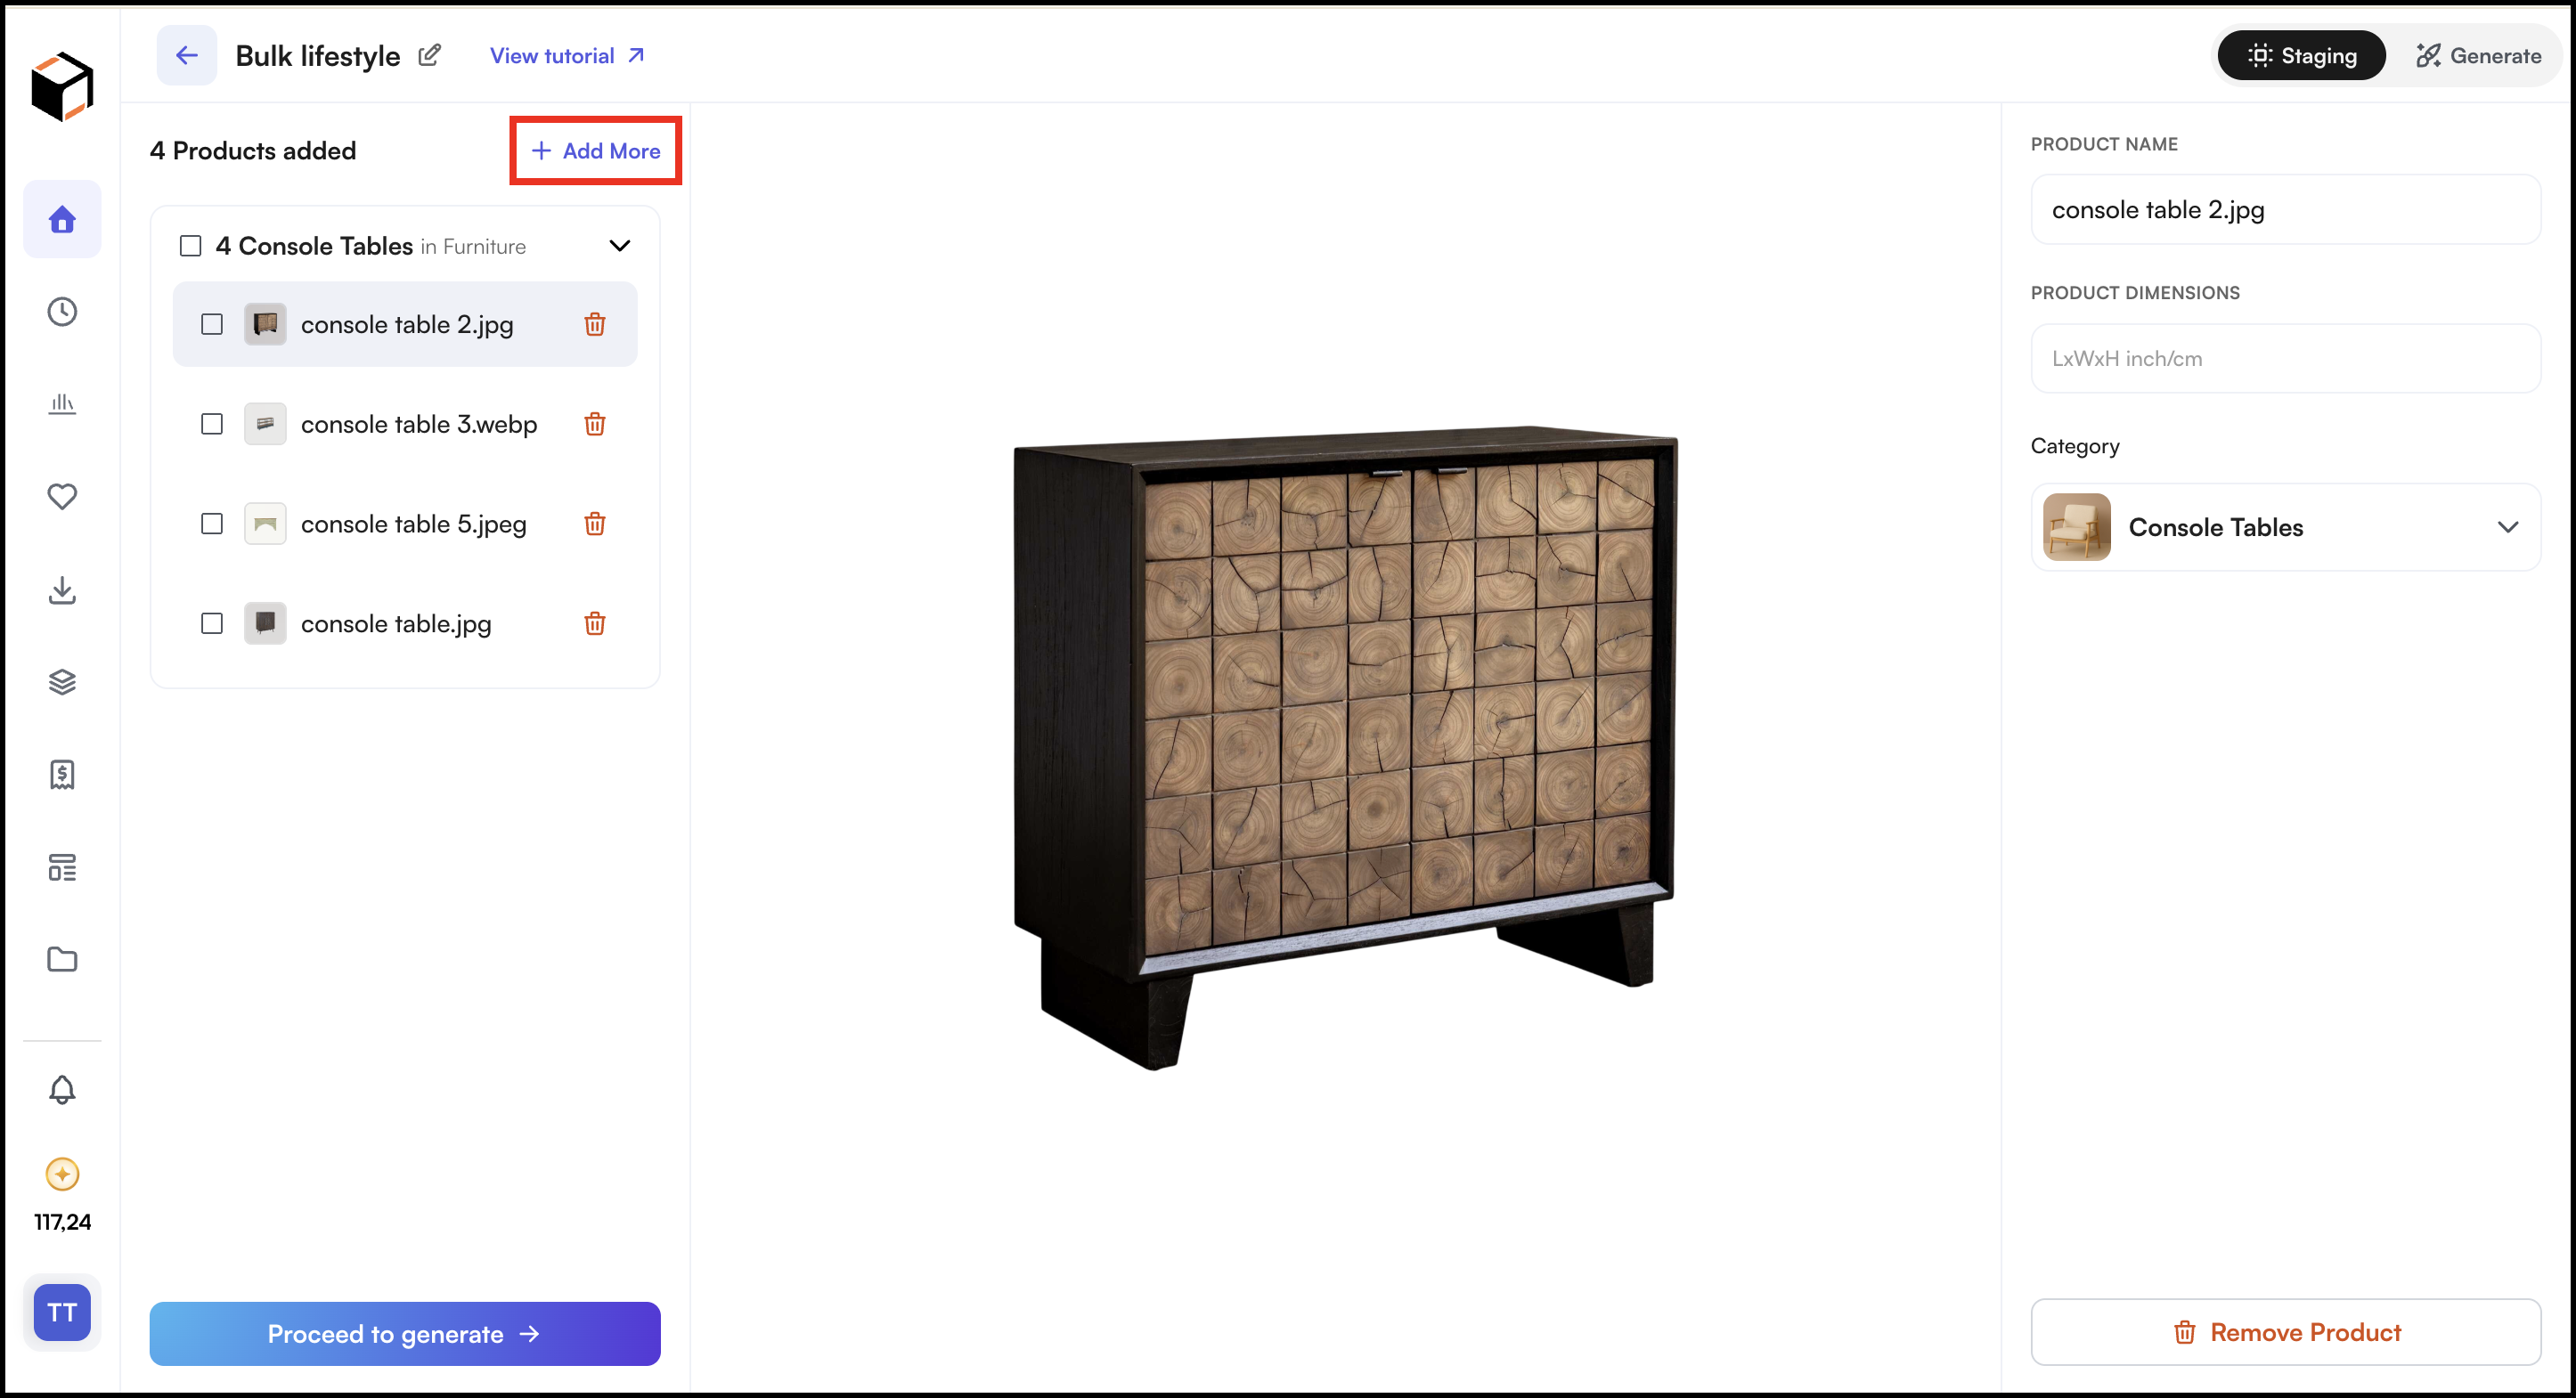
» Add more products
- Click + Add More.
- Upload images from your device or choose them from Assets.
- Close the window to return to Staging.
» Remove a product
- Click the delete icon next to the product.
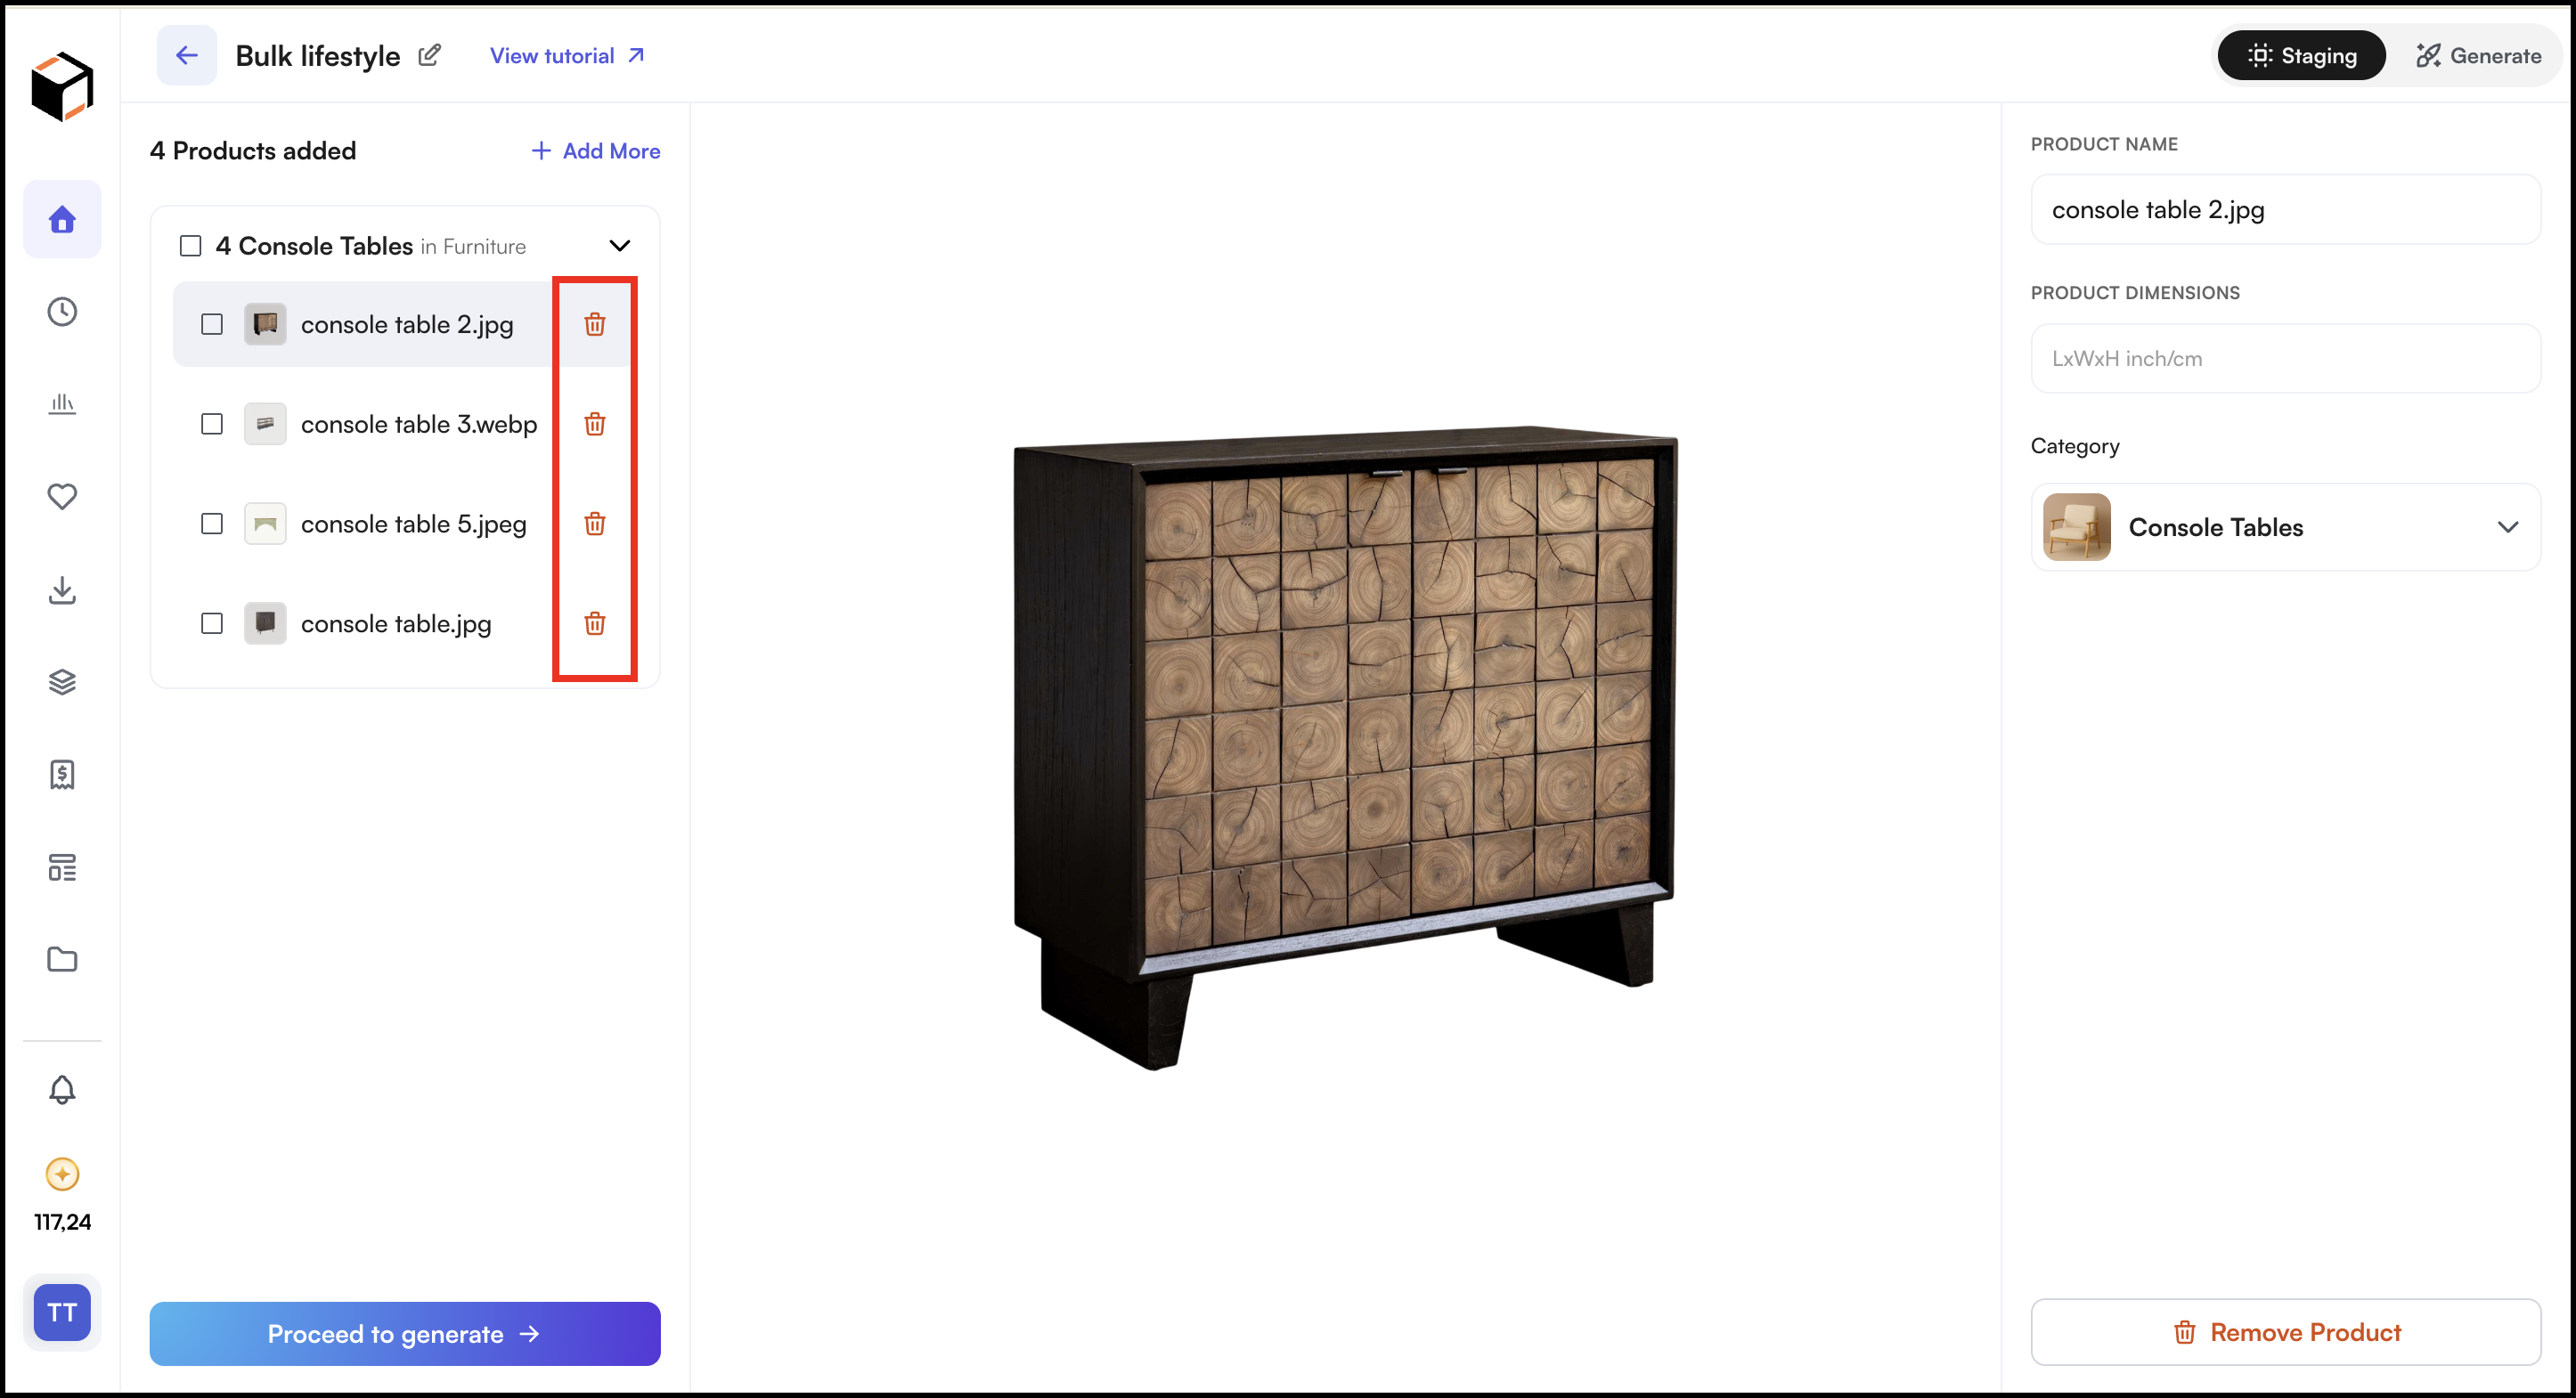
- Or select it and click Remove Product at the bottom right.
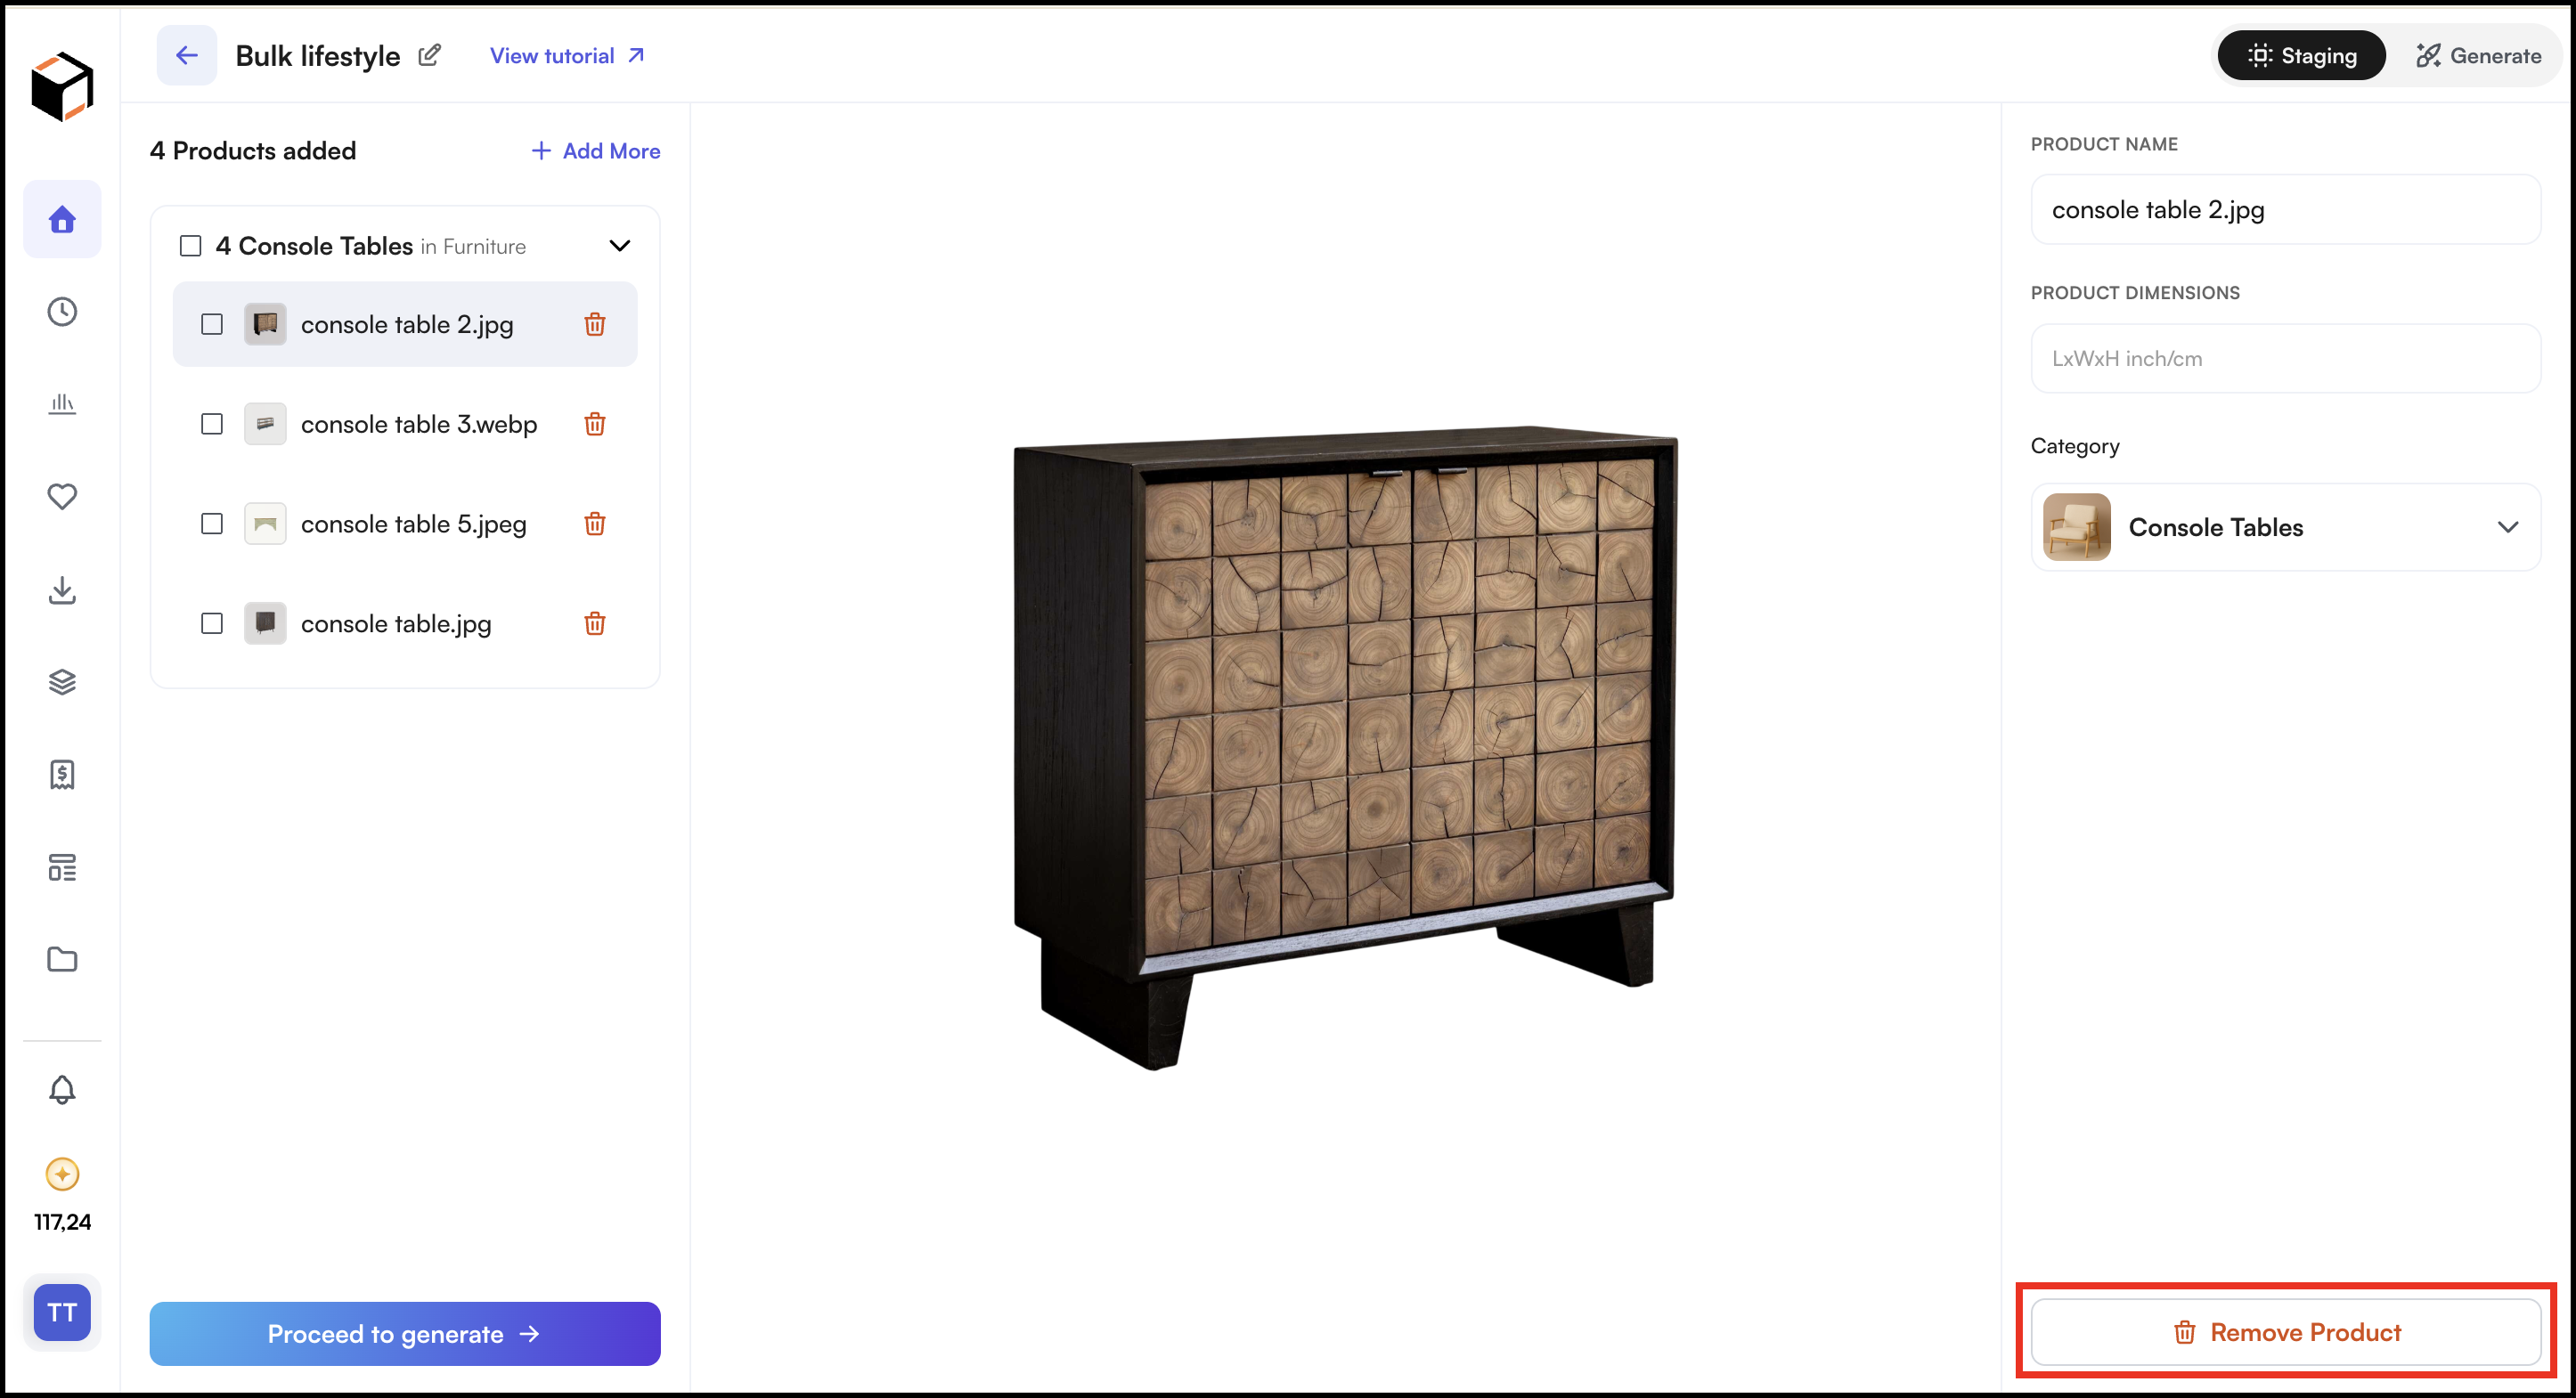
Tip: Remove any image where the background wasn’t removed cleanly. Poor cut-outs carry through into the final lifestyle images.
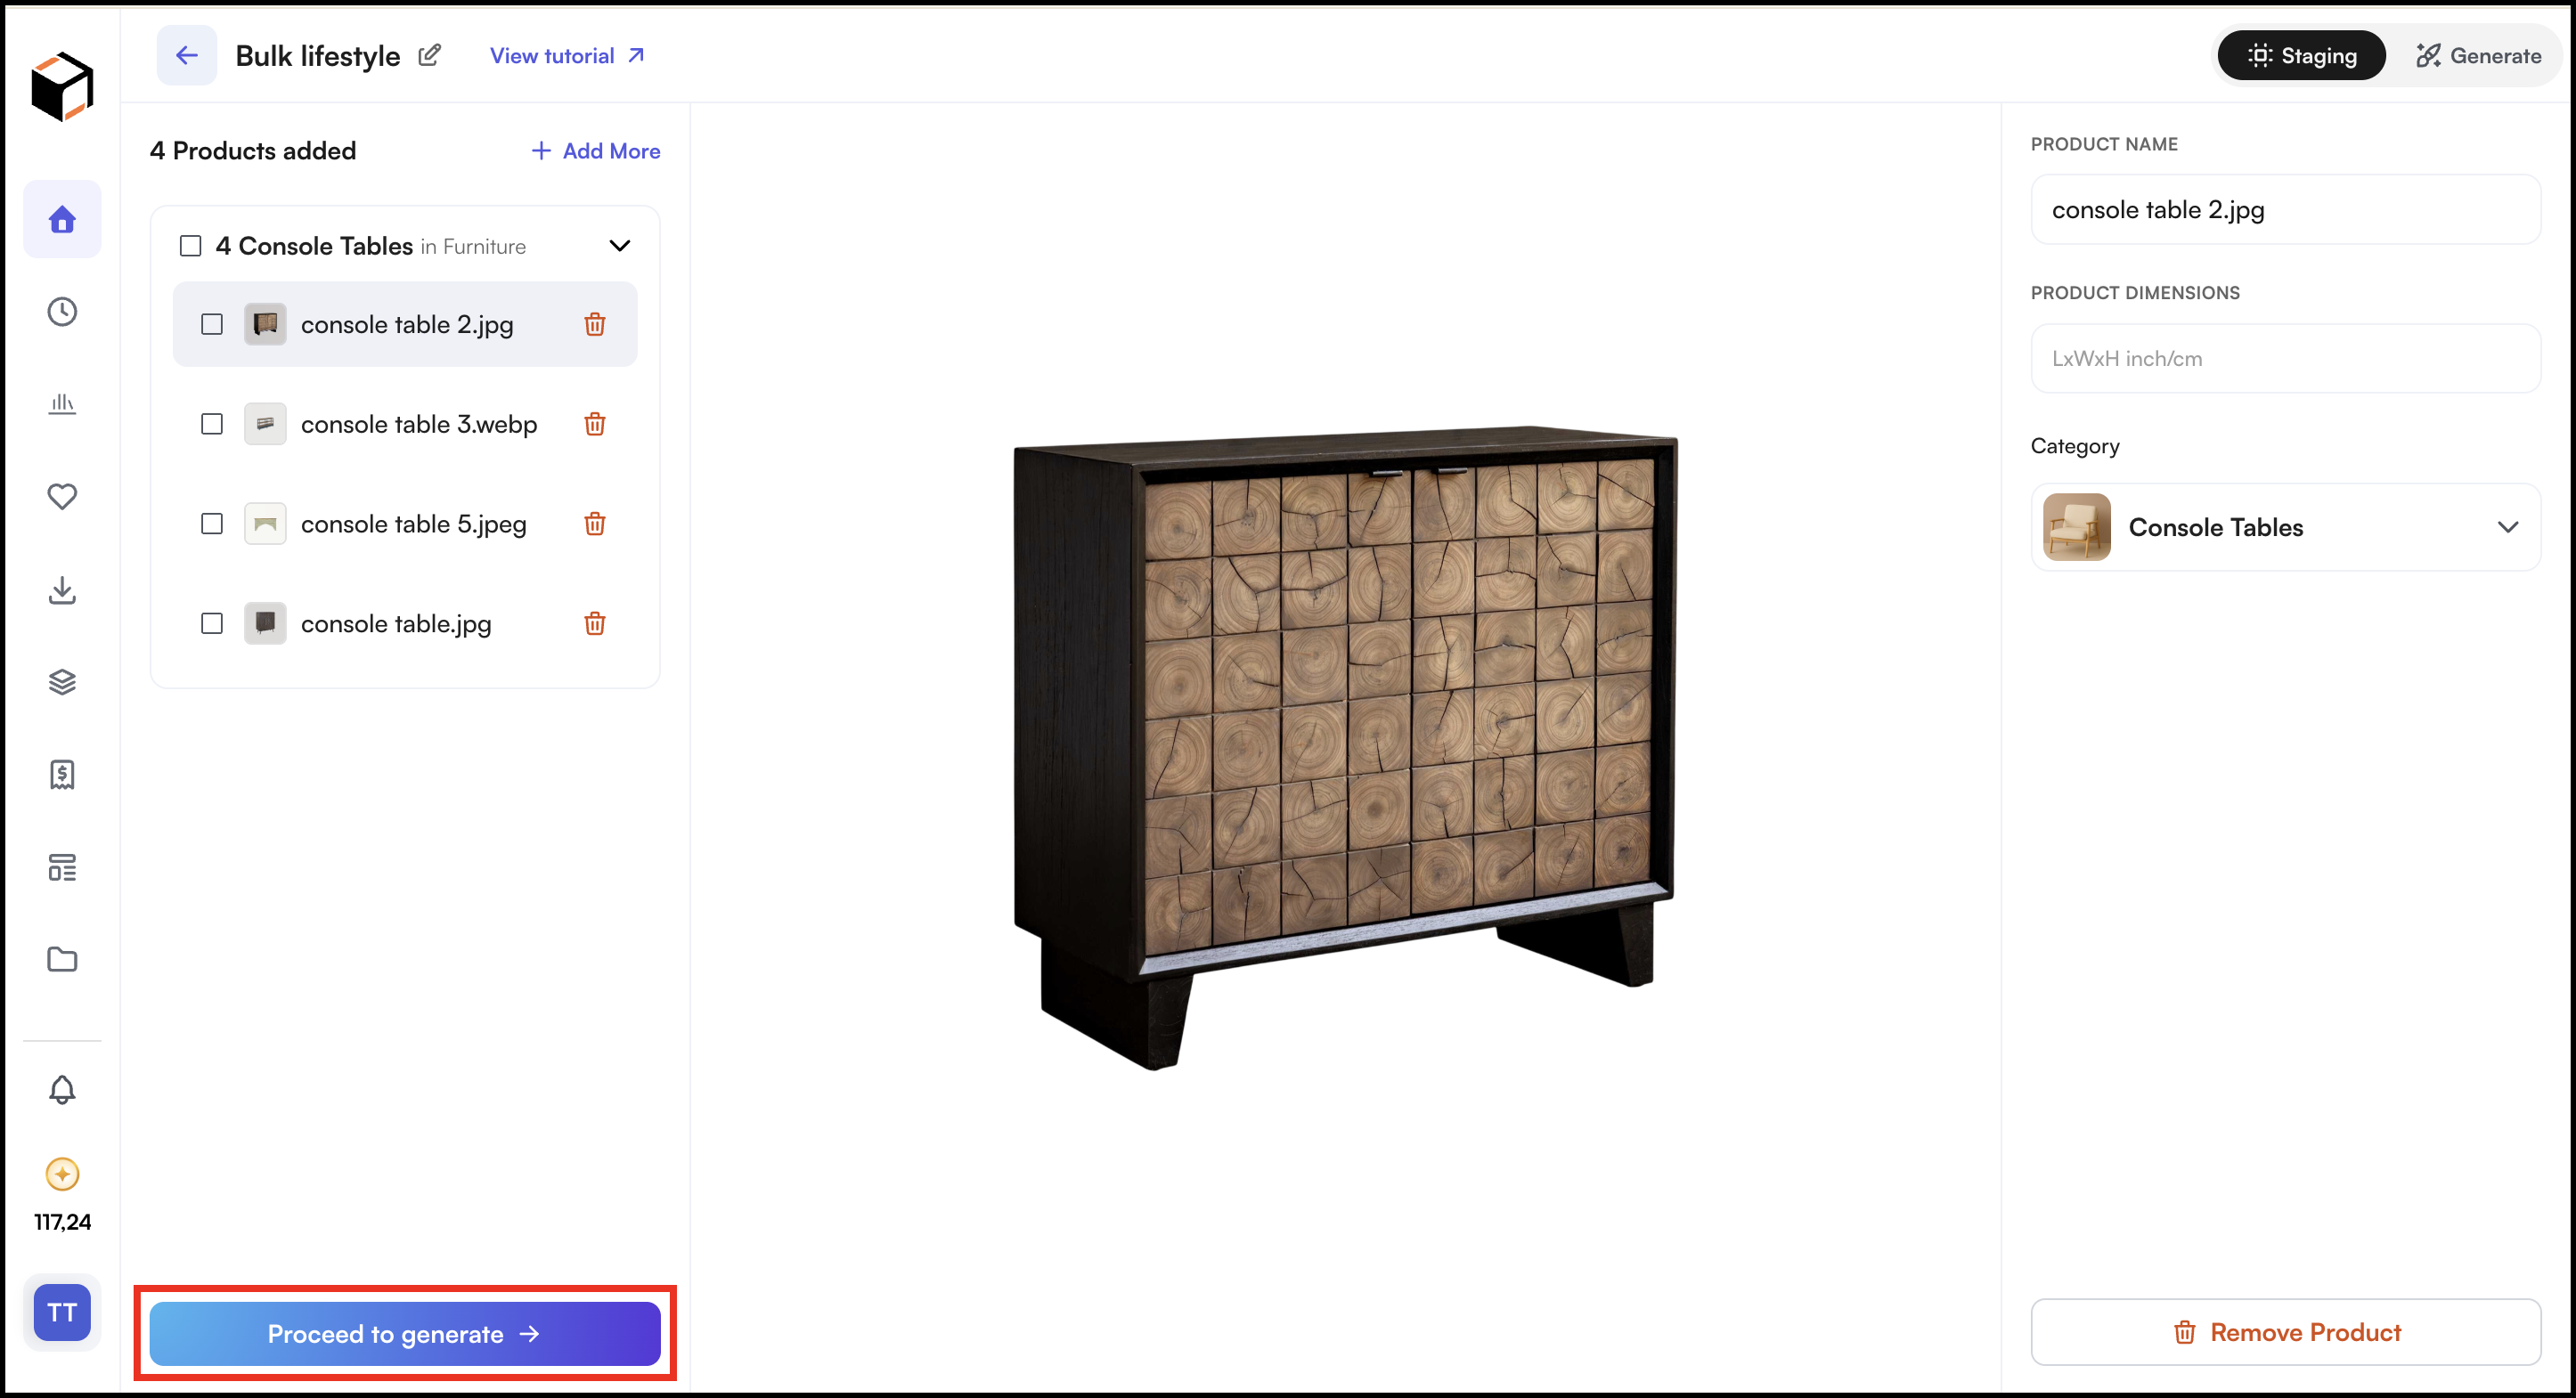
- When your product list is ready, click Proceed to generate.
- Your generate screen opens up with a plan mentioned.
D. Set Up the Scene on a Preview Product
Before generating images for every product, you set up and test the look on one product first.
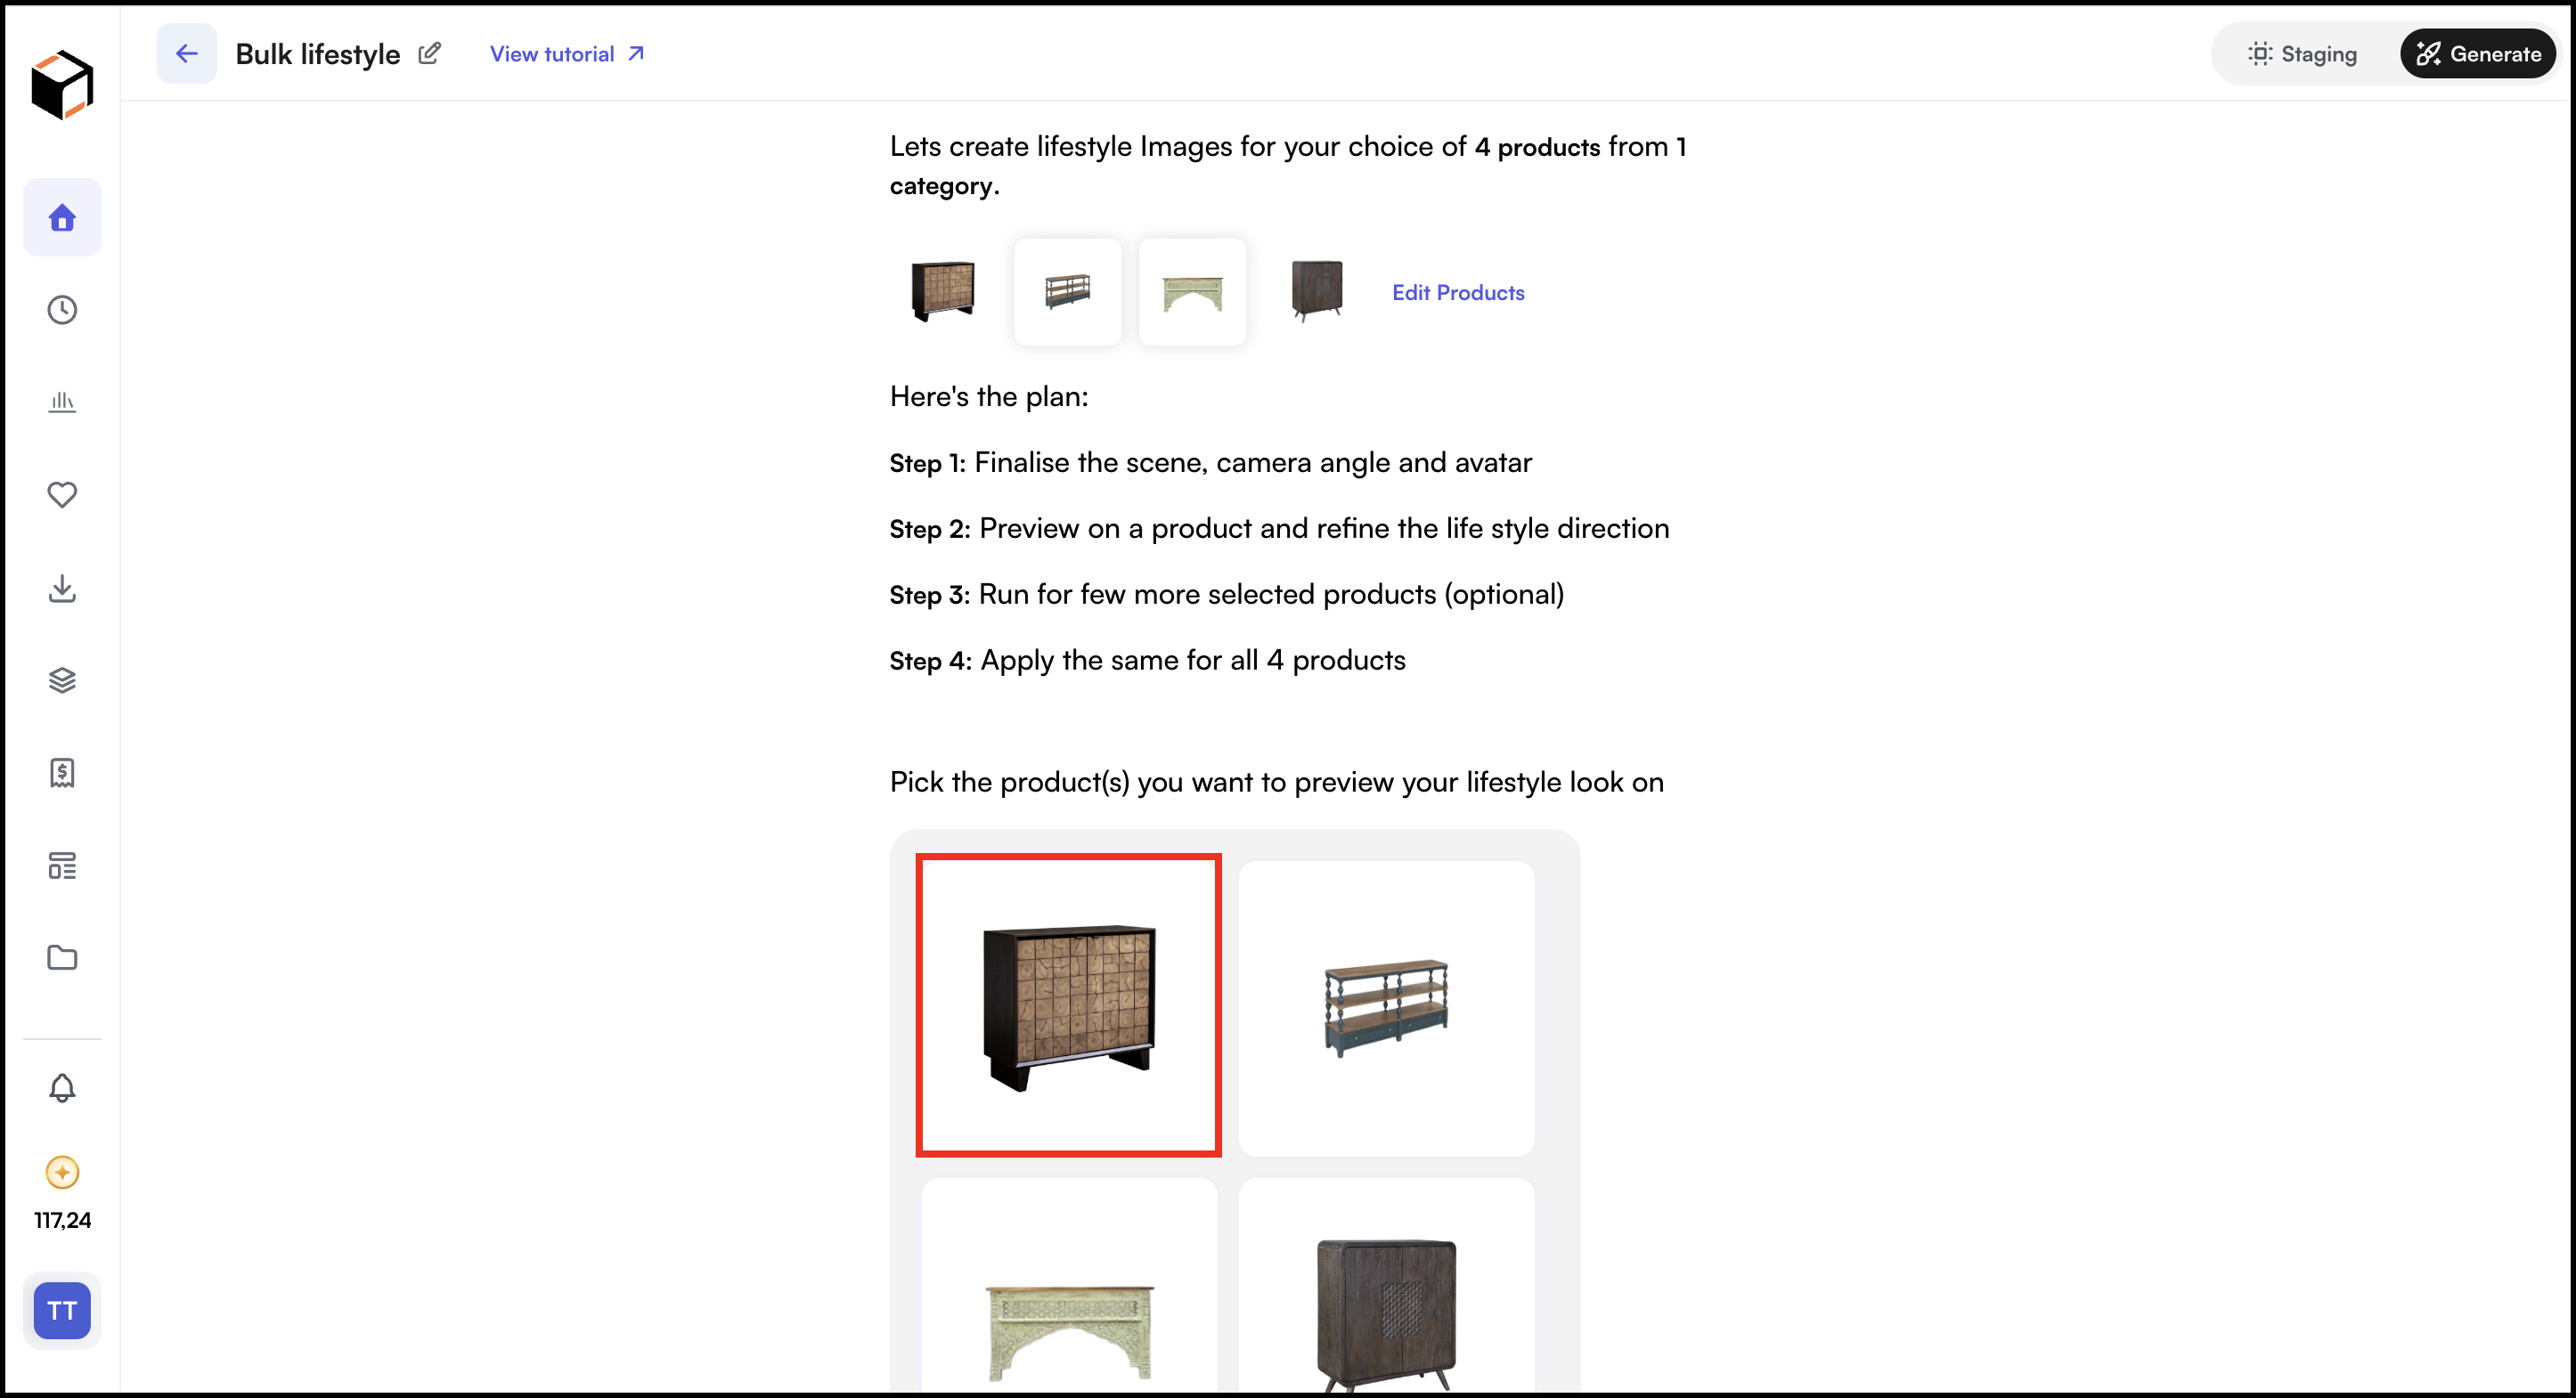
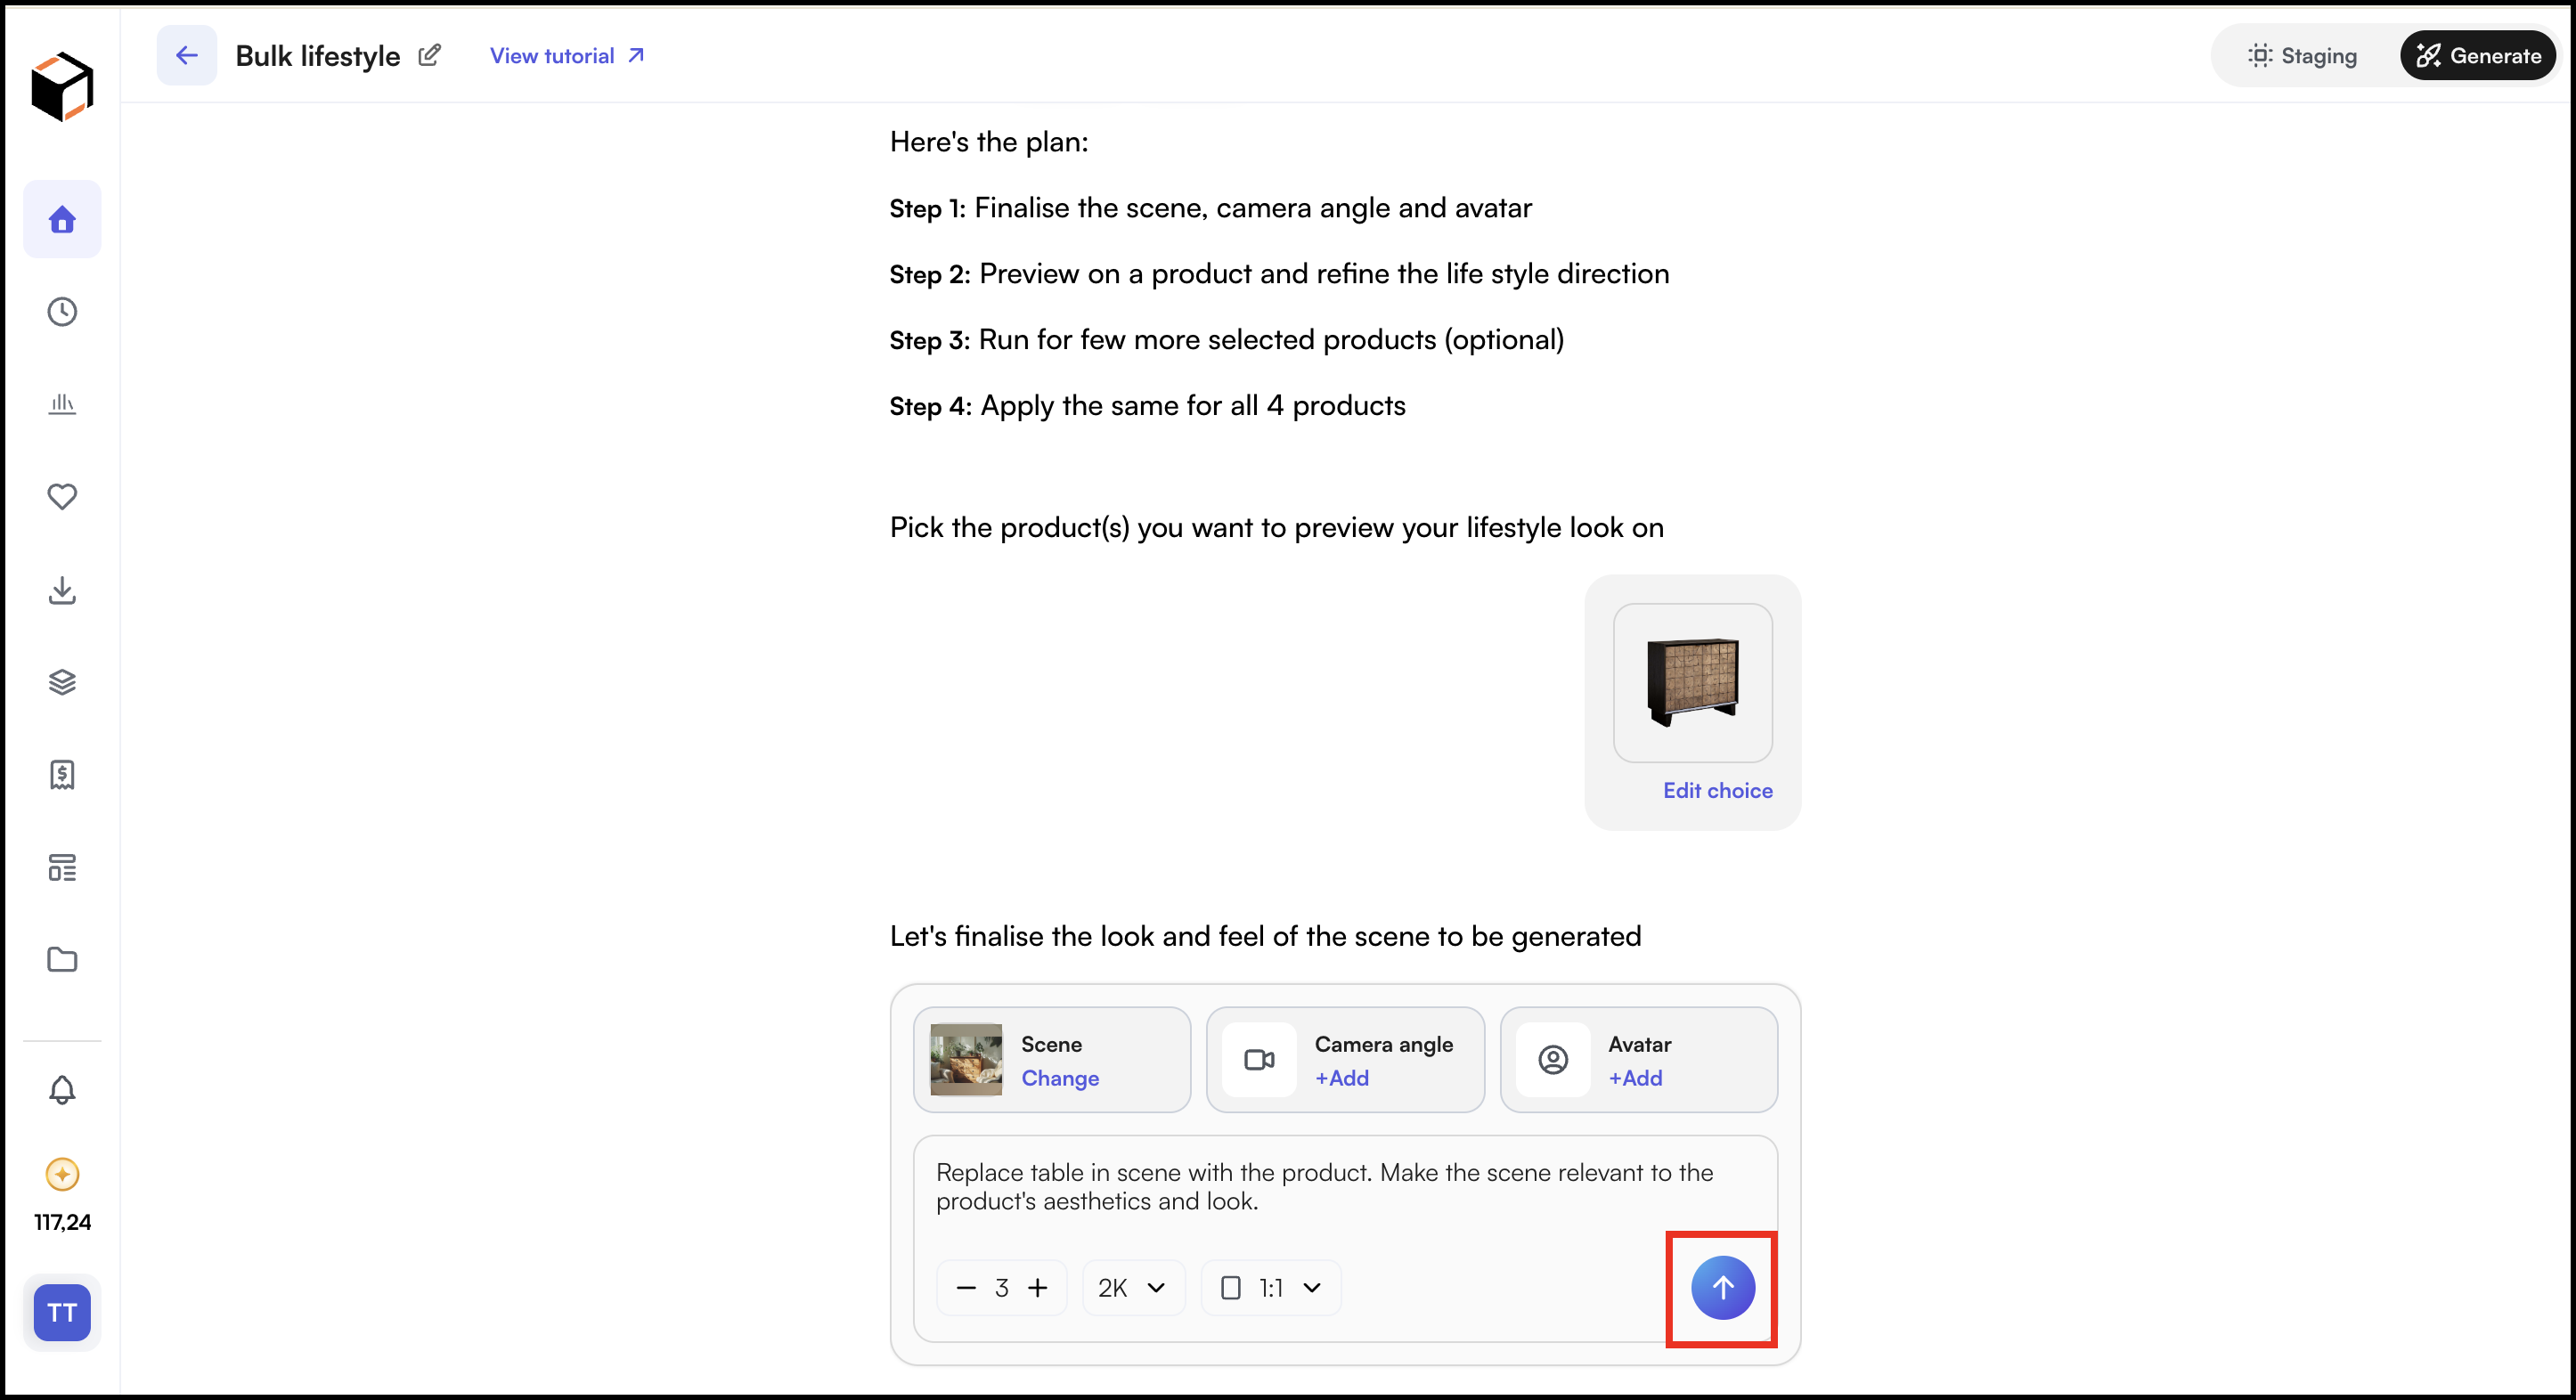
- Under Pick the product(s) you want to preview your lifestyle look on, select a product to preview.
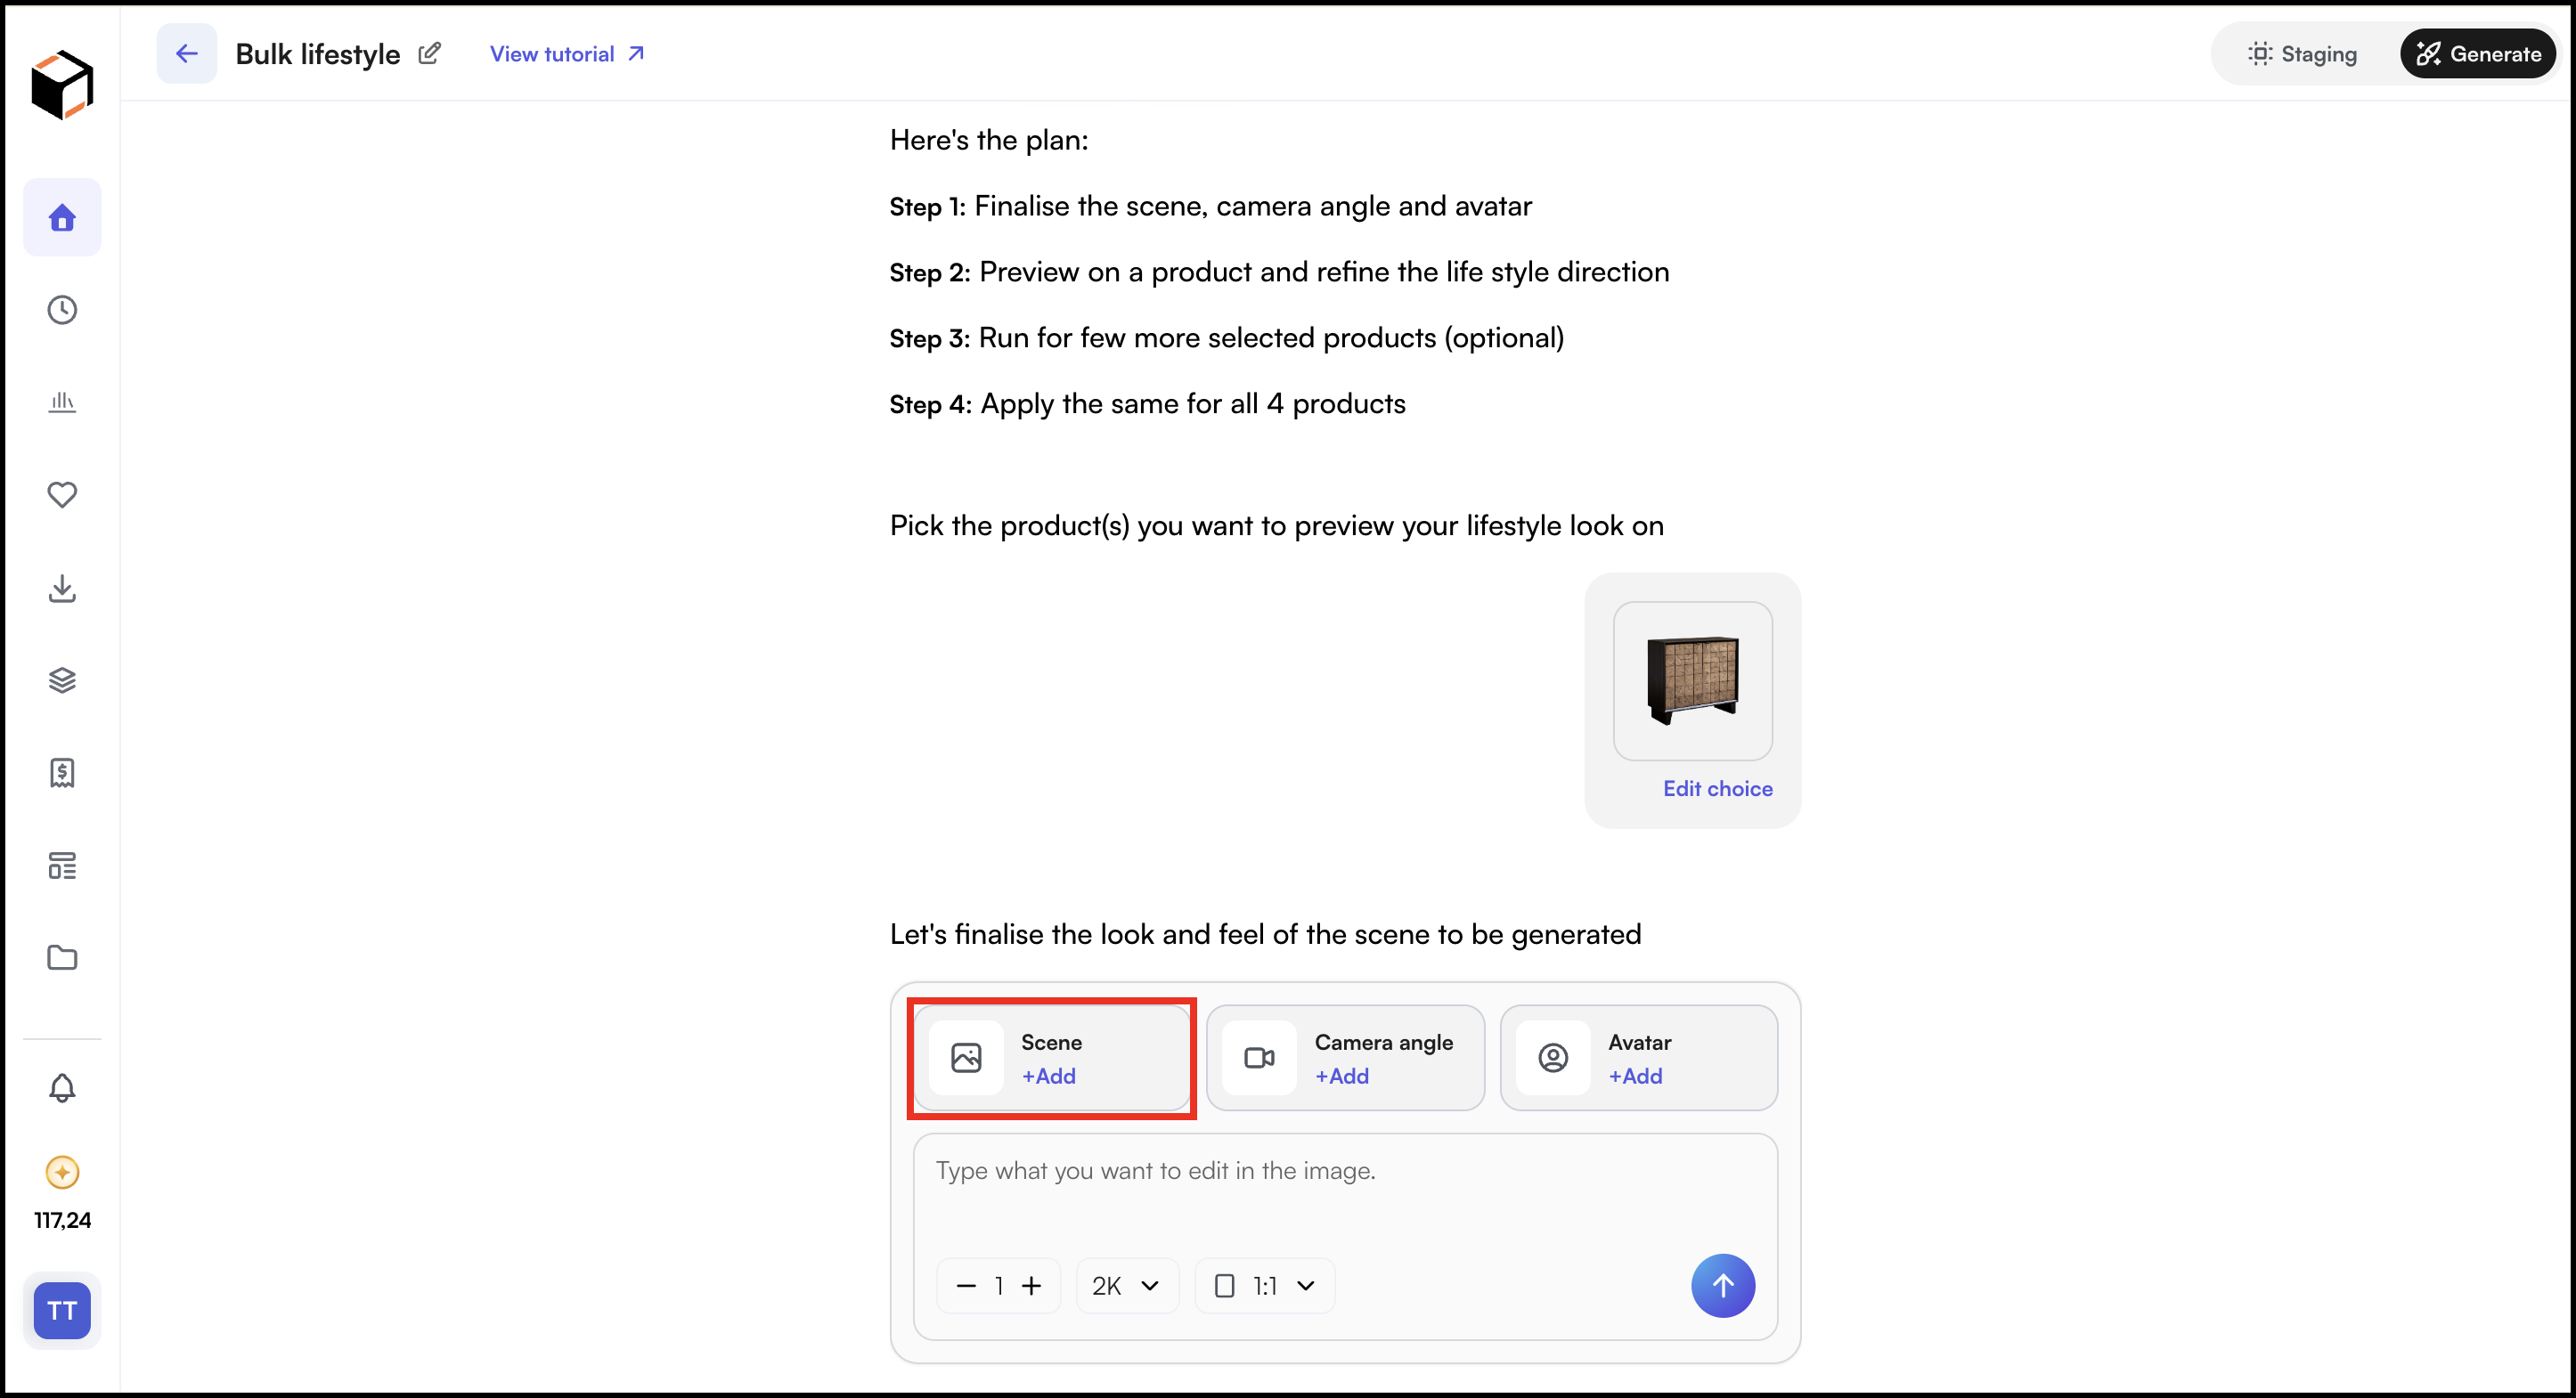
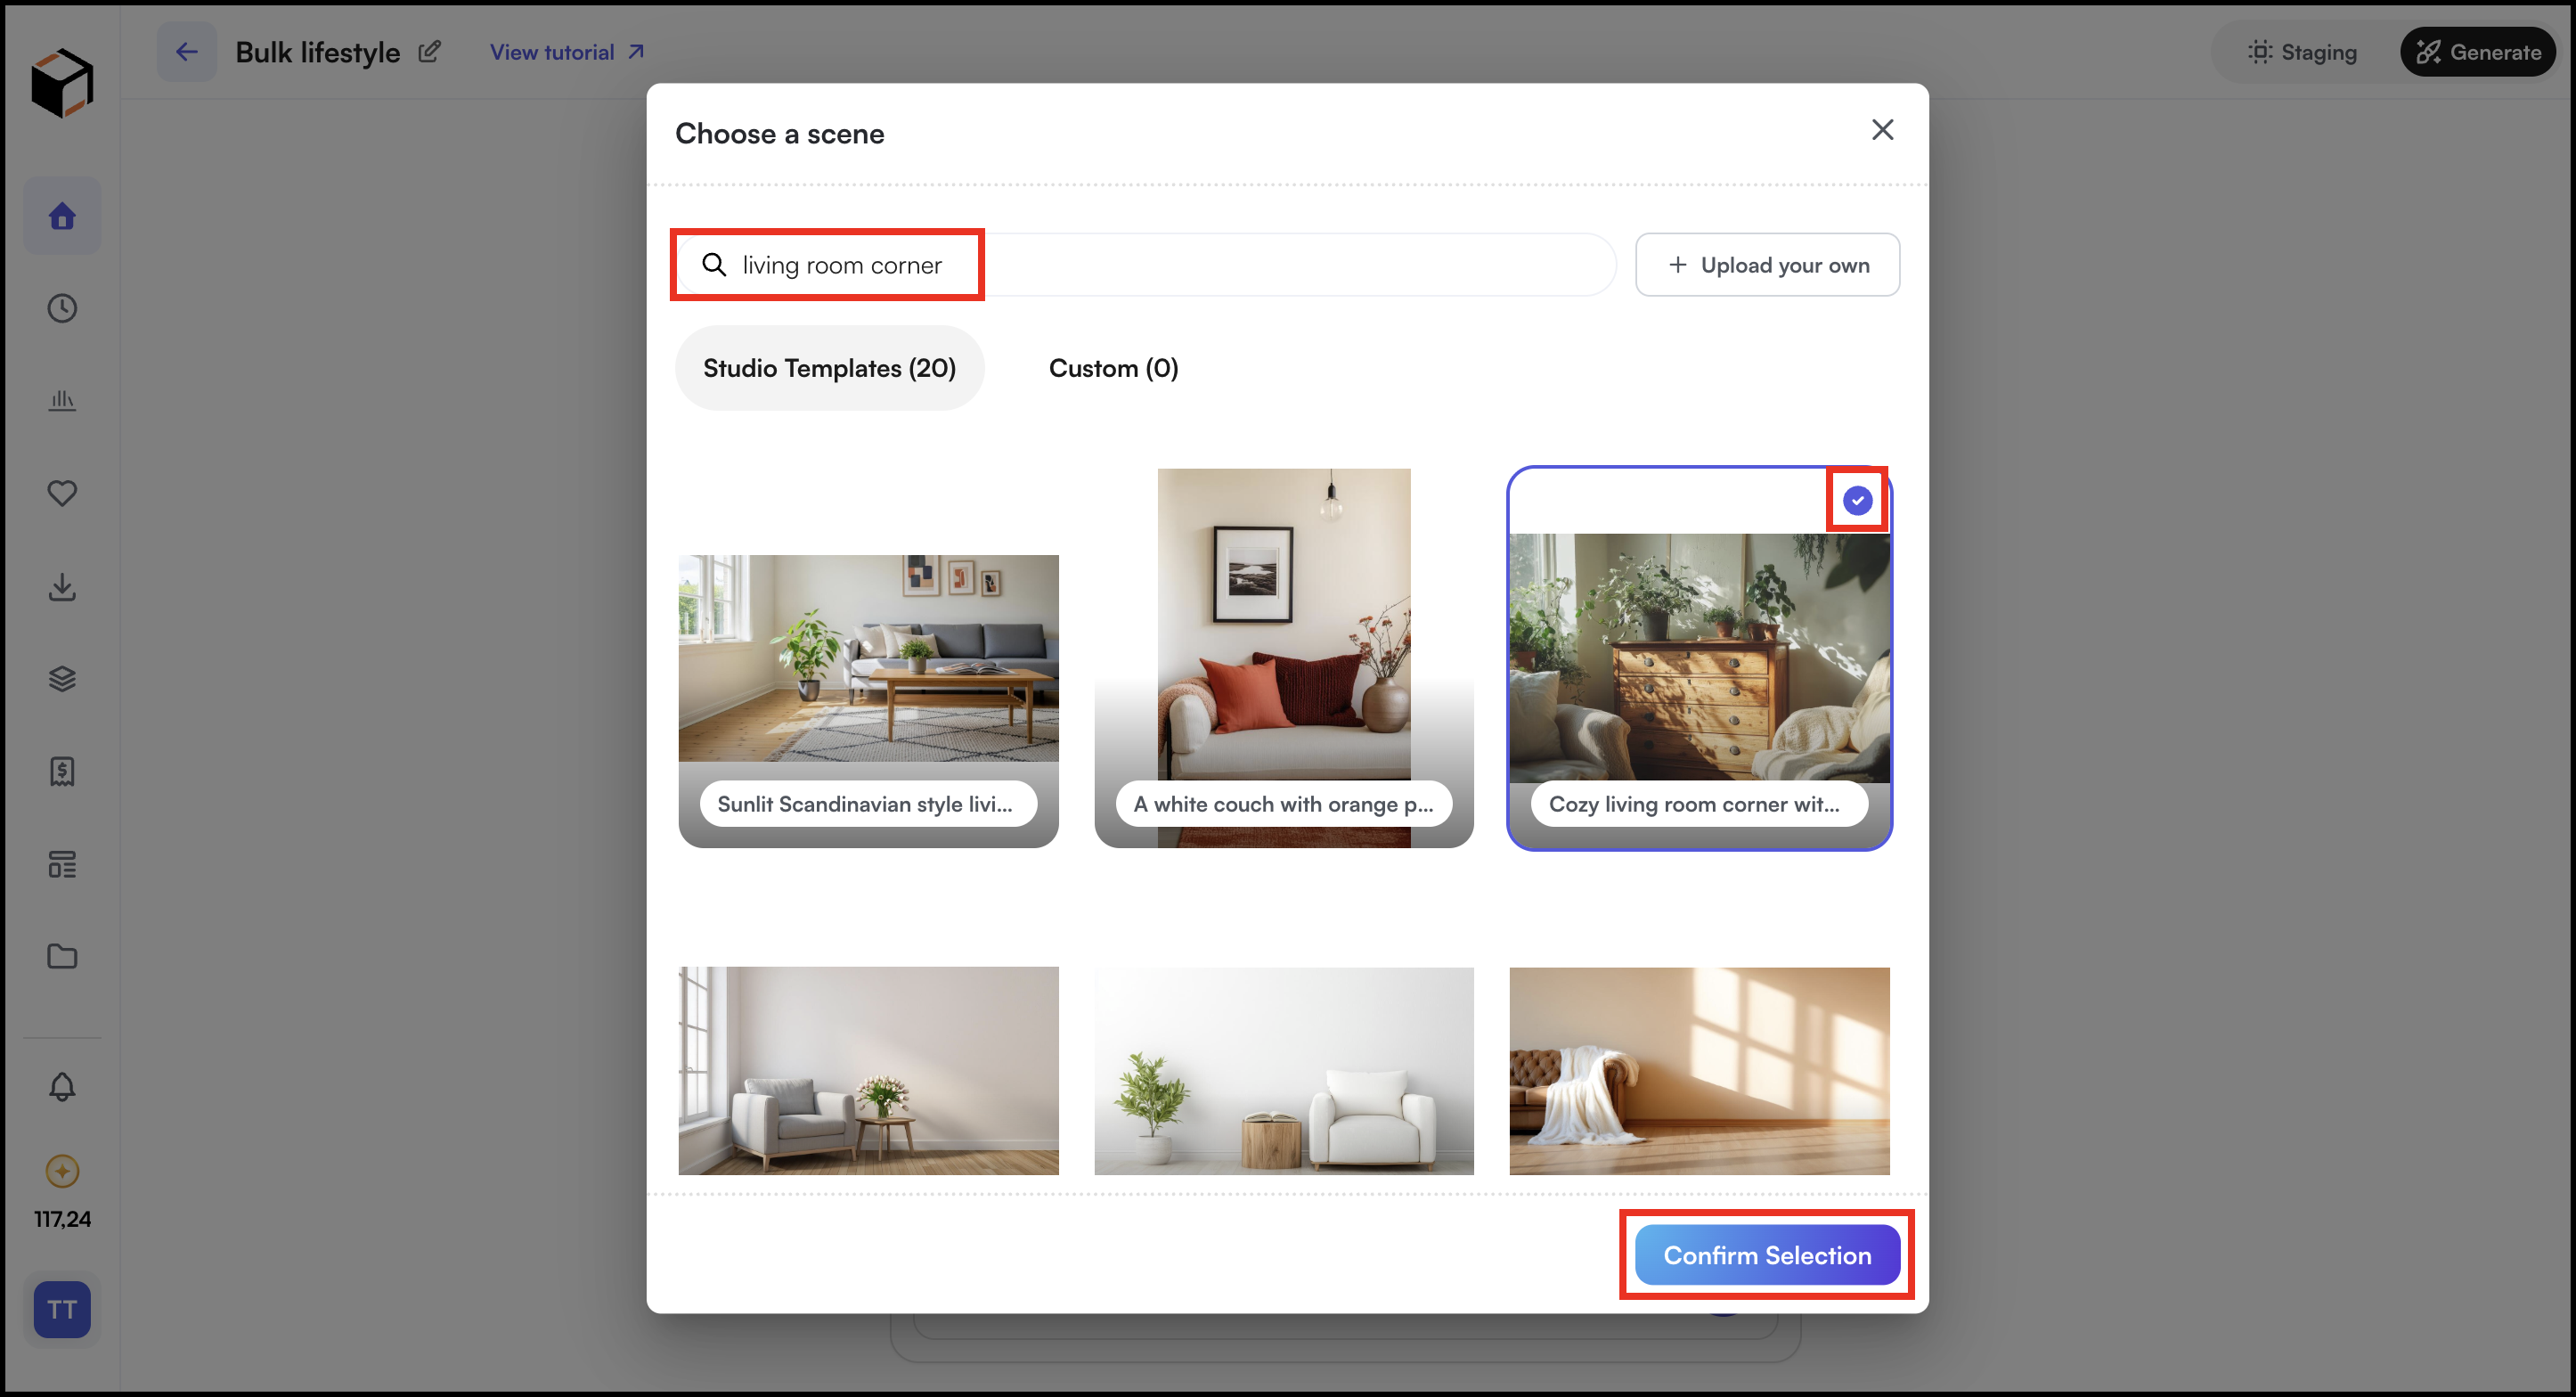
- Click Scene, search for a scene (for example, living room corner), select a template from Studio Templates or Custom, and click Confirm Selection.
- You can also click Upload your own to use your own scene image.
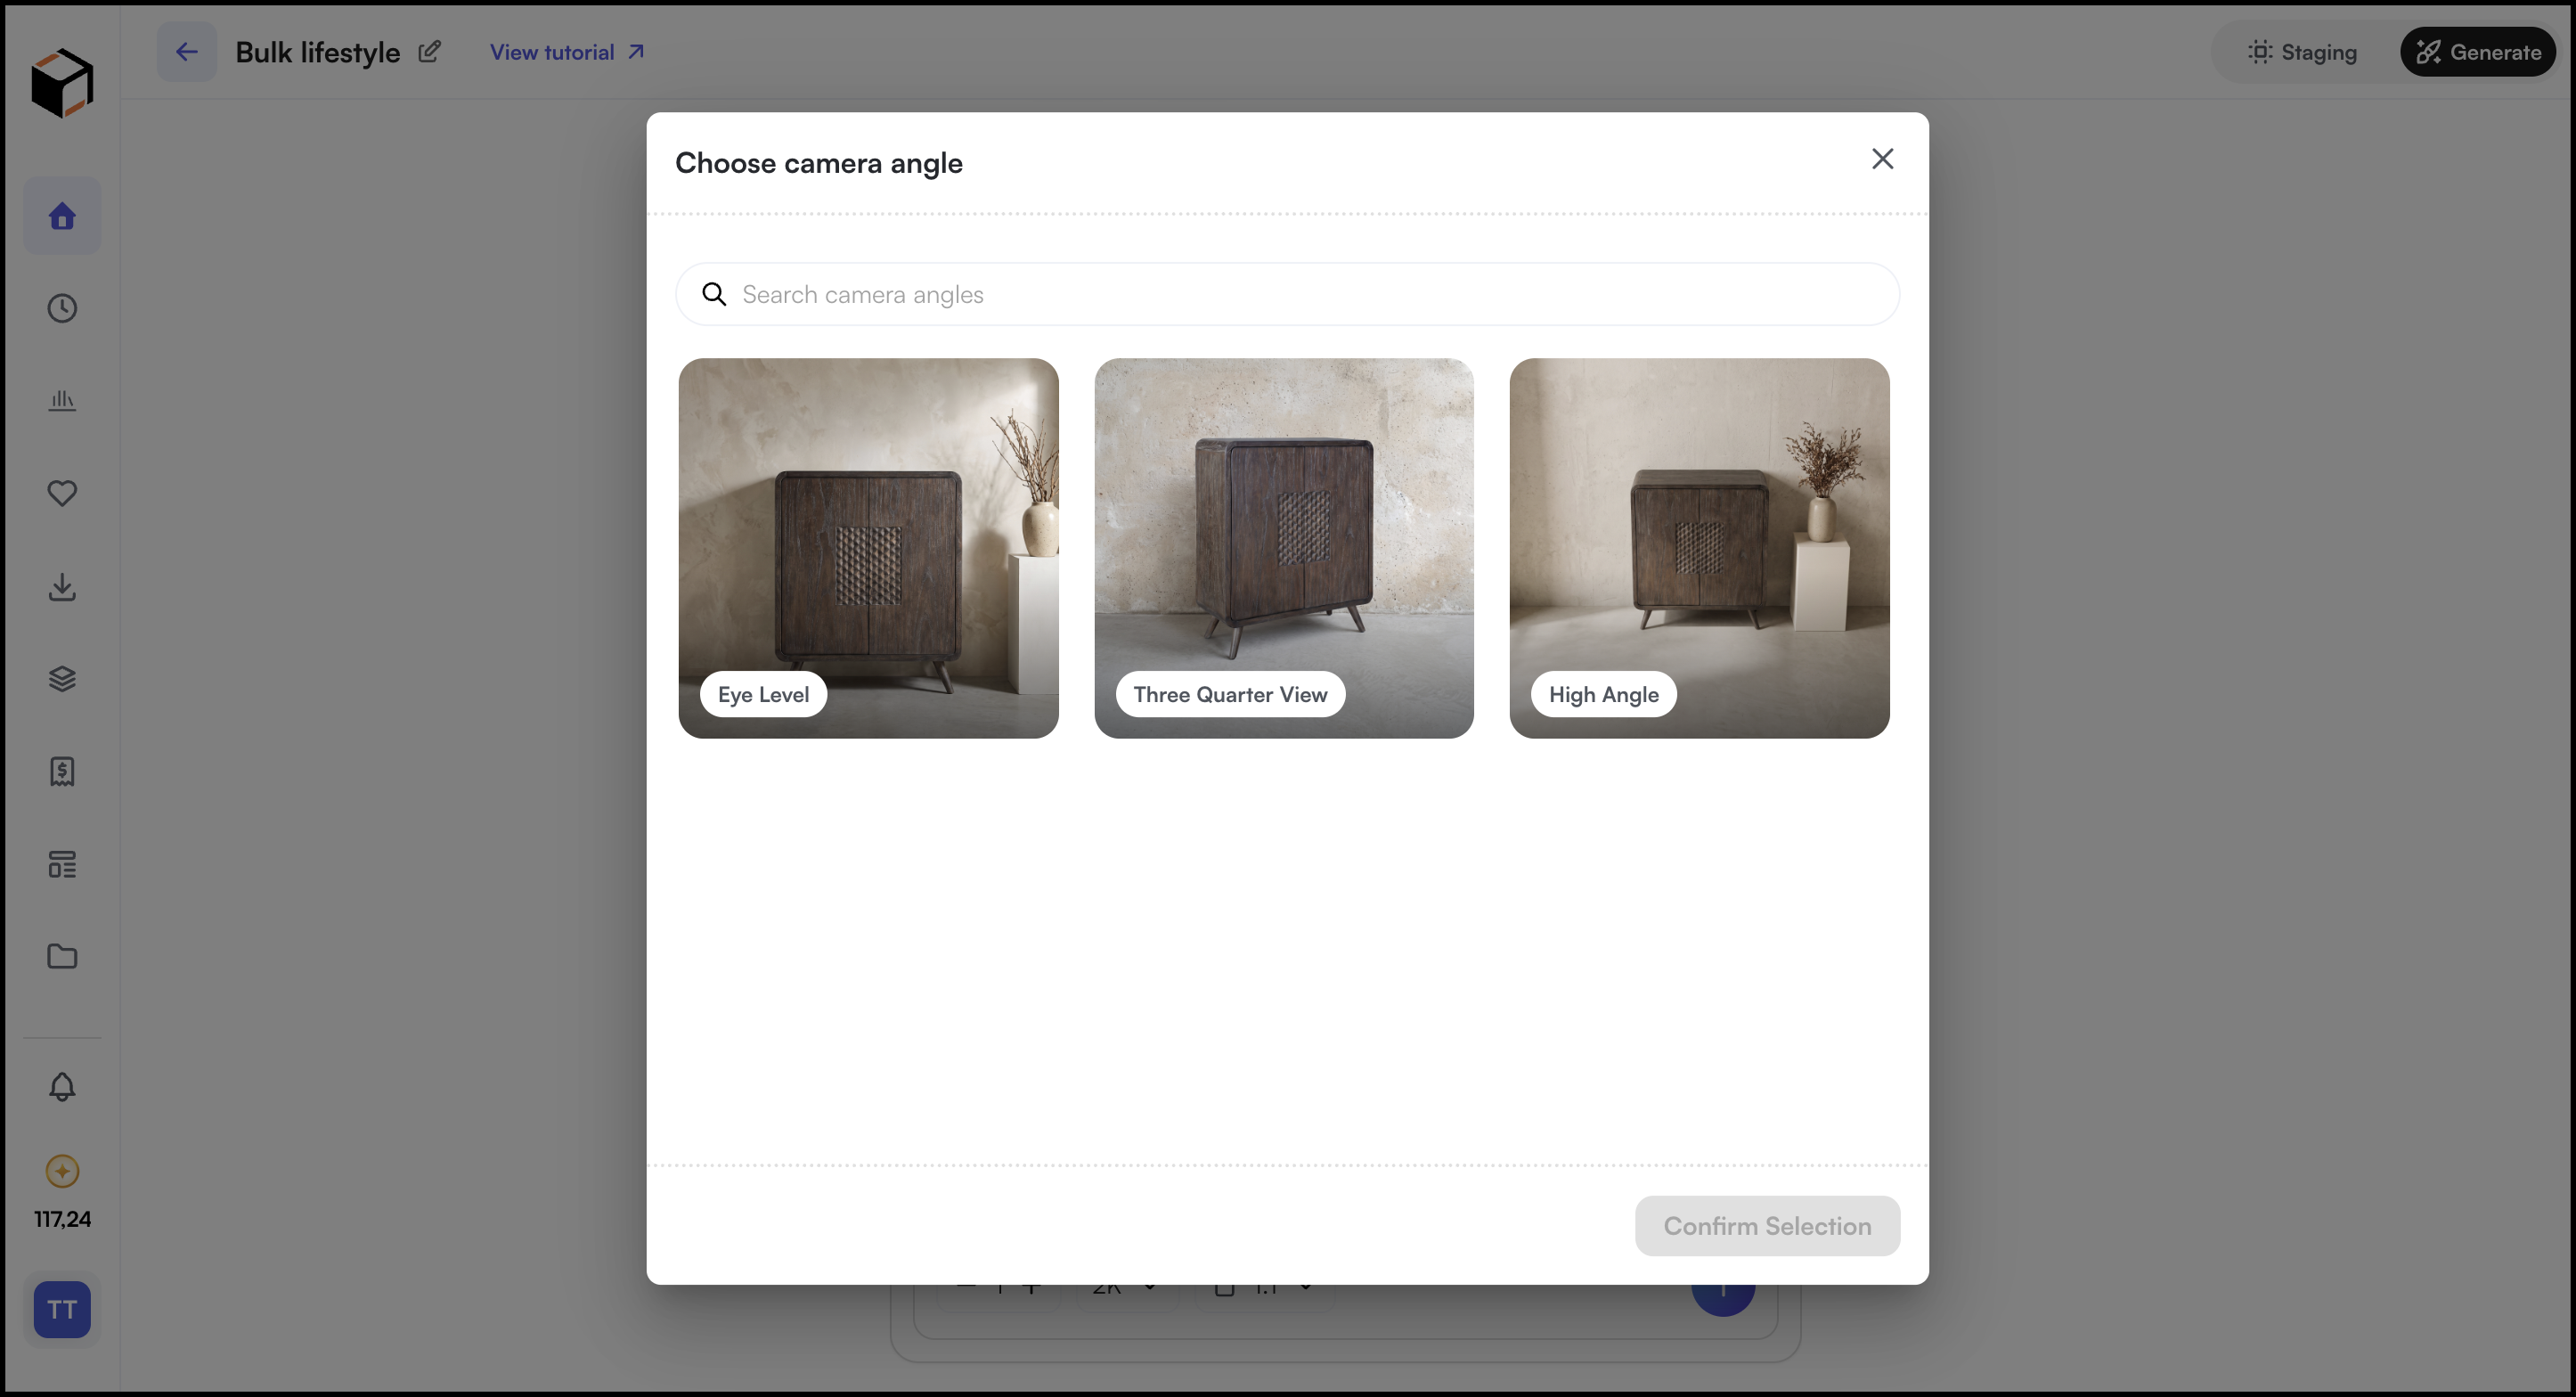
- Optionally, click Camera angle and choose a view, such as Eye Level, Three Quarter View, or High Angle.
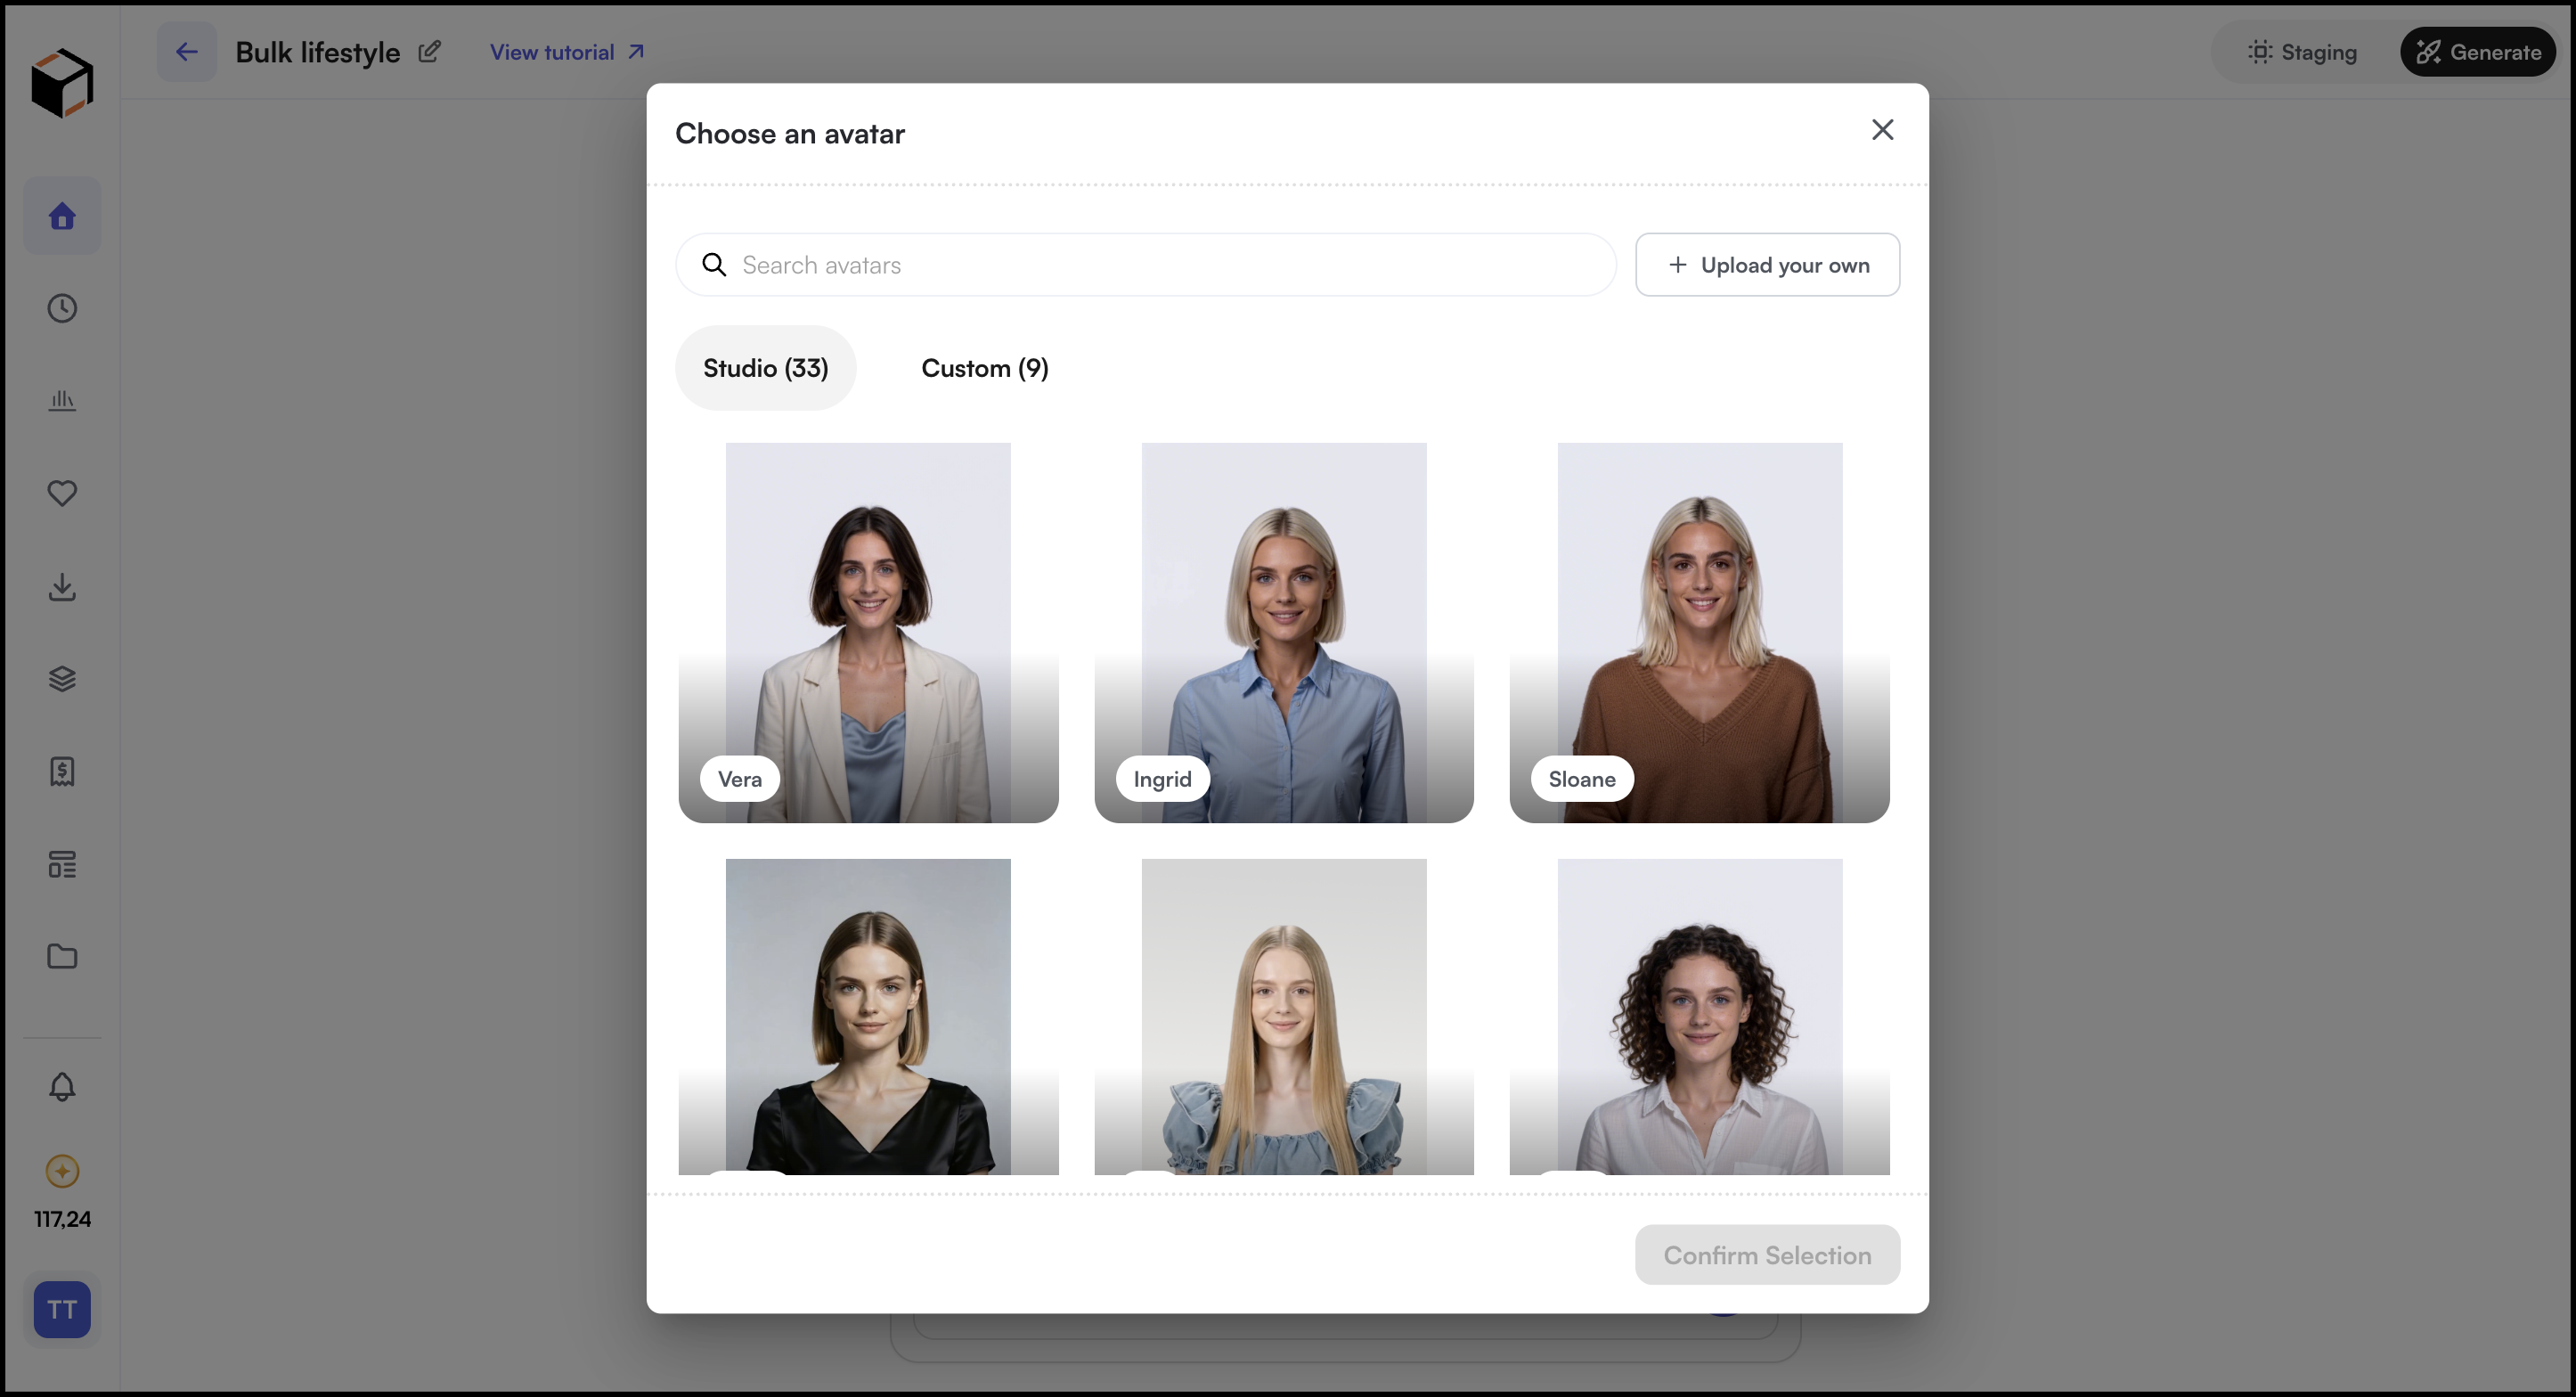
- Optionally, click Avatar to add a model to the scene.
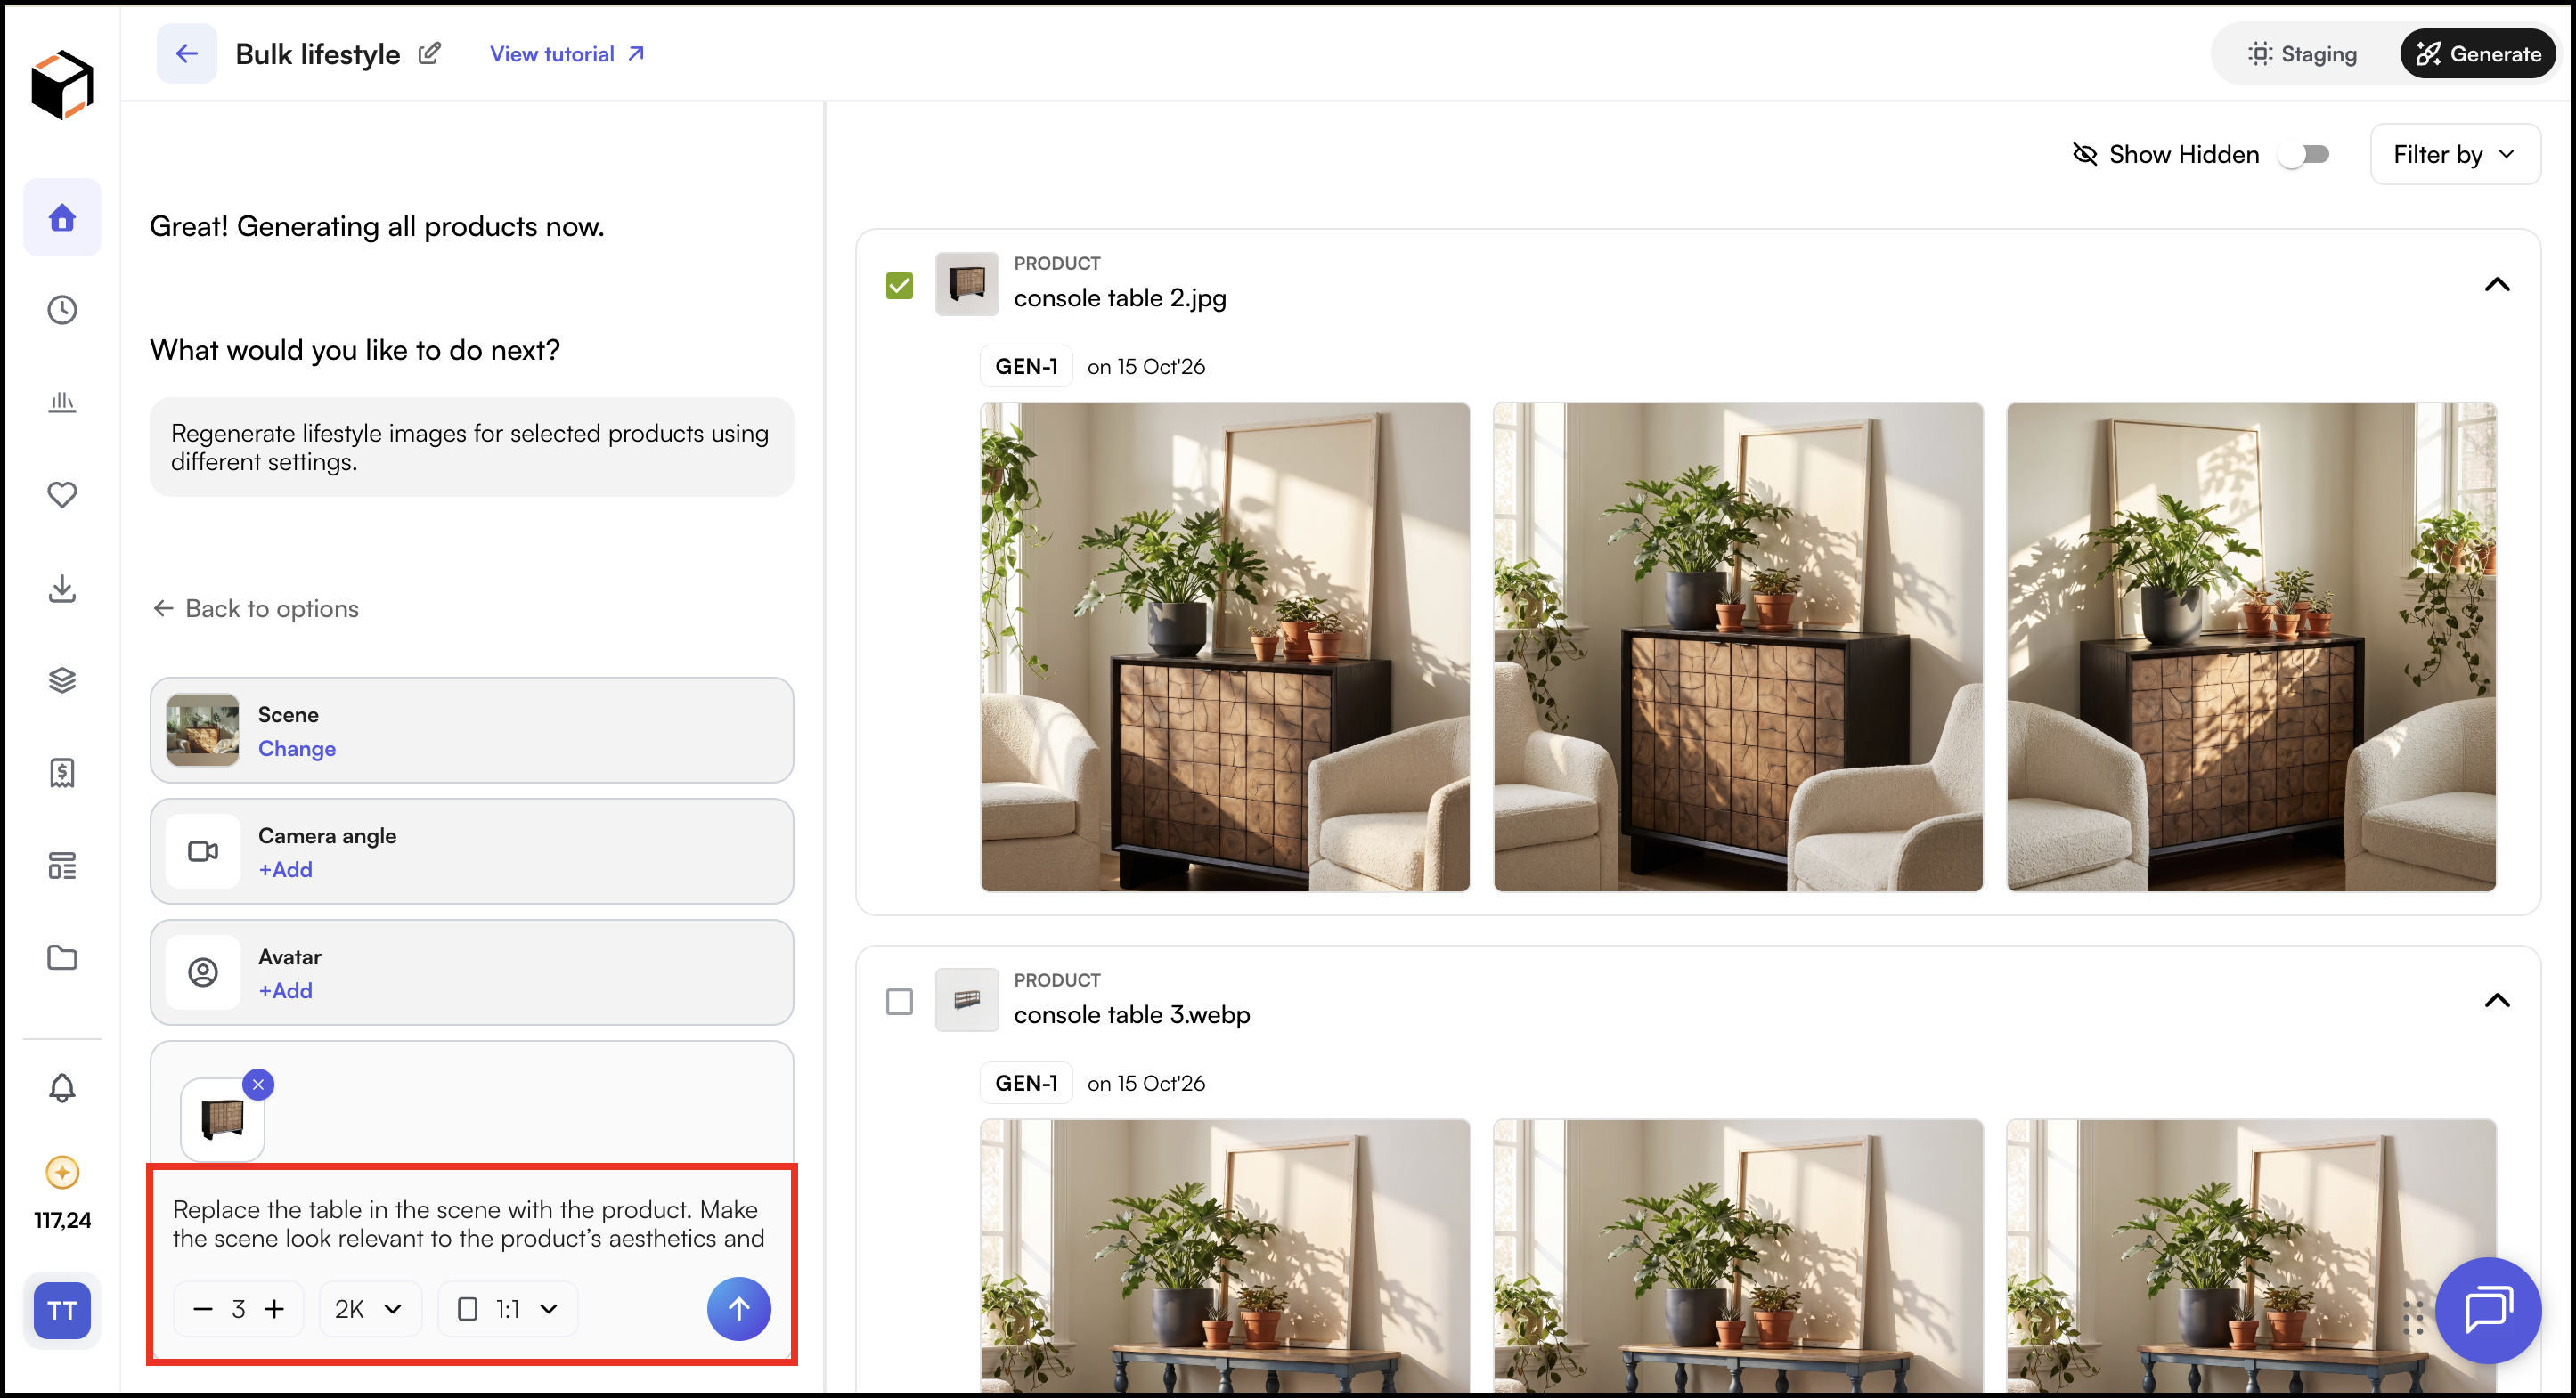
- In the prompt box, describe how the product should appear in the scene. For example: “Replace the table in the scene with the product. Make the scene look relevant to the product’s aesthetics and look.”
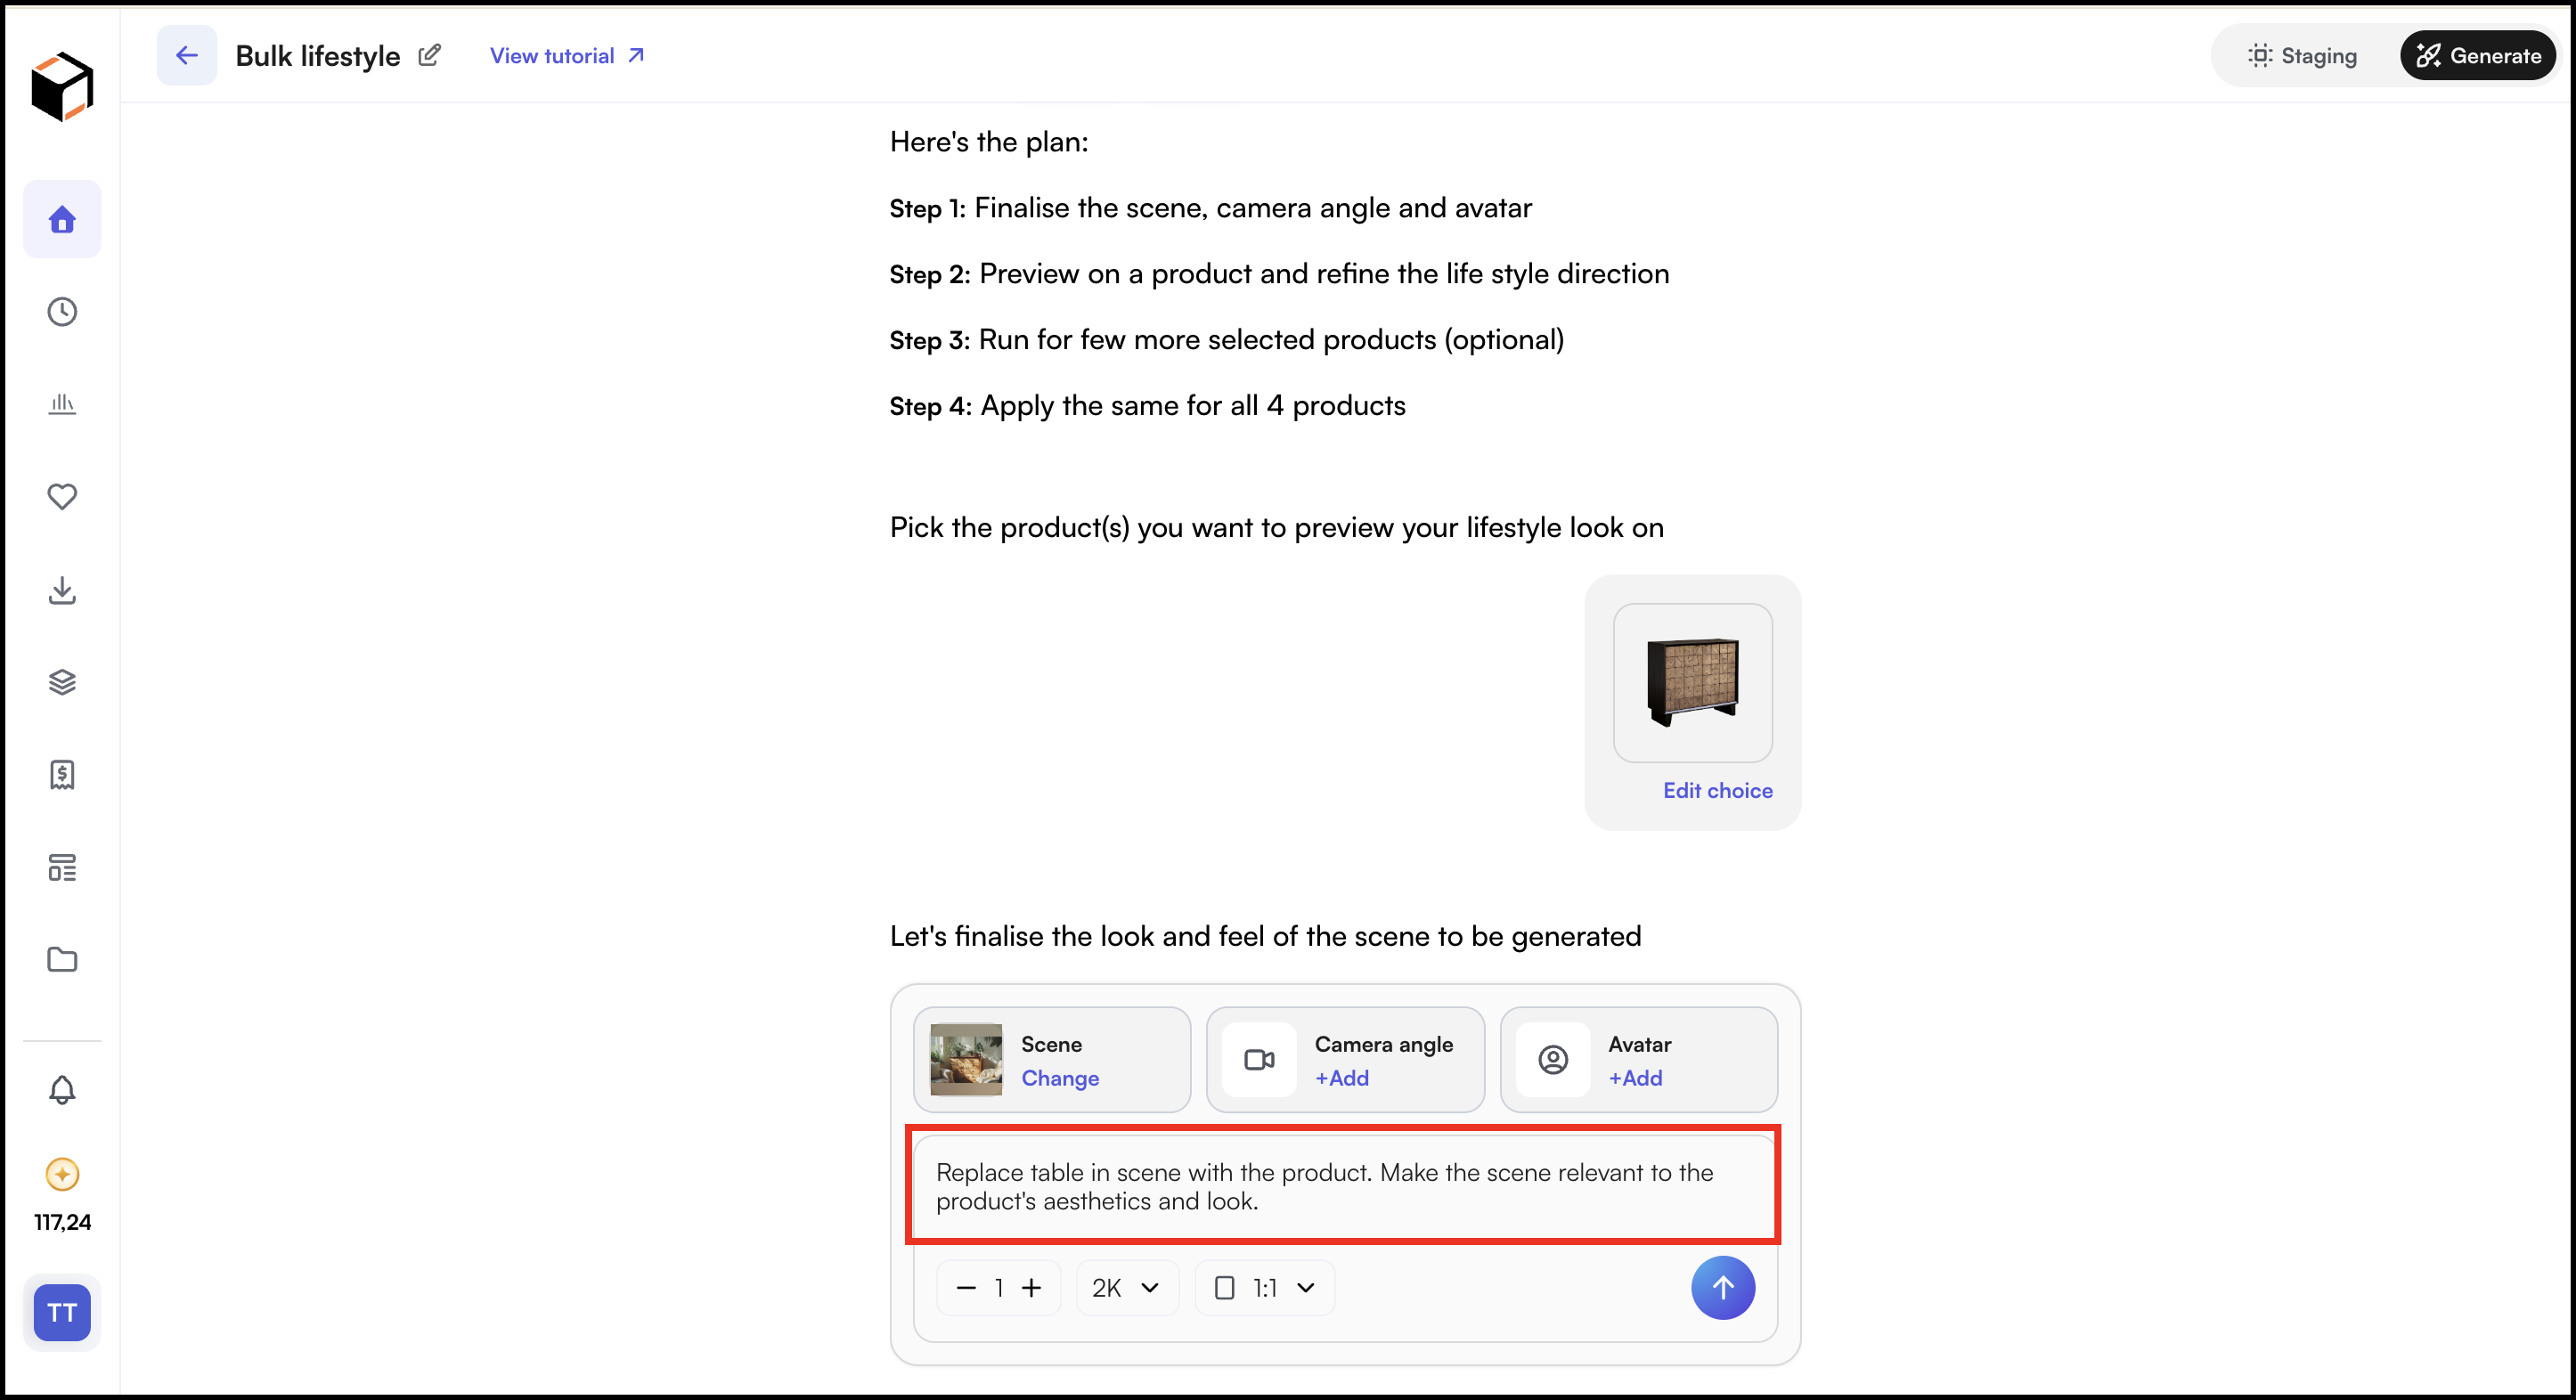
- Set the number of images to generate using the – and + controls.
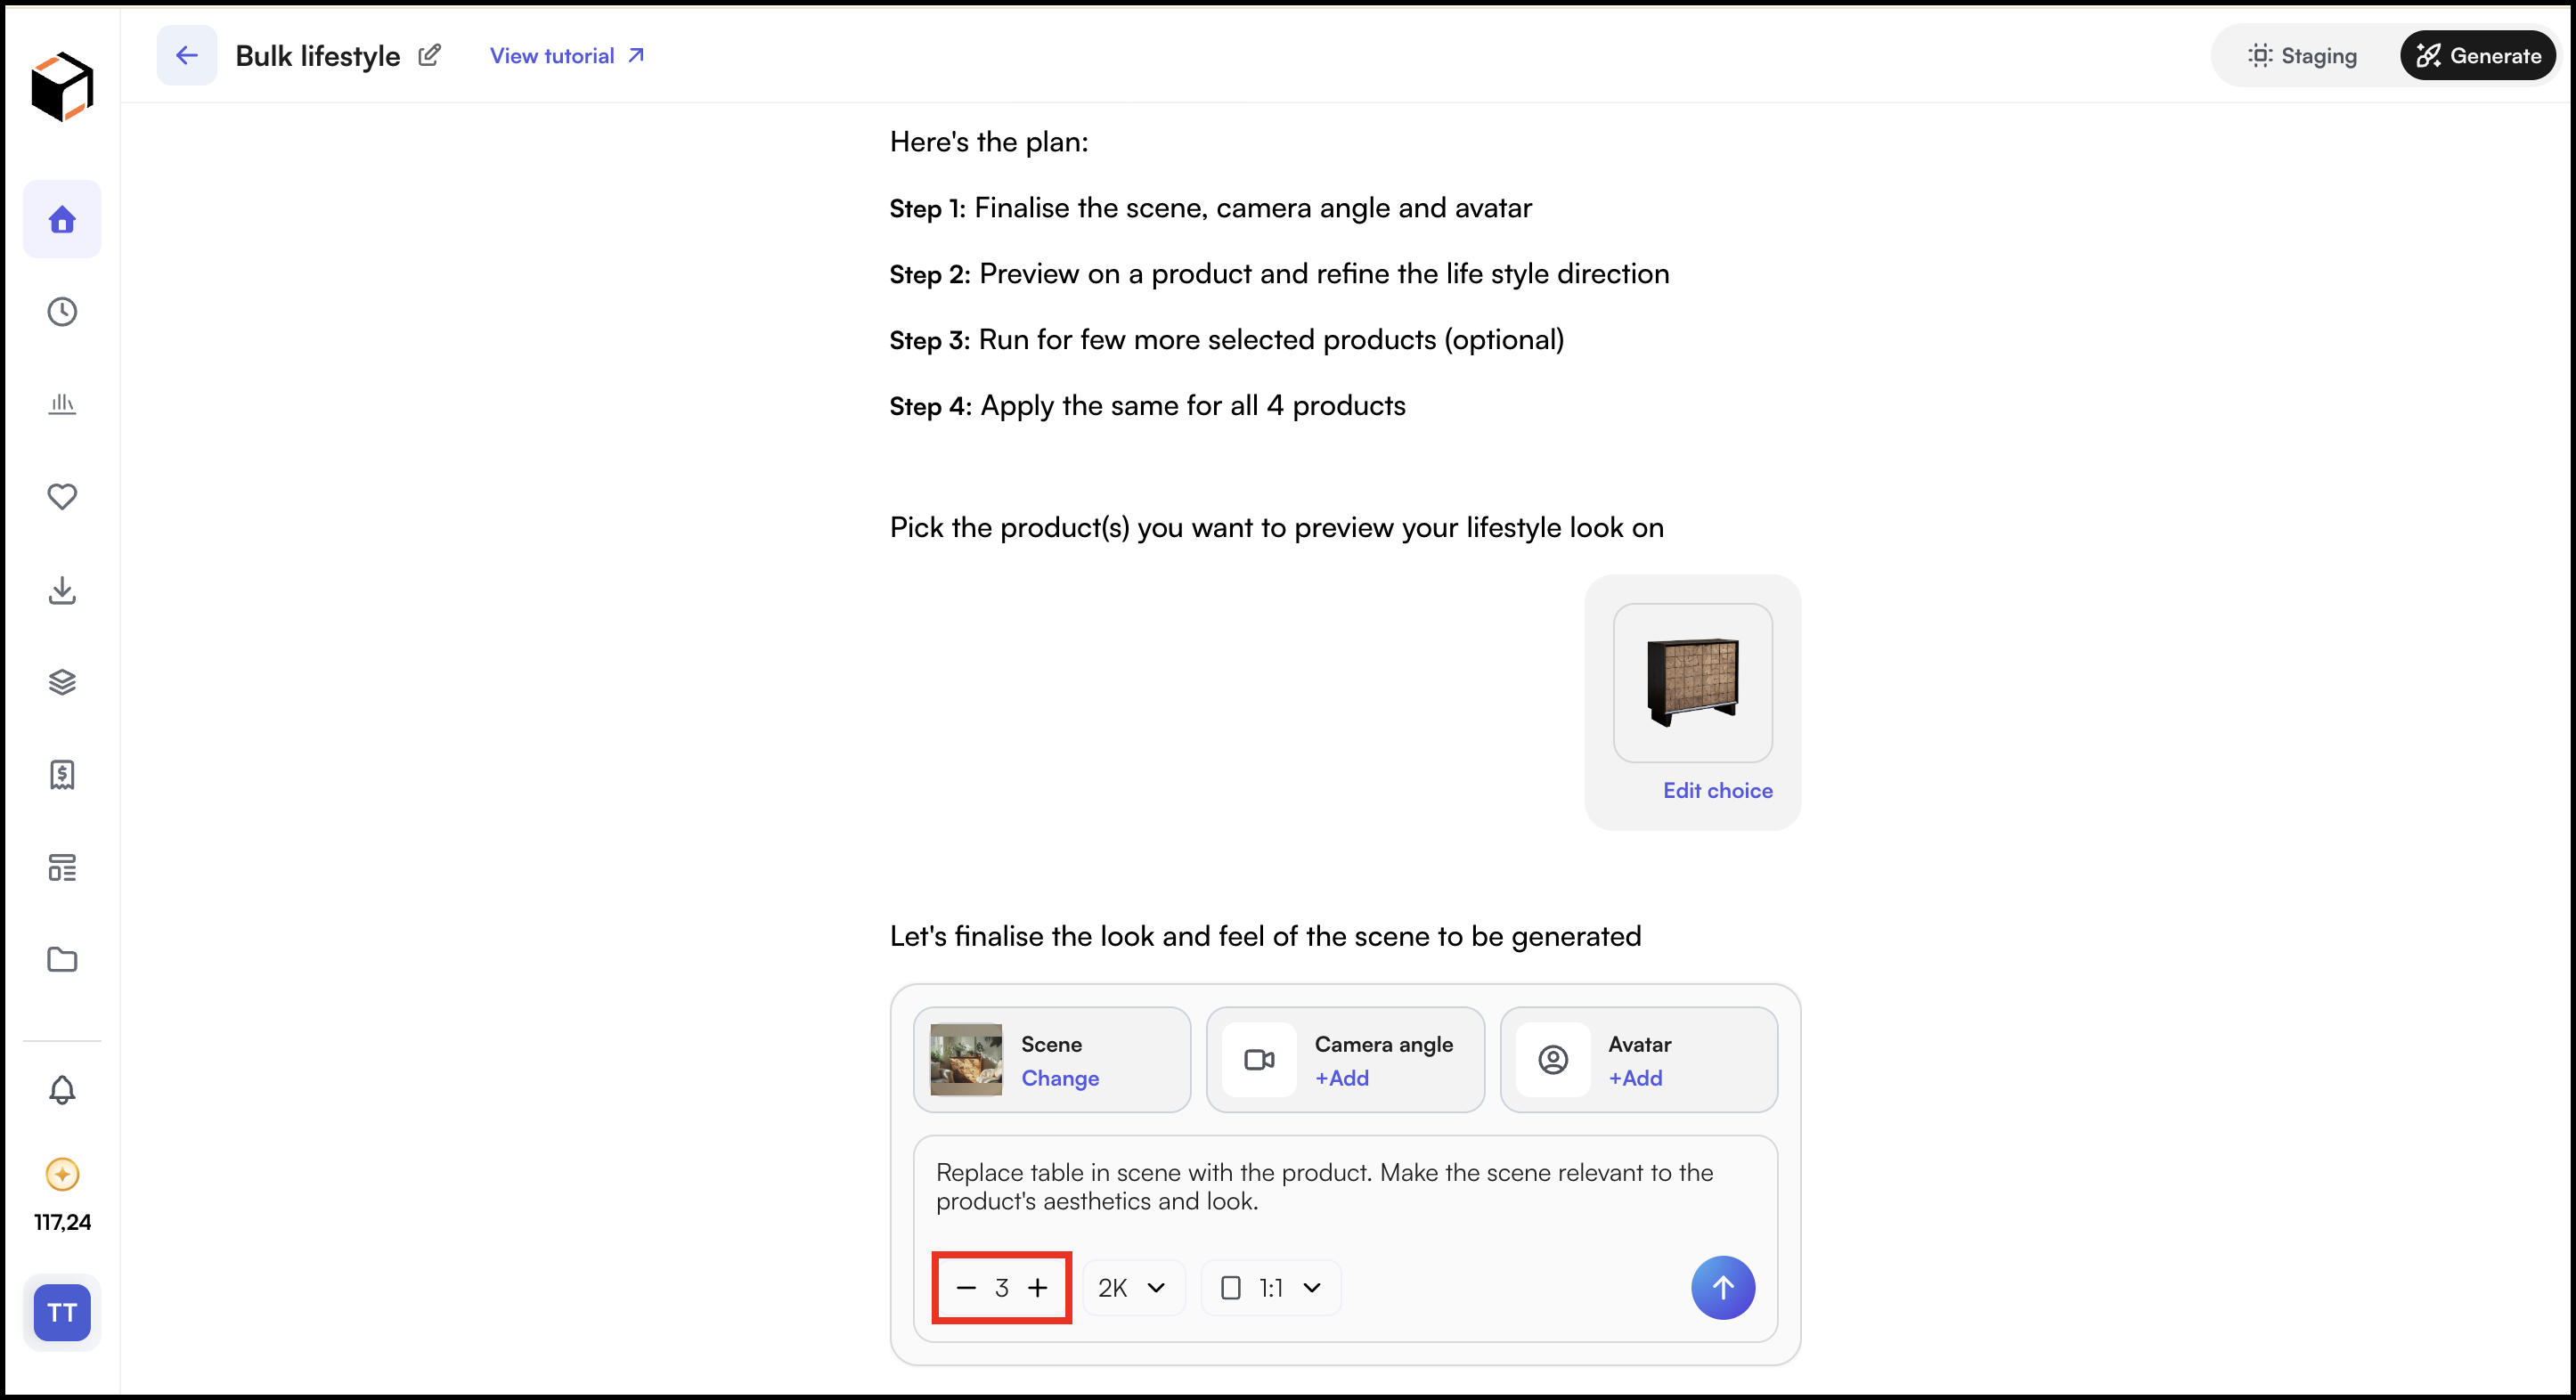
- Choose the resolution (2K or 4K).
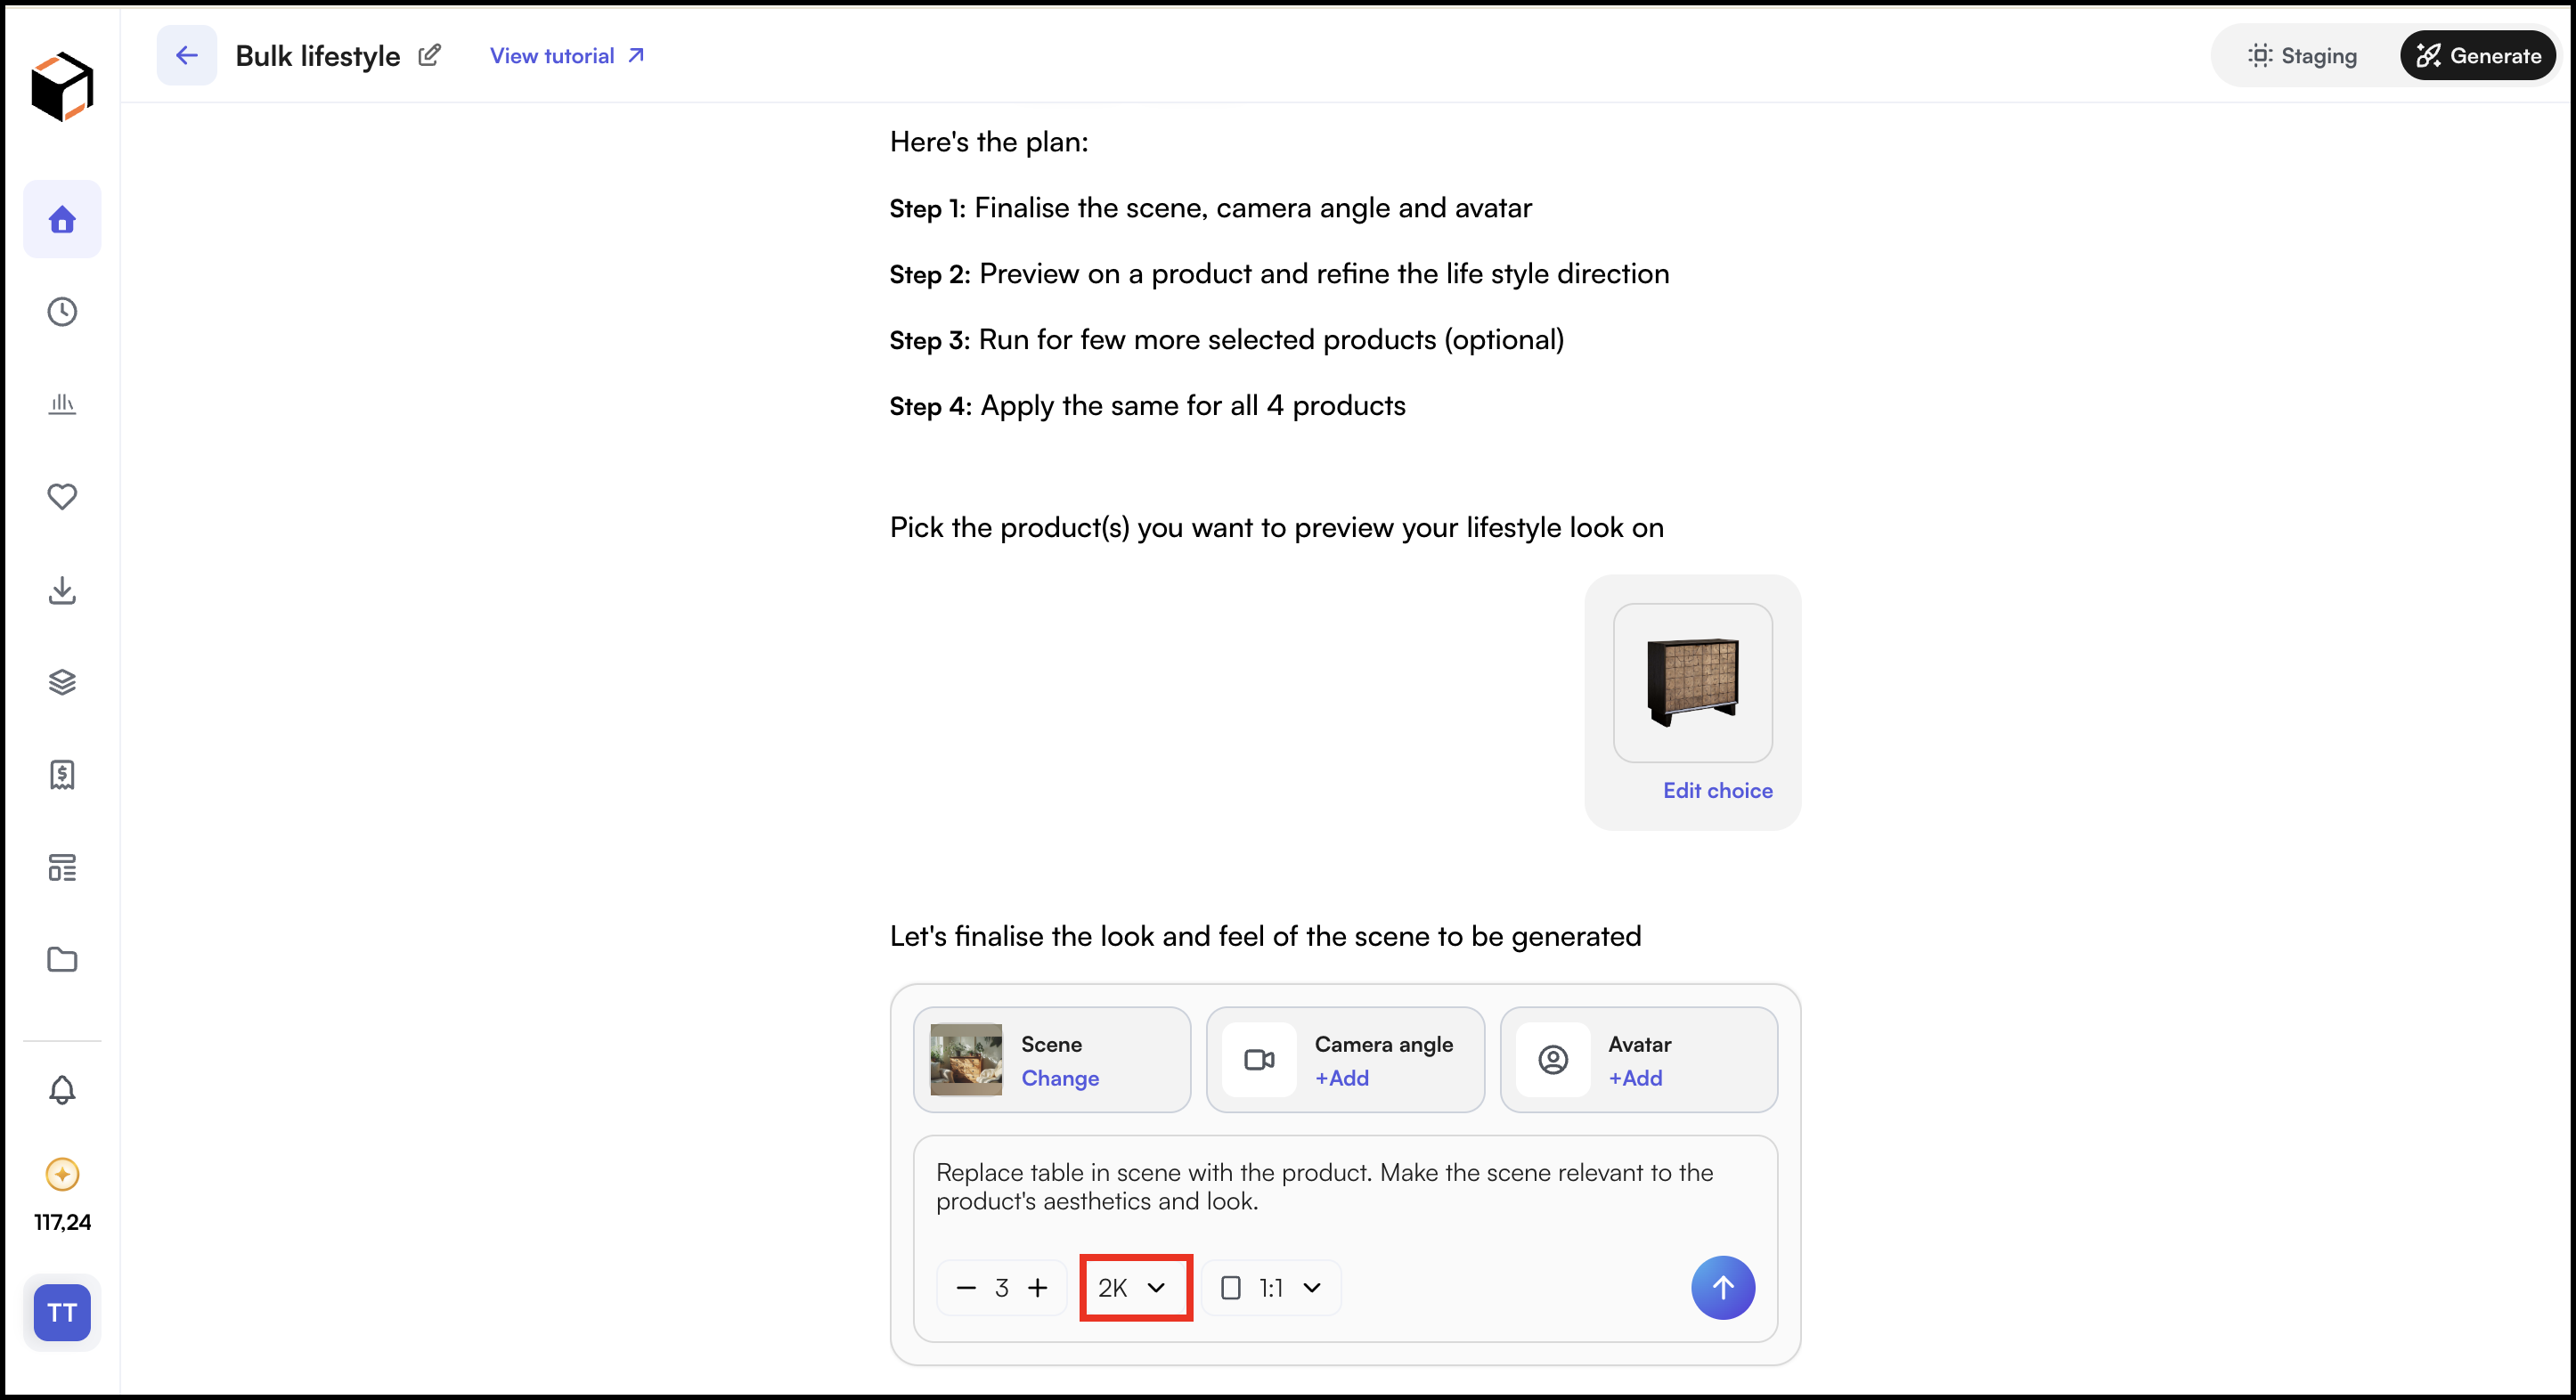
- Choose aspect ratio (1:1, 3:2, 2:3, 5:4, 4:5, 4:3, 3:4, 16:9, 9:16, or 21:9).
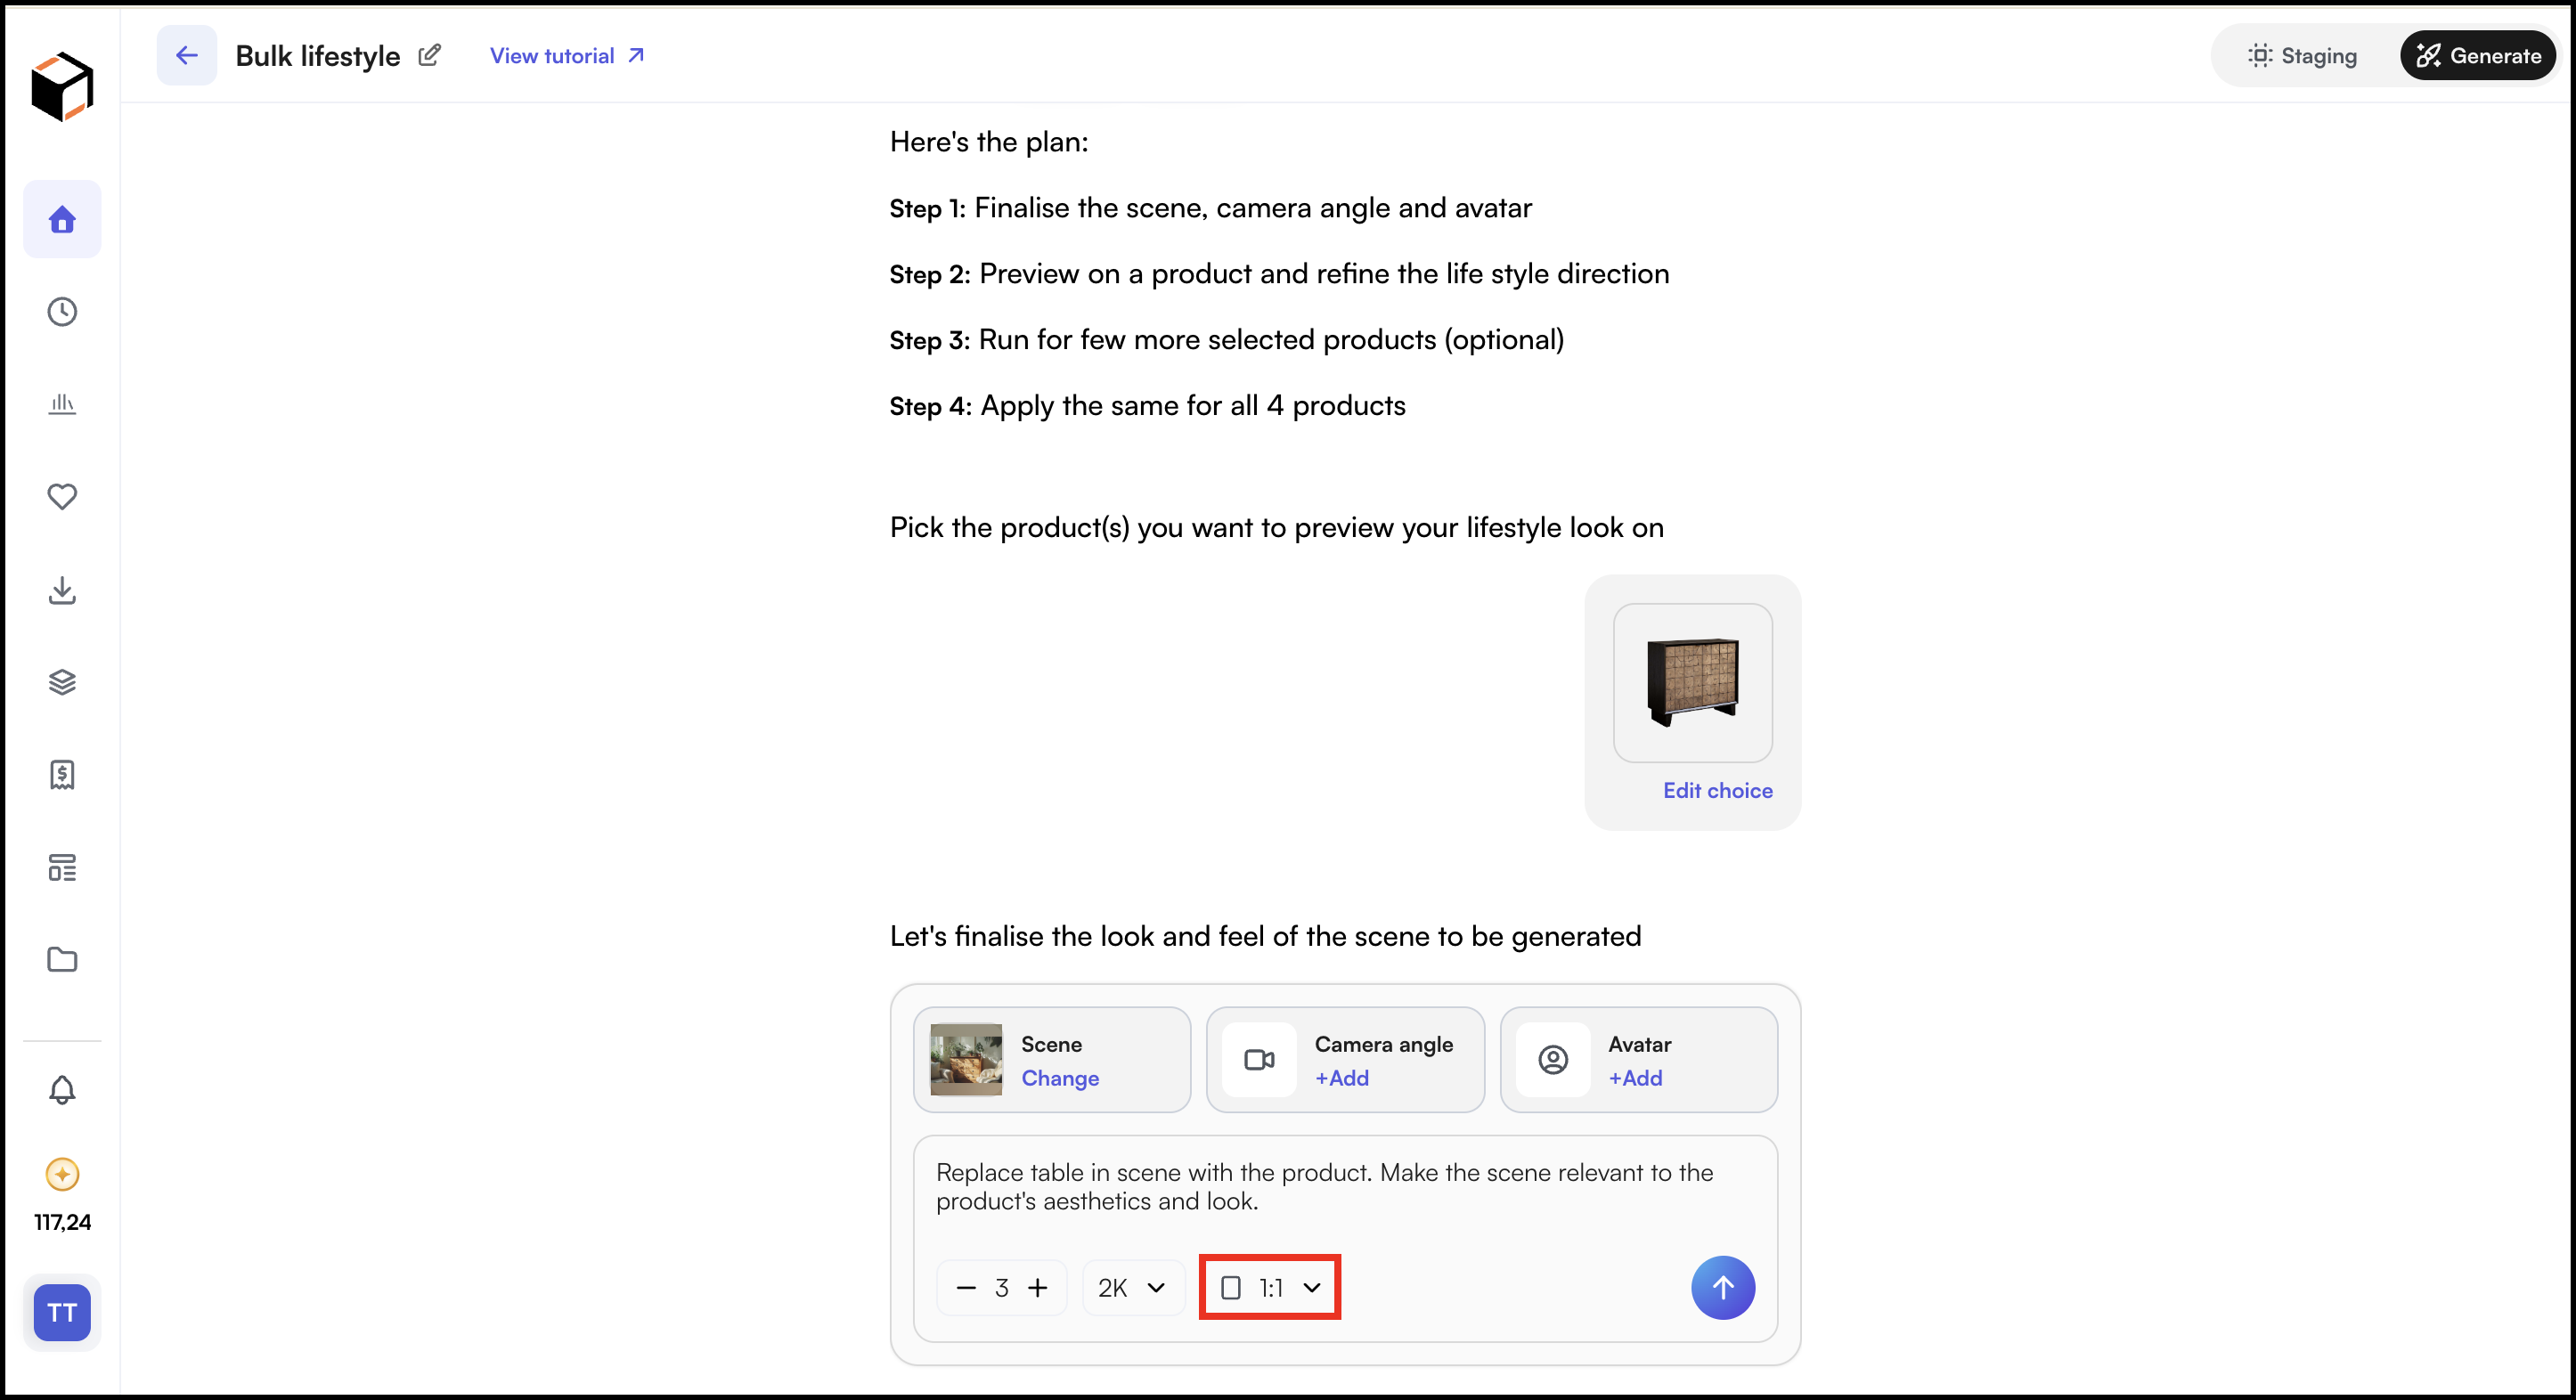
- Click the Generate button. The credits needed are shown on the button before you confirm, at 4 credits per image.
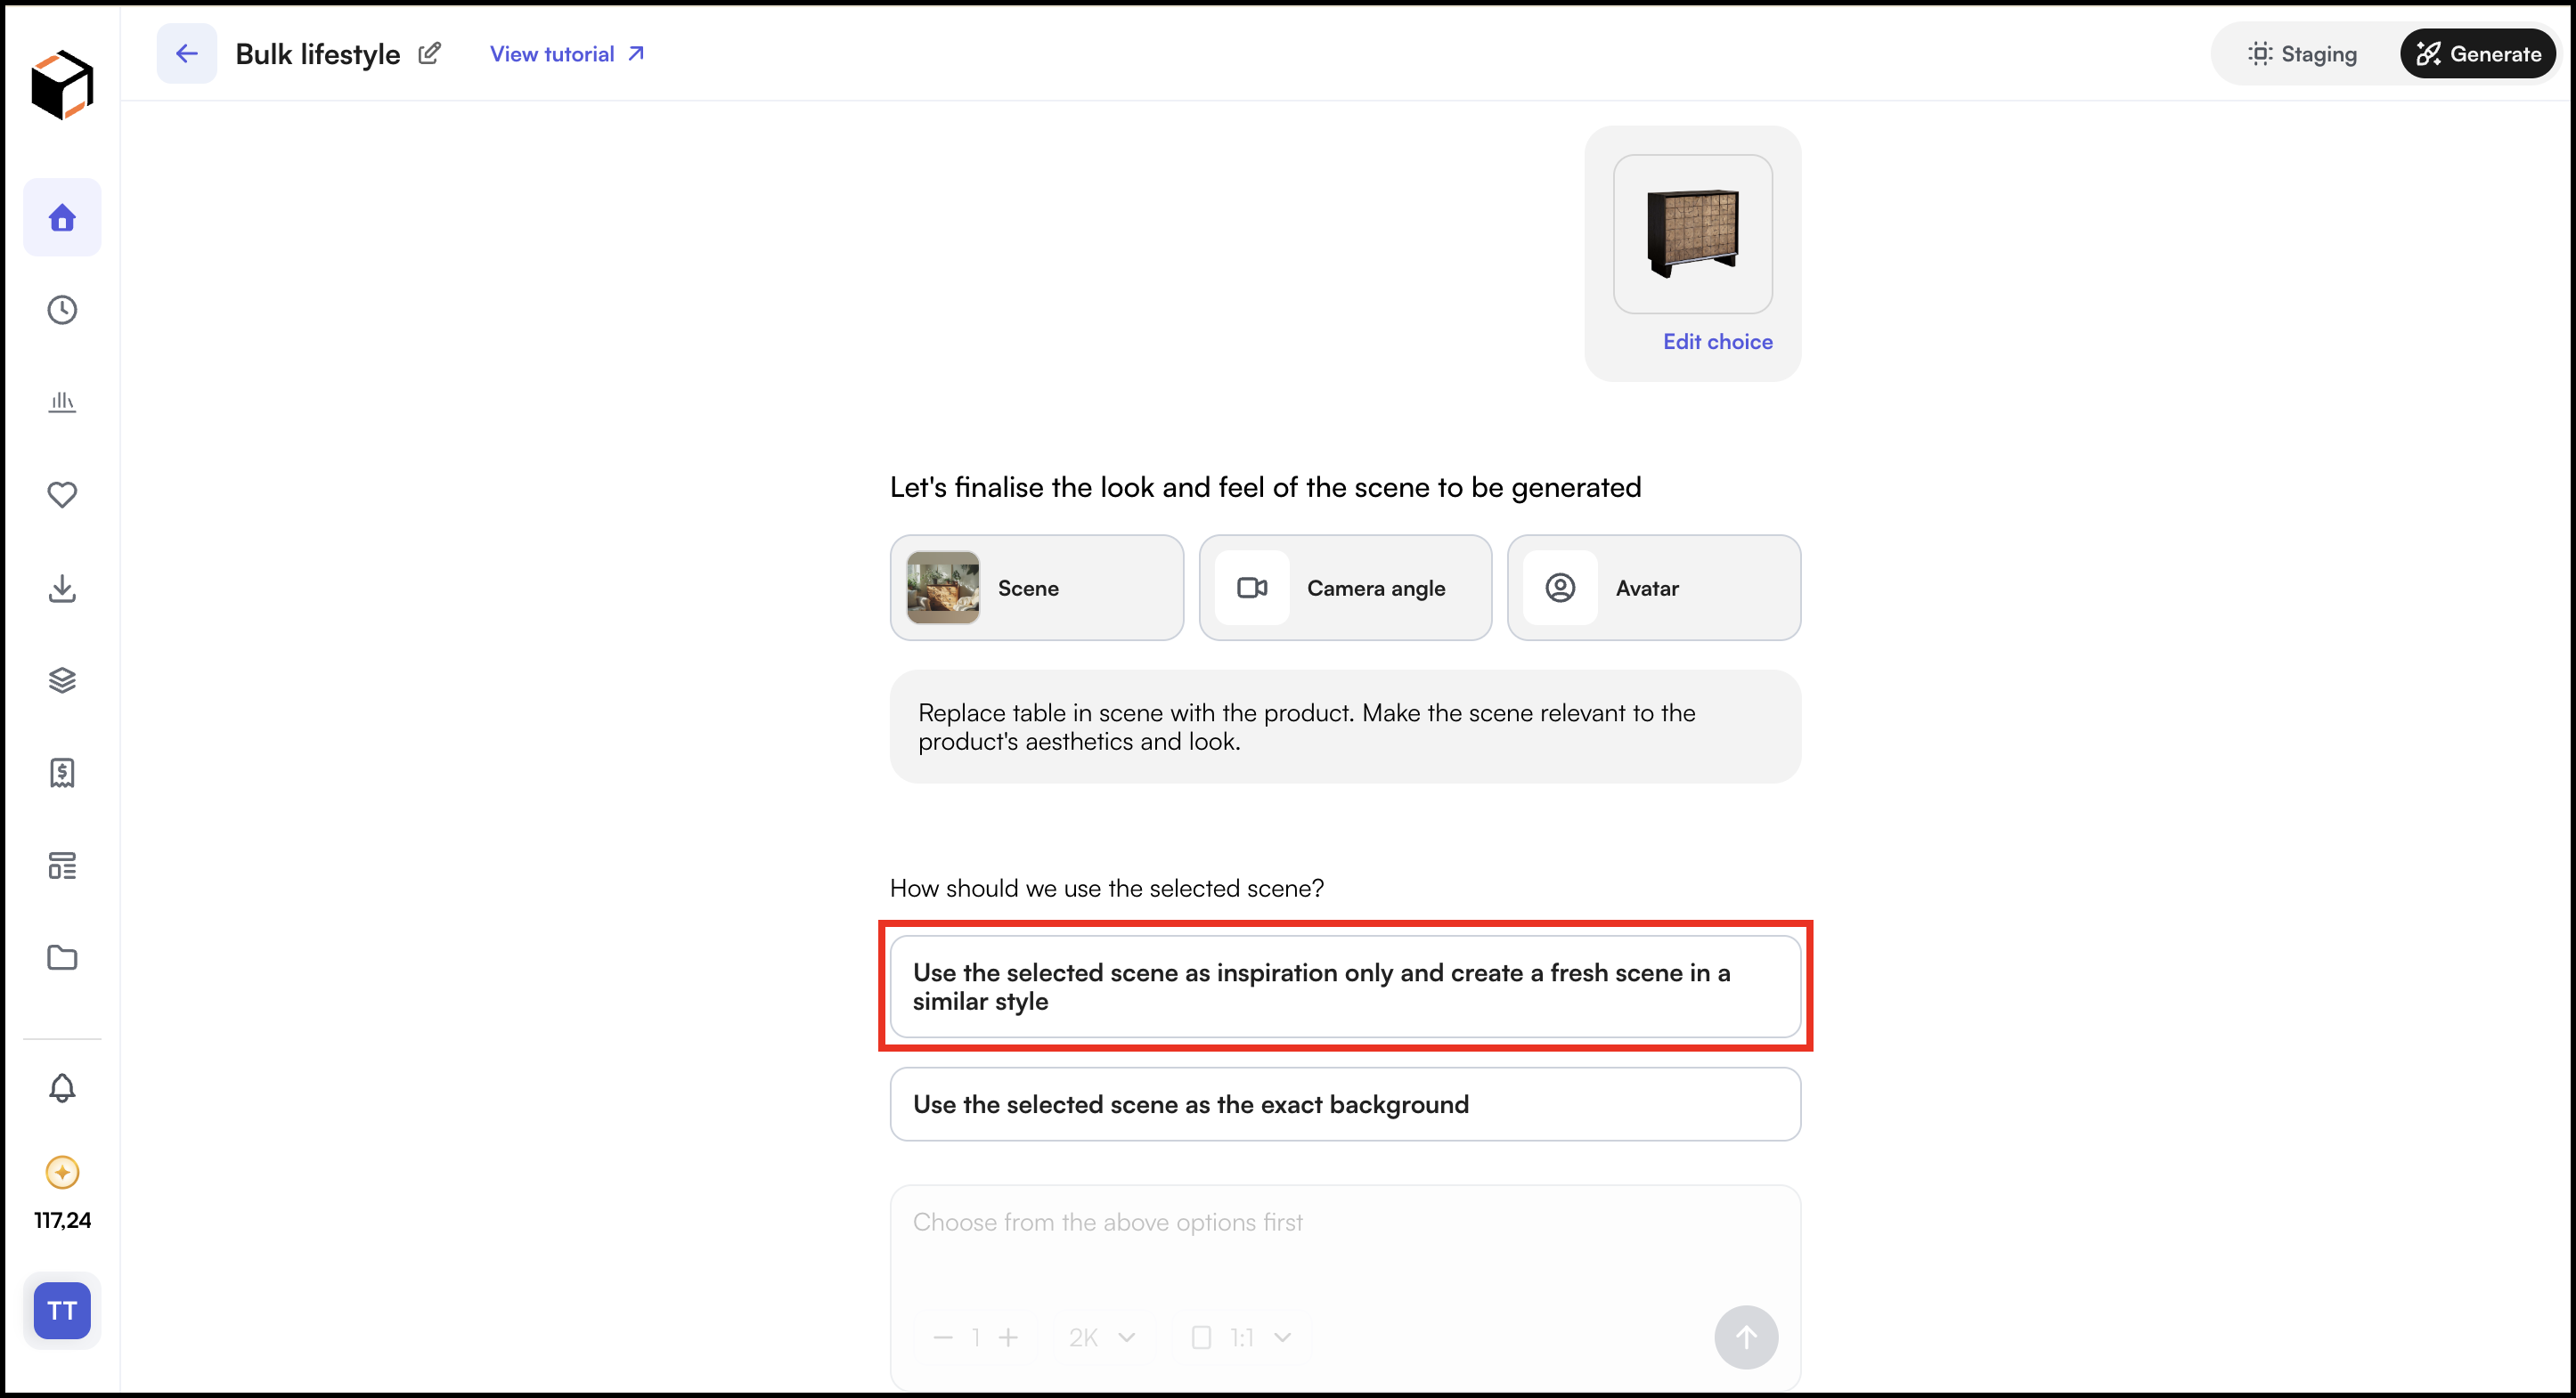
- Choose how WizStudio should use the selected scene:
- Use the selected scene as inspiration only and create a fresh scene in a similar style
- Use the selected scene as the exact background
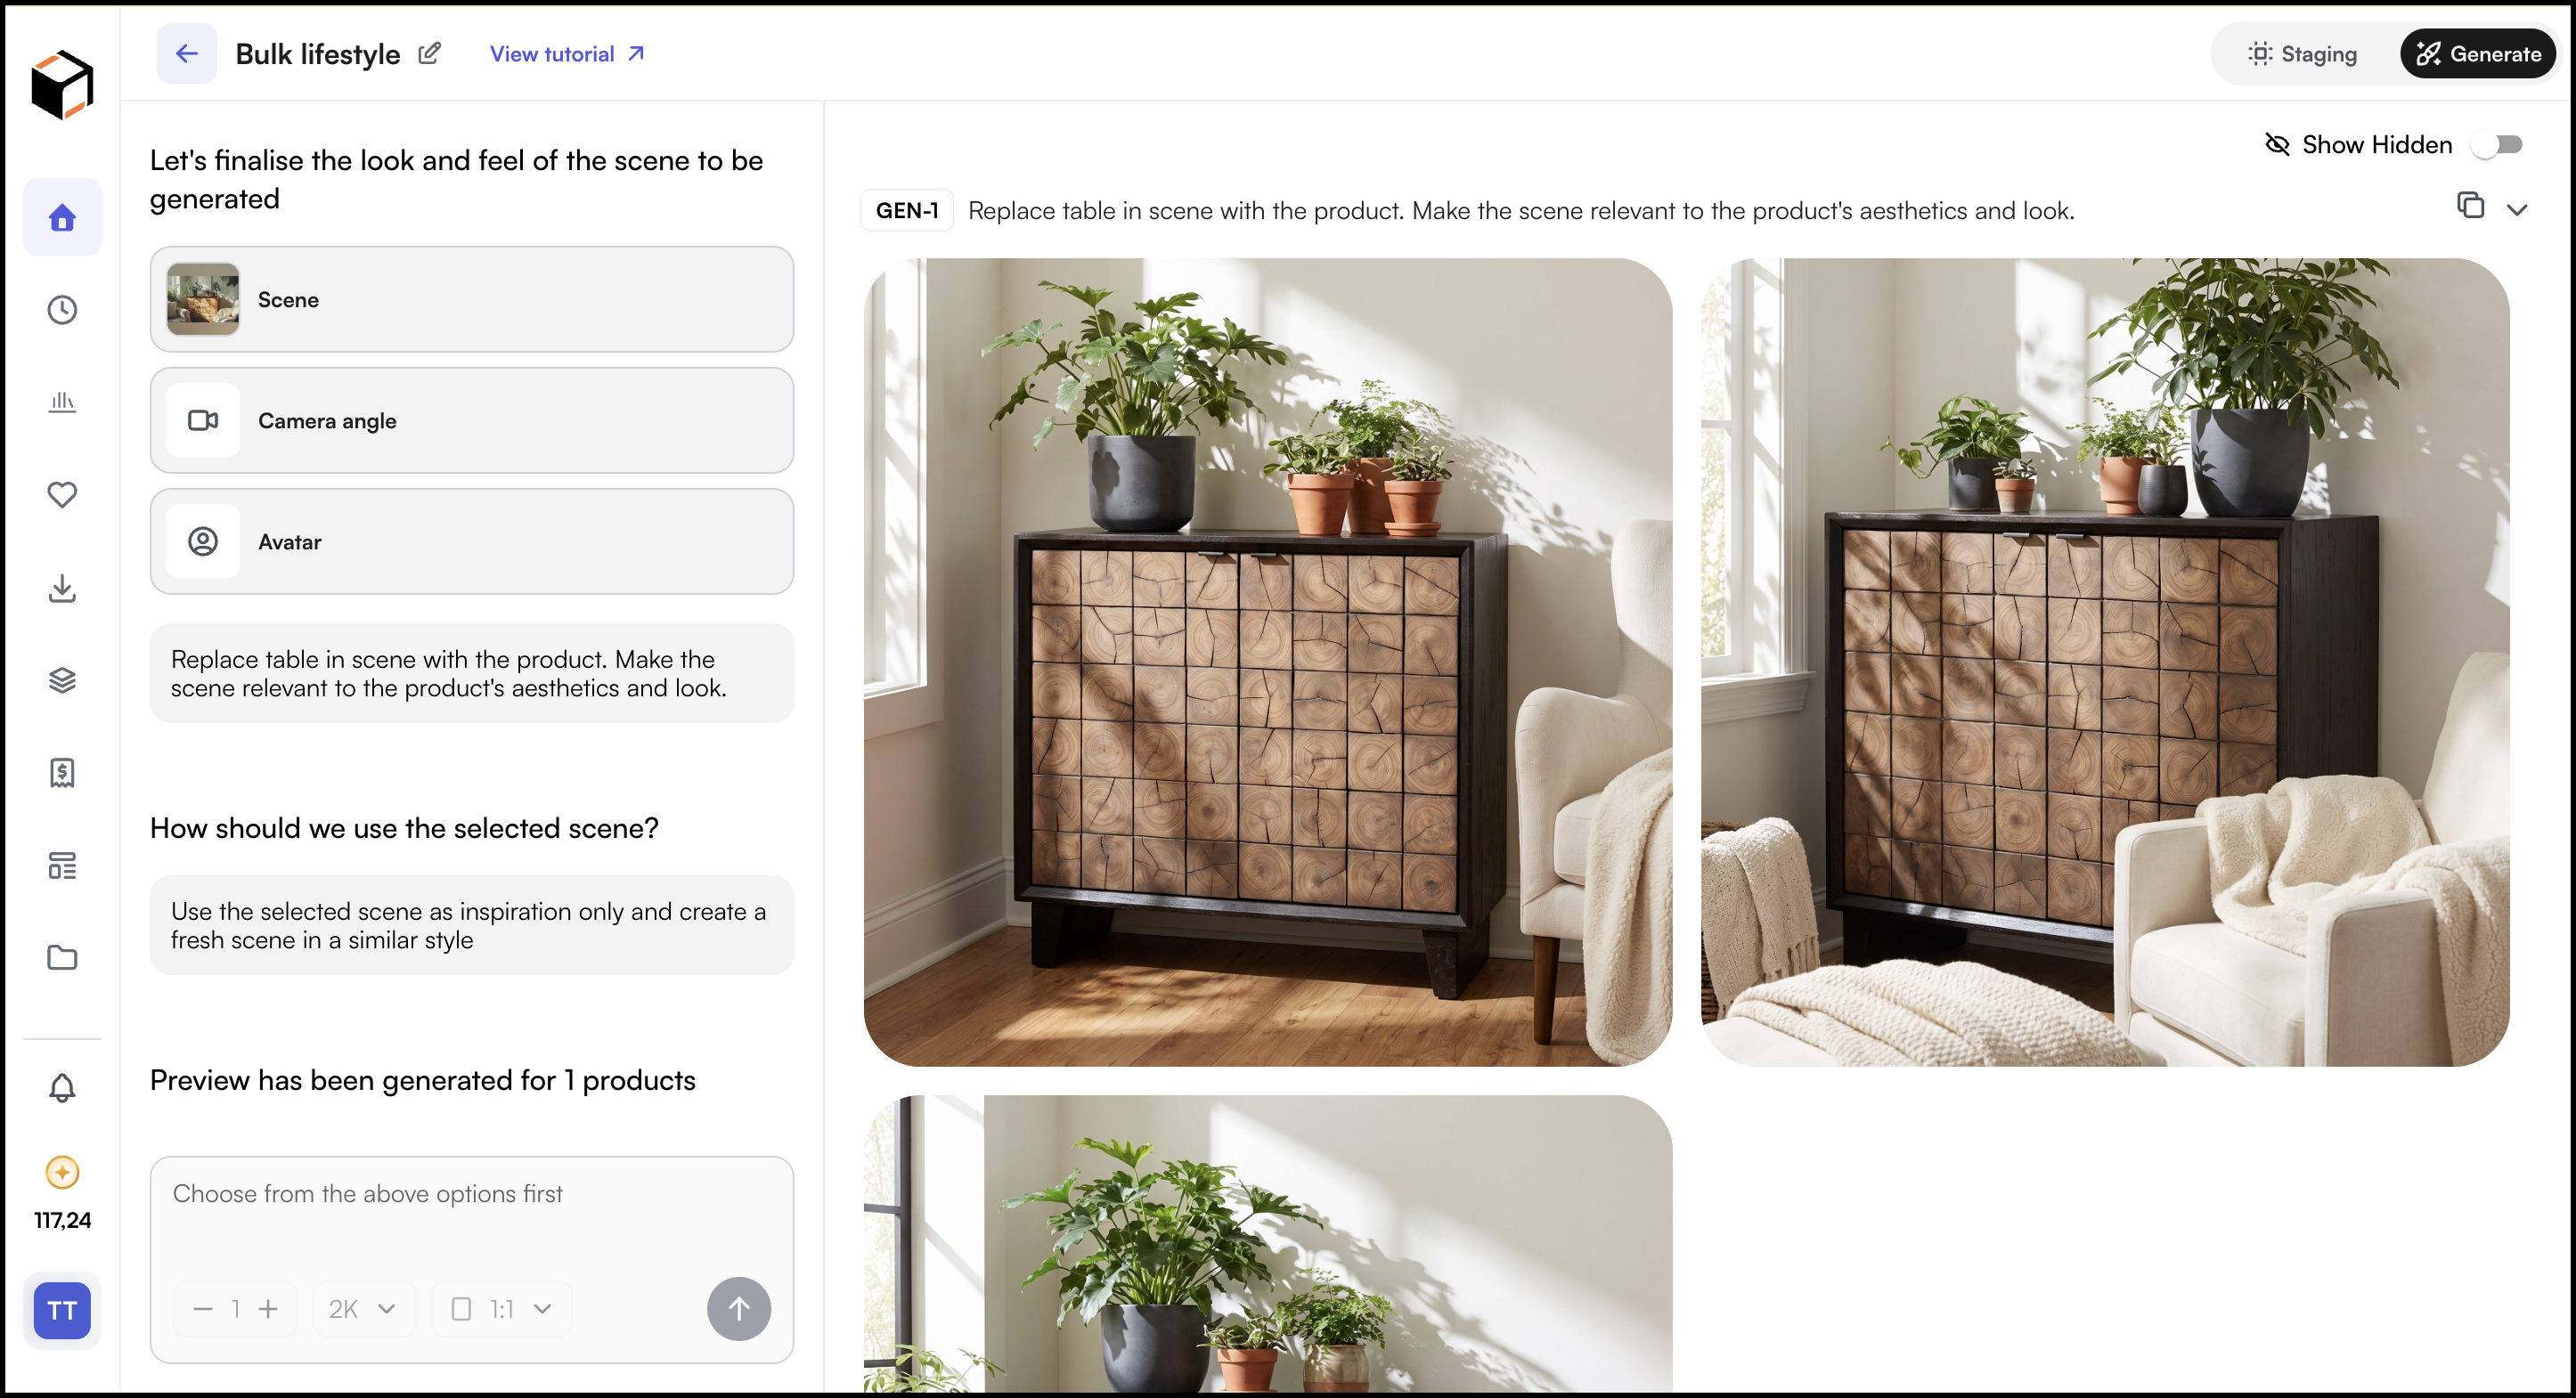
- Wait a few minutes. Your generated images will appear on the screen once they are ready.
- Either select an image you like or try generating more variations.
- You can preview the images with different settings if you are not completely satisfied. See Section E.
E. Refine the Preview
Once the preview images are ready, check whether they match what you want. If they don’t, adjust the prompt and generate again. You can iterate as many times as you need before applying the look to the rest.
- Select what would you like to do next?
- Select I want to preview with different settings to preview product with different settings.
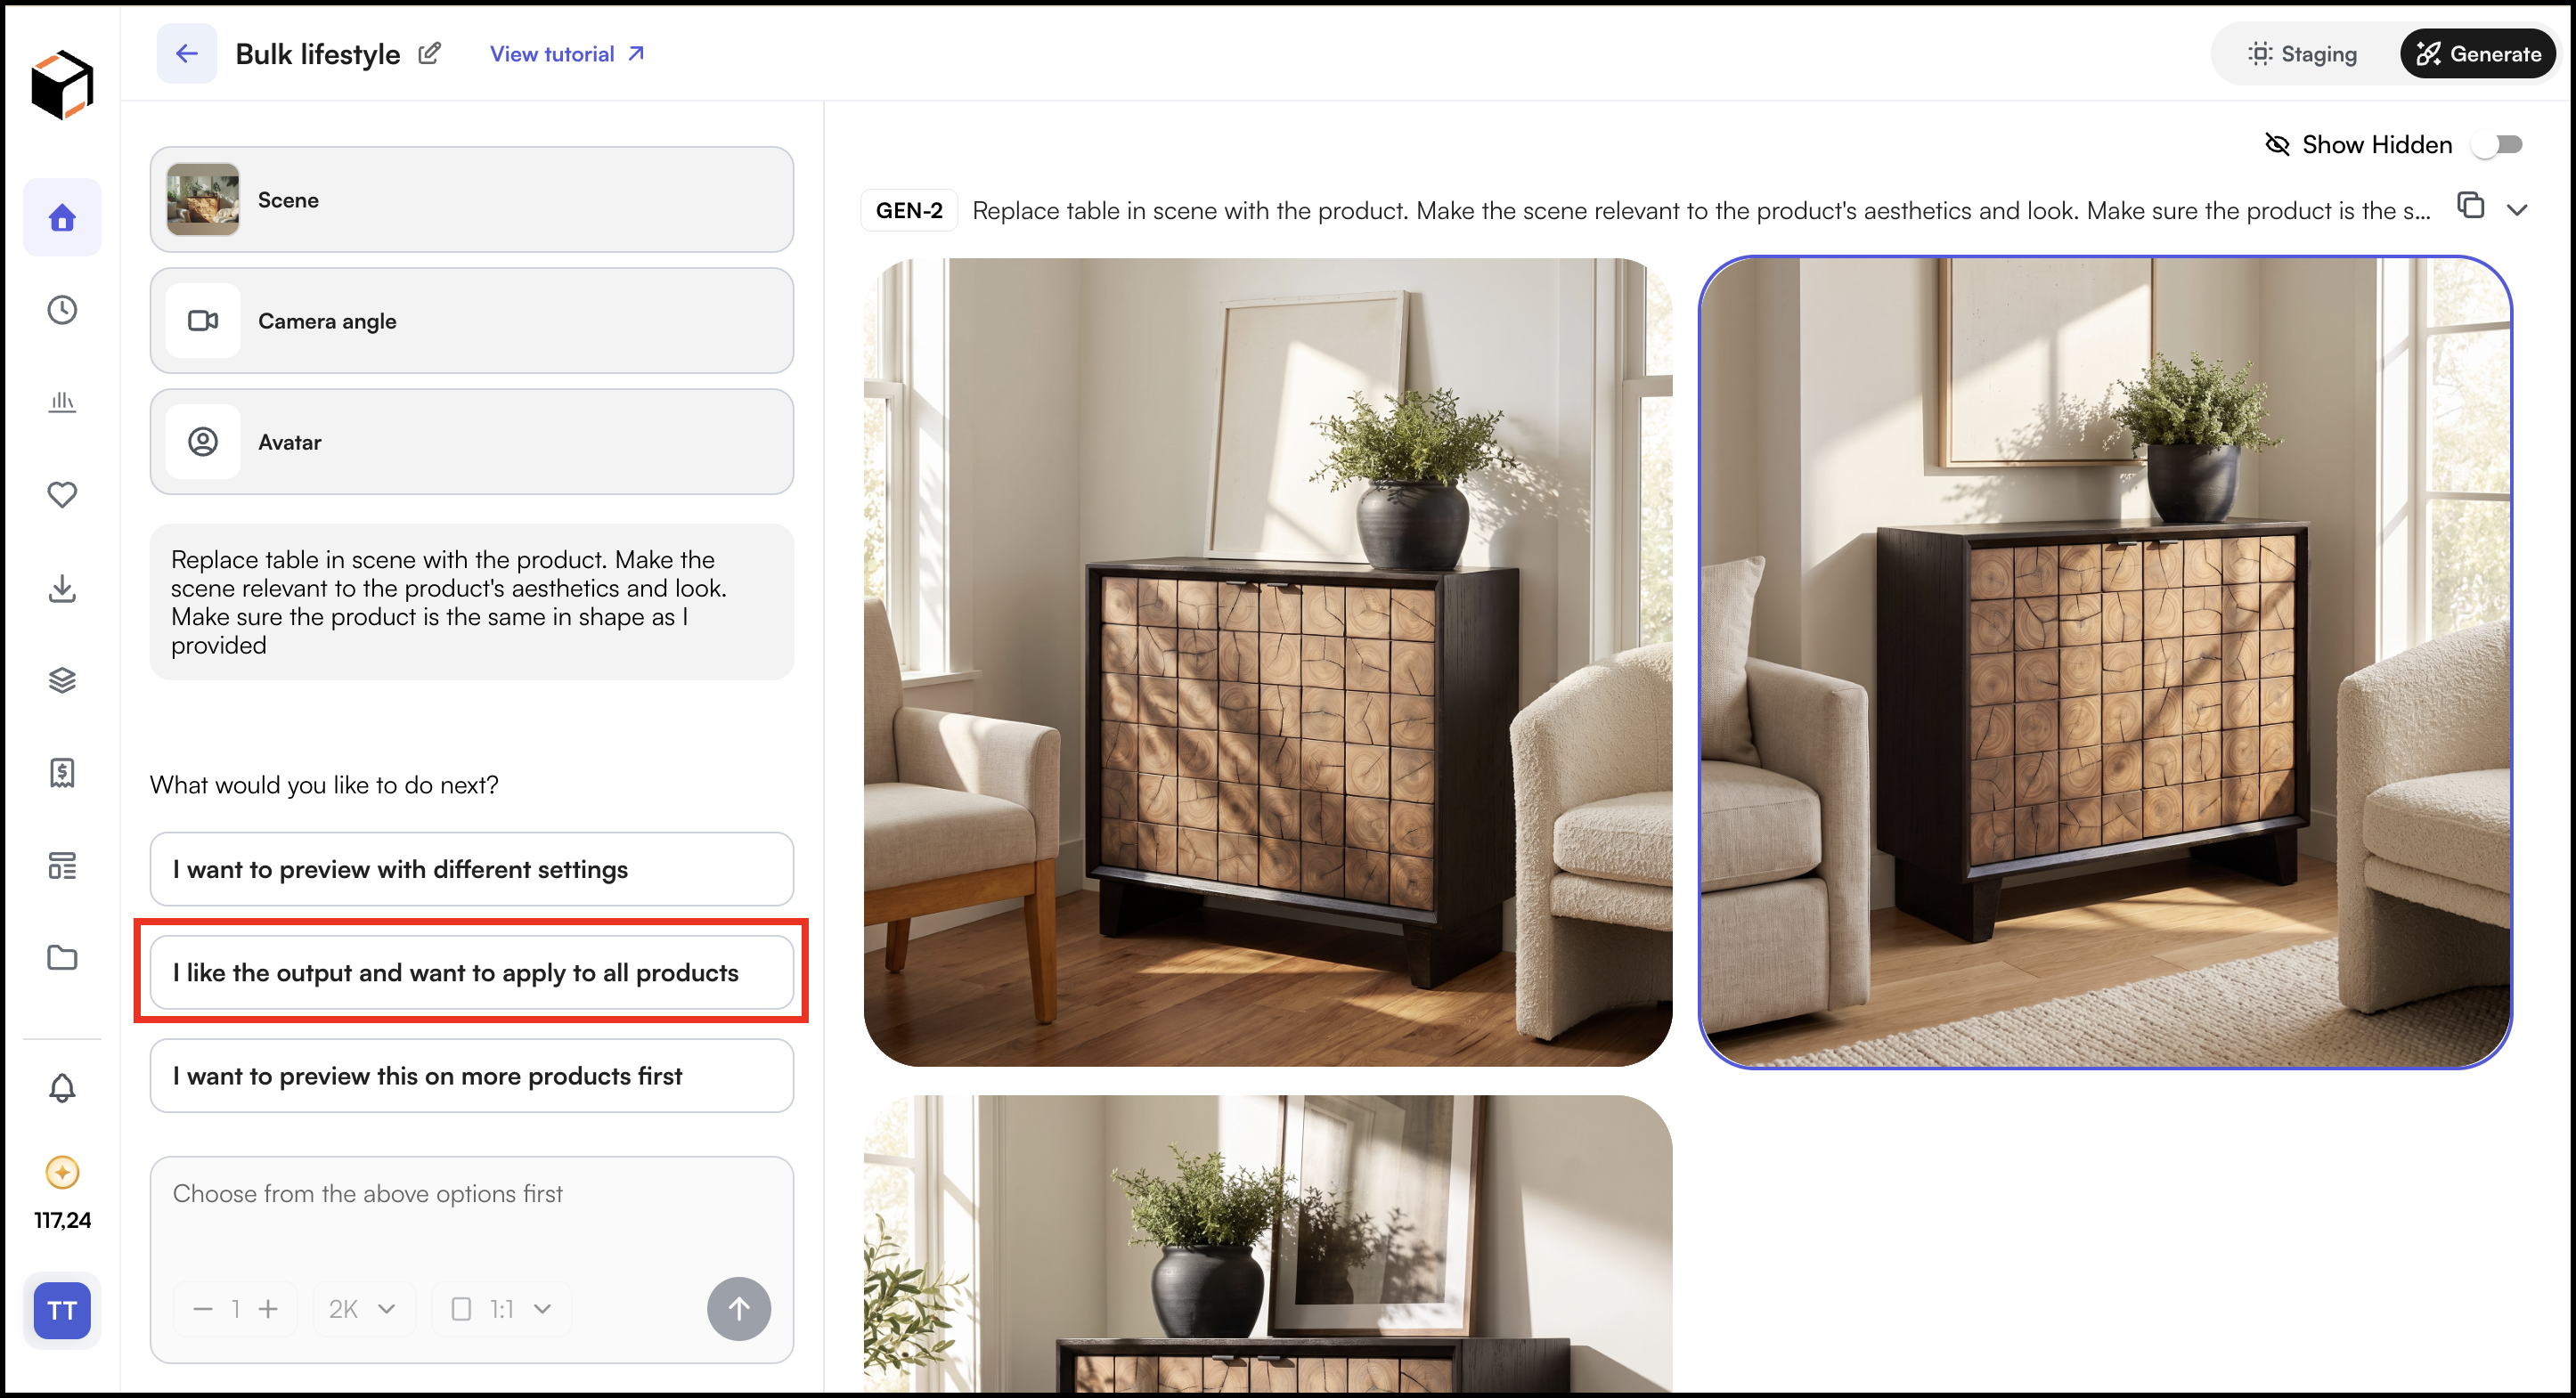
- Select I like the output and want to apply to all products when you are happy with the previews
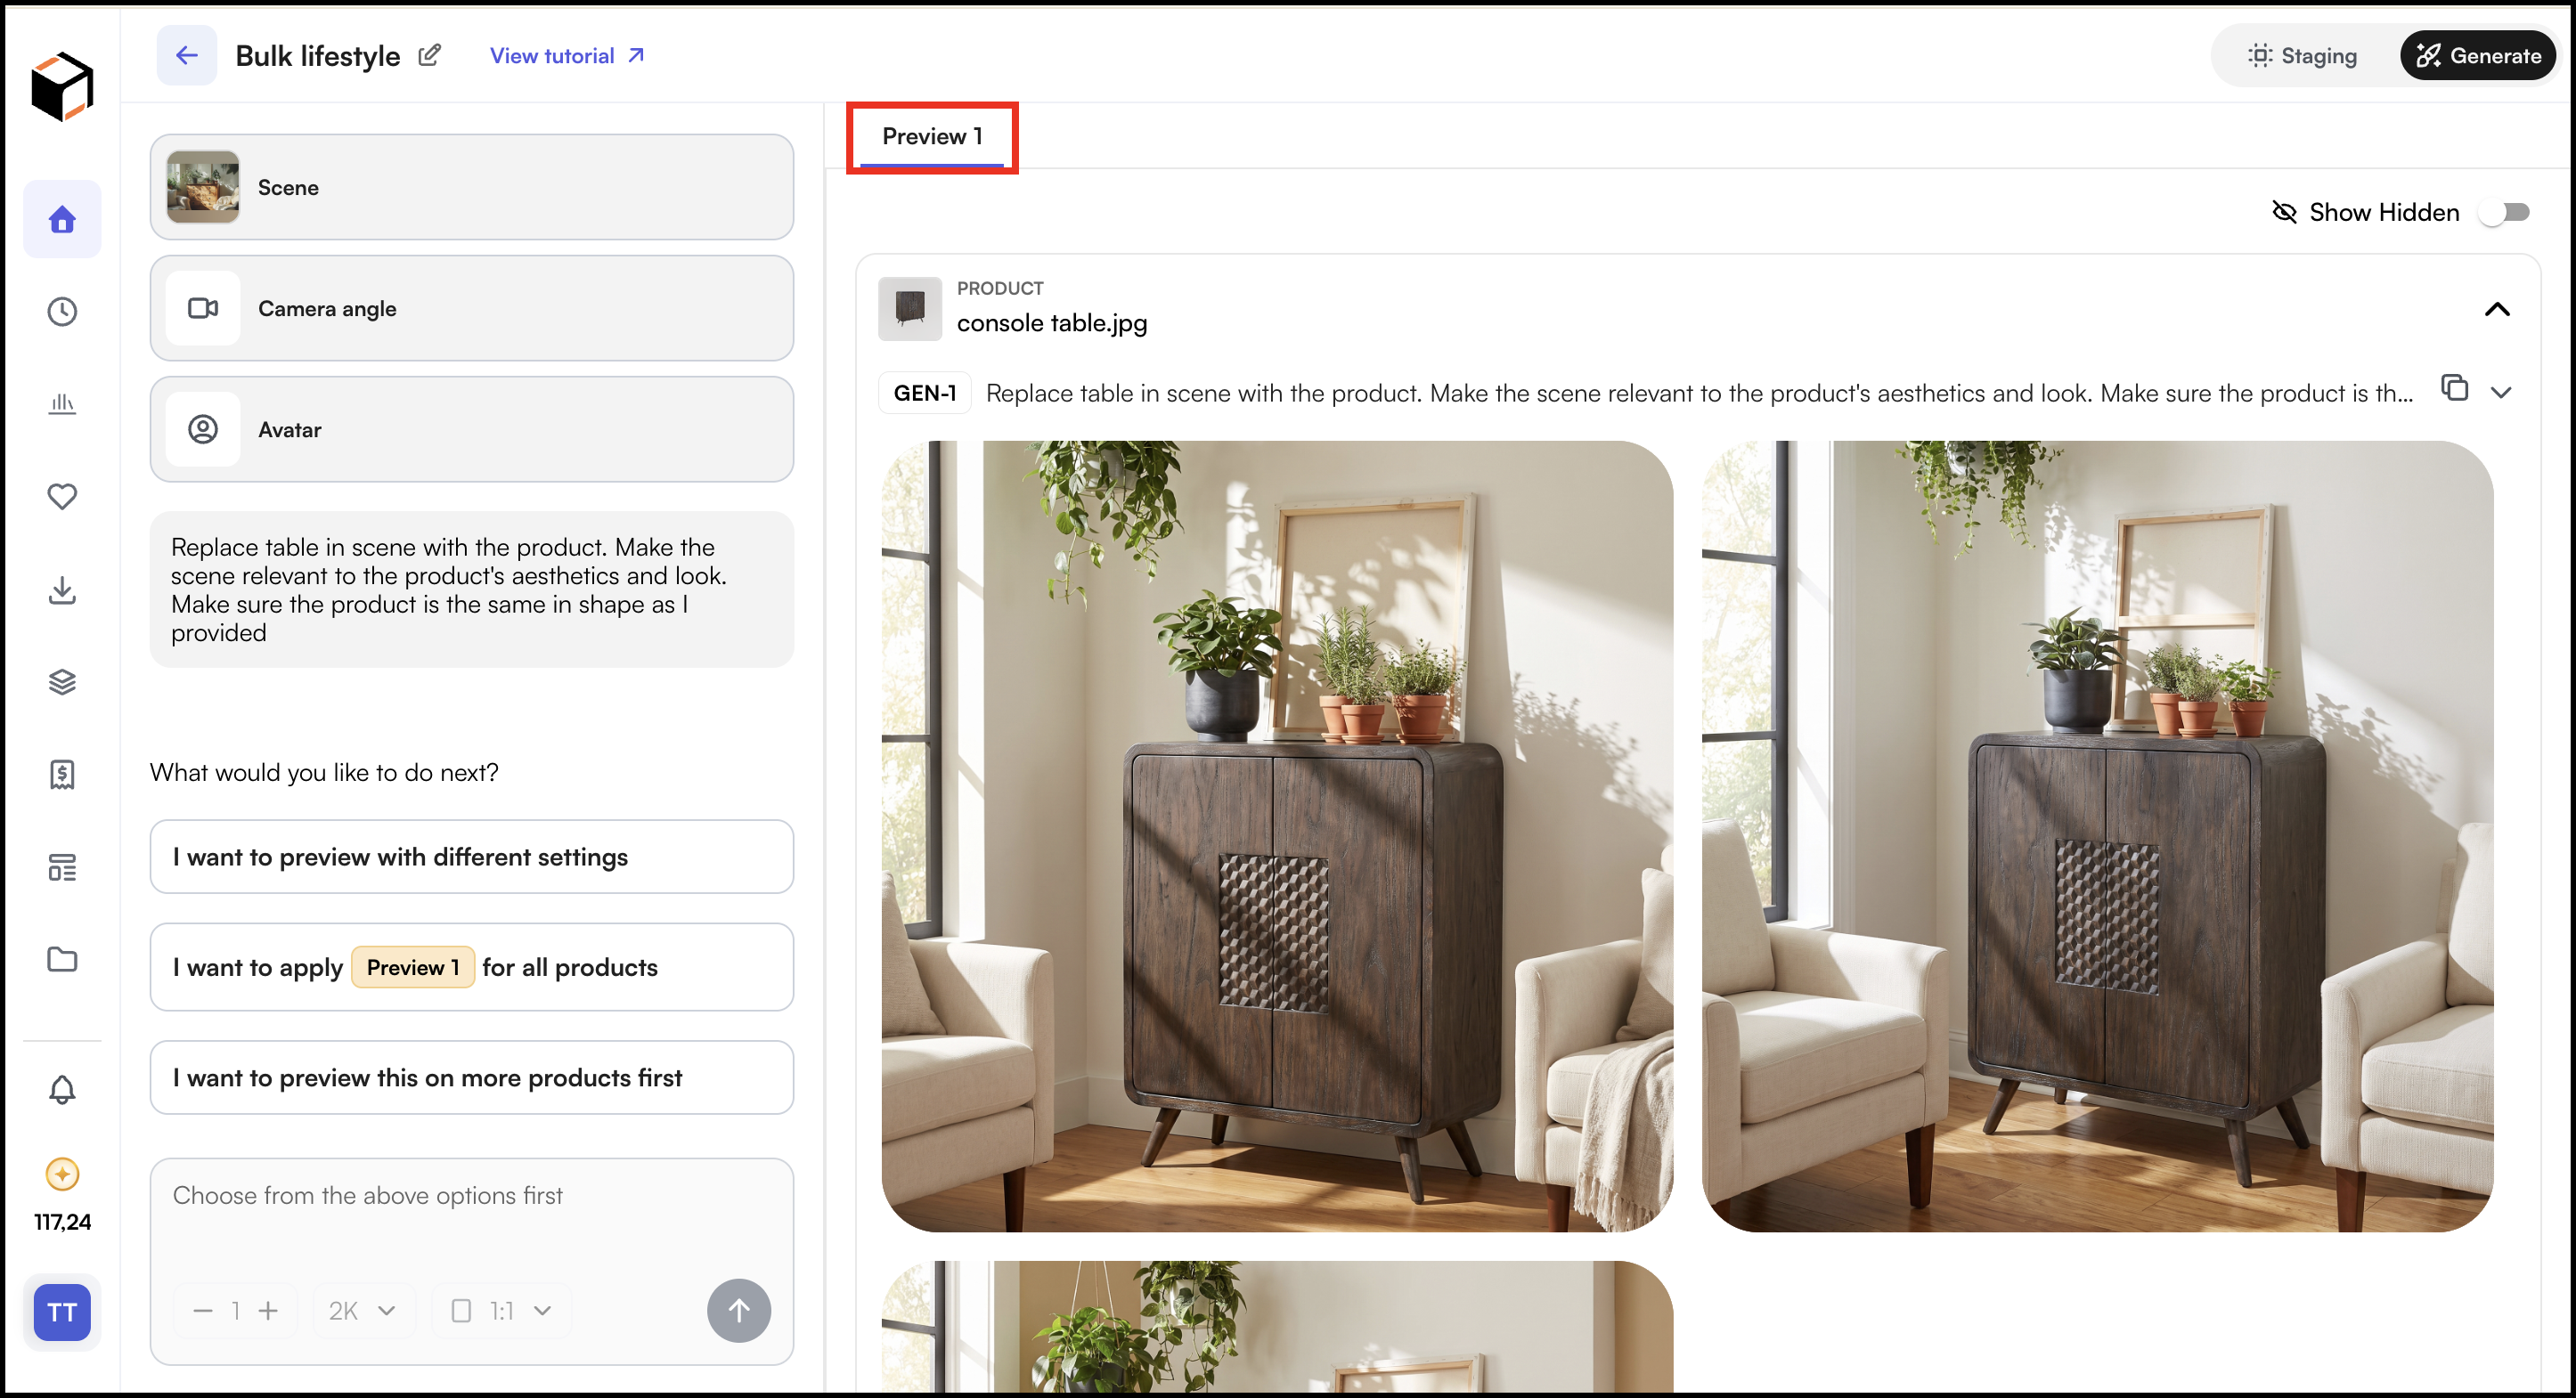
- Select I want to preview this on more products first to create more previews and choose the product you want to preview it on. You can later apply Preview 1 to all products (option b).
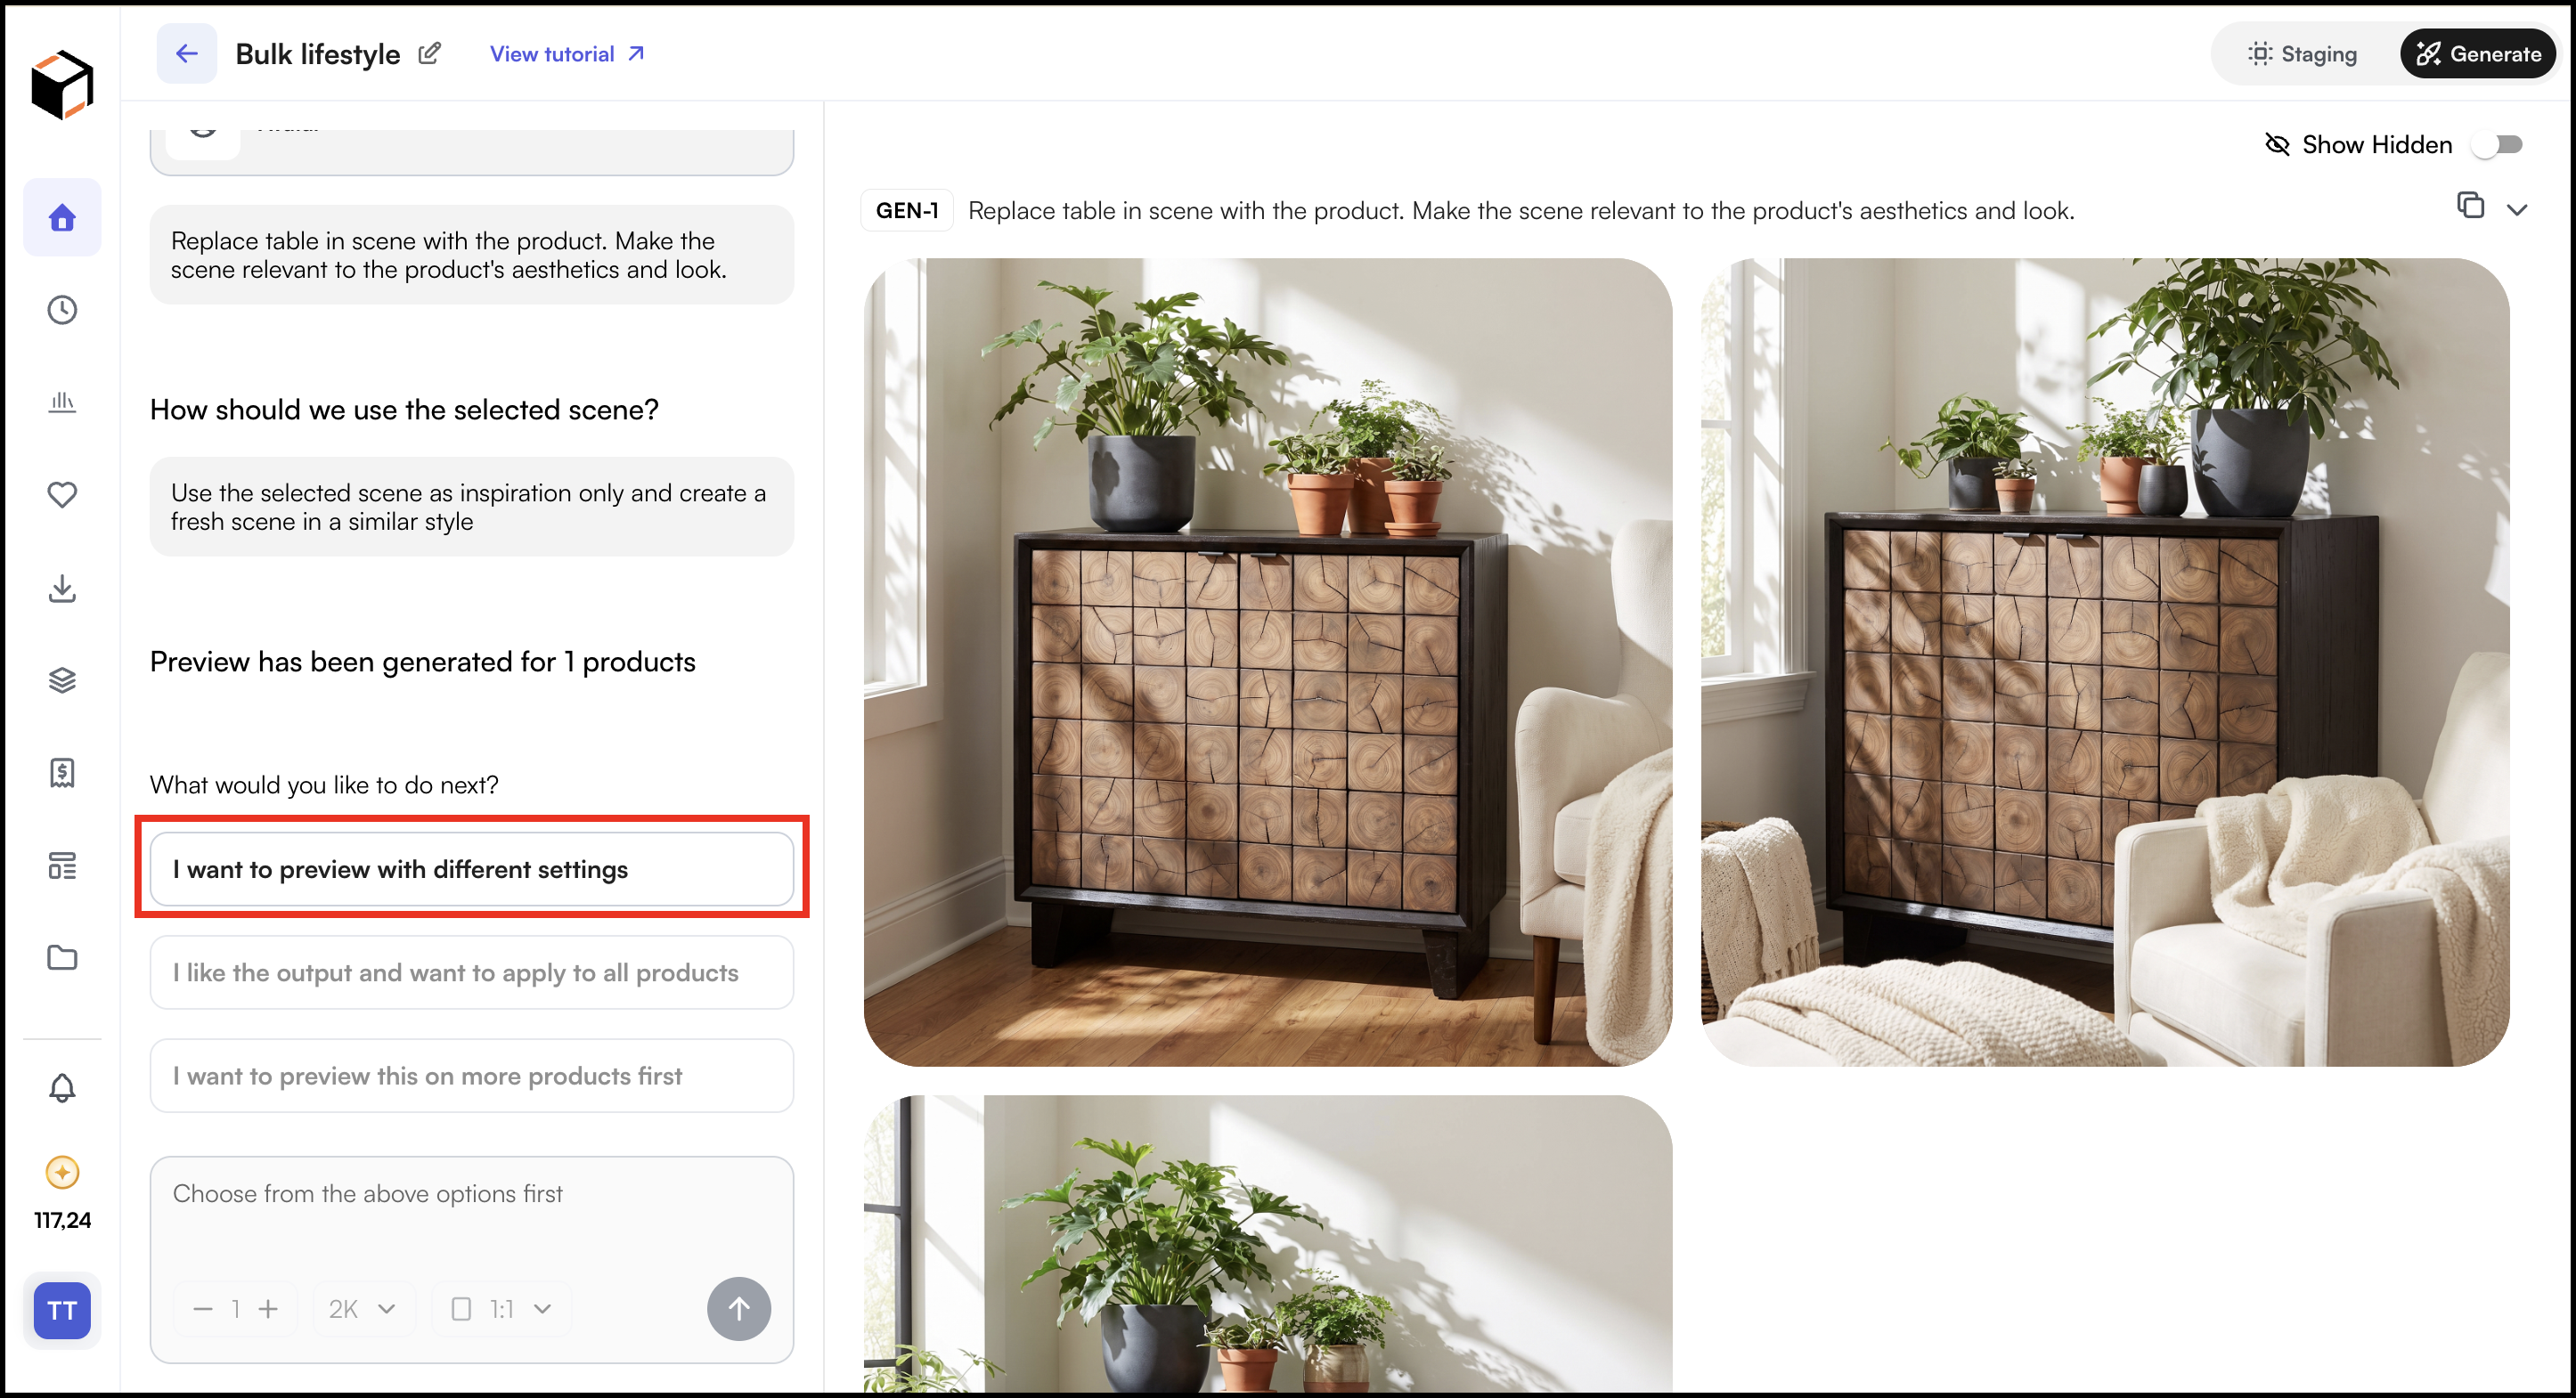
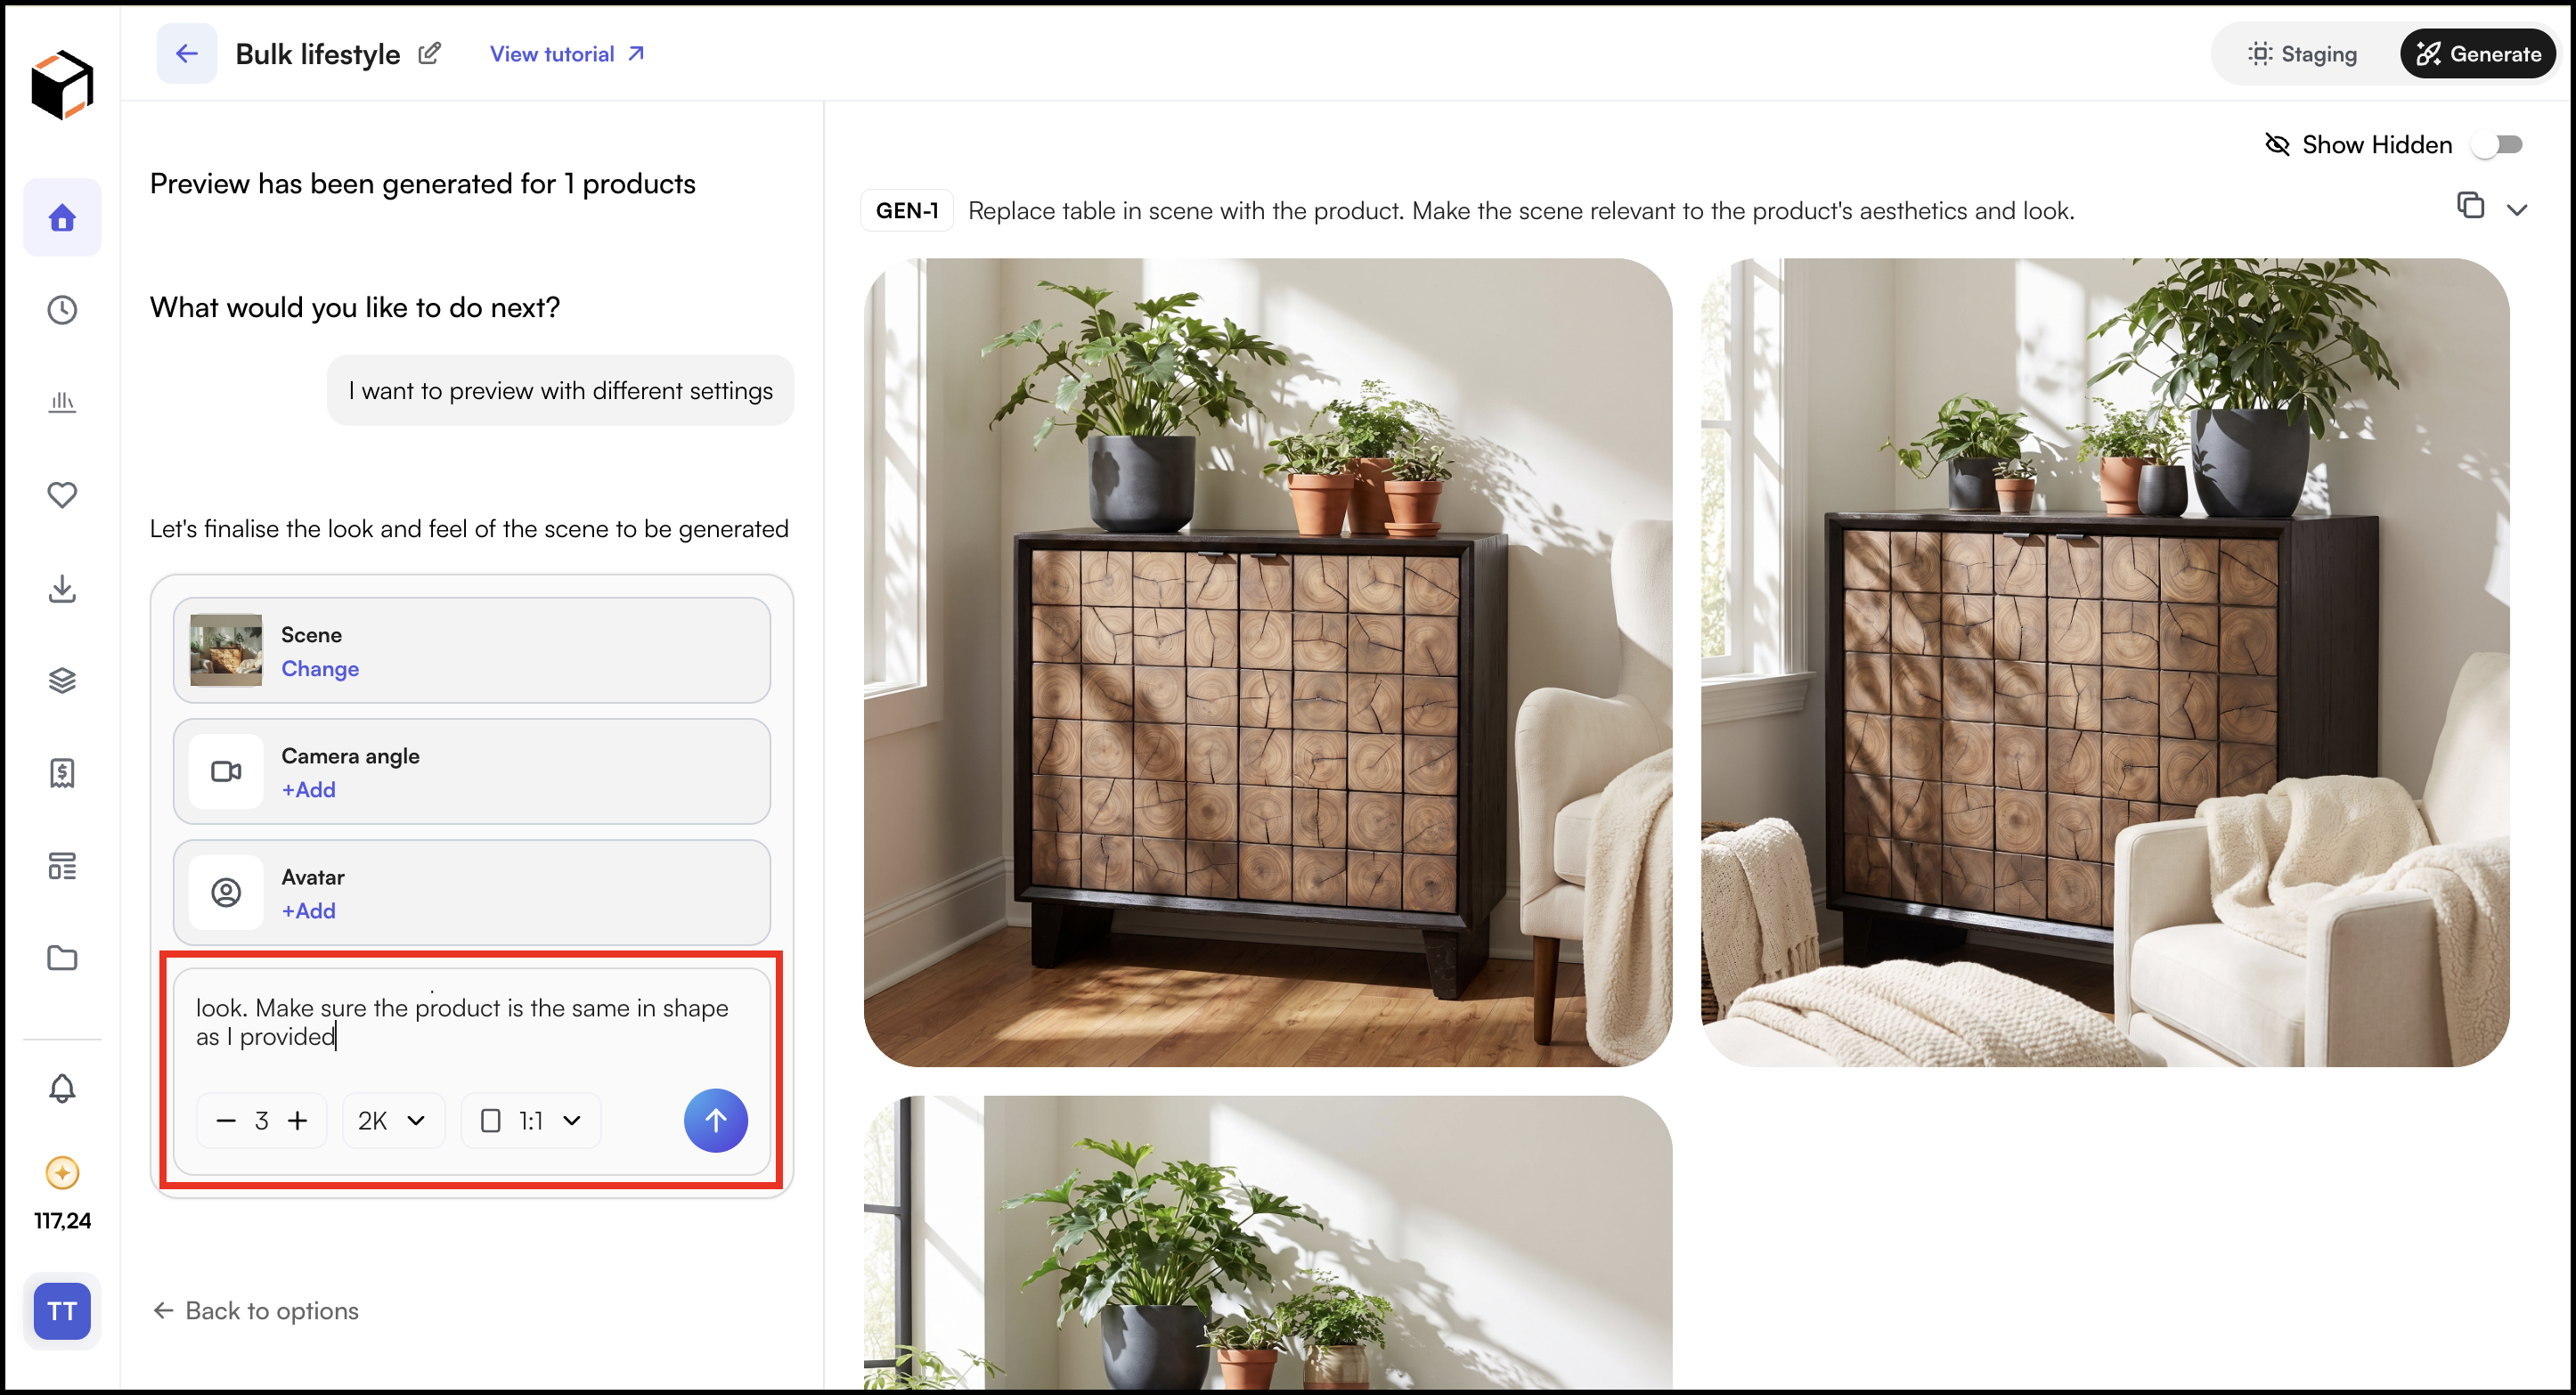
- This reopens the prompt and settings used for that set.
- Edit the prompt with more specific instructions. For example, if the product looks out of proportion, add: “Make sure the product is the same in shape as I provided.”
- Set the number of images to generate using the – and + controls and click Generate.
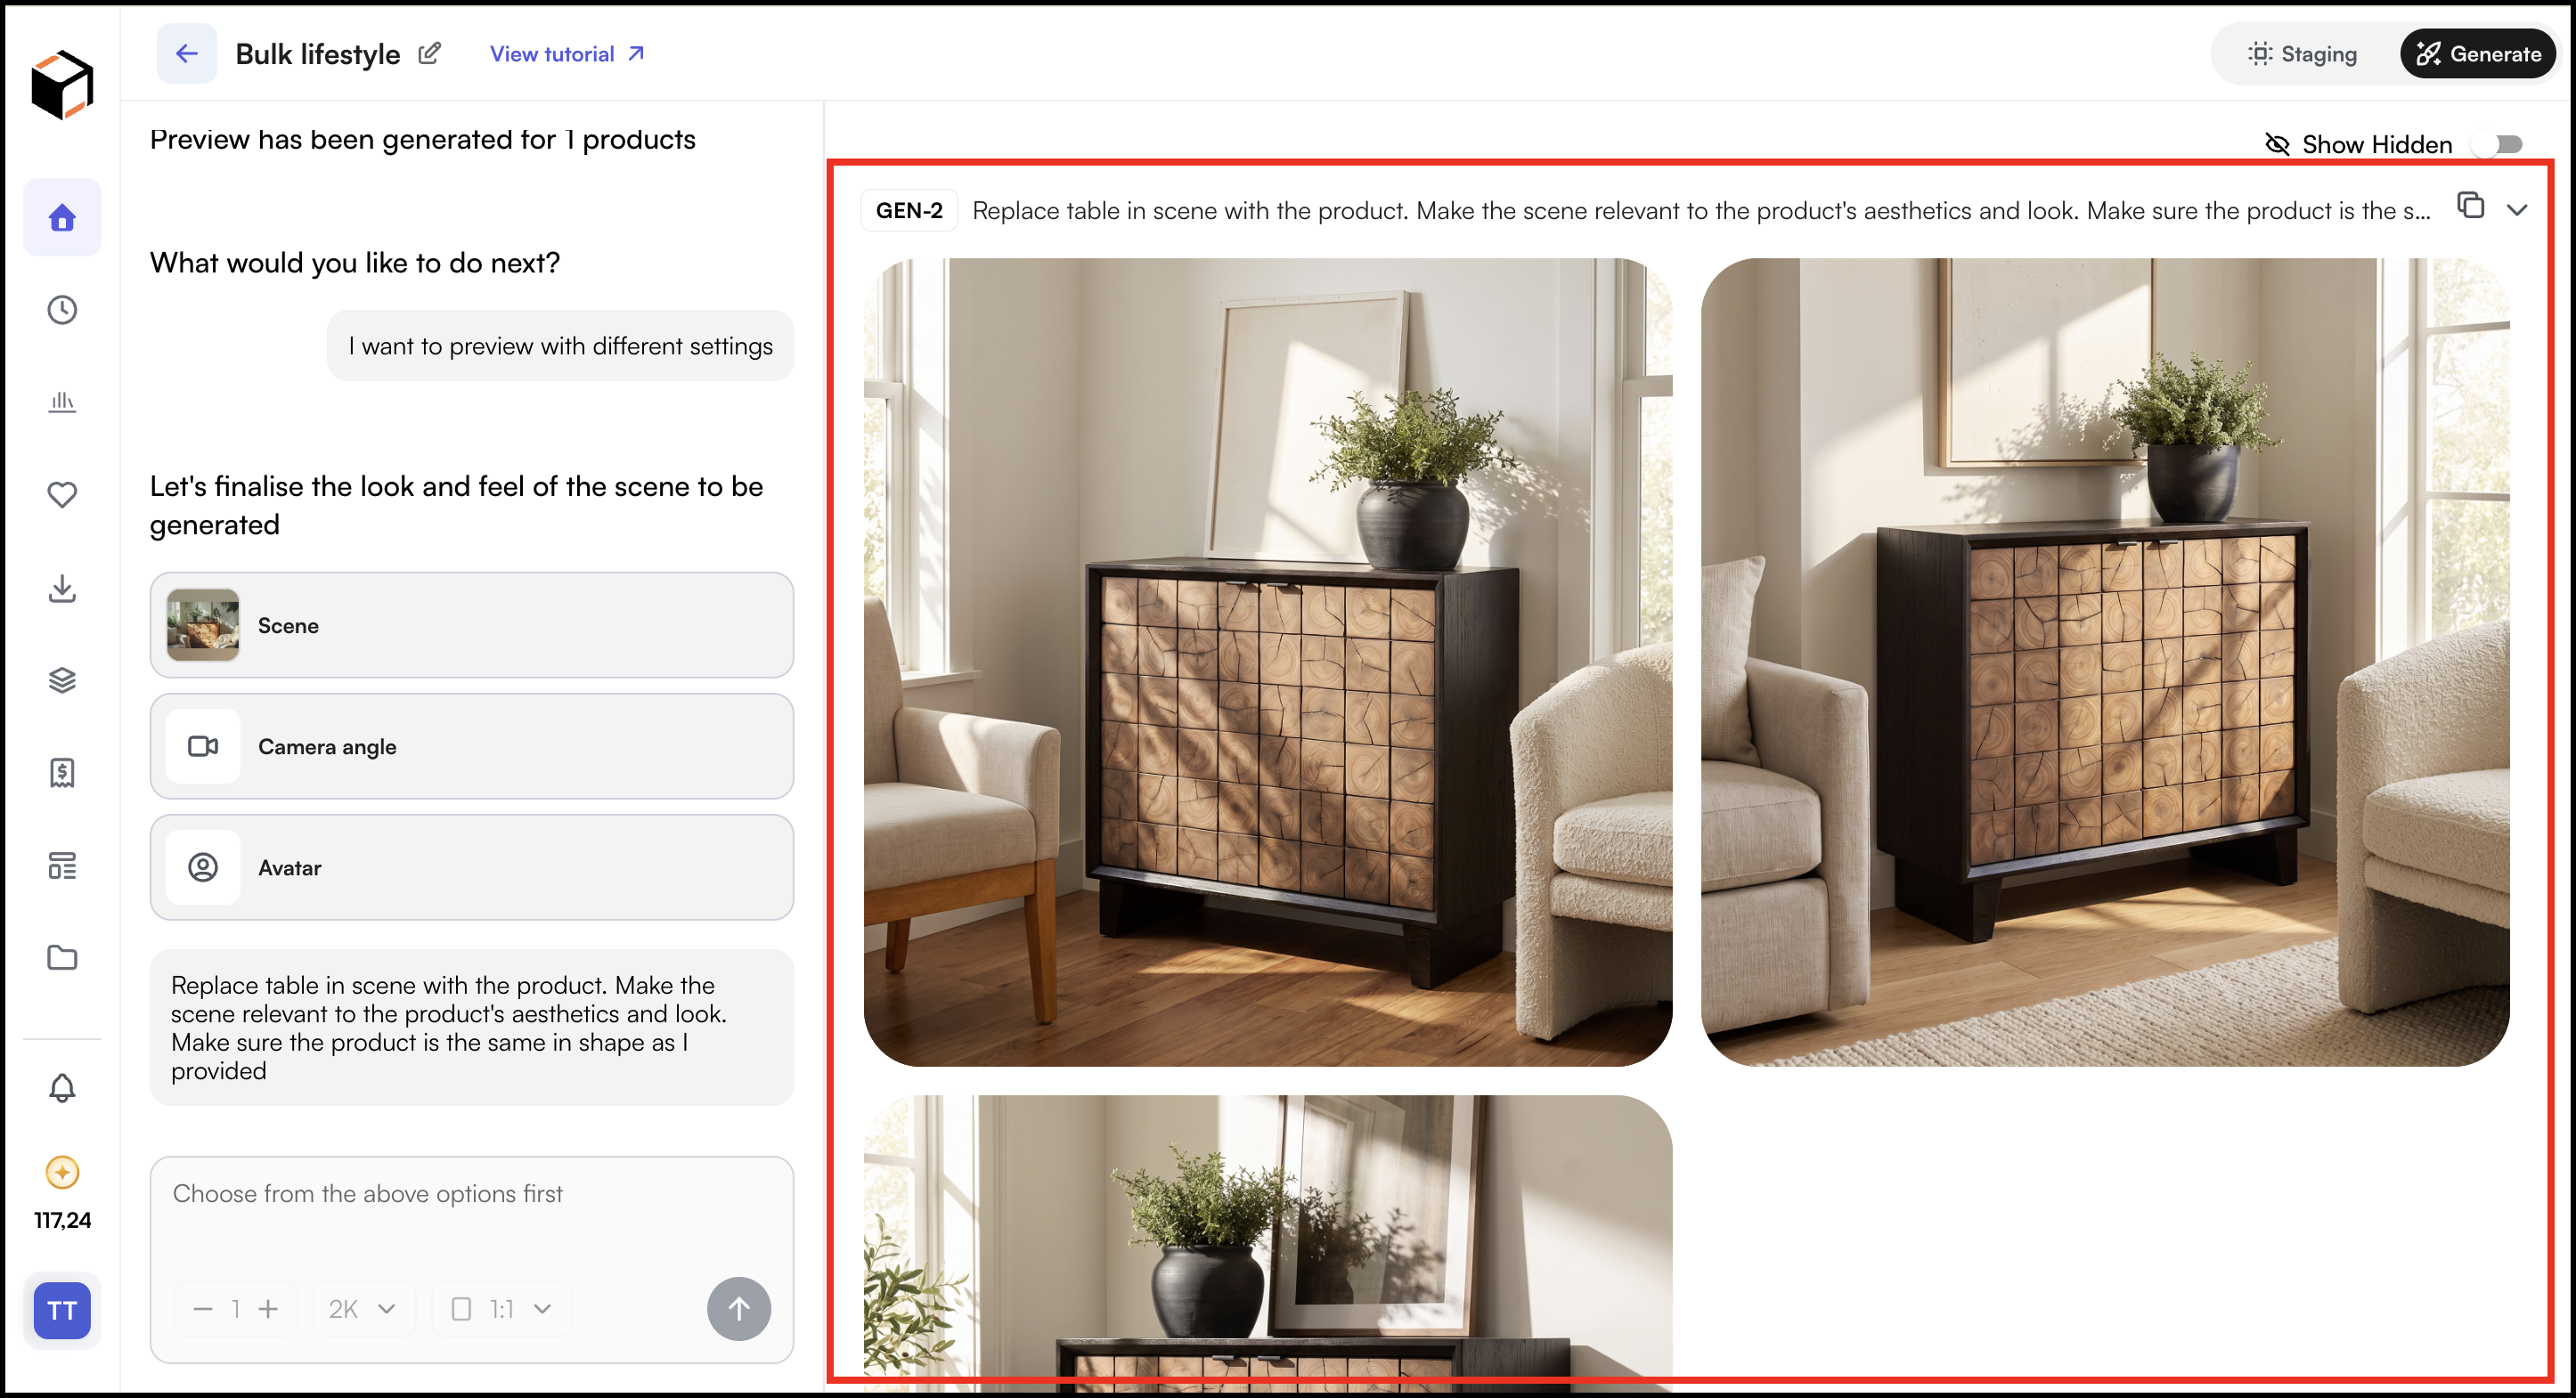
- The new set appears above the previous one, labelled with your updated prompt (GEN 2), so you can compare the two.
F. Preview on More Products (Optional)
Before applying the look to every product, you can test it on a few more products, especially ones that look different from your first preview product.
- Mark your preferred preview image as Best.
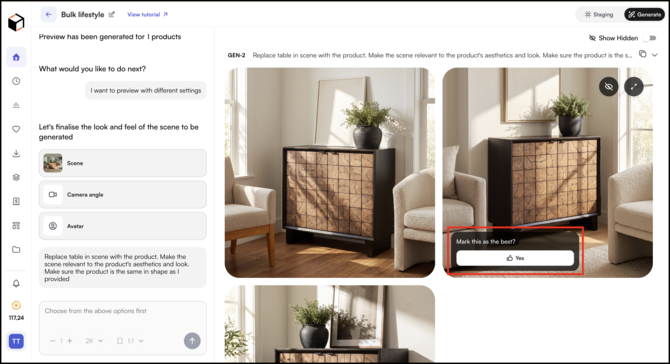
- From the options shown, choose to use the selected image as a reference and preview it on more products.
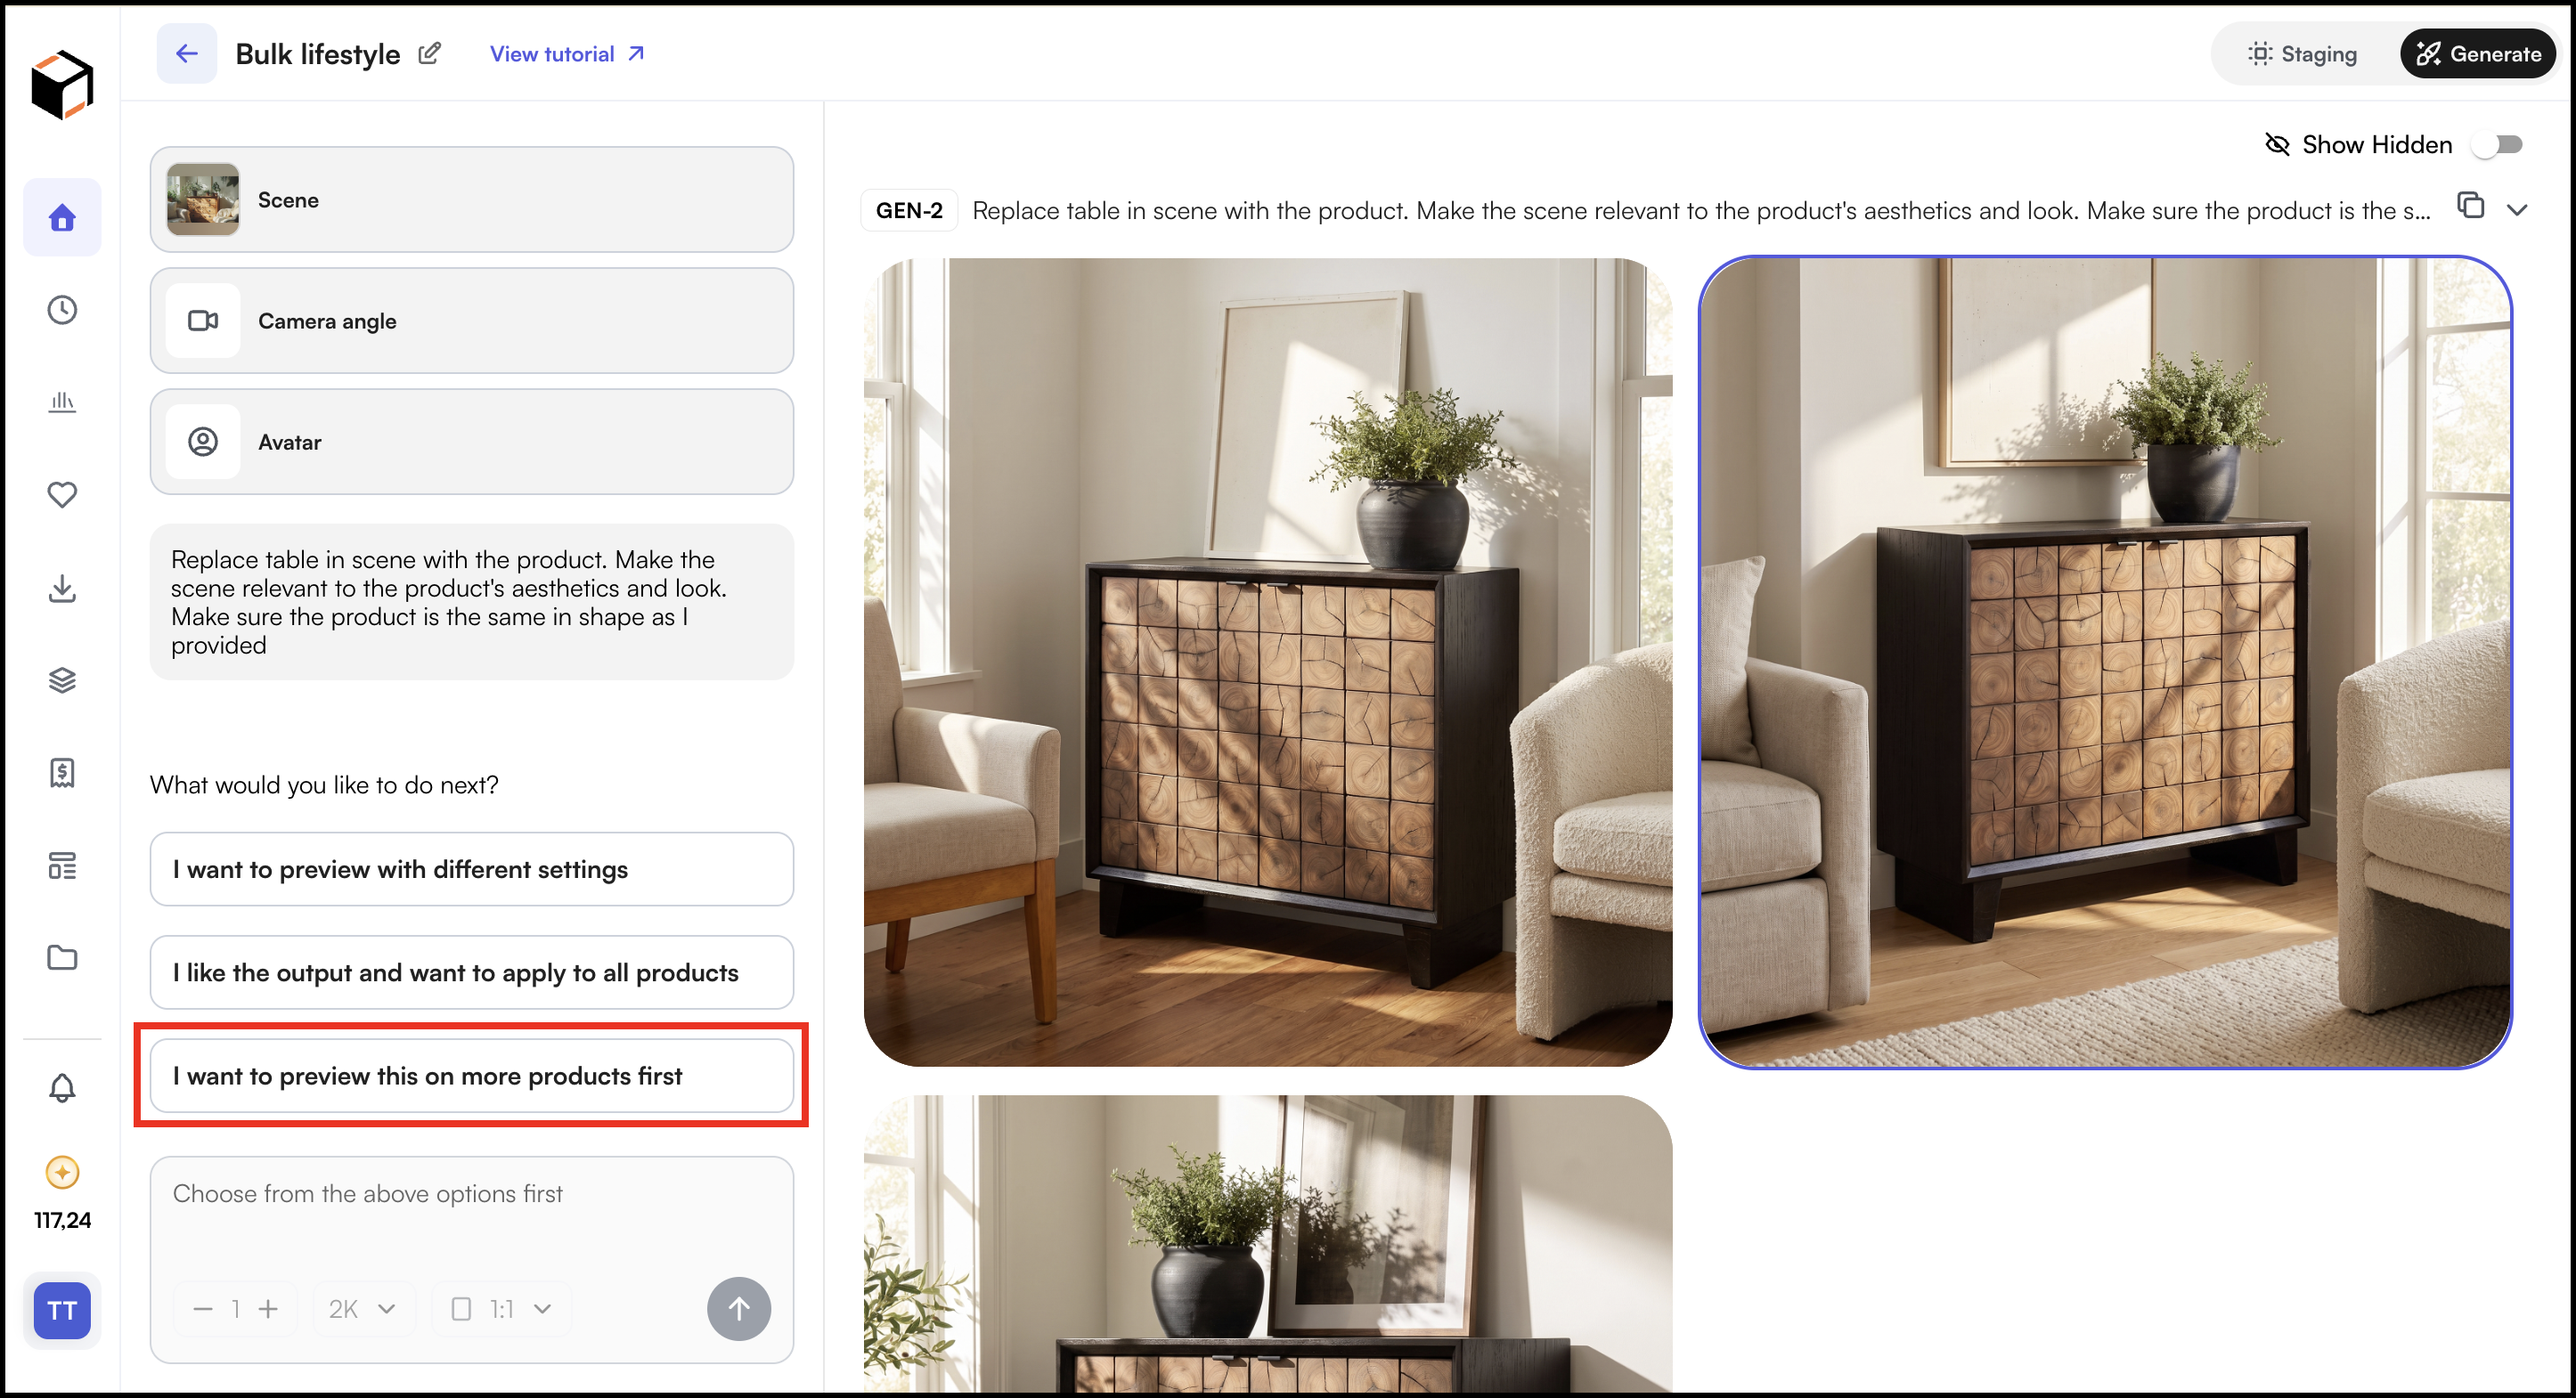
- Select the product you want to preview on and confirm.
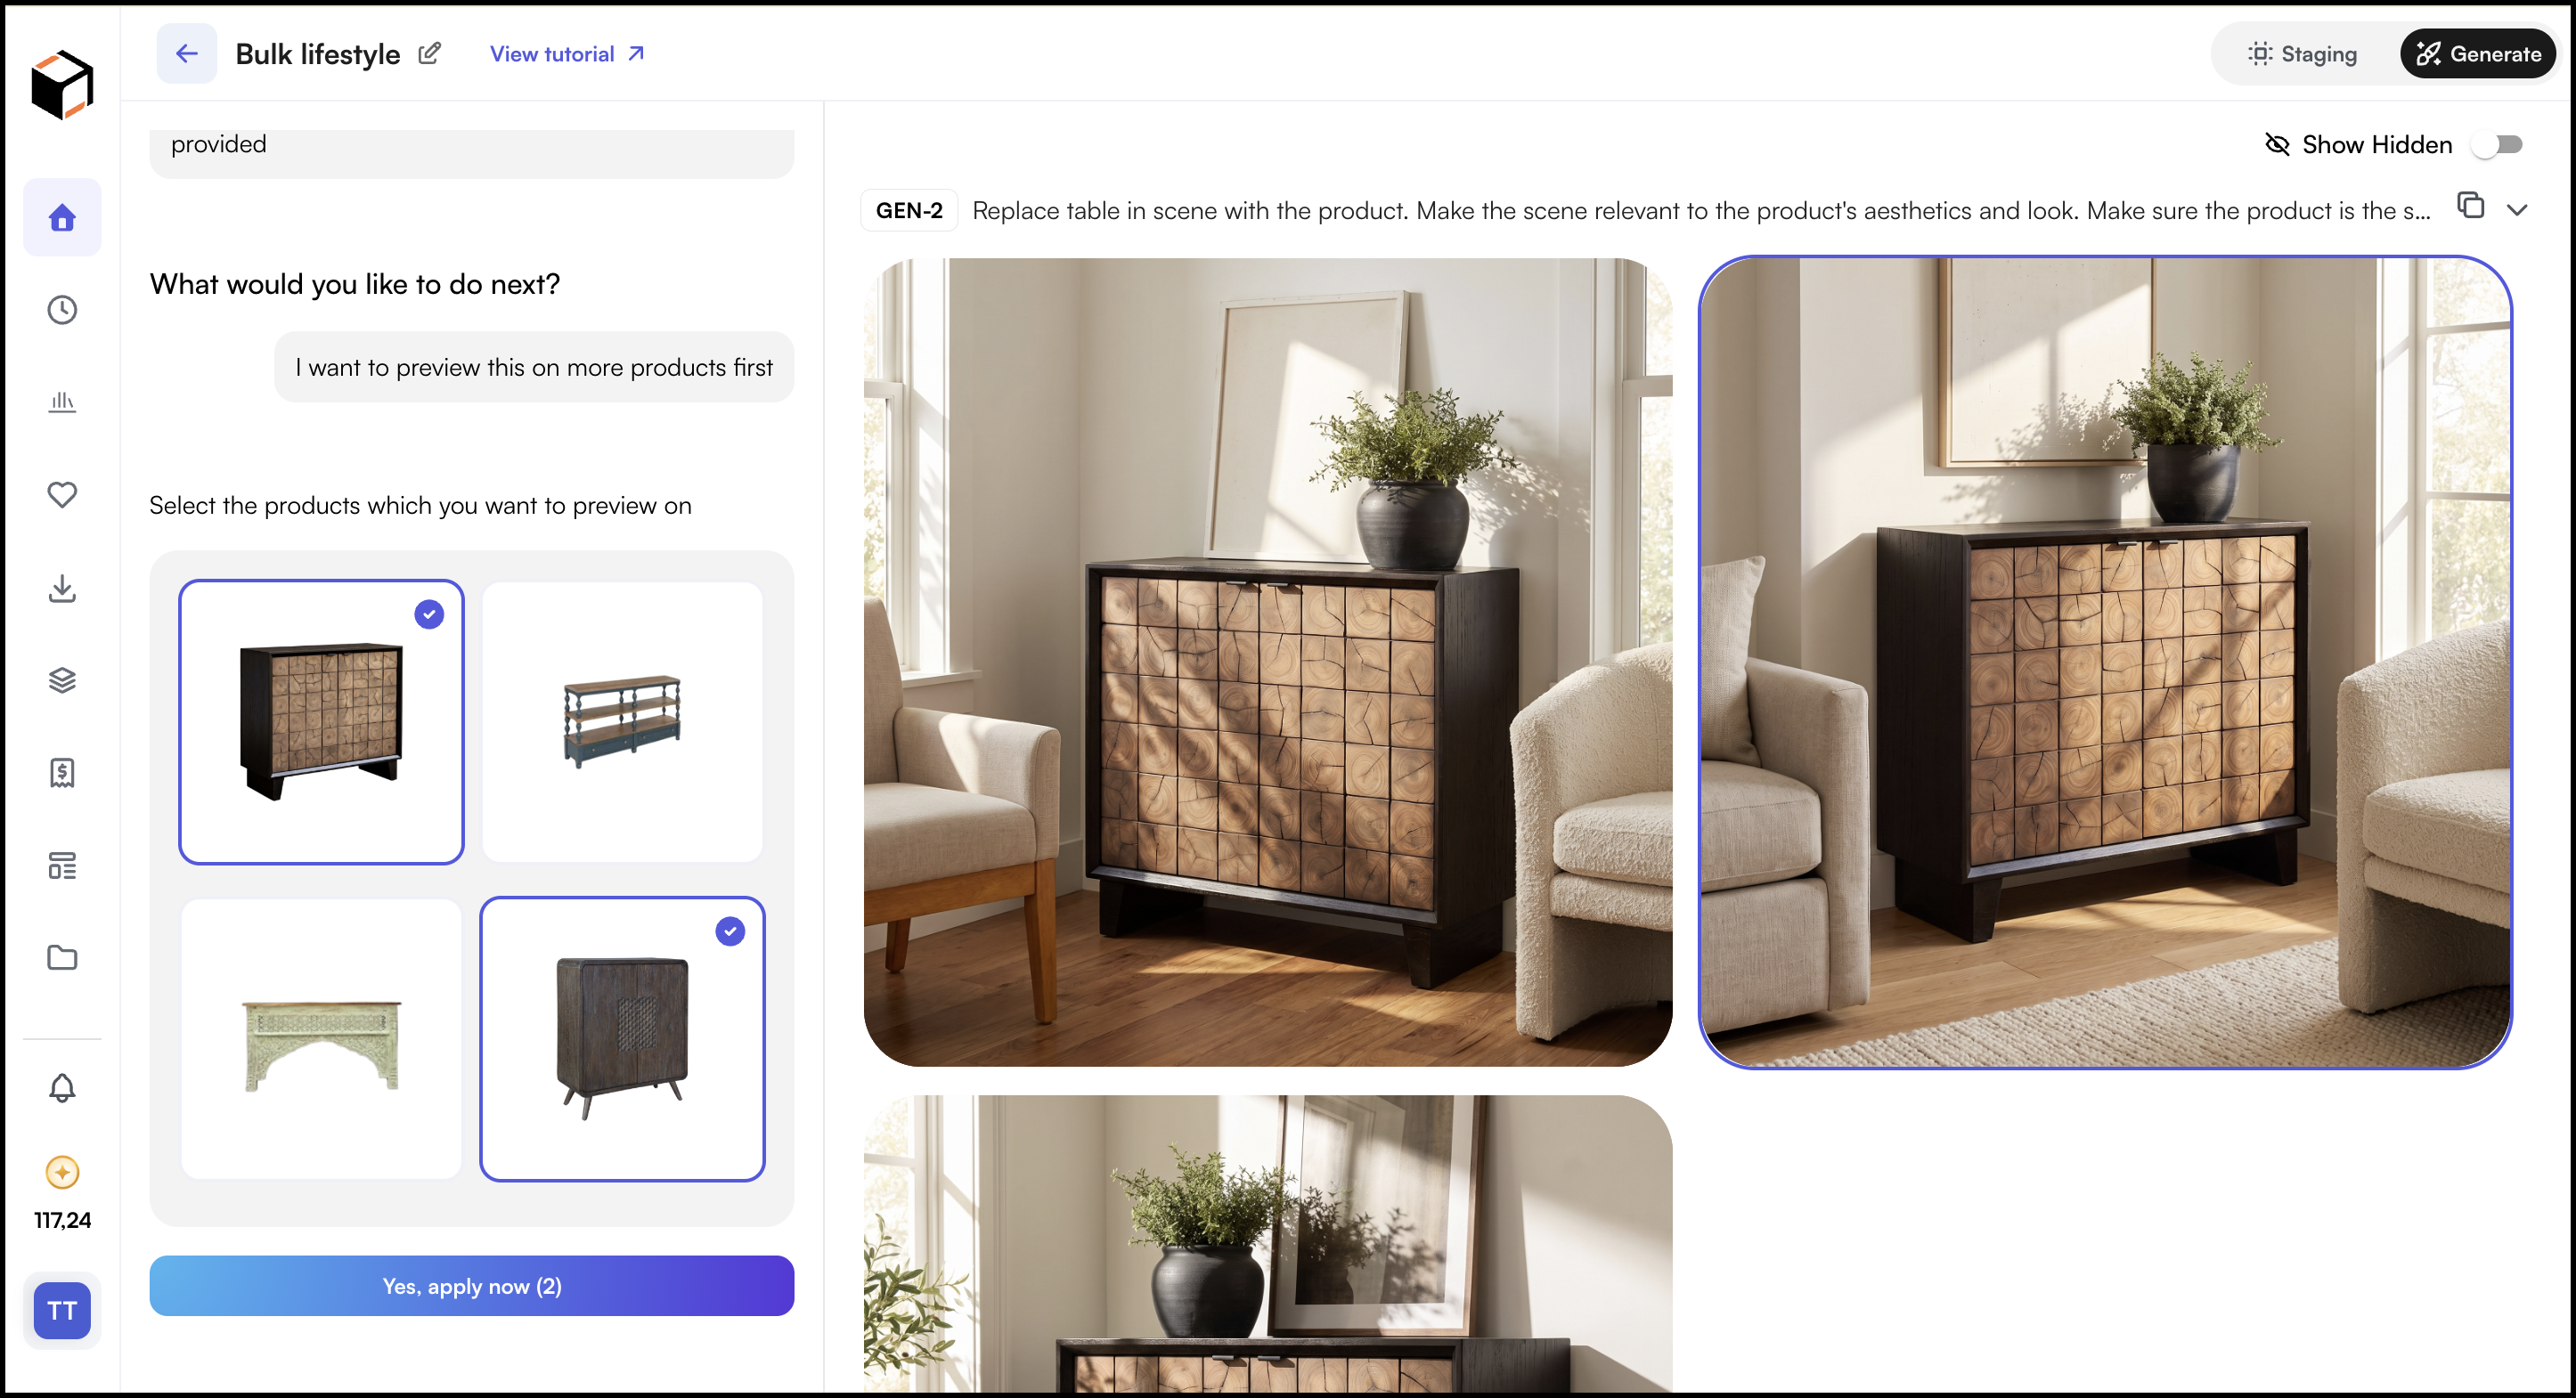
- Choose to apply the settings now. WizStudio generates a preview for that product using the same settings.
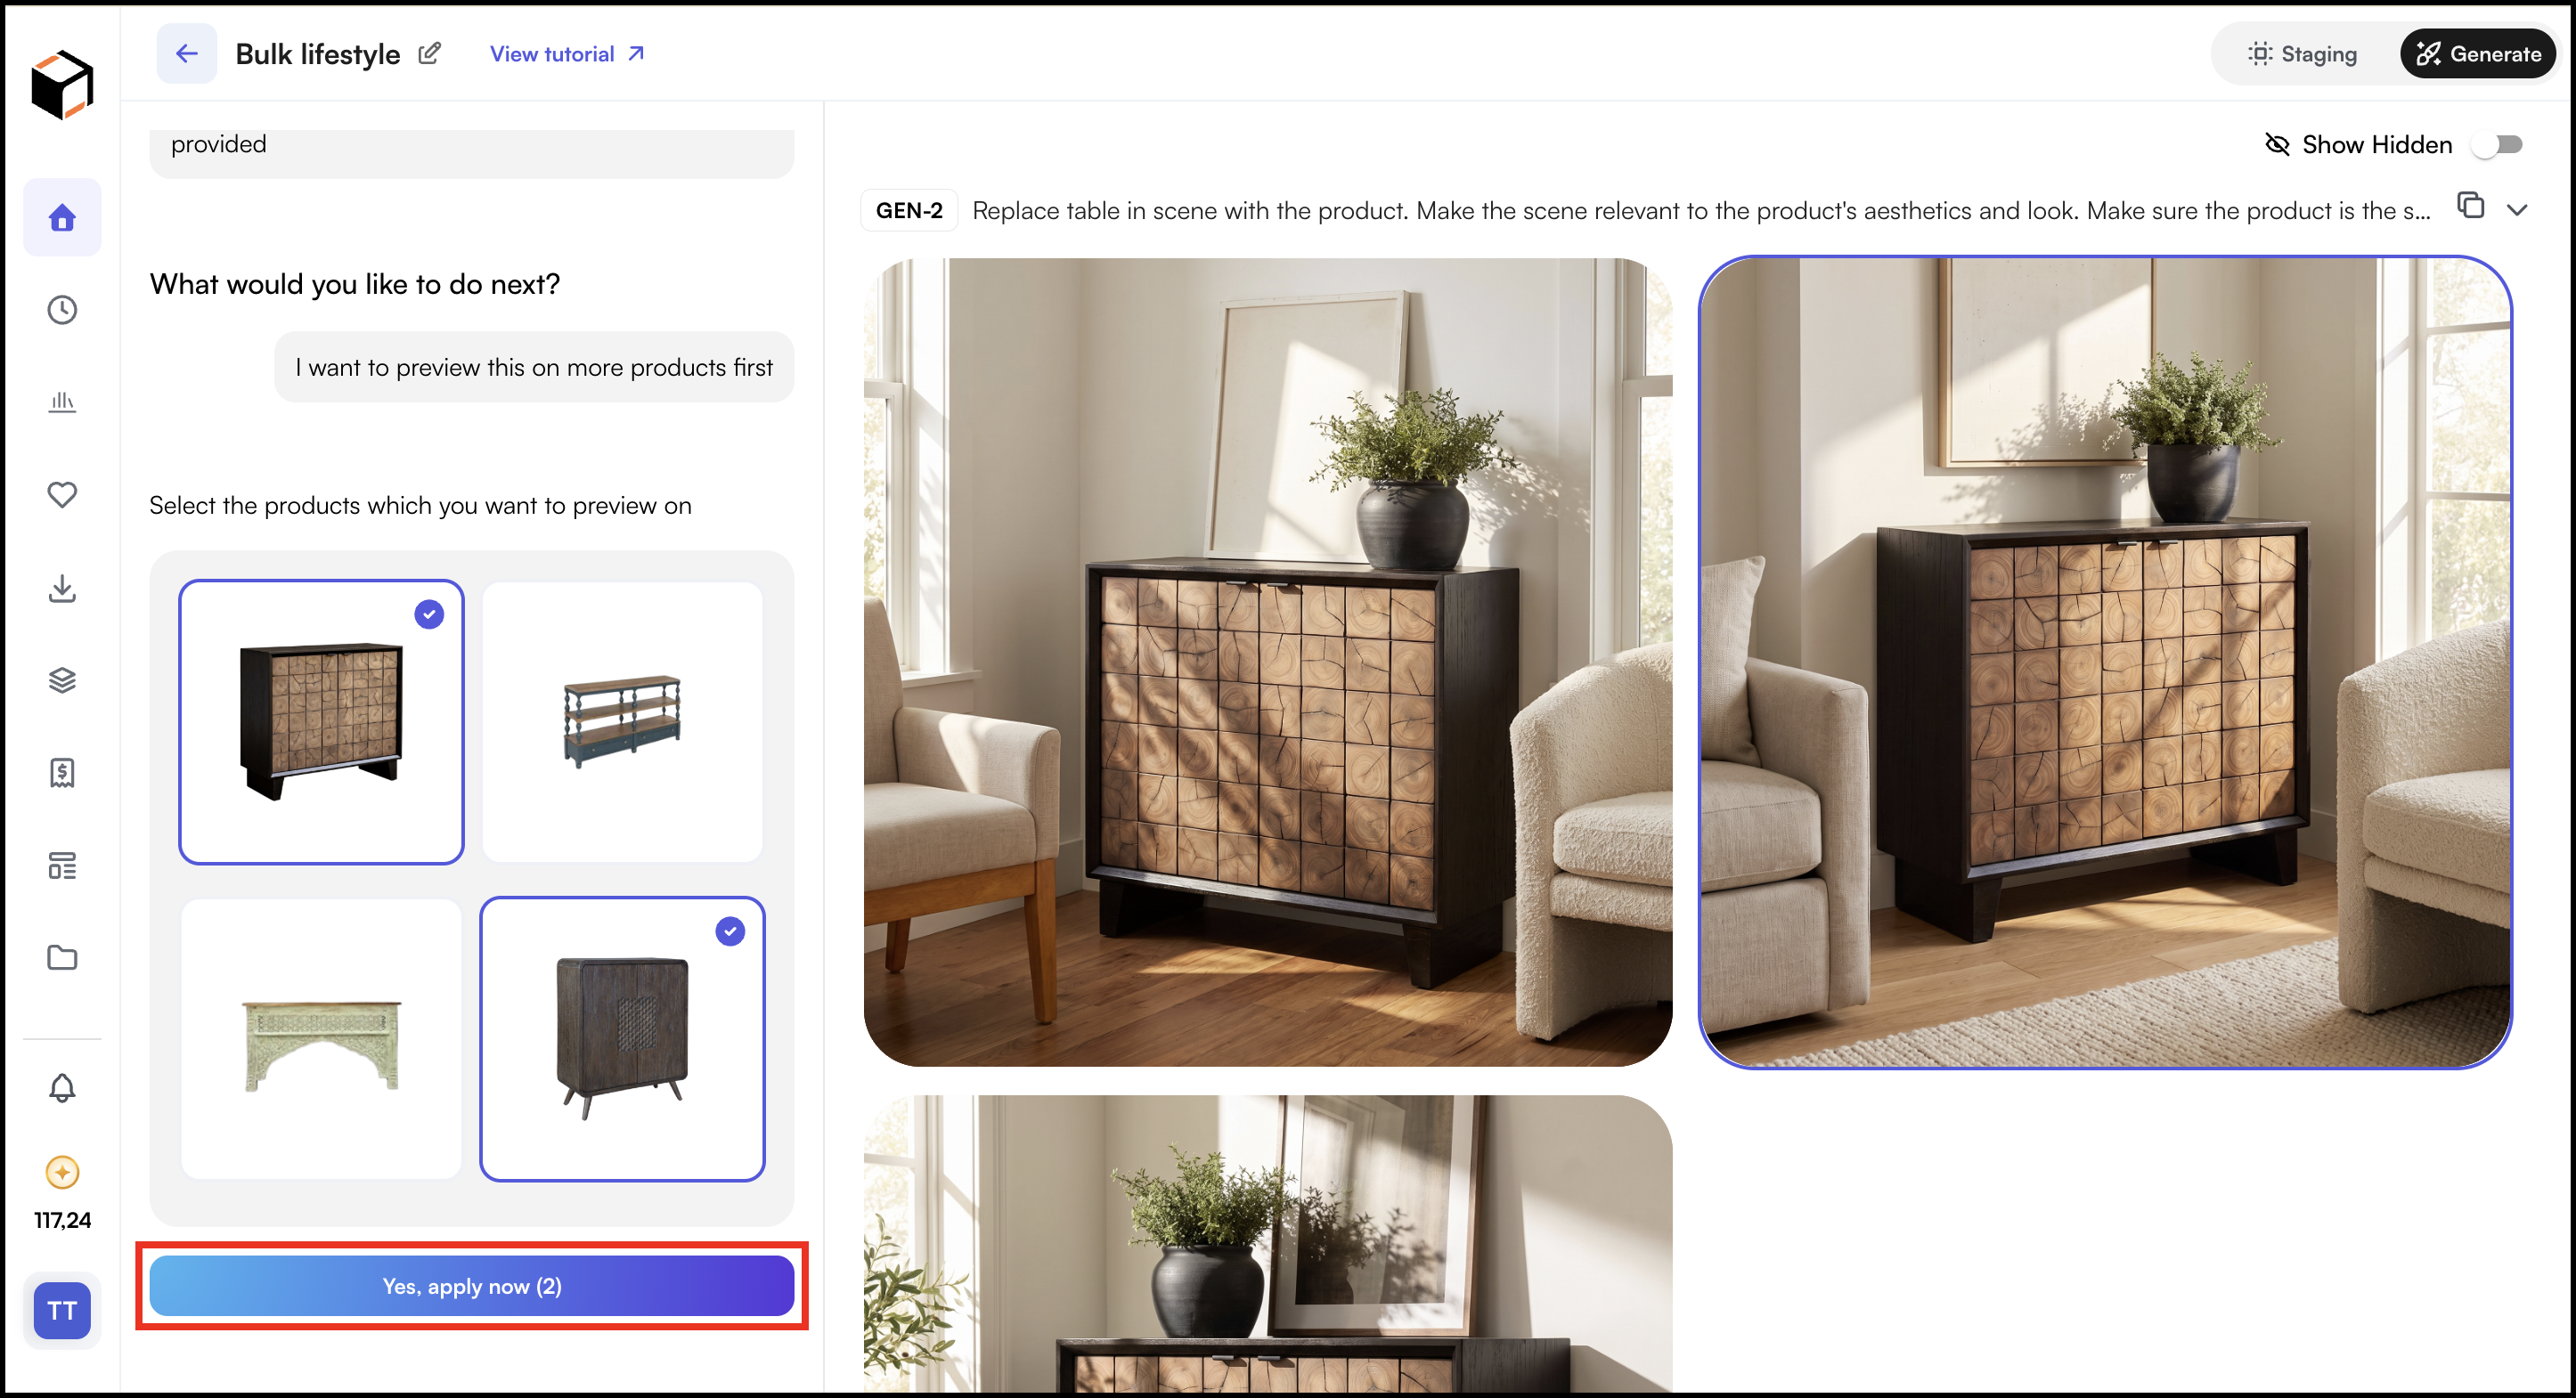
- Open the Preview tab to compare the new preview with your earlier ones. You can create multiple previews.
G. Apply to All Products
When you are happy with the previews, apply the look to the full batch. Before you do, check the crop and overall quality of the previews, including details like faces if your scene includes a model.
» Apply your preview settings to all products
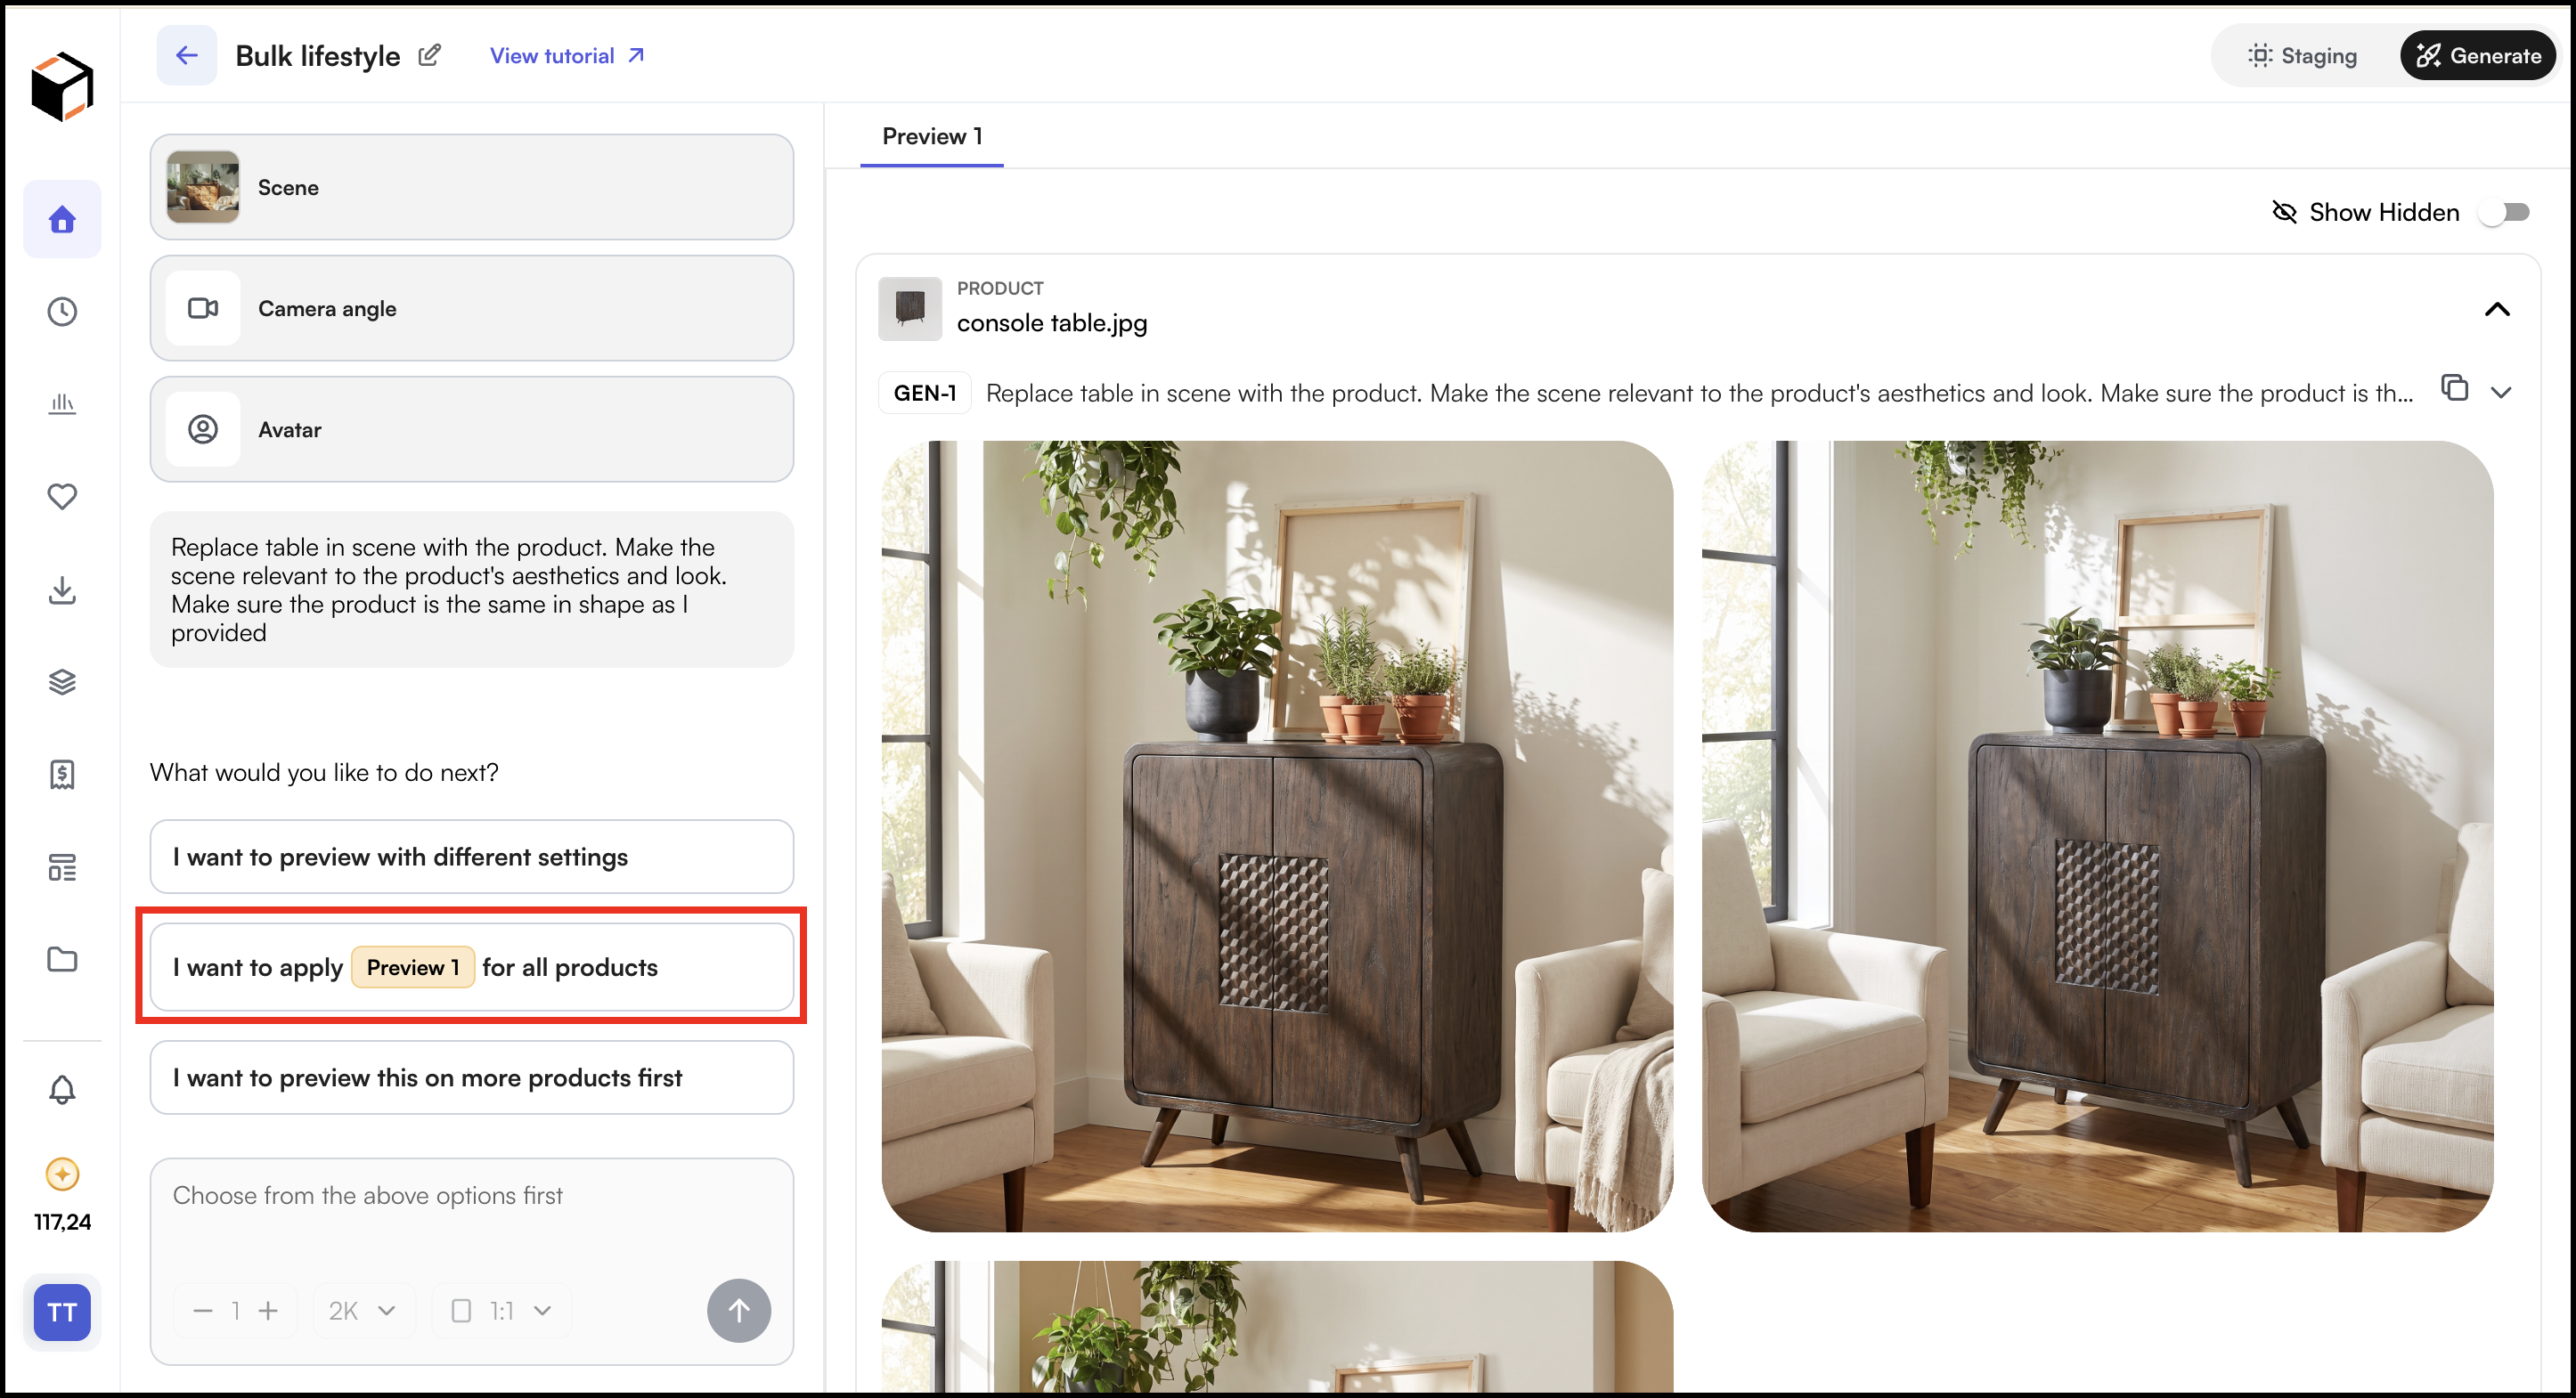
- If you like Preview 1 options then select I want to apply Preview 1 to all products.
- WizStudio exits the preview stage and starts generating images for every product using the same prompt and settings.
» Generate all products directly from one preview image
- Mark the preview image you want to use as Best.
- Choose the option to apply it to all products.
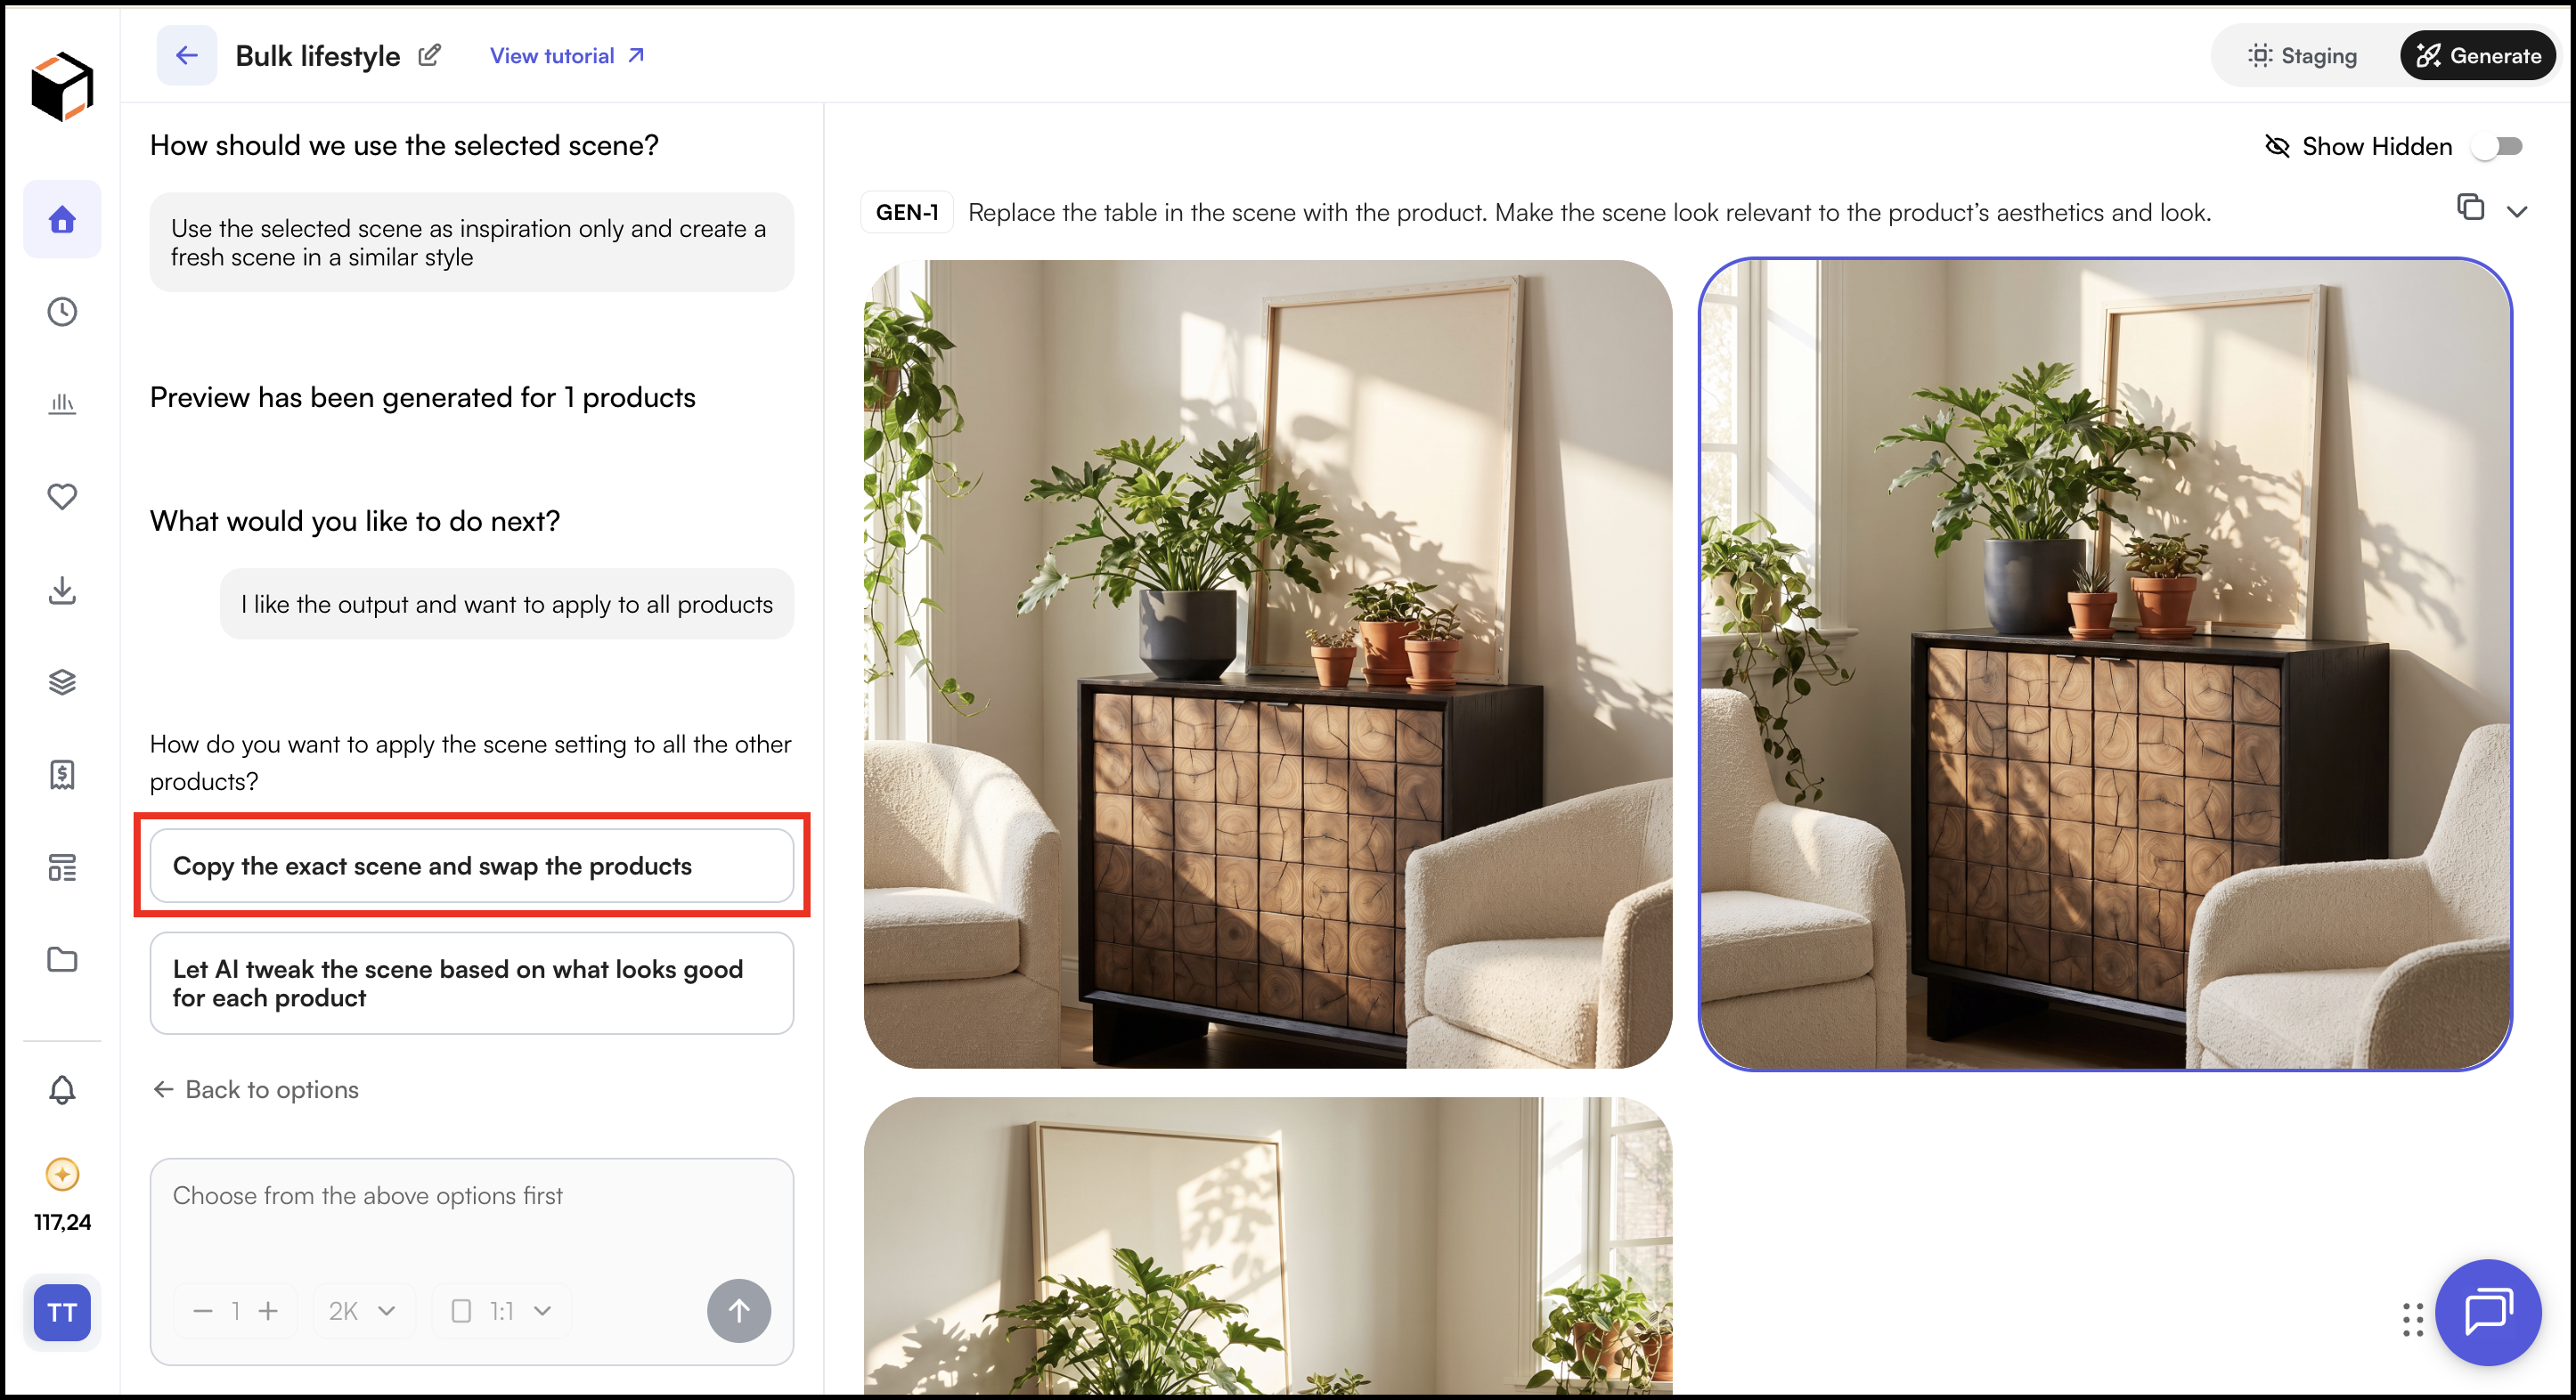
- Select how the scene should be applied:
- Copy exact scene and swap products: Keeps the same scene and layout, and swaps in each product. Best when you want every product shown in an identical setup.
- Let AI create the scene: Uses the selected image as a direction and adjusts the scene to suit each product. Best when you want some variety while keeping a consistent look.
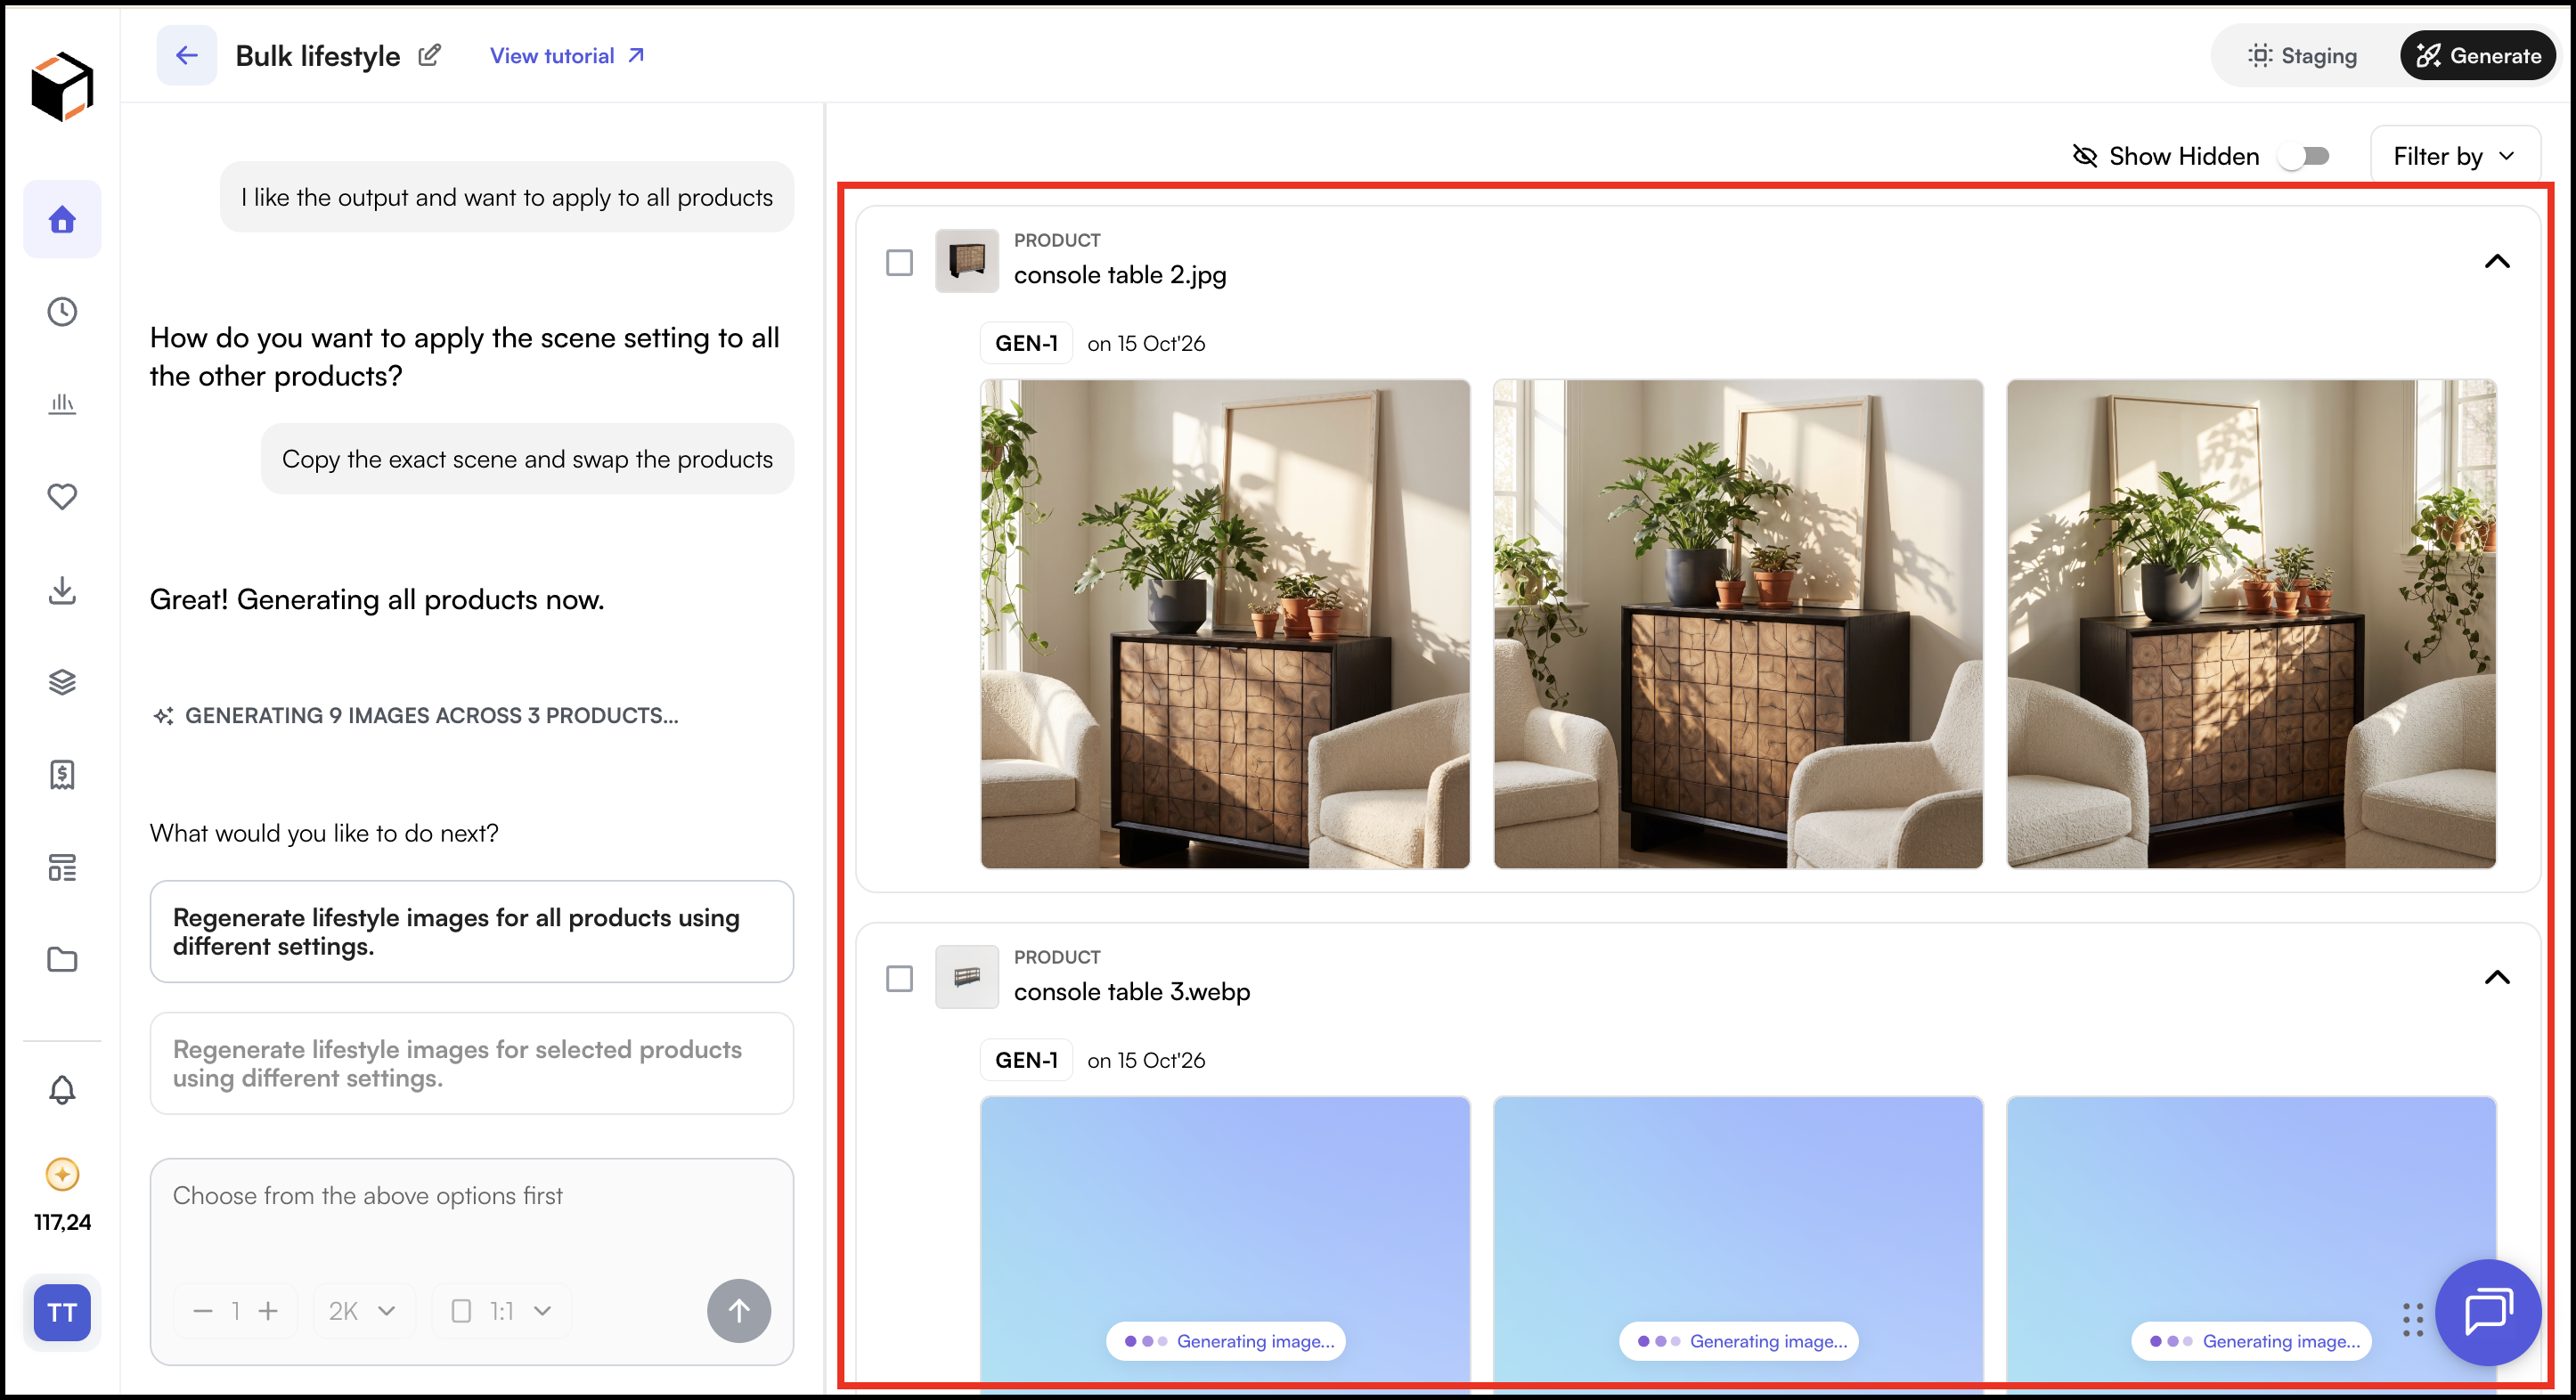
- Select one to start bulk generation for all the products.
- You can track progress in the product list. Products still being processed show a generating status.
H. Review Results and Make Edits
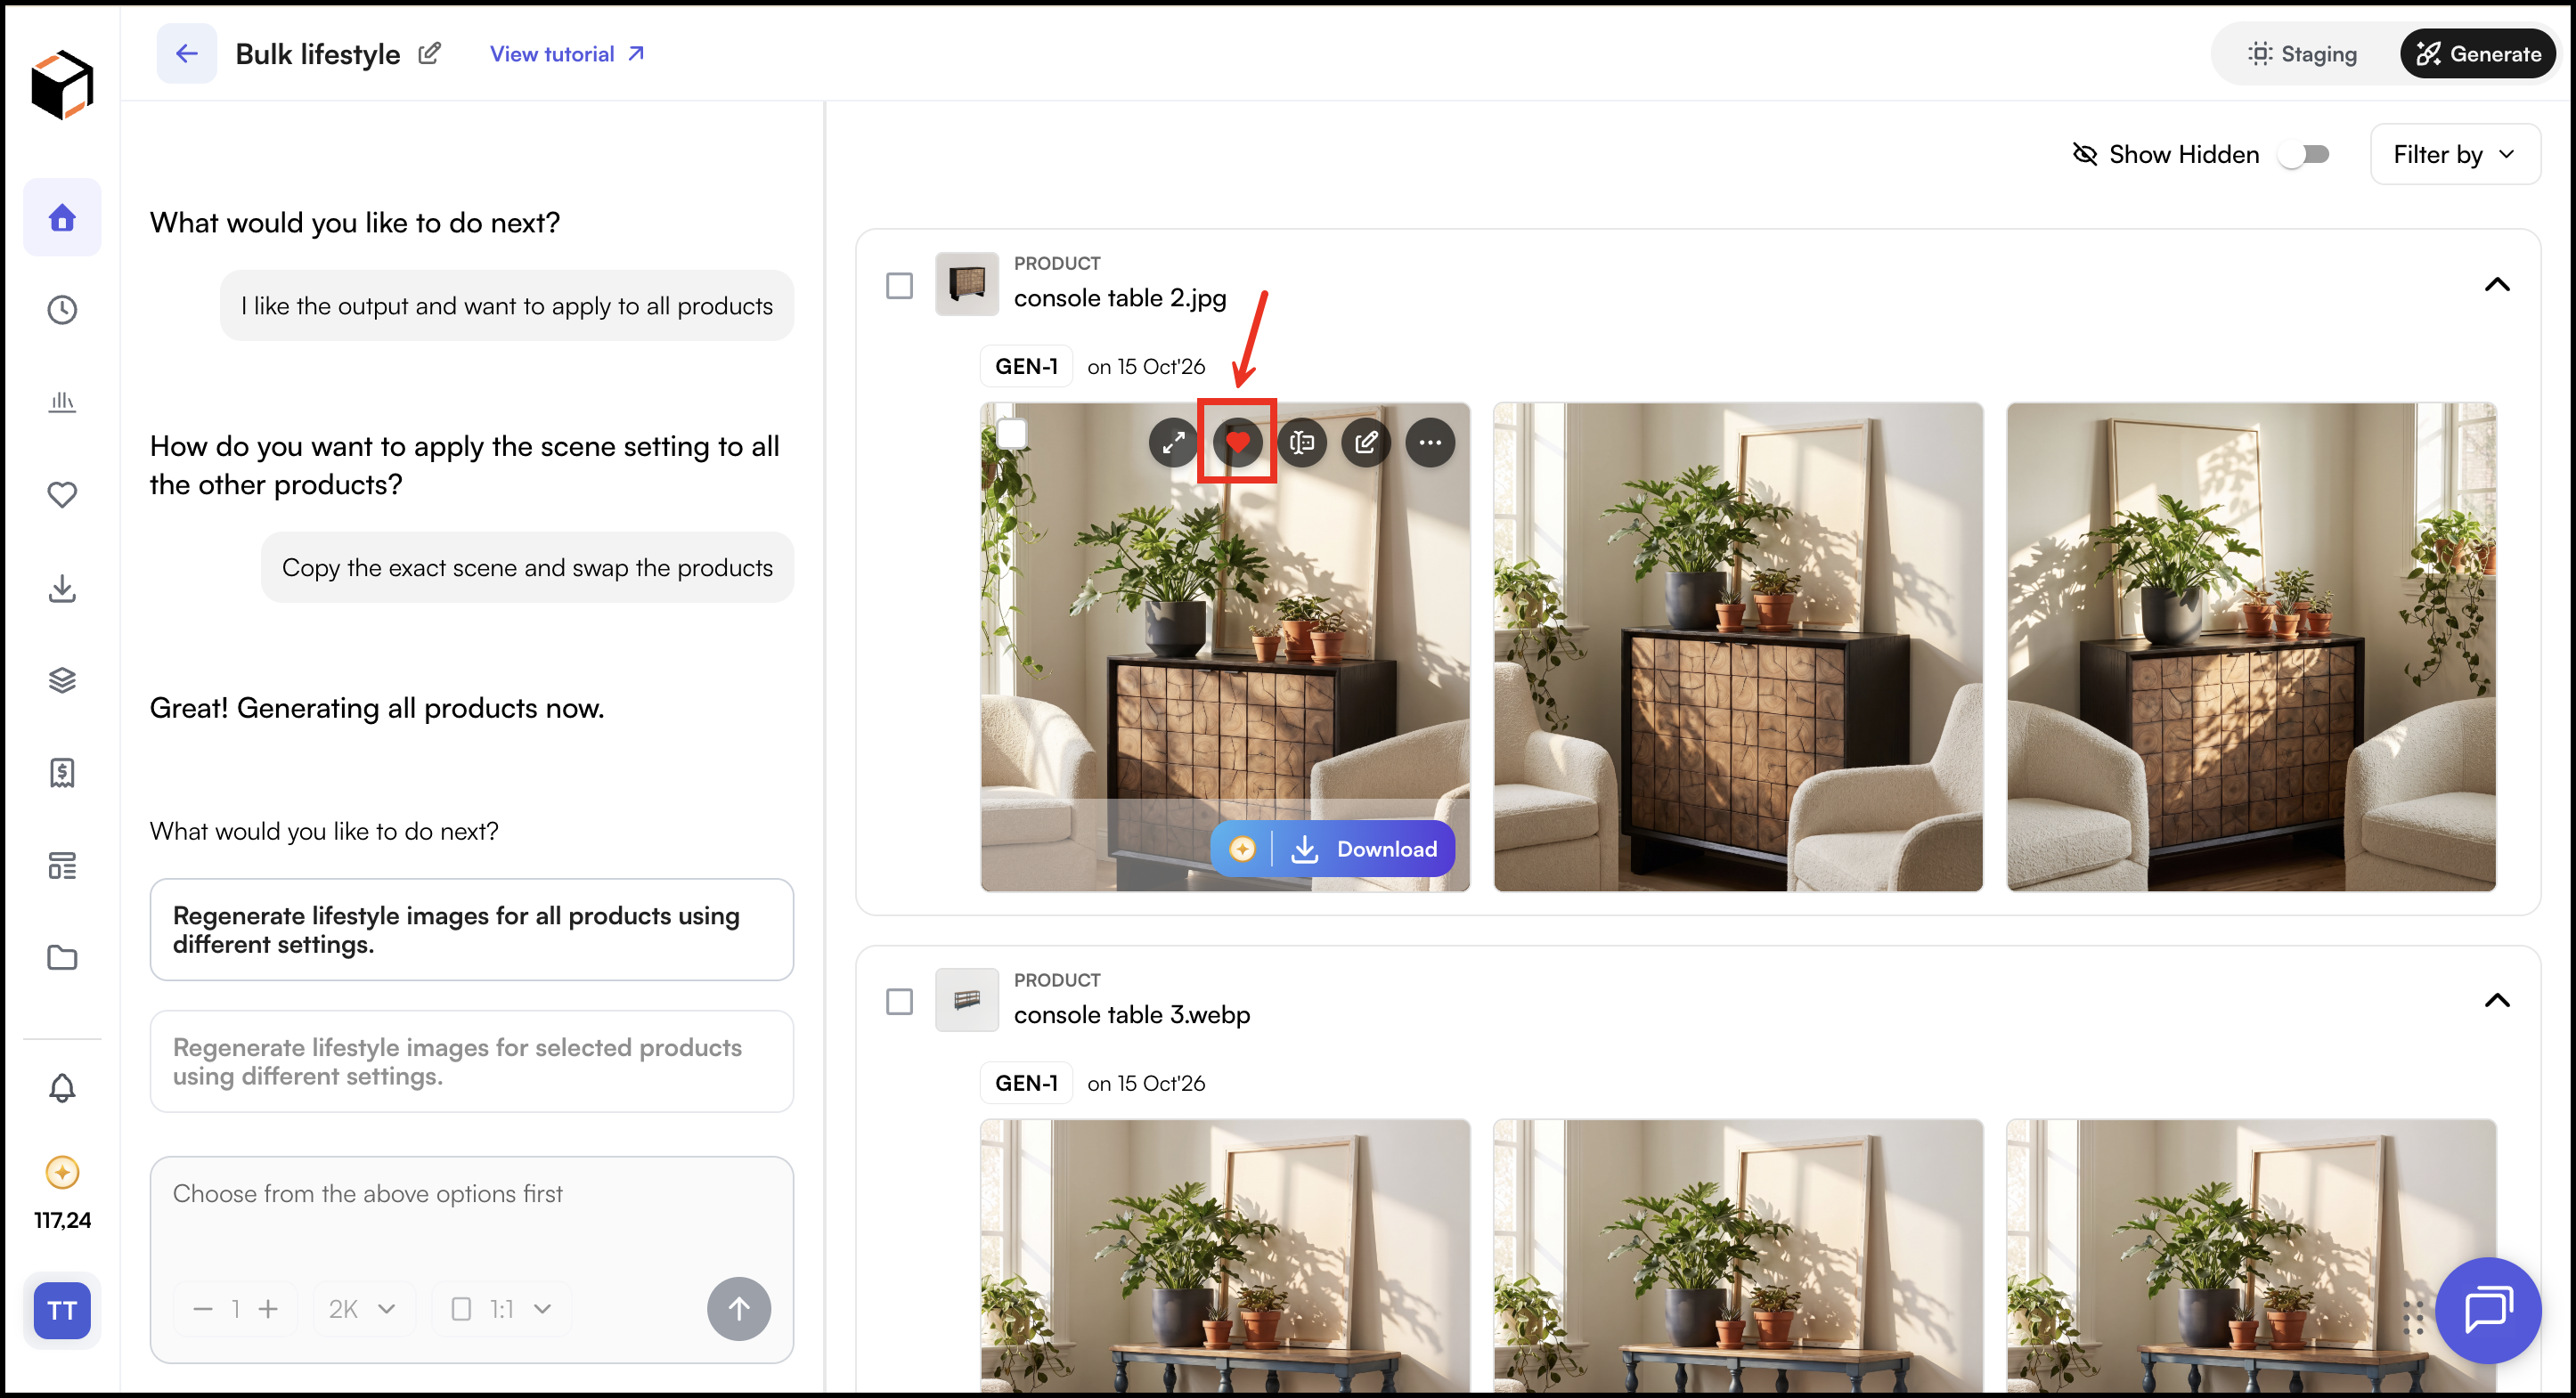
- Review the images for each product and click the Favorite icon on the ones you want to keep. You can favorite more than one image per product.
- If none of a product’s images work, leave it without a favorite.
- Use the filter option (for example, Products - Without Favorites) to see only the products that still need attention.
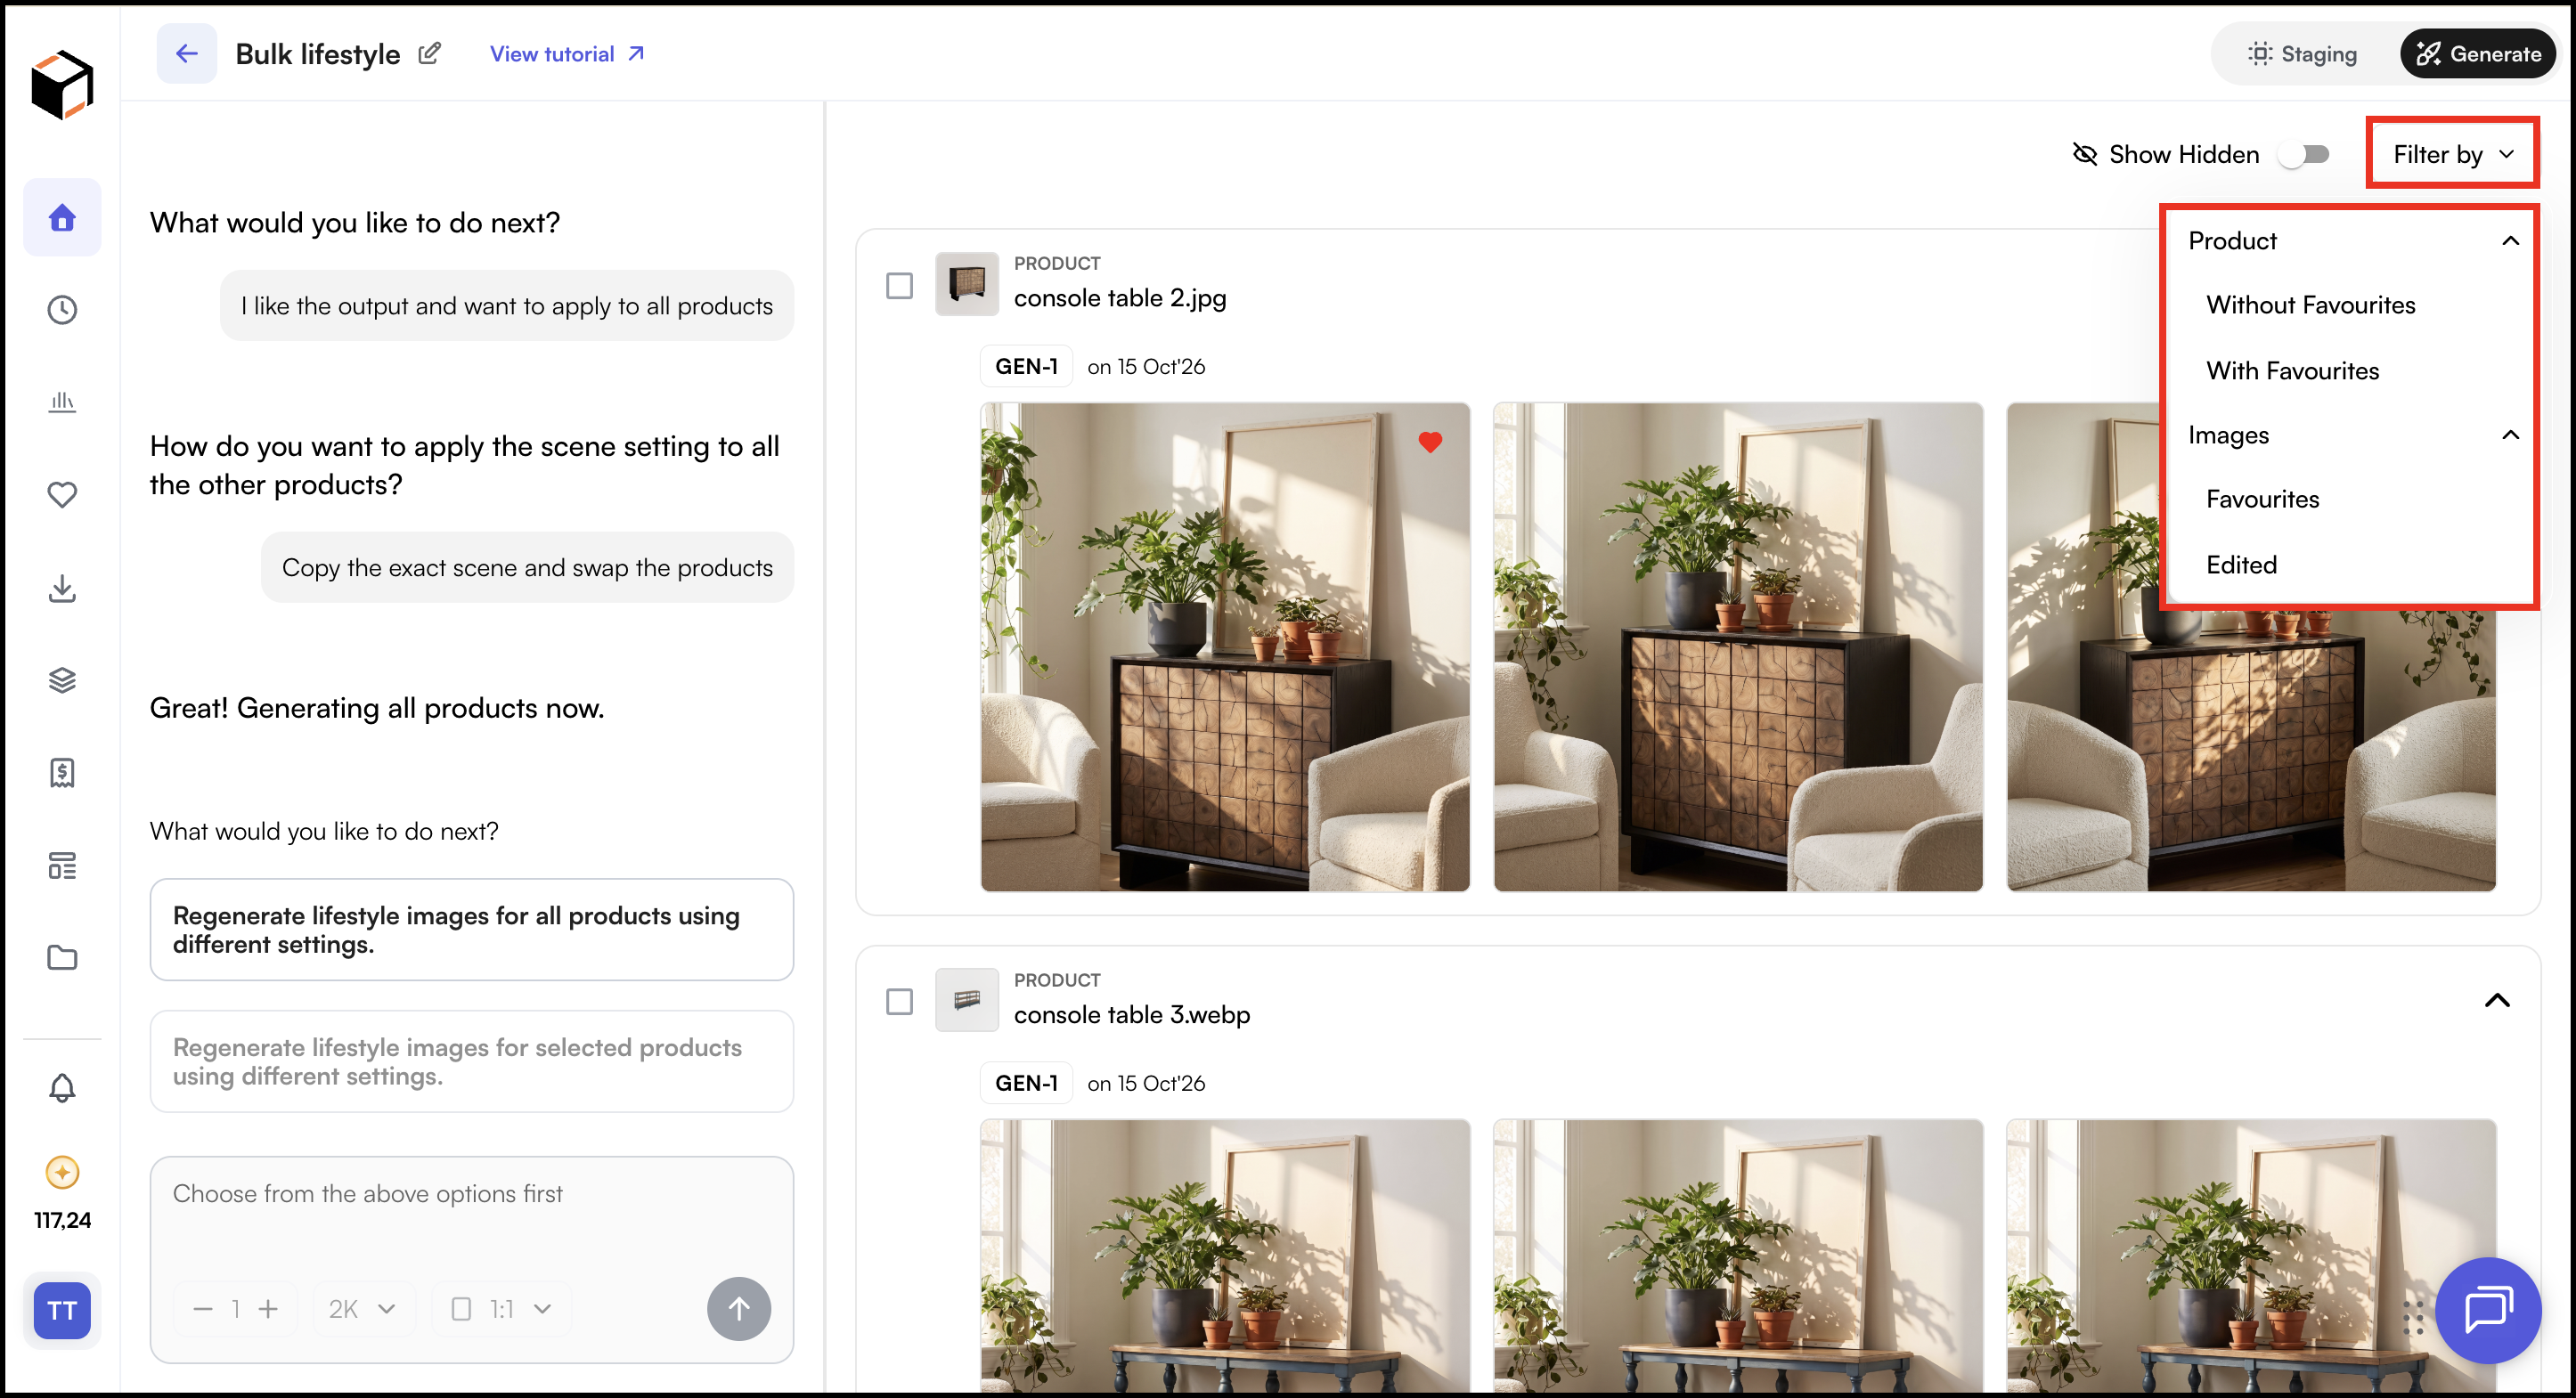
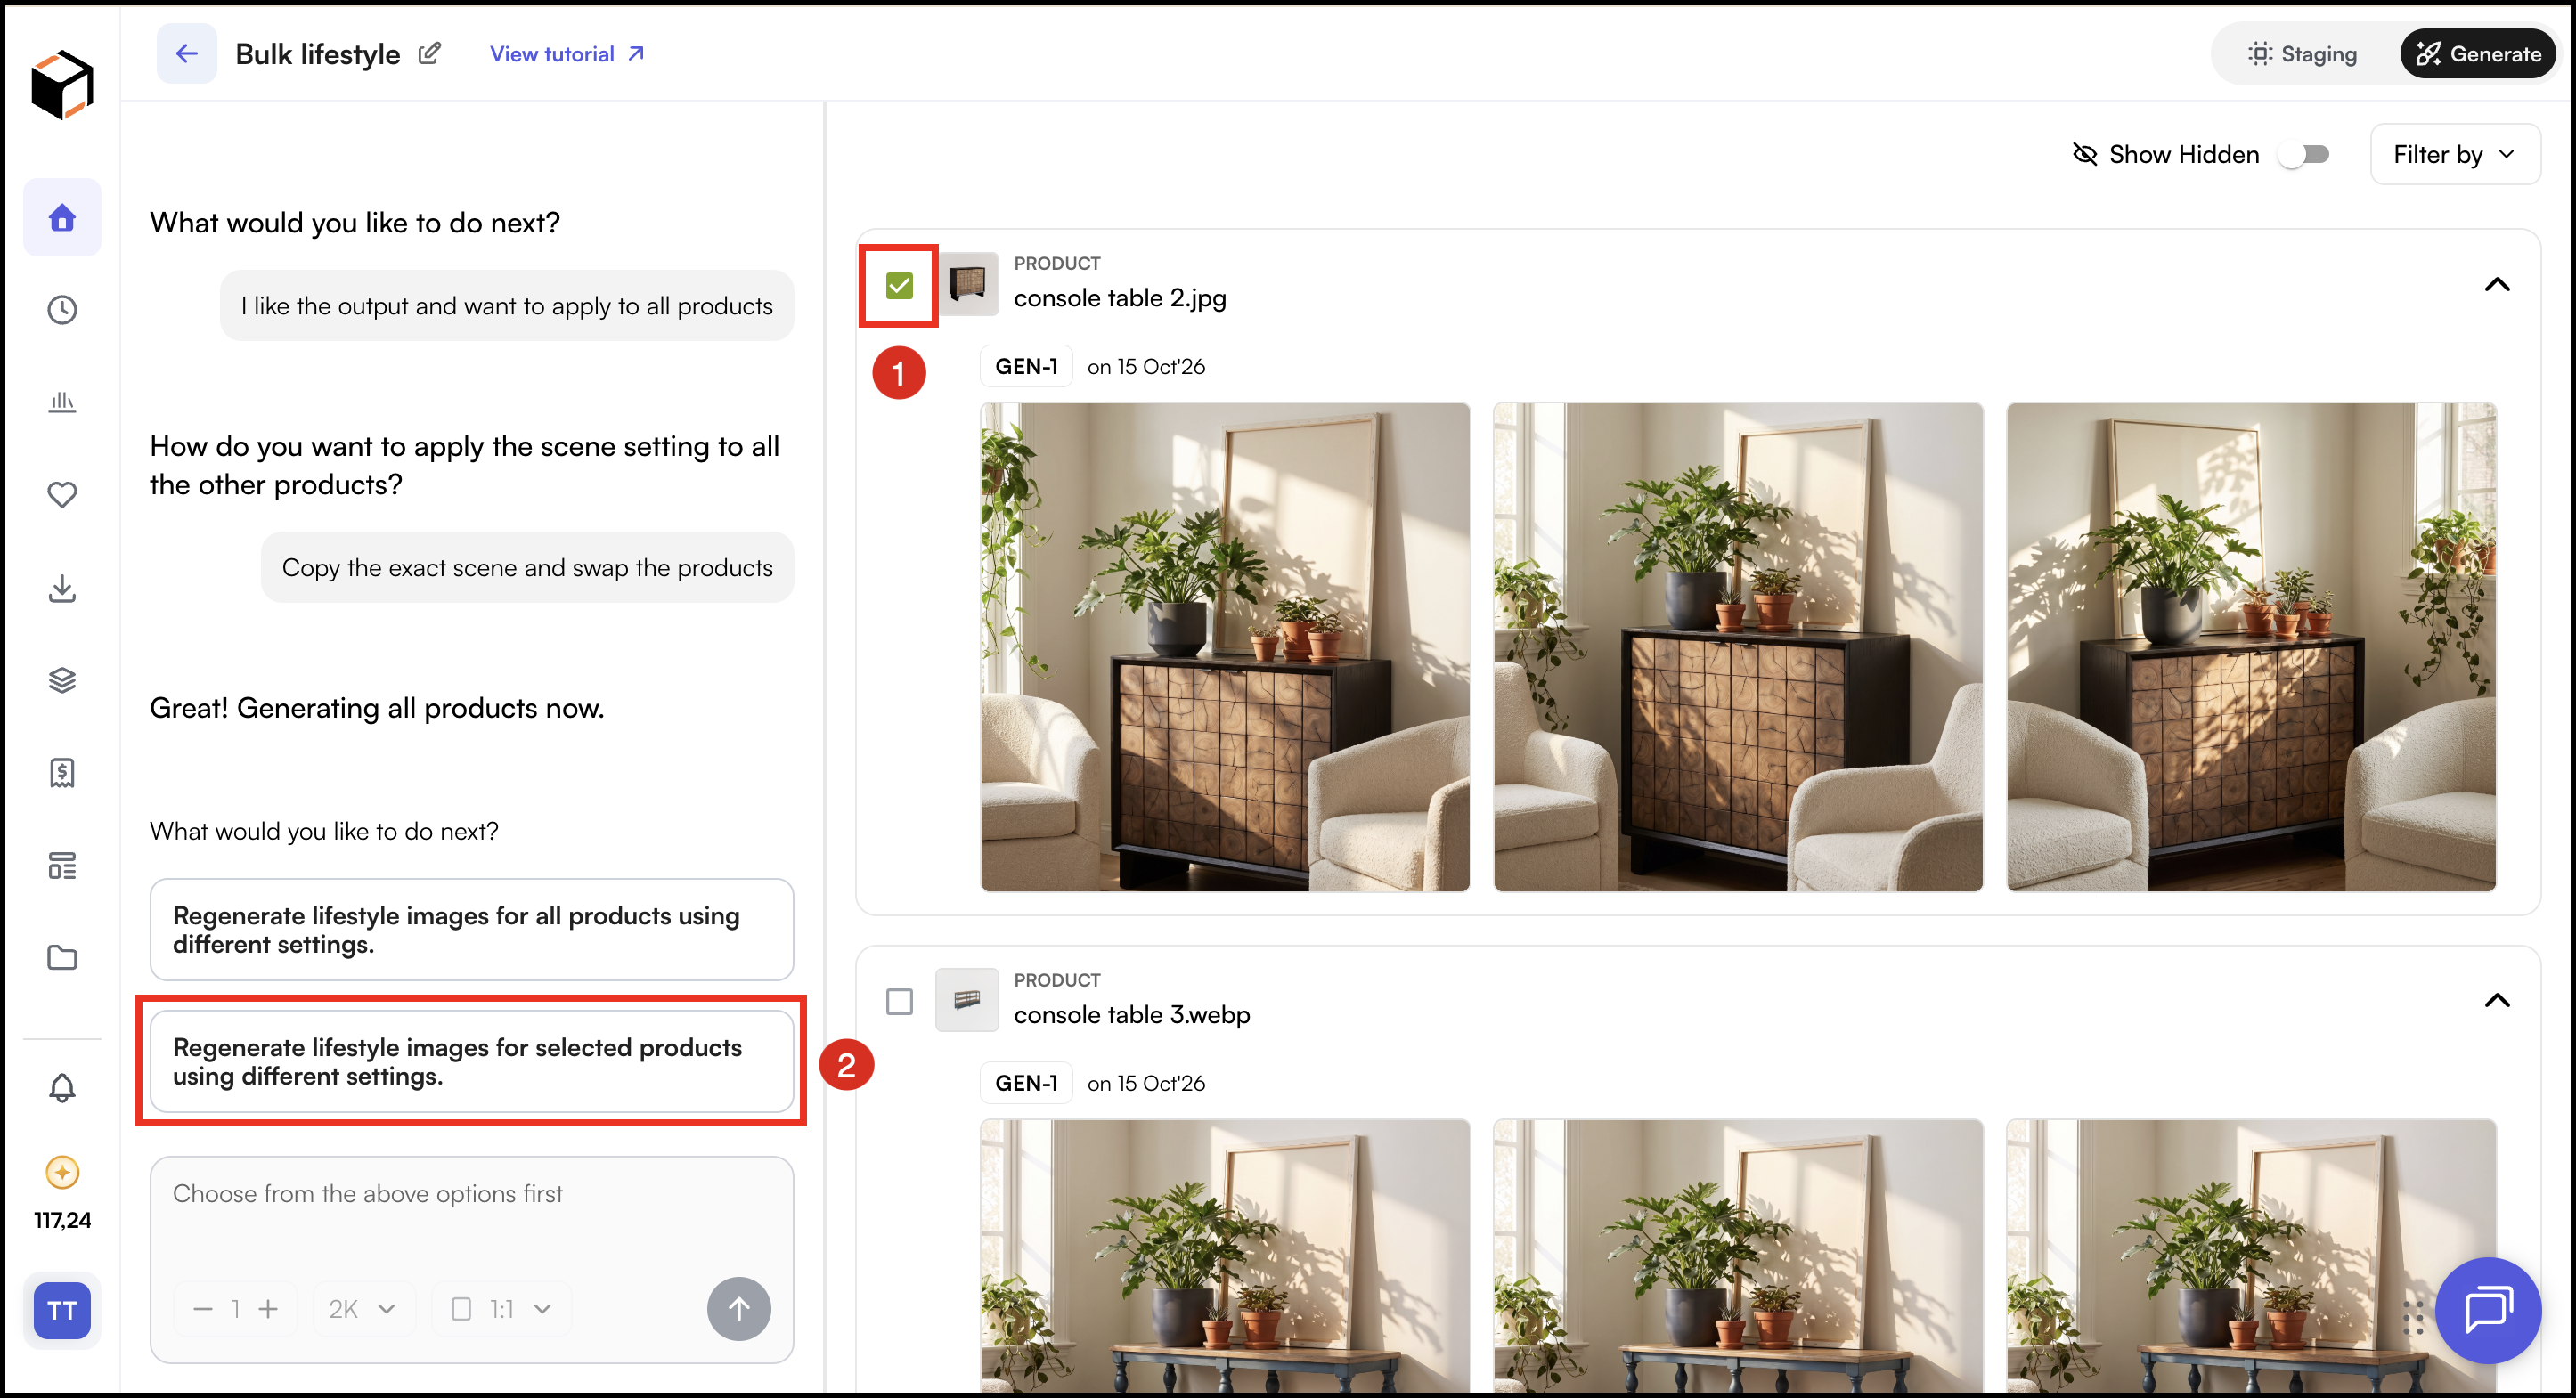
» Regenerate the scene for one product
- Select the product.
- Choose the option to regenerate the scene.
- Update the prompt and, if needed, choose a different scene.
- You can also change the scene, camera angle, and avatar if required.
- Confirm to generate new images for that product only. The rest of the batch is not affected.
» Make a small change to an image you like
- Choose the option to edit the image.
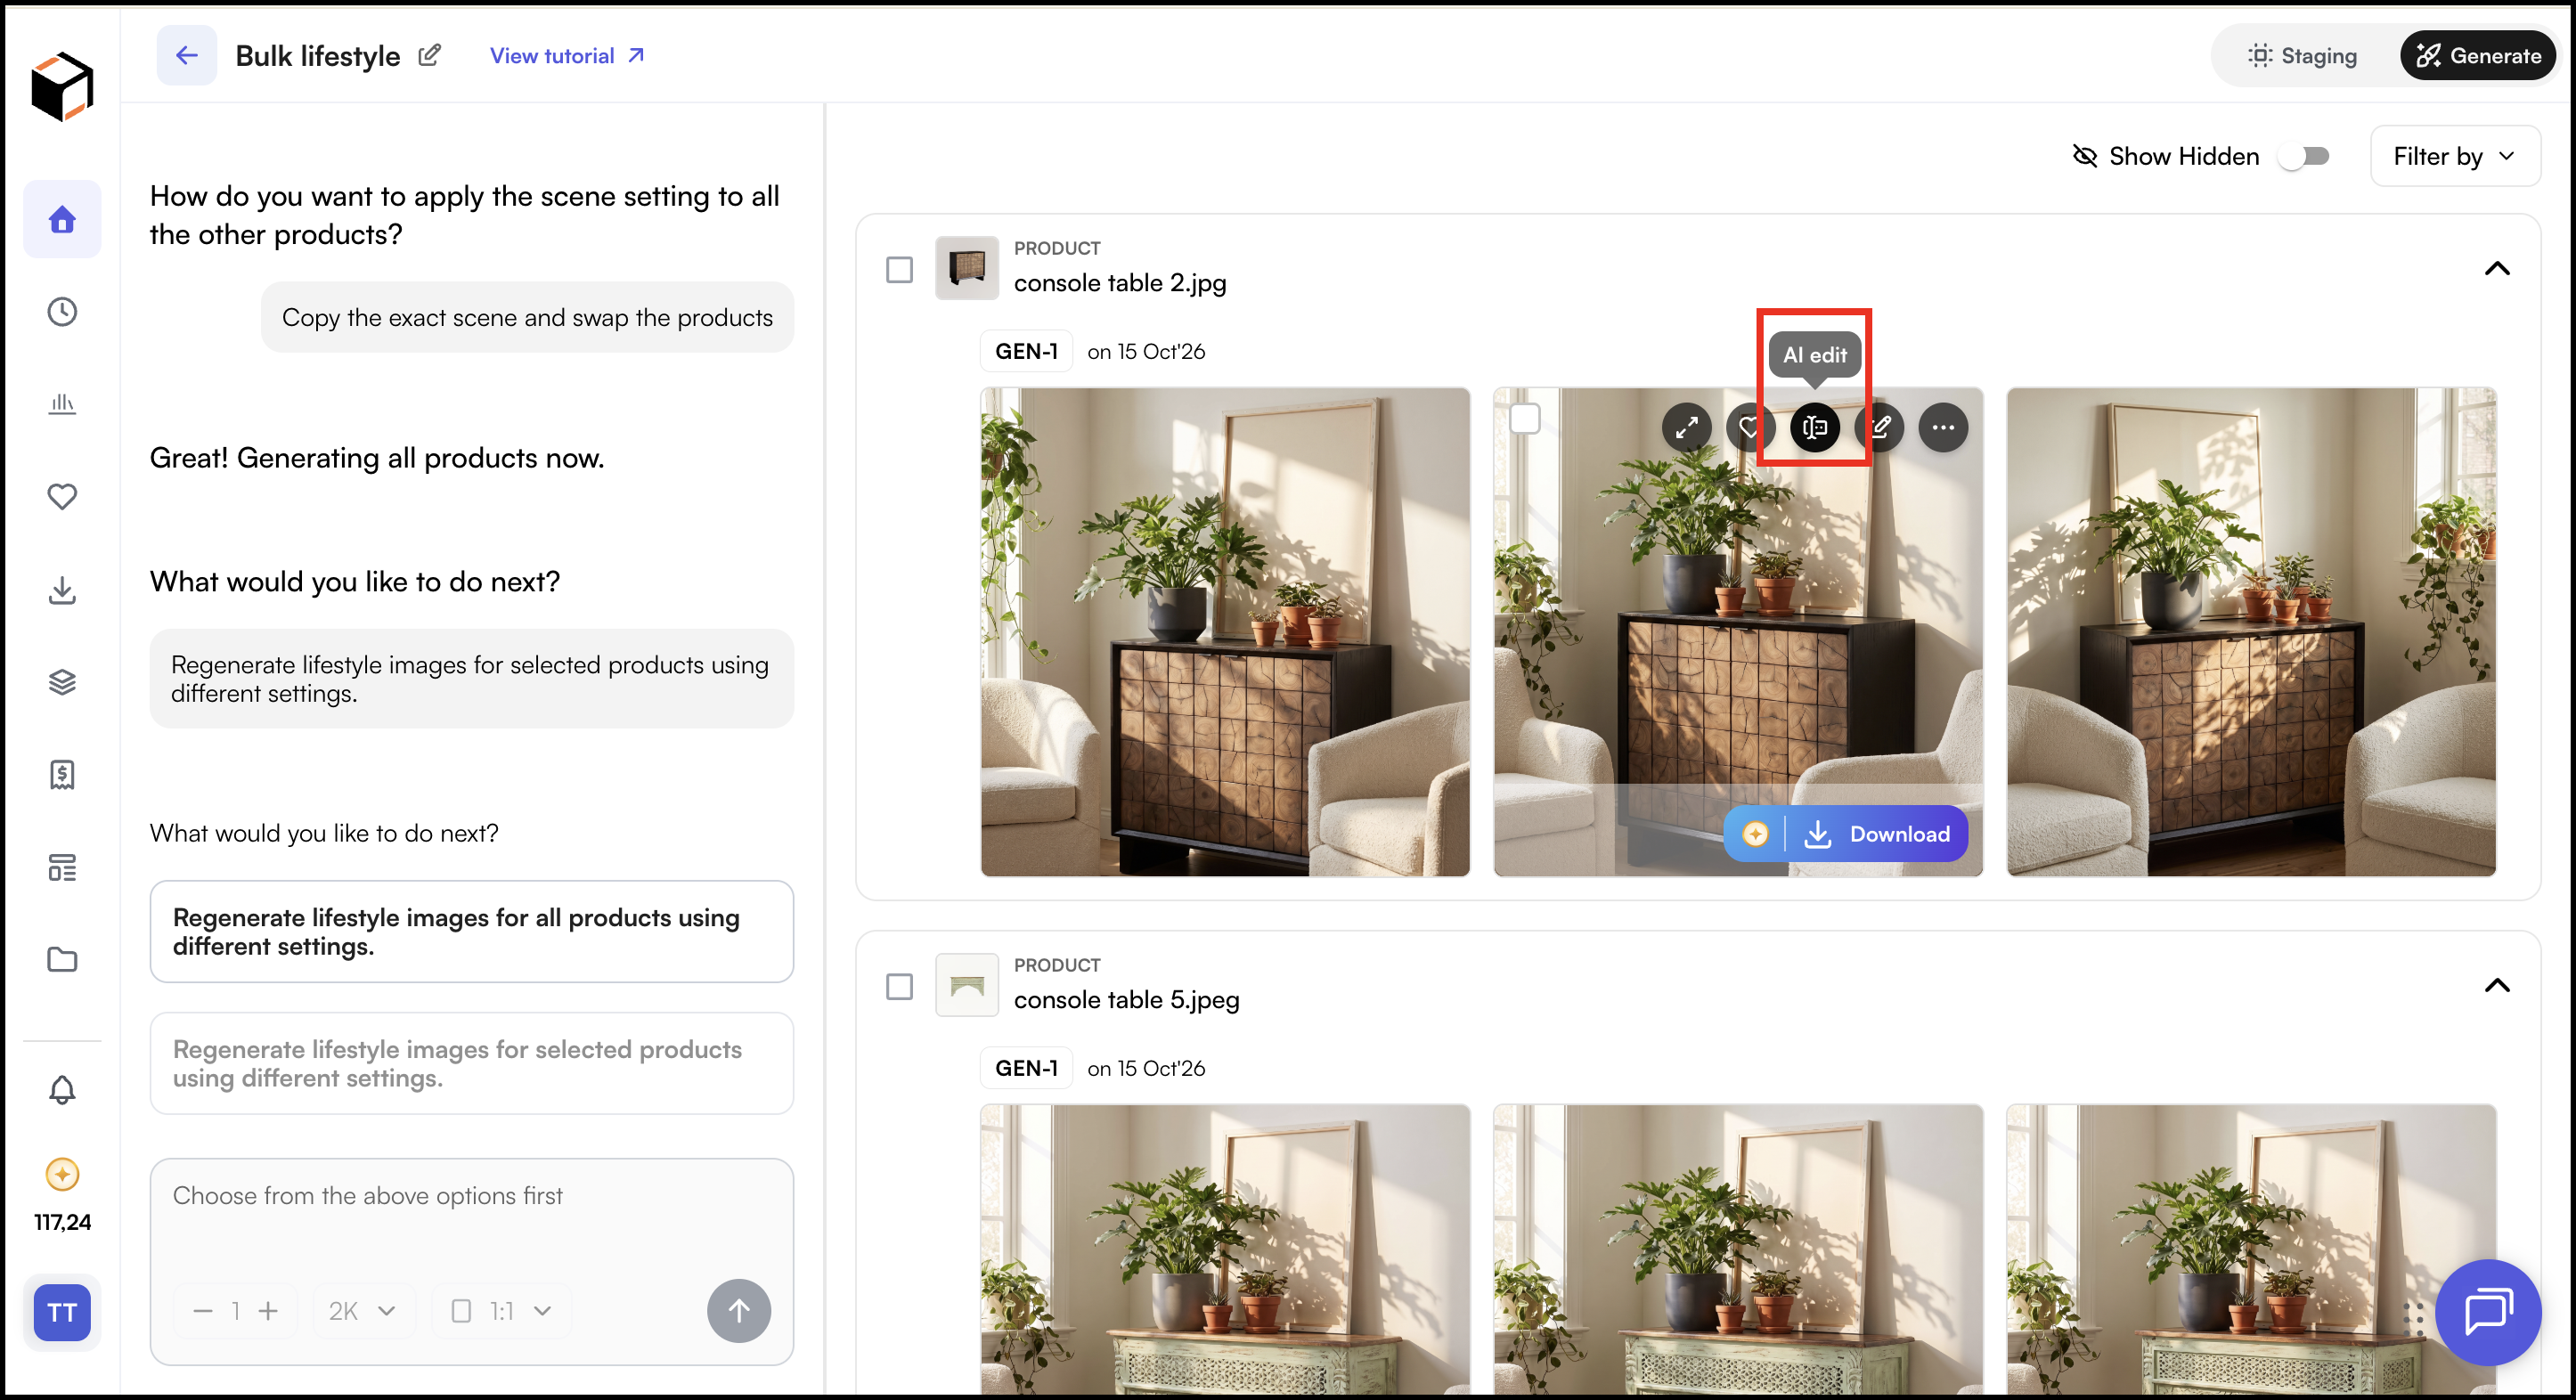
- Describe the change, for example, “Remove the plant from the window.”
- Run the edit to create the updated version.
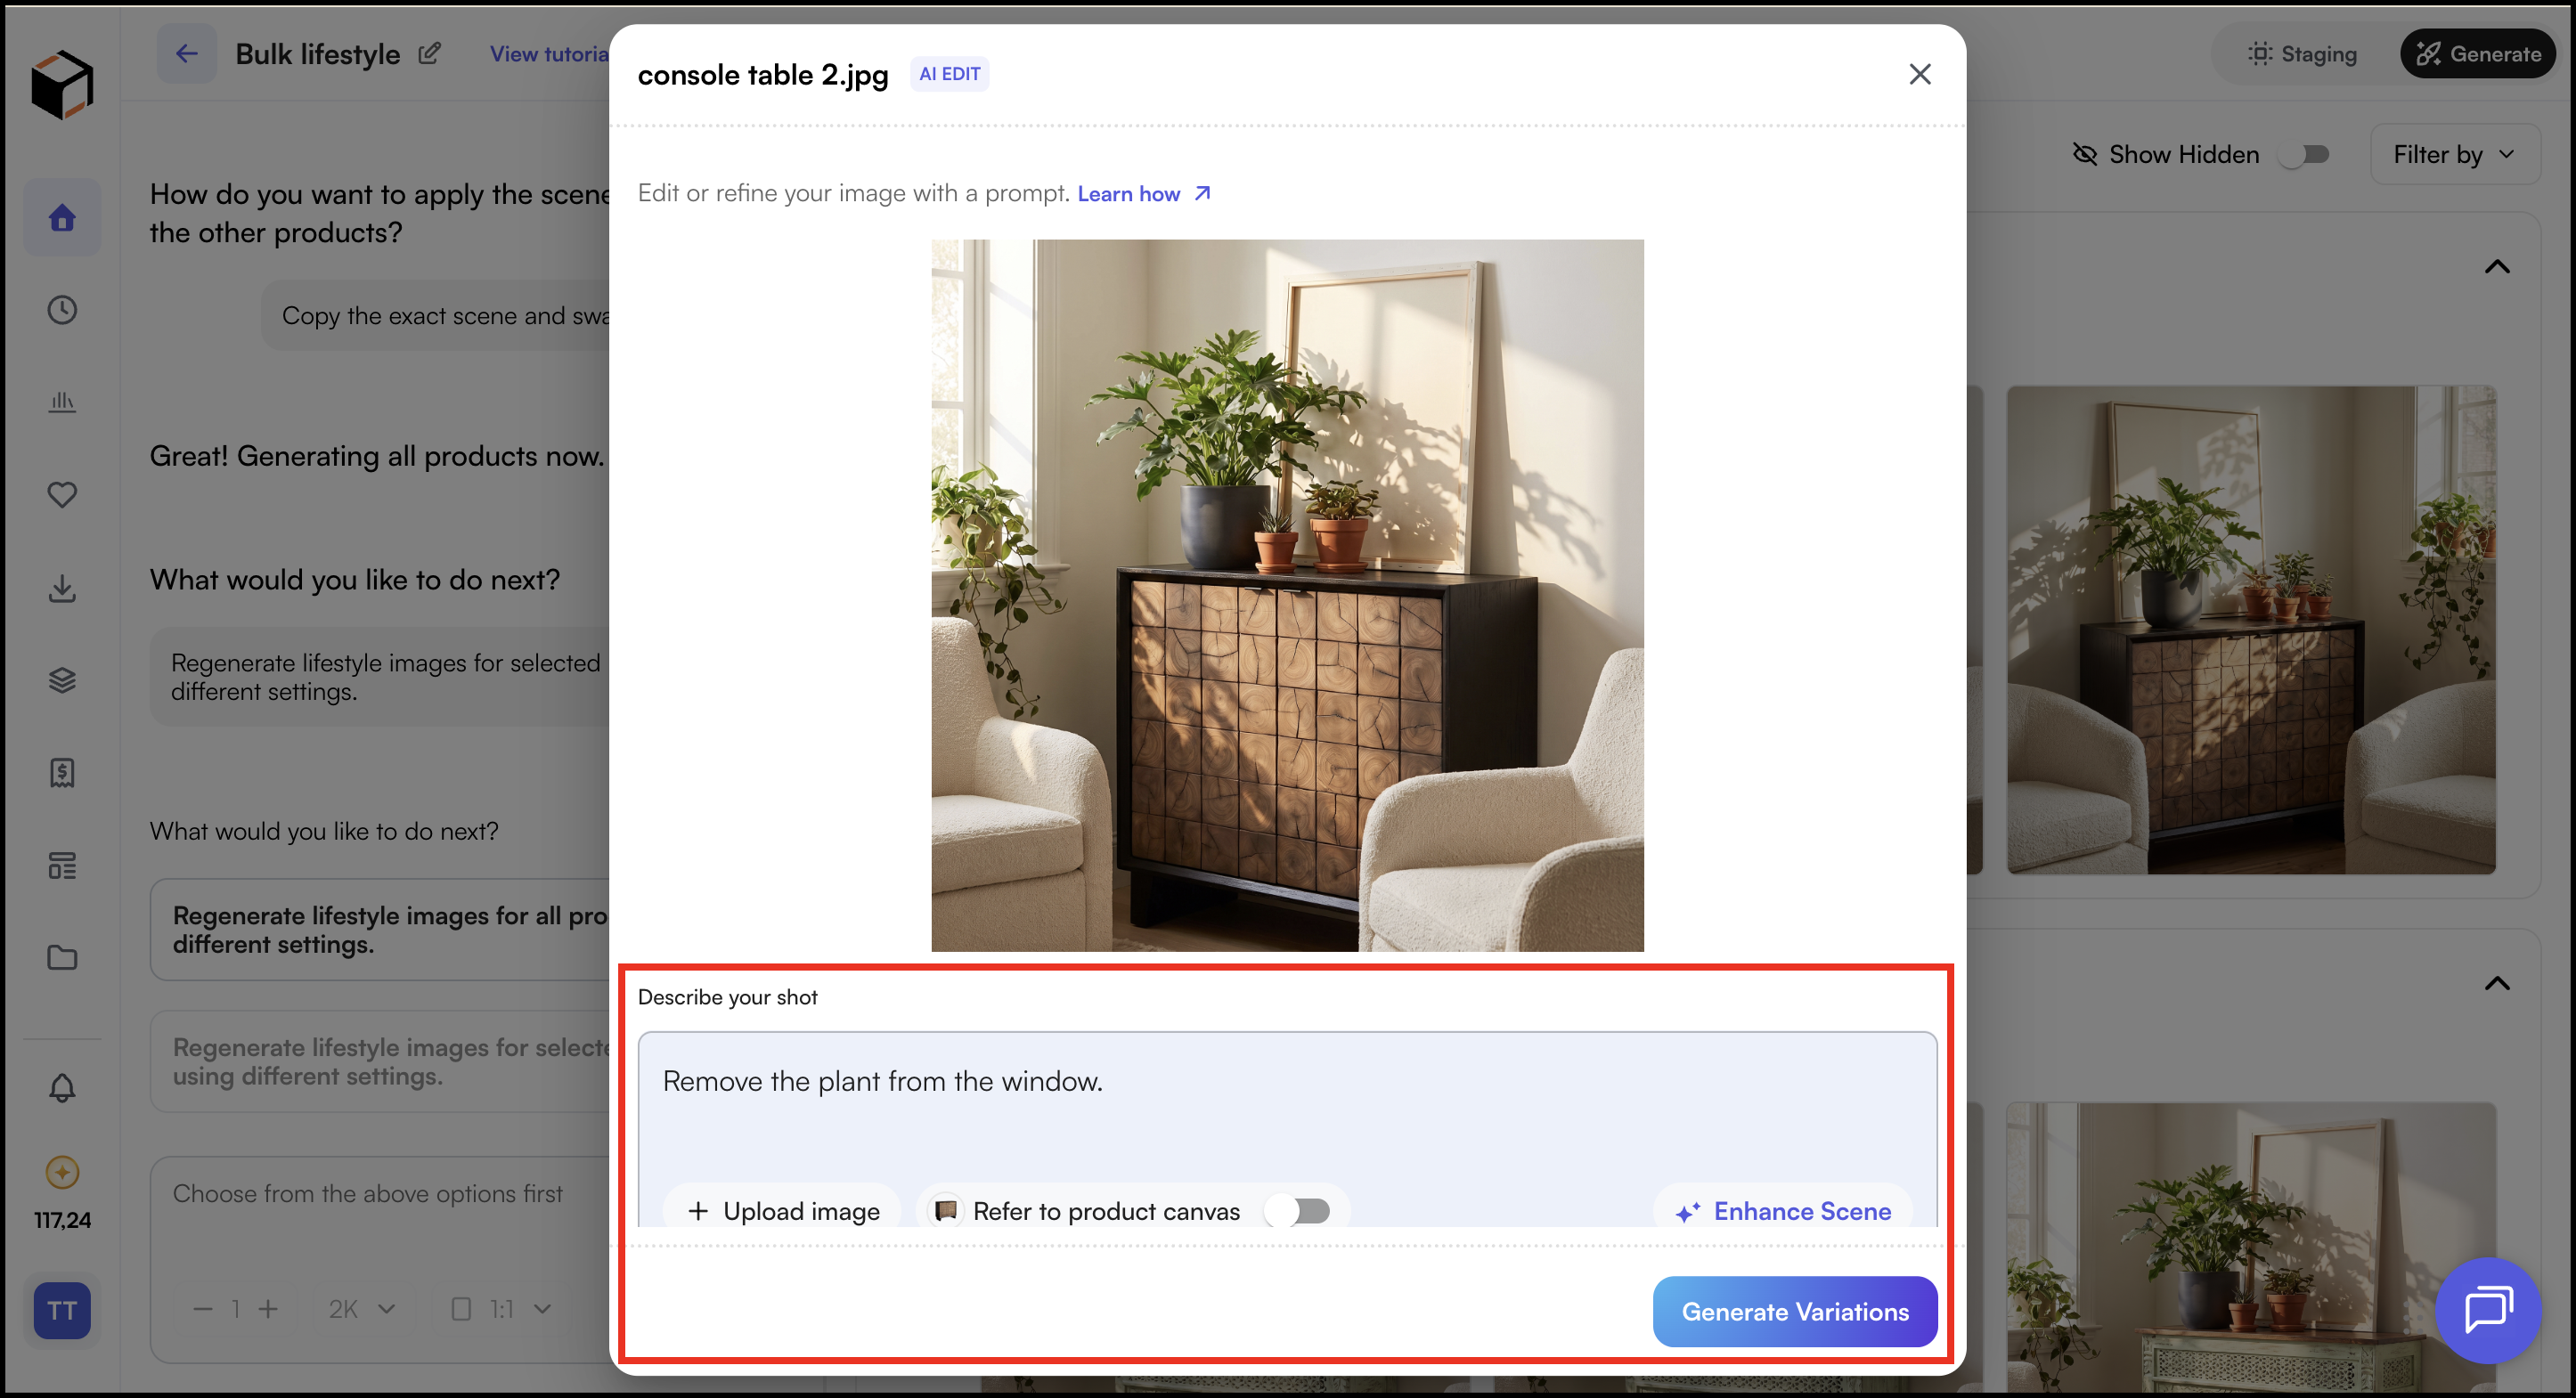
Note: You can edit existing images while other products are still generating. Edits are charged as per your plan. See Credits and Charges.
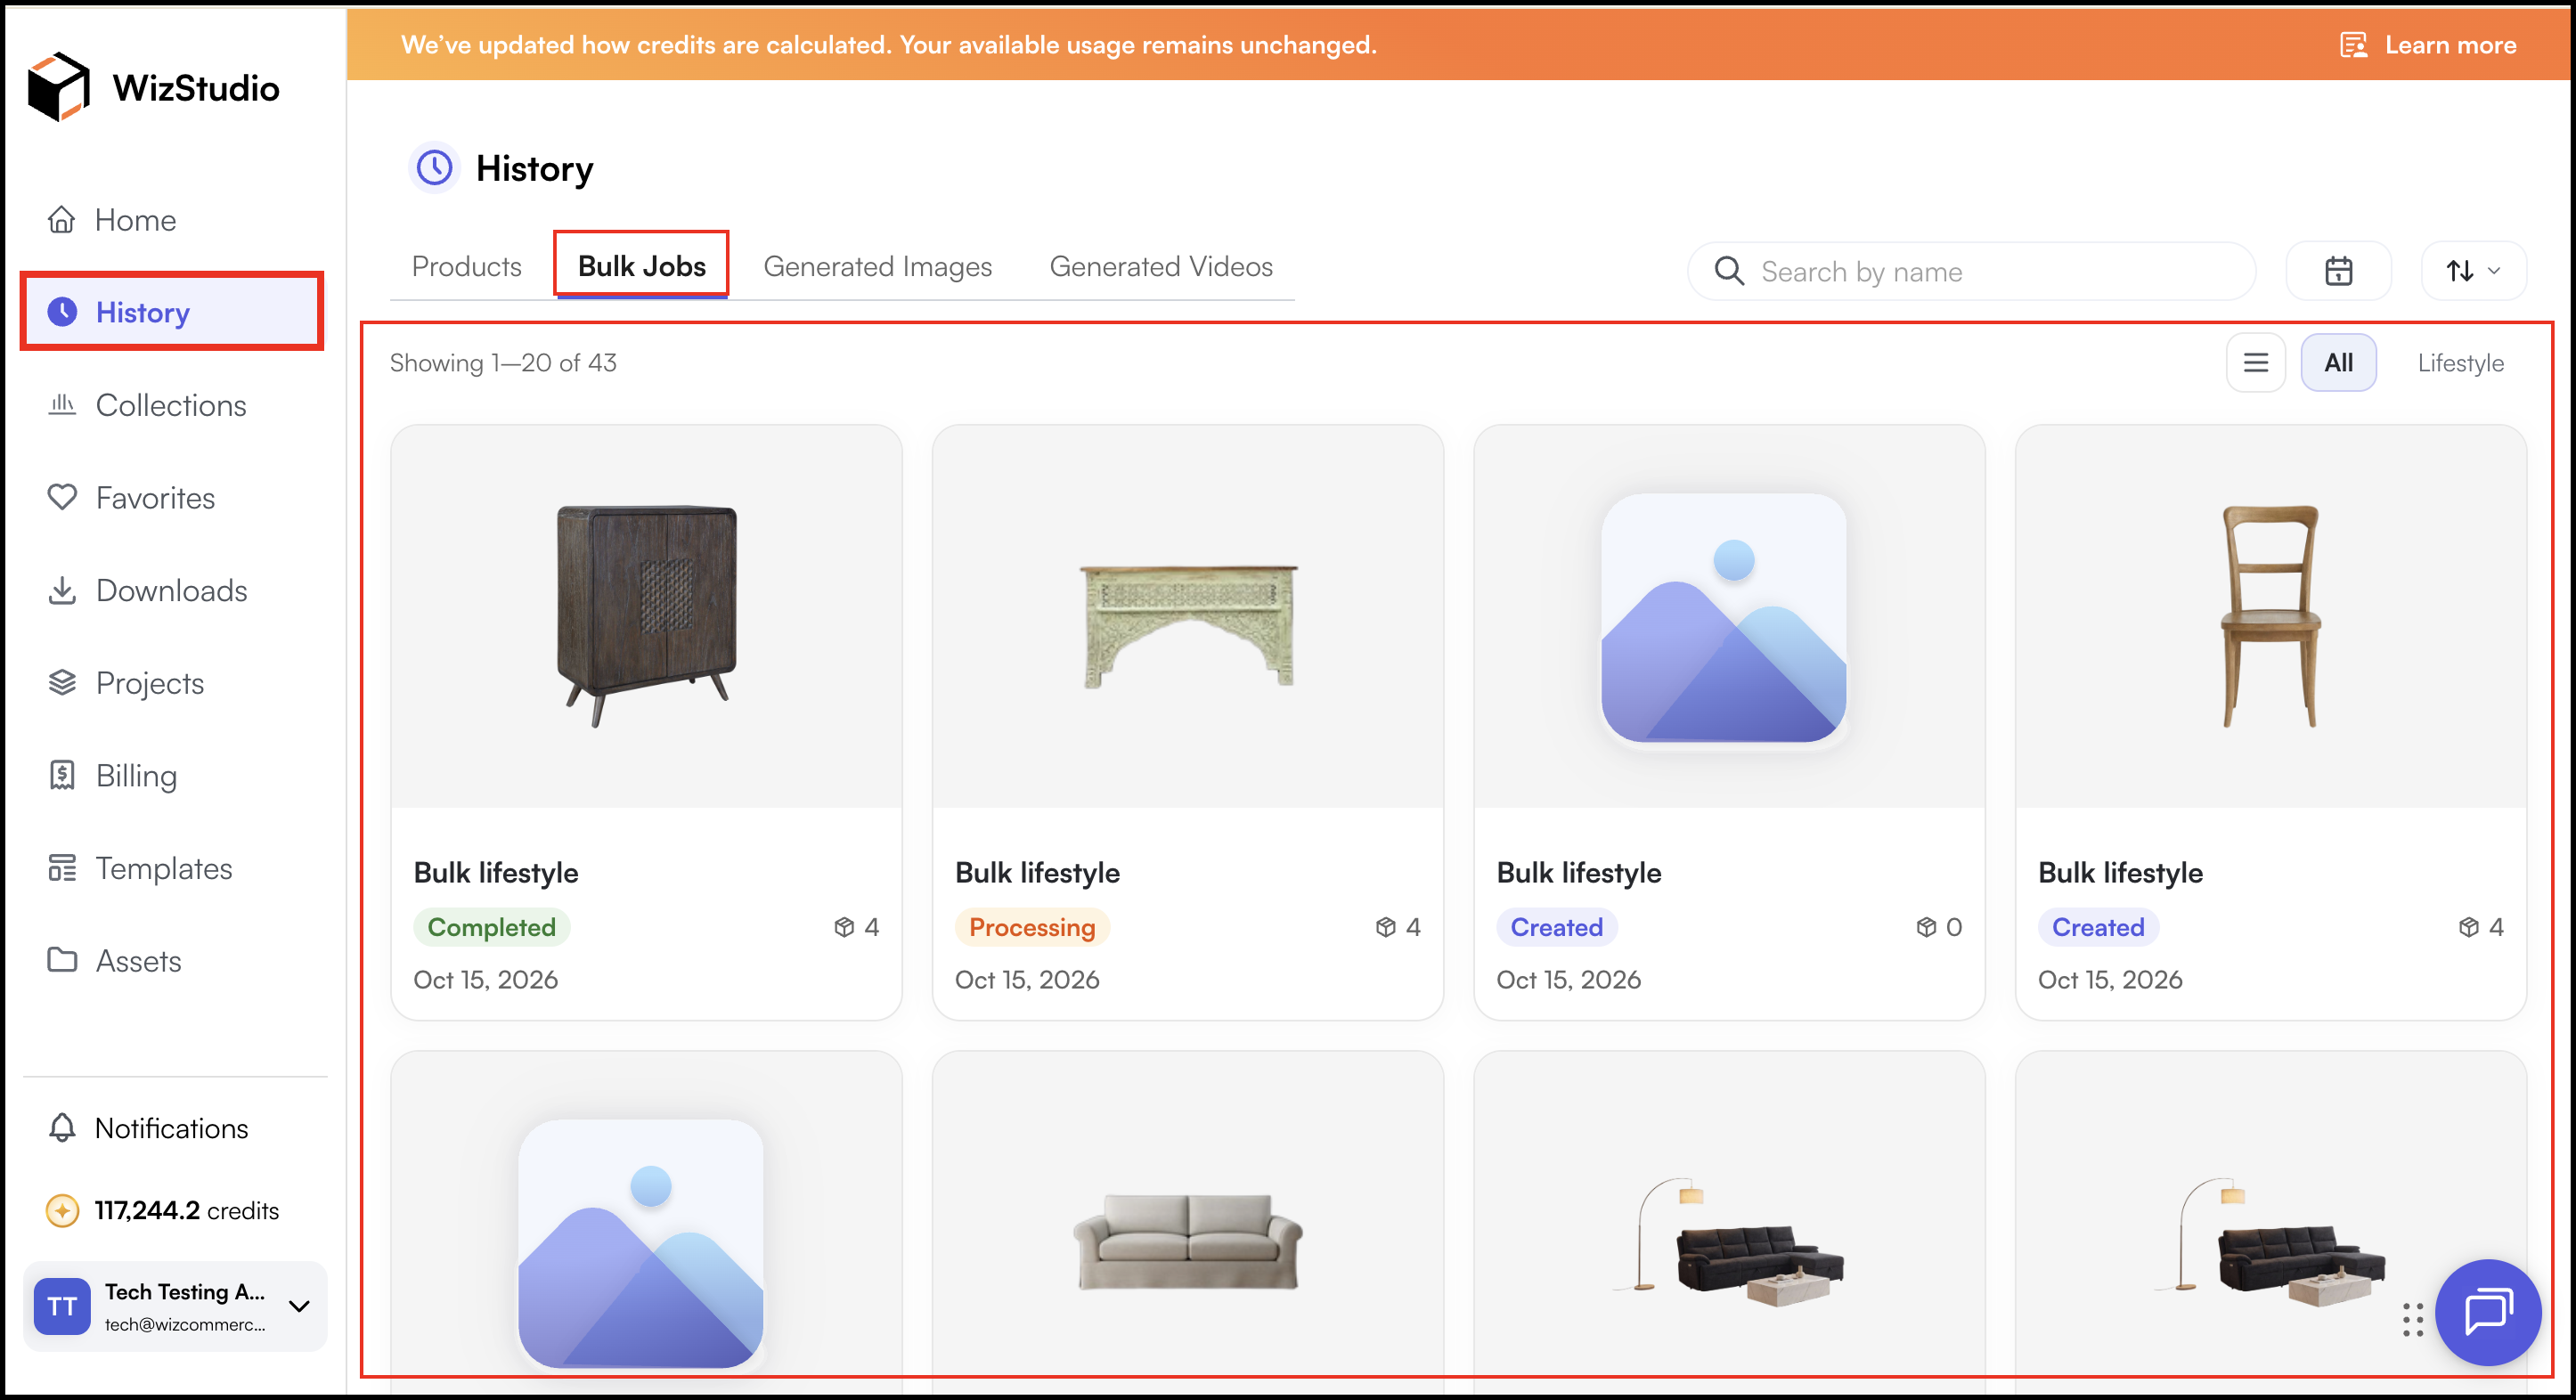
I. View Past Bulk Jobs
- Go to History → Bulk Jobs.
- Scroll down to see the generated items for each completed bulk job.
J. Credits and Charges
Bulk Lifestyle is charged when images are generated, not when they are downloaded.
| Action | Cost |
|---|---|
| Generate Bulk Lifestyle Images | 4 credits per image |
| Download Bulk Lifestyle Images | Free, on every plan |
| Edit an image (AI Edit or any other edit) | As per your plan |
| Download an edited image | As per your plan |
For example, generating 3 preview images uses 12 credits. The credit cost is always shown on the Generate button before you confirm.
Note: Every user gets 2 free Bulk Lifestyle projects.
K. Best Practices
- Use it for similar products. Bulk Lifestyle works best on a set of products that share a look, such as a range of sofas or lamps. Very different products are better created one at a time in the Lifestyle Generator.
- Iterate in preview before you run the rest. Refine the direction on one product until you are happy with it. It’s much easier to fix the look on one product than across the whole batch.
- Decide how closely each product follows the scene. Choose Copy exact scene and swap products to keep the same scene for every product, or Let AI create the scene to let it adjust the scene to suit each product.
- Not sure how the AI will adjust the scene? Preview on more than one product first. Then generate in bulk using one of those preview batches as your reference.
FAQs
1. Can I create lifestyle images for many products at once instead of one by one?
A. Yes. That’s what Bulk Lifestyle is for. You set up the scene once on a preview product, and then apply it to every product in the batch.
2. How many products can I add in one batch?
A. You can add up to 50 products in one Bulk Lifestyle batch. If you have more, split them into multiple batches and reuse the same scene direction.
3. How much does Bulk Lifestyle cost?
A. Each image costs 4 credits when it is generated, including preview images. Downloading is free on every plan. Edits and other actions are charged as per your plan.
4. Do I get any free Bulk Lifestyle projects?
A. Yes, every user gets 2 free Bulk Lifestyle projects.
5. Can I use Bulk Lifestyle for products that look very different from each other?
A. You can, but results are best when products are similar, since every product follows the same scene direction. If each product needs its own scene, use the Lifestyle Generator instead.
6. Will all my products end up in the same room?
A. Only if you want them to. Choose Copy exact scene and swap products for an identical setup across all products, or Let AI create the scene for scenes that are adjusted to suit each product.
7. What’s the difference between using a scene as inspiration and as the exact background?
A. Inspiration only creates a fresh scene in a similar style. Exact background places your product directly into the scene you selected.
8. What happens if I skip the dimensions step?
A. Your images will still be generated. Adding dimensions helps WizStudio get each product’s scale right, and you can add them for individual products later in the Staging tab.
9. Can I redo just one product without regenerating the whole batch?
A. Yes, select the product and choose the option to regenerate its scene. Only that product is regenerated.
Still need help? Reach out to our support team at help@wizcommerce.com.