This article explains how to configure every email your organization sends through WizCommerce, such as automated reminders, sender and branding details, and the triggers that control customer-facing and internal emails, all from one place under Settings.
Platform: WizOrder | Who is this for: Admins
Table of Contents
| Sections | Topics |
| A | Where to Find Email Settings |
| B | Set Reminders |
| C | Email Configuration |
| D | External Email Triggers |
| E | Internal Email Triggers |
| F | FAQs |
Before You Begin
- You need Admin access to view and change Email Settings. If you don't see the Email Settings menu, contact our support team at help@wizcommerce.com.
- All settings described here live under Settings → Org Settings → Email Settings.
- Changes apply to your whole organization's email flow, so confirm timing and recipients before enabling an email.
- Make sure your Support email and Branding Image are set up under Email Configuration first; these appear on the emails sent from the other sections.
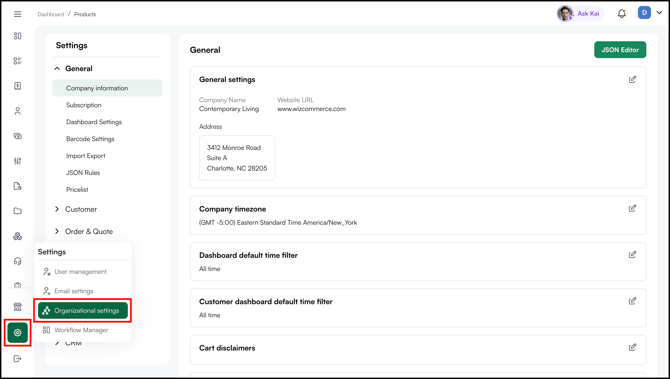
A. Where to Find Email Settings
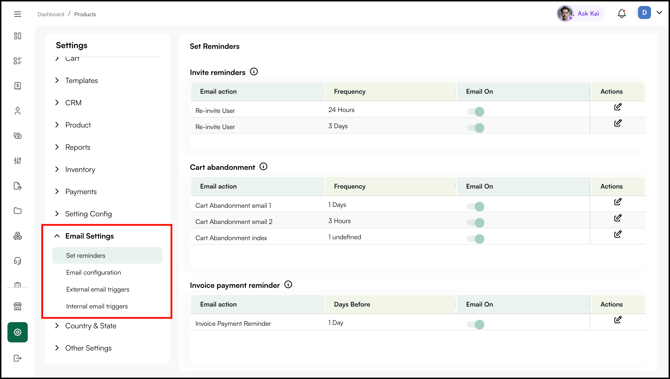
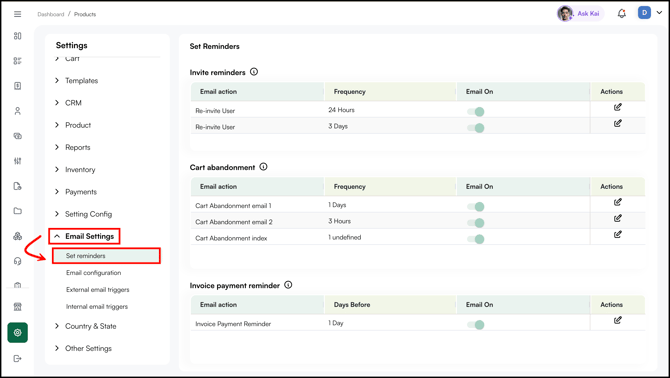
In WizOrder, all email controls are managed from one place. Go to Settings → Org Settings →Email Settings.
The section expands into four sub-sections.
| Page | What it Controls |
| Set Reminders | Automated follow-up emails such as re-invites, cart abandonment, and invoice payment reminders |
| Email Configuration | Your sender details, support email, branding logo, and CC recipients |
| External Email Triggers | Emails sent to customers and external recipients |
| Internal Email Triggers | Emails sent to your internal team and sales reps |
Each section works the same way: you turn an email on or off using the toggle, and you use the edit (pencil) icon in the Actions column to change its settings.
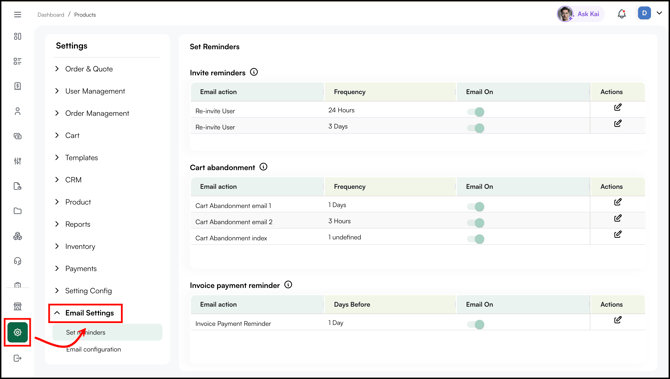
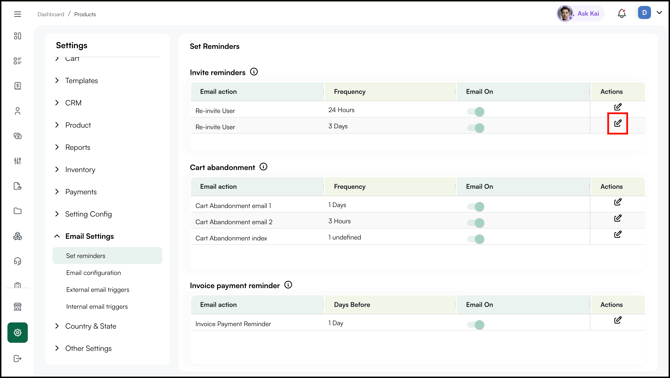
B. Set Reminders
The Set reminders page controls the automated reminder emails WizCommerce sends on a schedule. It is divided into three groups. Each row has an Email On toggle to enable or disable that reminder, and an edit icon under Actions to adjust it.
Invite reminders
Reminds users who have been invited but have not yet accepted. Each row sets how long WizCommerce waits before sending a reminder.
| Email Action | Frequency | Email On |
|---|---|---|
| Re-invite User | Hours or Days | Toggle on/off |
| Re-invite User | Hours or Days | Toggle on/off |
Cart abandonment
Sends follow-up emails when a buyer leaves items in their cart without checking out.
| Email Action | Frequency | Email On |
| Cart Abandonment email 1 | Hours or Days | Toggle on/off |
| Cart Abandonment email 2 | Hours or Days | Toggle on/off |
| Cart Abandonment index | Hours or Days | Toggle on/off |
Invoice payment reminder
Reminds customers about an upcoming invoice due date. The Days Before value sets how many days ahead of the due date the reminder is sent.
| Email Action | Days Before | Email On |
|---|---|---|
| Invoice Payment Reminder | 1 Day | Toggle on/off |
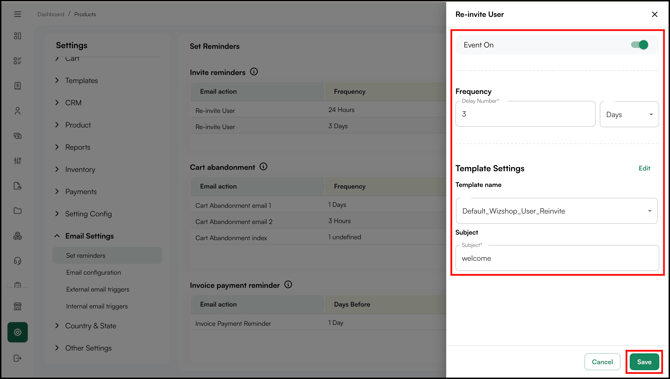
To change a reminder's timing or turn it off:
- Go to Settings → Org Settings → Email Settings → Set Reminders.
- Click the edit icon under Actions to edit email action.
- Edit particular details (such as adjust the frequency or enable or disable the event) and click Save to apply those changes.
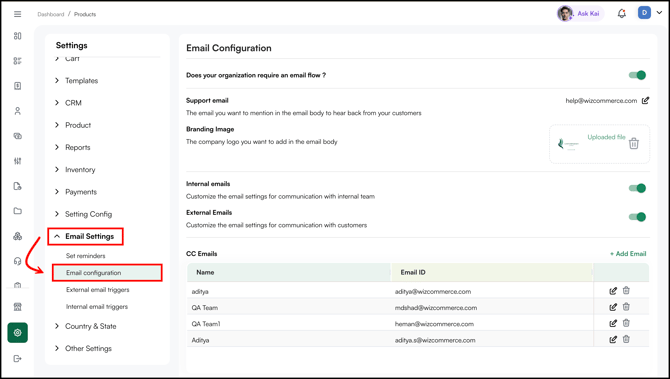
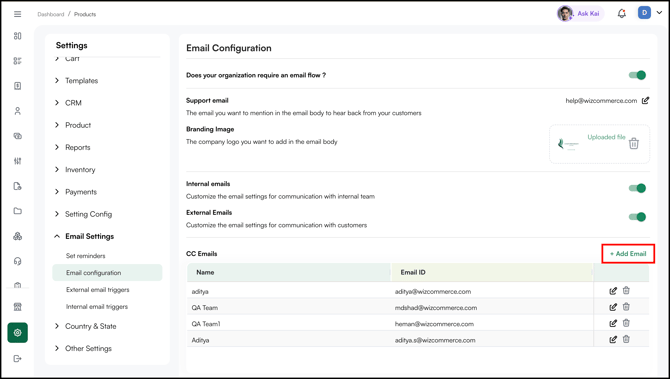
C. Email Configuration
The Email configuration page sets the sender identity and branding that appear on the emails WizCommerce sends. The page begins with a master toggle -- Does your organization require an email flow?. When this is on, WizCommerce sends emails on your behalf; when off, the email flow is disabled.
| Setting | What it Does |
|---|---|
| Support Email | The email address shown in the email body so customers know where to reply. Use the edit icon next to it to change the address. |
| Branding Image | The company logo added to the email body. Upload your logo here, or use the delete icon to remove the current file. |
| Internal Emails | Toggle that controls email settings for communication with your internal team. |
| External Emails | Toggle that controls email settings for communication with your customers. |
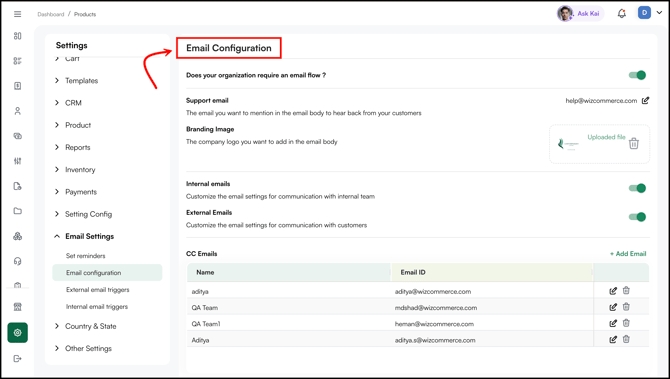
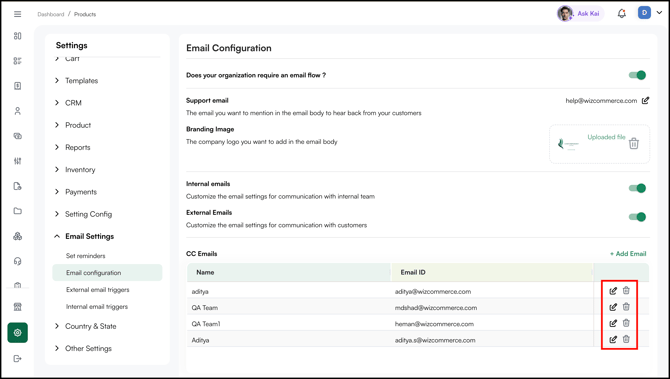
CC Emails
The CC Emails table lists the people copied on outgoing emails. Each entry shows a Name and an Email ID, with edit and delete icons on each row.
To add a CC recipient:
- Go to Settings → Org Settings→ Email Settings → Email configuration.
- Click + Add Email above the CC Emails table.
- Enter the Name and Email ID and Save the entry.
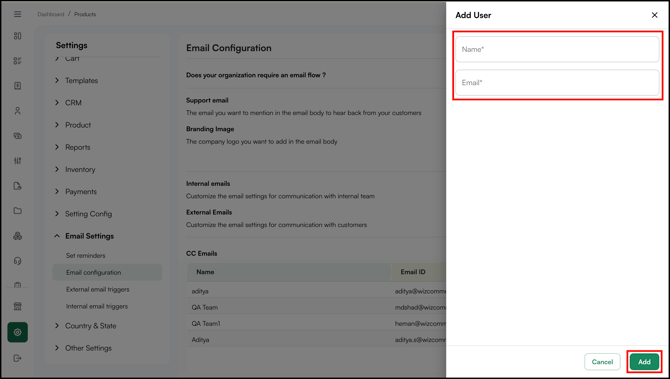
- To edit or remove a recipient, use the edit or delete icon on that row.
WizShop Emails
The WizShop Emails table lists the WizShop emails. Each entry shows a Name and an Email ID, with edit and delete icons on each row.
To add a WizShop recipient:
- Go to Settings → Org Settings→ Email Settings → Email configuration.
- Click + Add Email above the WizShop Emails table.
- Enter the Name and Email ID and Save the entry.
- To edit or remove a recipient, use the edit or delete icon on that row.
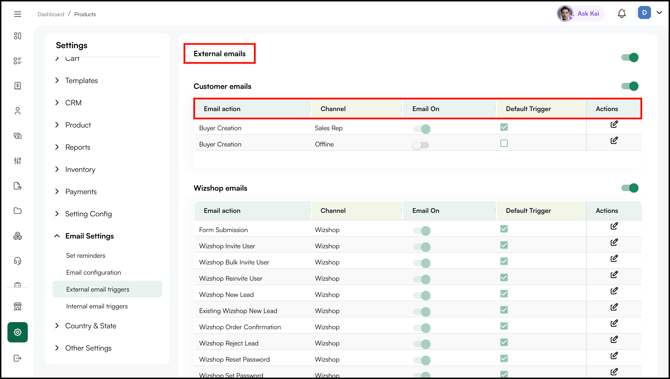
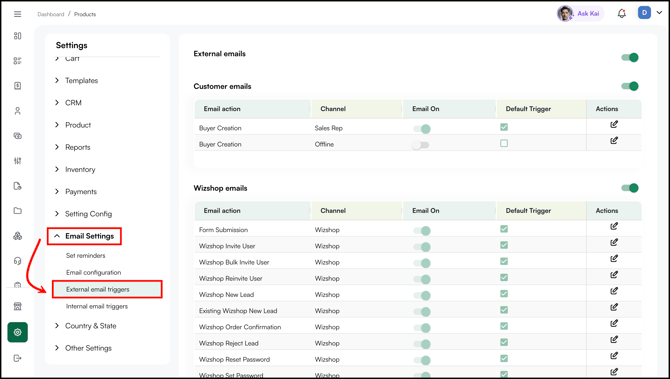
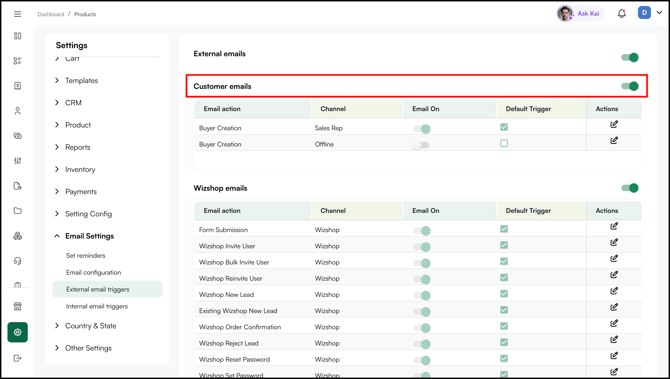
D. External Email Triggers
The External email triggers page controls every email sent to people outside your organization (customers and external recipients). Each group of emails appears in its own section that you can switch on or off as a whole using the toggle next to the section heading.
Within each section, emails are listed in a table:
| Column | What it means |
|---|---|
| Email Action | The event that sends the email (for example, Buyer Creation, Order Confirmation) |
| Channel | The source or context the email applies to (for example, Sales Rep, Offline, WizShop) |
| Email On | Toggle to enable or disable that specific email |
| Default Trigger | Checkbox marking whether the email fires automatically by default |
| Actions | Edit icon to change the email's settings |
The External email triggers page includes the following sections:
| Section | Purpose |
|---|---|
| Customer | Emails sent directly to customers (for example, Buyer Creation by Sales Rep or Offline channel) |
| Wizshop | WizShop emails; form Submission, Invite User, Bulk Invite User, Reinvite User, New Lead, Existing Wizshop New Lead, Order Confirmation, Reject Lead, Reset/Set Password, and more |
| Import/Export |
Import/export emails; export success, export failure, import invoices validation failure, import products validation failure, import shipments validation failure, and more |
| Integrations |
Integrations emails; buyer push failure, order push failure, payment push failure, and more |
| Order |
Order emails; order cancel, order confirmation, order draft, order pending approval, WizShop order pending approval, and more |
| Payments |
Payment emails; payment authorization, payment order failure, payment failure buyer, payment link order, payment link buyer, refund to order, refund to buyer, and more. |
| Recurring_payment |
Recurring_payment emails; recurring payment schedule, recurring payment schedule updated, and more |
| Quote |
Quote emails; quote channel, quote draft, quote review, quote order, and more |
| Claim order |
Claim order emails; return claim order cancel, return order confirmation, return order pending approval, and more |
| Visitor |
Visitor emails; visitor created and more |
| Comment |
Comment emails; comment added quote and order, comment added task, and more |
| Referral |
Referral emails; referral received and more |
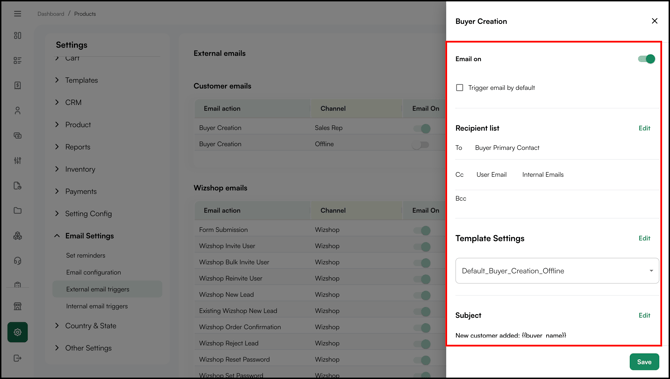
To turn an external email on or off:
- Go to Settings → Org Settings → Email Settings → External Email Triggers.
- Use the toggle next to a section heading to enable or disable that whole group, or
- Click the edit icon under Actions to change that email's settings.
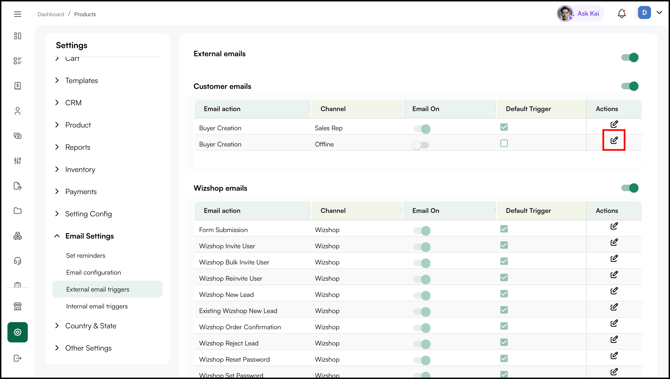
- Edit particular details (such as enable or disable the event) and click Save to apply those changes.
E. Internal Email Triggers
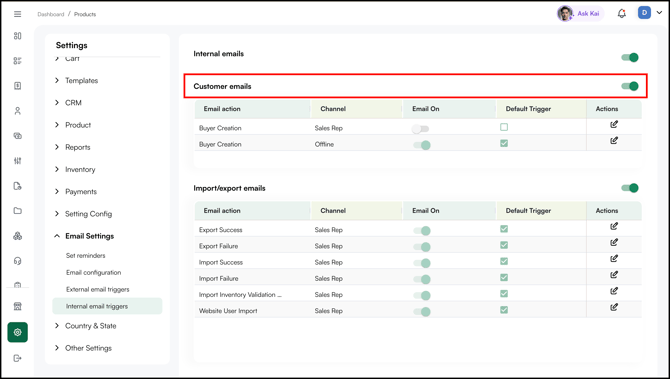
The Internal email triggers page controls emails sent to your own team rather than to customers. It uses the same layout as External email triggers. Each group is a section with an on/off toggle, and every email row shows Email action, Channel, Email On, Default Trigger, and Actions.
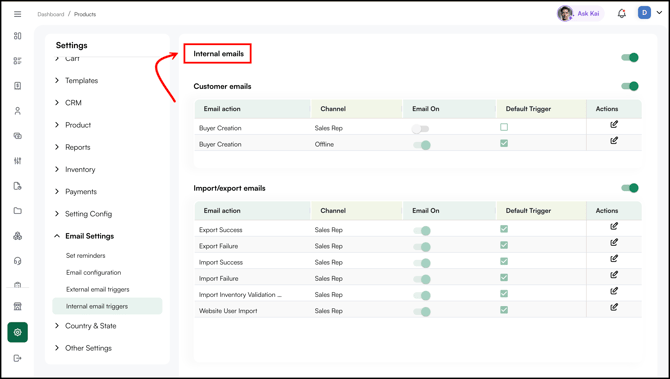
The Internal email triggers page includes the following sections:
| Section | Purpose |
|---|---|
| Customer | Internal notifications related to customer events (for example, Buyer Creation by Sales Rep or Offline channel) |
| Import/Export | Import/Export email; Export Success, Export Failure, Import Success, Import Failure, Import Inventory Validation, and Website User Import |
| Integrations |
Integrations emails; integration success update, integration failure update, invoice received, invoice updated, and more |
| Payment |
Payment emails; payment reminder and more |
| Lead | Lead emails; lead creation and more |
| Other |
Order emails; order pending approval, WizShop order pending approval, order pending approval updated, and more |
| Sales rep onboarding |
Sales_rep_onboarding emails; reset password, reset password (multi-tenant), user creation, user creation (multi-tenant), and more. |
| Claim order |
Claim order emails; return order cancel, return order confirmation, return order pending approval, and more |
| WizShop |
WizShop emails; order confirmation, WizShop new lead, and more |
To manage an internal email:
- Go to Settings → Org Settings → Email Settings → Internal email triggers.
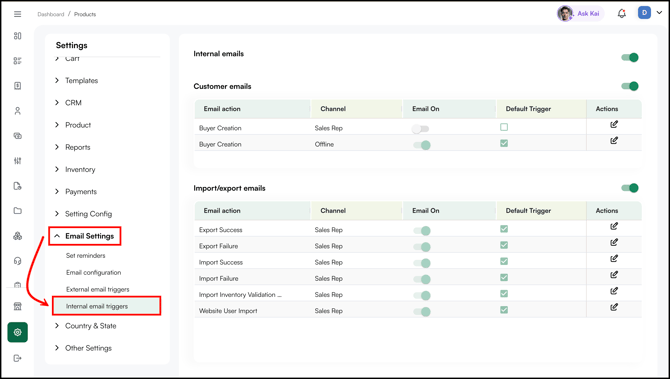
- Use the toggle next to a section heading to enable or disable that whole group.
- Click the edit icon under Actions to change its settings.
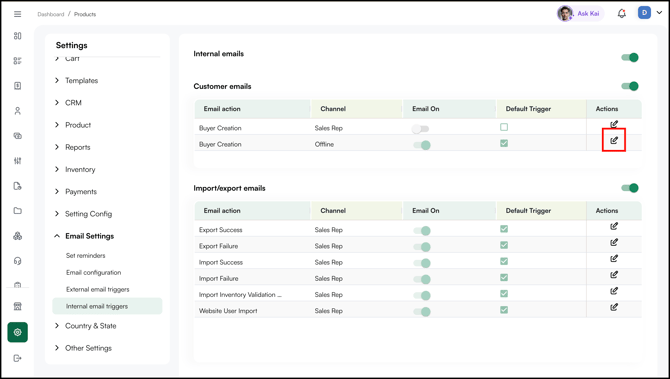
- Edit particular details (such as enable or disable the event) and click Save to apply those changes.

FAQs
1. What is the difference between External and Internal email triggers?
A. External email triggers control emails sent to people outside your organization, such as customers and storefront visitors. Internal email triggers control emails sent to your own team, such as import/export job notifications and sales rep onboarding emails.
2. I turned off a section but emails are still sending. Why?
A. Each section has a master toggle next to its heading, and each email within it has its own Email On toggle. Make sure both the section toggle and the individual email's toggle are off.
3. What does the Default Trigger checkbox do?
A. Default Trigger marks whether an email fires automatically by default for that action and channel. Unchecking it stops the email from being sent automatically while still keeping it available.
4. Where do I change the email address customers reply to?
A. Go to Settings → Organizational Settings→ Email Settings → Email configuration and edit the Support email field using the edit icon next to it.
5. How do I add someone to be copied on outgoing emails?
A. On the Email configuration page, click + Add Email above the CC Emails table, enter the person's name and email address, and save.
6. Can I add my company logo to the emails?
A. Yes. On the Email configuration page, upload your logo under Branding Image. It will appear in the email body.
Still need help? Reach out to our support team at help@wizcommerce.com.