Design and publish website popups directly from the WizCommerce WordPress admin, for promotions, announcements, lead capture, or seasonal campaigns. Set who sees the popup, where it shows up, and when it appears.
Platform: WizShop | Who is this for: Admins
To Get There: WordPress admin > Popups
Table of Contents
Before You Begin
- You must have Admin access to the WizCommerce WordPress admin.
- Decide upfront who should see the popup, where on your site it should appear, and when it should trigger.
- For visual customization (images, headlines, buttons, body copy), you will use the Elementor editor.
A. Create a New Popup
- Sign in to your WizCommerce WordPress admin.
- In the left sidebar, click Popups. The Popups list opens, showing every popup in your account along with its title, type, status, author, and date.

- From this view, you can:
- Filter by All, Published, Drafts, or Trash
- Search: Find a popup by name using the search bar
- Edit, preview, or delete: Hover over a popup's title to see the action links (Edit, Quick Edit, Trash, Preview, Export Template, Edit with Elementor)
- Click Add New Template at the top of the page.

- In the New Template dialog:

- Under Choose Template Type, select Popup from the dropdown.
- Enter a name in the Name your template field.
- Click Create Template.
B. Choose a Template from the Template Library
The Elementor Library opens with ready-made popup templates you can use as a starting point.
- In the Library, click the Popups tab.

- Browse the available templates; examples include special offer banners, AdBlock notices, newsletter signups, and discount popups.
- Click any template to see a full preview.
- Click Insert to load the template into your popup. To start from scratch instead, close the Library and build the popup yourself in Elementor.

C. Customize the Popup in Elementor
The Elementor editor opens with your selected template loaded, or with an empty canvas if you skipped the Library.
- Add widgets/elements (images, text, form )to the popup.

- Click any element to add it to the popup (heading, image, button).

- To add an image:

- Click the image, then click Choose Image in the left panel.

- In the Insert Media dialog, either upload a new file or pick one from the Media Library.

- Add Alt Text so the image is described correctly for accessibility.

- Click Select.

- Click the image, then click Choose Image in the left panel.
- To add new elements, drag widgets from the Elements panel on the left, Heading, Image, Text Editor, Video, Button, Divider, and others.
- Right-click any container on the popup to access additional actions, Edit Container, Duplicate, Copy, Paste, Save as Template, Delete.

Note: Elementor is a separate visual editor. For detailed guidance on widgets, styling, and layout edits, see the Elementor documentation.
D. Set Display, Trigger, and Advanced Rules
Before you publish, decide where the popup appears, when it triggers, and who sees it.
- At the top right of the Elementor editor, click the click the dropdown arrow next to the Publish button.


Step 1: Choose where the popup appears (Conditions)
- Under Where do you want to display your Template?, the default condition is Include → Entire site, the popup appears across your entire storefront.

- To narrow it down, click the Entire site dropdown and pick a different scope:

.png?width=644&height=349&name=popip24%20(1).png)
- Entire site: Every page of your storefront
- Archives: Archive pages only
- Singular: A specific page type (opens further options below)
- If you pick Singular, a third dropdown appears so you can choose exactly which type of page. Options include:


- All singular — every singular page
- Front page — your homepage only
- Posts, In Category, In child Categories, In Tag, Posts by author
- Pages, Pages by author
- Landing Pages, Landing Pages by author
- Media, Media by author
- Direct child of, Any child of, By author
- To exclude specific pages instead of including them, click the Include dropdown and switch it to Exclude. The popup will show everywhere except the pages you list.

- To stack multiple conditions, for example, include the entire site but exclude the front page, click Add condition and configure each row.

- Click Next to move to the Triggers step.

Step 2: Choose when the popup triggers (Triggers)
- On the Triggers step, you see seven trigger types. Each one starts as No (off). Toggle any trigger to Yes to activate it, then set its input:

- On Page Load: The popup appears after the page loads. Set Within (sec) to the delay you want (for example, 20 seconds).
- On Scroll: The popup appears once the buyer scrolls. Set Direction to Down or Up, and Within (%) to the scroll percentage that should trigger it (for example, 50).
- On Scroll To Element: The popup appears when the buyer scrolls to a specific element on the page. Enter the element's CSS class or ID in Selector (for example, .my-class).
- On Click: The popup appears after a set number of clicks anywhere on the page. Set Clicks to the number (for example, 1).
- After Inactivity: The popup appears if the buyer has not interacted with the page for a set time. Set Within (sec) to the inactivity period (for example, 30).
- On Page Exit Intent: The popup appears when the buyer moves to close the tab or leave the page. No additional input needed.
- AdBlock Detection: The popup appears if an ad blocker is detected on the buyer's browser. Set Within (sec) to the delay before showing it.

- You can turn on more than one trigger. The popup will fire whenever any of the active triggers is met.
- Click Next to move to the Advanced Rules step.

Step 3: Choose who sees the popup (Advanced Rules)
- On the Advanced Rules step, you see nine rule types. Each one starts as No (off). Toggle any rule to Yes to activate it, then set its inputs:

- Show after X page views: The popup only appears after the buyer has visited a set number of pages. Set Page Views to the number (for example, 3).
- Show after X sessions: The popup only appears after the buyer has visited the site a set number of times. Set Sessions to the number (for example, 2).
- Show up to X times: Limits how often the popup appears to a single buyer. Set Times (for example, 3), Per (Persisting keeps the count across sessions; Session resets per visit), and Count (On Open counts each time the popup opens).
- When arriving from specific URL: Controls visibility based on the URL the buyer came from. Set the dropdown to Show or Hide, and paste the URL.
- Show when arriving from: Appears only when the buyer arrives from a specific traffic source. Pick any combination of Search Engines, External Links, and Internal Links.
- Hide for logged in users: Hides the popup from logged-in users. Pick the user roles to hide it from (for example, Subscriber).
- Show on devices: Limits the popup to specific devices. Pick any combination of Desktop, Mobile Portrait, Mobile Landscape, Tablet Portrait, and Tablet Landscape.
- Show on browsers: Limits the popup to specific browsers. Pick any combination of Chrome, Firefox, Safari, and others.
- Schedule date and time: Sets a start and end date for the popup. Pick the Timezone, then set Start and End date and time. Useful for time-bound campaigns like seasonal sales.

- You can turn on more than one rule. The popup will only appear when all active rules are met. The more rules you activate, the smaller the audience.
- Click Save & Close to apply all three steps (Conditions, Triggers, and Advanced Rules) to the popup.

Step 4: Target by WizShop Buyer Data (WizShop Advanced Rules)
In addition to Elementor's native rules, WizShop provides a second set of condition types based on your actual buyer data, customer segments, price lists, login status, cart contents, and more. Use these to target popups to specific wholesale audiences without any manual workarounds.
Adding a WizShop Rule Group
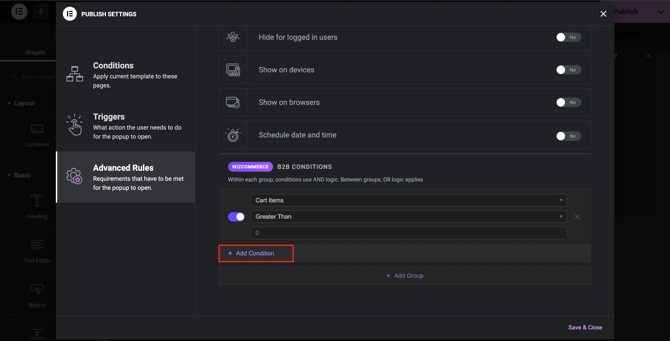
- In the Advanced Rules panel, scroll past the nine Elementor rules to find the WizCommerce B2B Conditions section.
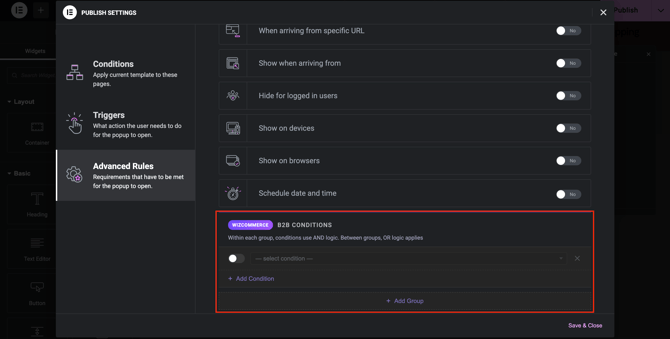
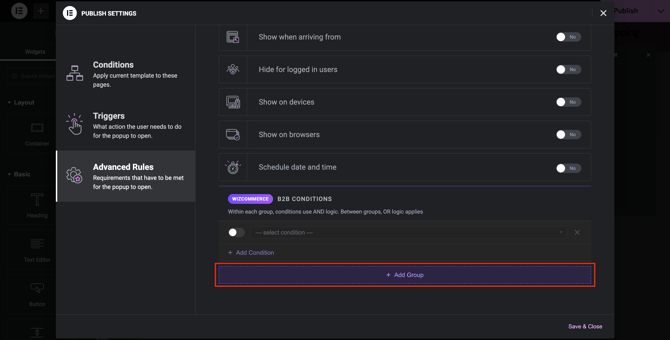
- Click Add Group .
- Enable a condition by toggling it on.
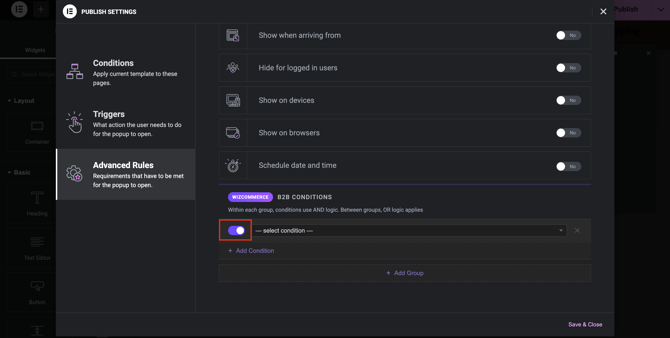
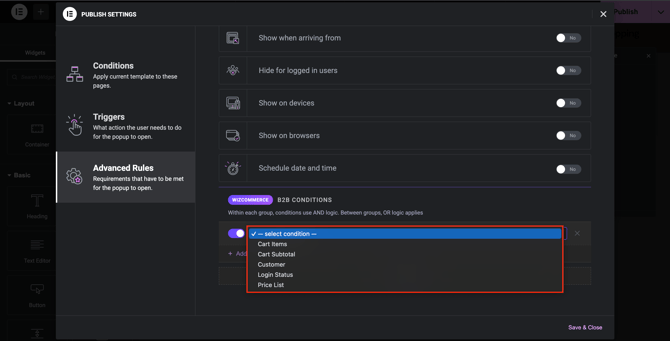
- A rule group row appears. Click the Condition dropdown to select one of the ten WizShop condition types (listed below).
- Set the Operator and Value for the condition from the dropdown.
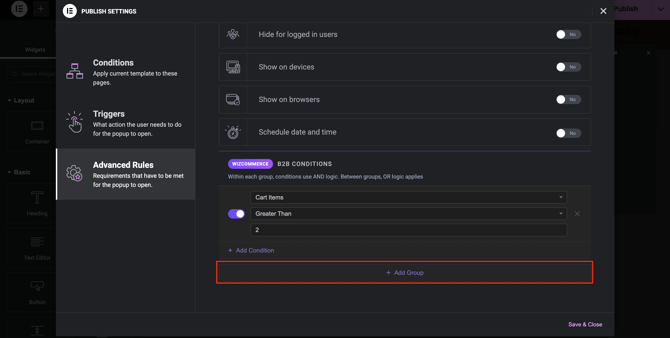
- To add another condition inside the same group, click Add Condition within the group row. Conditions inside a group are joined by AND logic, all must be true.
- To add a second group, click Add Group again. Groups are joined by OR logic, the popup shows if any one group's conditions are fully met.
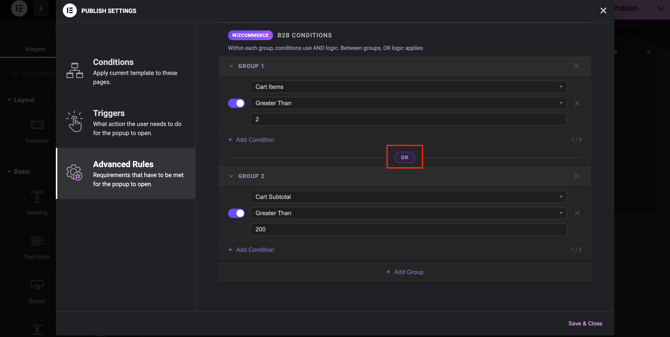
Note: You can create up to 5 rule groups, each with up to 5 conditions. The more groups you add, the broader the audience. The more conditions within a group, the narrower it becomes.
The 10 WizShop Condition Types
| Condition | Operators | What It Targets |
|---|---|---|
| Customer Segment | Is / Is Not | Buyers assigned to a specific segment (e.g., Gold, Silver, Platinum) |
| Price List | Is / Is Not | Buyers on a specific price list (e.g., Dealer, Retail, Wholesale) |
| Discount Group | Is / Is Not / Has Any | Buyers assigned to a specific discount group |
| Customer | Is / Is Not | A specific named customer account |
| WizShop User Role | Is / Is Not | Buyers by their role (e.g., Buyer, Approver, Admin) |
| Product / Product ID | Is / Is Not / In Category | Pages showing a specific product or product category |
| Cart Items | Greater Than / Less Than / Equals | Number of items currently in the buyer's cart |
| Cart Subtotal | Greater Than / Less Than / Equals | Current cart value before tax and shipping |
| Page Type | Is / Is Not | Page category (e.g., Shop, Product, Cart, Checkout, Account, Custom) |
| Login Status | Is Logged In / Is Guest | Whether the buyer is logged in or browsing as a guest |
Note:
-
Cart Items and Cart Subtotal conditions re-evaluate in real time as buyers add or remove products, no page reload is needed. If you set a cart subtotal threshold, the popup will fire the moment that value is reached during the buyer's session.
- Guest users only match the Login Status = Is Guest condition. All other WizShop conditions, Customer Segment, Price List, Discount Group, Customer, and WizShop User Role, return false for guests because there is no buyer record to evaluate. If your popup uses any of those conditions, it will not appear to guests regardless of other settings.
-
If a buyer belongs to multiple segments, the Customer Segment condition uses any-match logic, if any one of their assigned segments matches your rule, the condition passes. A buyer assigned to both Gold and Platinum will qualify for a rule targeting either segment.
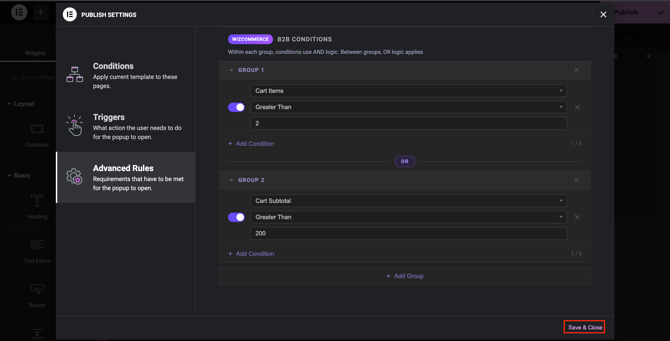
When all rule groups are configured, click Save & Close to apply all four steps, Conditions, Triggers, Elementor Advanced Rules, and WizShop Rules, to the popup.
E. Publish the Popup
- When you are ready, click Publish in the top right of the Elementor editor.

- The popup goes live immediately on your storefront.
- To save without publishing, open the Publish dropdown and click Save Draft. Drafts appear in your Popups list with a Draft label and can be edited and published later.
F. Manage an Existing Popup
Once a popup is live, you can update or remove it from the Popups list.
- Go to Popups.

- Hover over the popup's title to see the action links.

- Use:
- Edit: Opens the WordPress edit screen for the popup. Use this to rename the popup, save it as a draft, or move it to Trash. To change the popup's actual content, click Edit with Elementor from this screen.

- Edit: Opens the WordPress edit screen for the popup. Use this to rename the popup, save it as a draft, or move it to Trash. To change the popup's actual content, click Edit with Elementor from this screen.
-
- Quick Edit: Opens an inline panel directly in the Popups list, letting you update basic details without opening any editor.Common edits from Quick Edit:

- Title: Rename the popup
- Status: Switch between Draft and Published without opening Elementor
- Date: Change the publish date and time
- Author: Reassign the popup to another team member
- Click Update to save, or Cancel to discard. Other fields on this panel, Slug, Password, Categories, Template are WordPress defaults and are not typically used for popups.
- Preview : To see the popup in a new tab
- Trash: To move the popup to Trash. Trashed popups stop showing on your storefront and can be restored from the Trash filter.
- Export Template: To download the popup template for reuse on another site
- Edit with Elementor: To open the popup in elementor and update its content, conditions, or rules
- Quick Edit: Opens an inline panel directly in the Popups list, letting you update basic details without opening any editor.Common edits from Quick Edit:
FAQs
1. Can I show a popup to only some buyers?
A. Yes. Use Advanced Rules in the publish settings to control who sees the popup. Elementor's native rules let you target by device, browser, session count, and traffic source. WizShop's rules let you target by customer segment, price list, discount group, login status, cart value, and more. Stack both sets of rules together for precise audience control, but remember Elementor rules combine with AND logic, and WizShop rule groups combine with OR logic.
2. My popup is not appearing on my storefront. What should I check?
A. Work through these in order. First, confirm the popup status is Published in the Popups list. Then open the popup in Elementor and check each layer: verify your Conditions include the current page, confirm at least one Trigger is turned on, and check that your Advanced Rules have not narrowed the audience too far. If you are using WizShop rules, confirm the buyer is logged in, guest users only match the Login Status = Is Guest condition, and all other WizShop conditions return false for guests. Finally, confirm Elementor Pro 3.x or higher is active, without it, popup conditions are disabled entirely.
3. Can I save a popup without publishing it?
A. Yes. In the Elementor editor, open the Publish dropdown and click Save Draft. The popup appears in your Popups list with a Draft label and stays hidden from your storefront. You can edit and publish it later when you are ready.
4. Can I use OR logic to show a popup to Gold customers or Platinum customers?
A. Yes, but not with Elementor's native Advanced Rules, those combine with AND logic only. Use WizShop Rule Groups instead. Add one rule group for Customer Segment = Gold and a second group for Customer Segment = Platinum. Groups are joined by OR logic, so the popup will show to buyers who match either group.
Still need help? Reach out to our support team at help@wizcommerce.com.