
Open the Publitas editor to add hotspots, edit text and images, auto-tag products, and preview how the Lookbook will look to sales representatives and buyers.
Platform: WizOrder | Who is this for: Admin
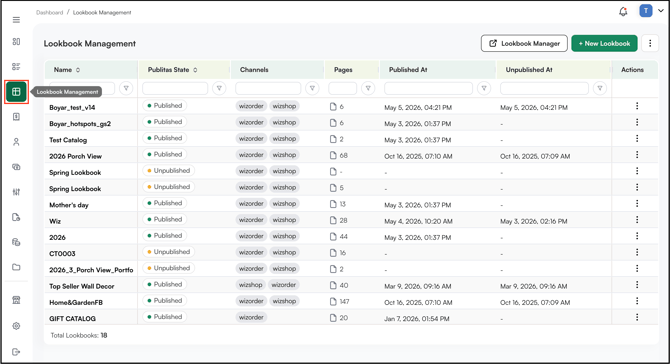
To Get There: Left Navigation bar (WebPortal) > Lookbook Management > three-dot menu > Edit in Publitas
Table of Content
| Section | Topics |
| A | Open the Publitas Editor |
| B | Find Your Way Around the Editor |
| C | Add Hotspots, Edit, and Preview Lookbook |
| D | FAQs |
Before You Begin
- You must have Admin access to WizCommerce.
- The Lookbook must already exist in WizCommerce. To create a new Lookbook, see the Create and Publish a Lookbook article.
A. Open the Publitas Editor
The Publitas editor is where you add hotspots, review auto-tagged products, and prepare the Lookbook for sales representatives. Open it any time you need to edit the contents of a Lookbook.
- Open Lookbook Management in WizCommerce.
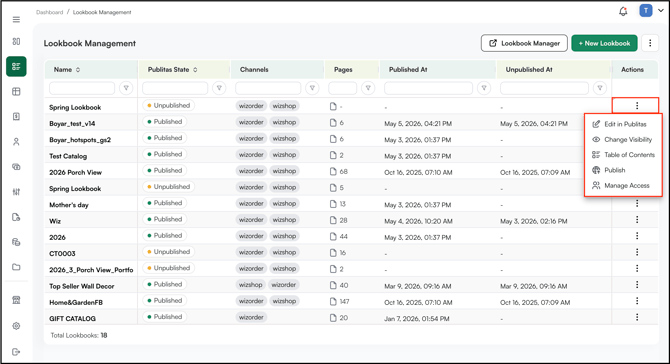
- Click the three-dot menu next to the Lookbook you want to edit.
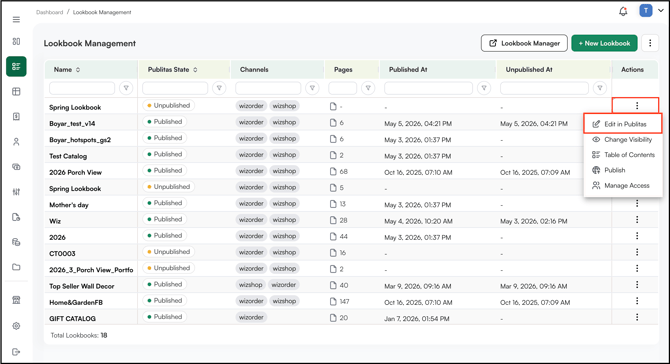
- Select Edit in Publitas. The Publitas editor opens in a new tab.
B. Find Your Way Around the Editor
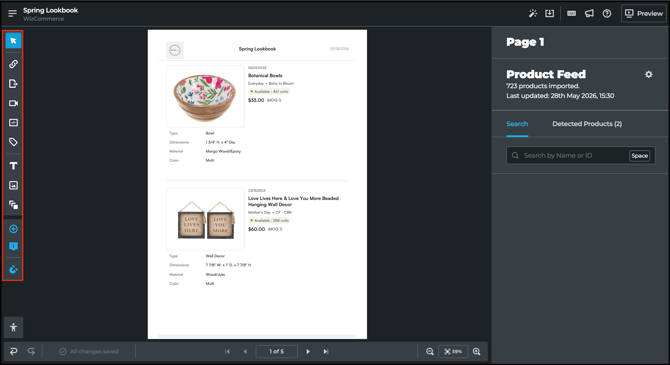
- Canvas (centre): The page you are currently editing. Use the controls at the bottom to move between pages, zoom in and out, or fit the page to your screen.
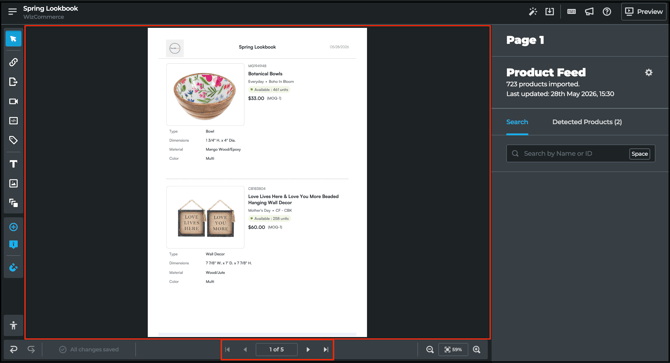
- Tools (left): The hotspot and editing tools. Use these to add product, link, video, text, or image elements to a page.
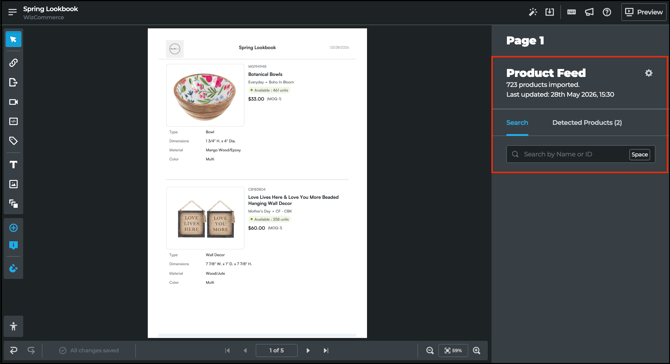
- Product Feed (right): Products available for tagging. Search finds any product from your WizCommerce feed; Detected Products shows SKUs Publitas already identified on the current page.
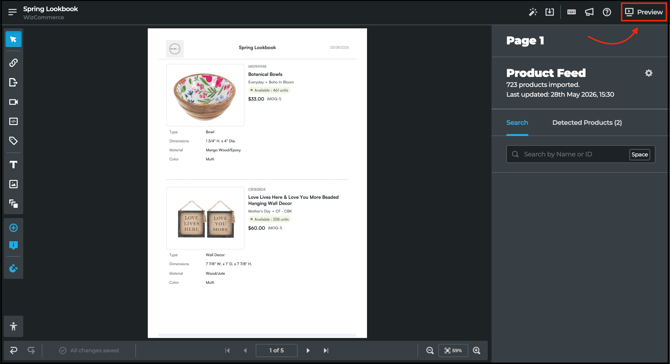
- Preview (top right): Opens a live preview of the Lookbook so you can see how it will look to sales representatives and buyers.
C. Add Hotspots, Edit, and Preview Lookbook
The Publitas editor gives you several ways to make a Lookbook interactive. Each feature is independent, use the ones that fit your Lookbook.
» Add a Link Hotspot
Link an area to an external URL, useful for landing pages, microsites, or brand references.
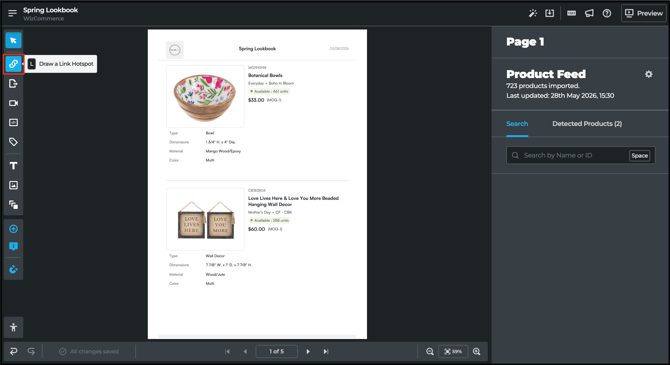
- Click the Link Hotspot tool in the left toolbar.
- Drag to draw the hotspot area on the page.
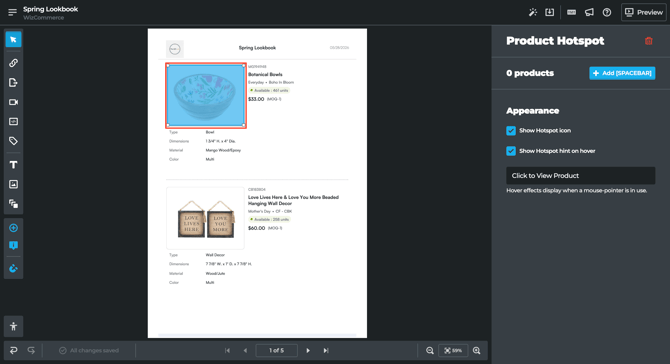
- Enter the URL in the field that appears.
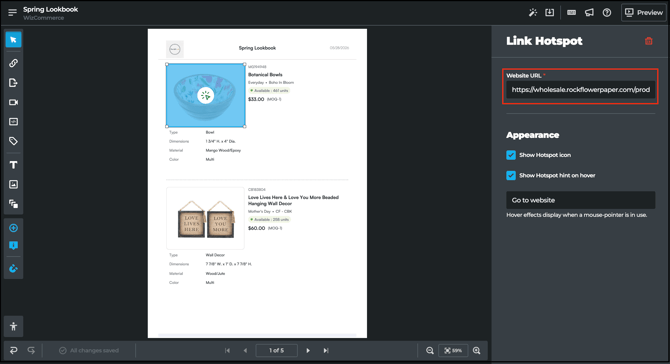
- Under Appearance, choose how the hotspot should display to buyers:
- Show Hotspot icon: Displays a visible icon over the hotspot area so buyers know it is clickable.
- Show Hotspot hint on hover: Shows a small hover label when a buyer moves their mouse over the hotspot.
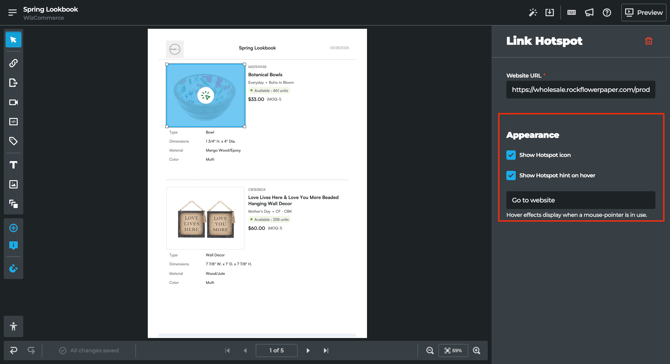
- Click outside the hotspot to save.
Note: Hover effects only apply when a buyer is using a mouse. On the iPad and other touch devices, the hint will not appear. Keep the hotspot icon turned on if you want visual cues across all devices.
» Add a Page-jump Hotspot
Link an area on one page to another page inside the same Lookbook, useful for sending buyers from a category cover to the first product page, or from a "see more" callout to a related section.
- Click the Page-jump Hotspot tool in the left toolbar. SKUs and key areas on the page are highlighted in blue, showing suggested spots where you can place a page-jump.
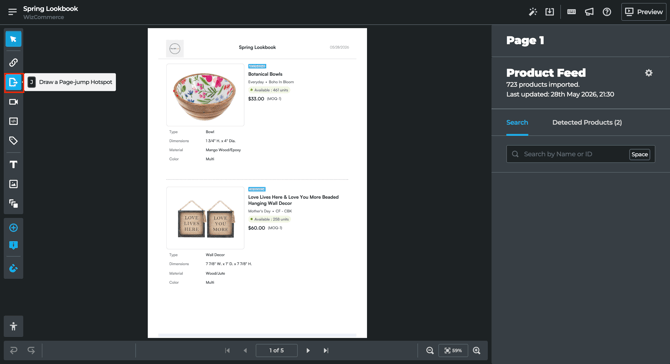
- Drag to draw the hotspot area on the page, or click one of the suggested blue areas.
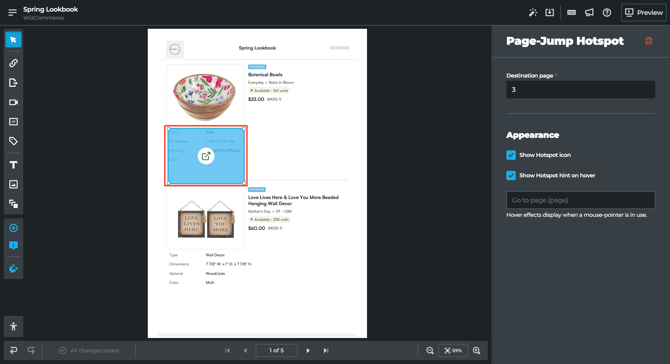
- In the right panel, enter the destination page number.
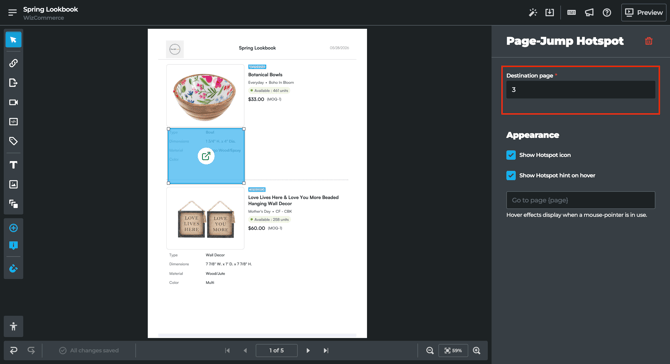
- Under Appearance, choose how the hotspot should display:
- Show Hotspot icon: displays a visible icon over the hotspot area so buyers know it is clickable.
- Show Hotspot hint on hover: shows a small hover label when a buyer moves their mouse over the hotspot.
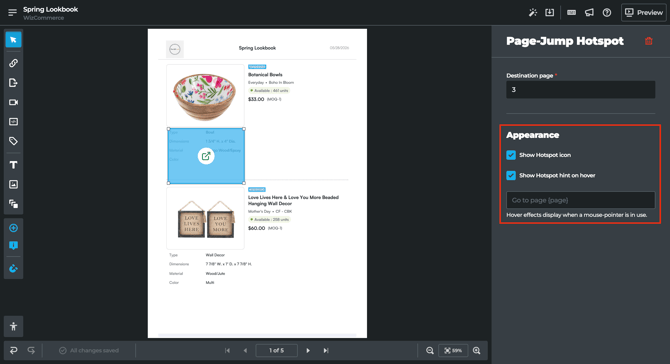
- Click outside the hotspot to save.
» Add a Video Hotspot
Embed a video that plays inside the Lookbook page, useful for product demos, brand films, or installation walkthroughs.
- Click the Video Hotspot tool in the left toolbar.
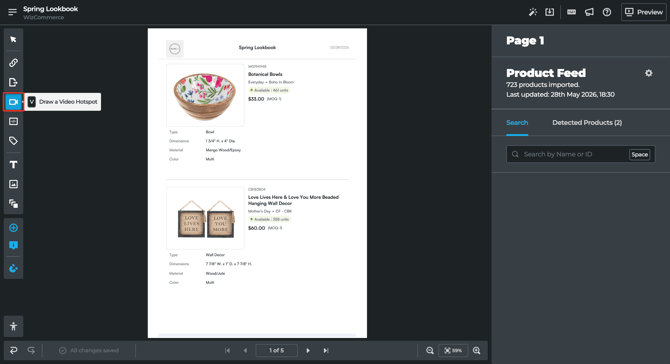
- Drag to draw the hotspot area on the page.
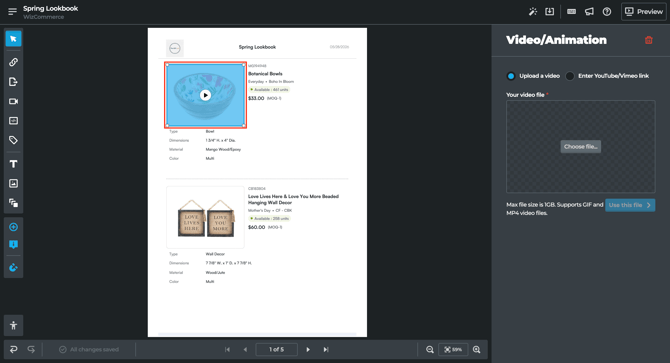
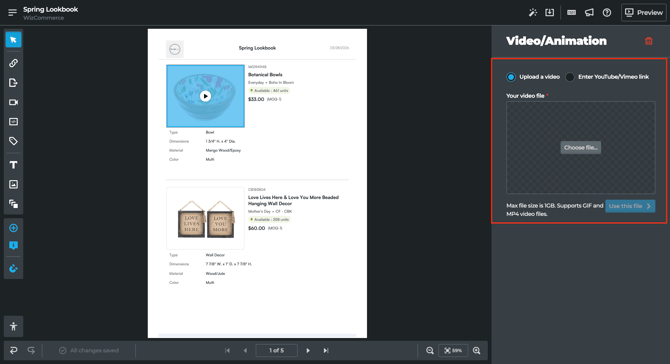
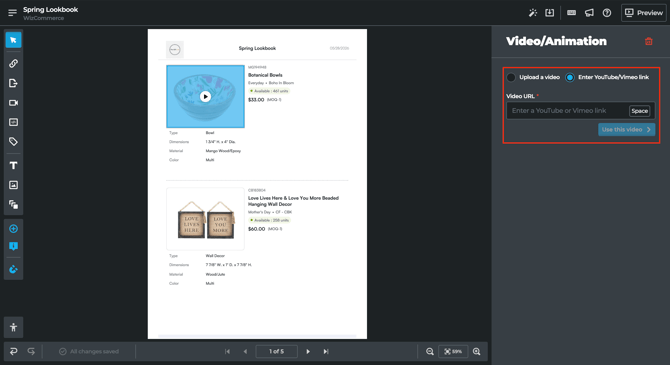
- Paste the video URL from YouTube or Vimeo, or upload a file directly from your computer.
- Click outside the hotspot to save.
» Add an External Content Hotspot
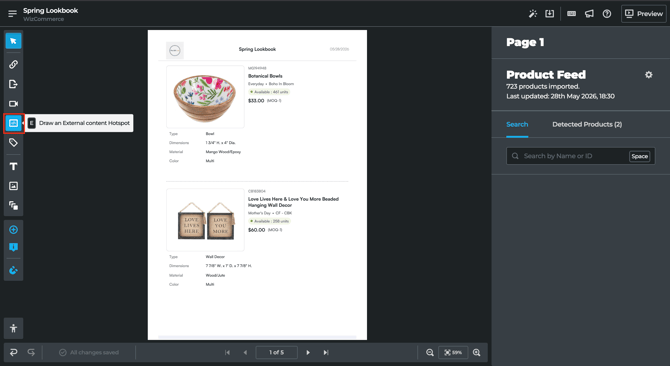
- Click the External Content Hotspot tool in the left toolbar (the icon with
</>).
- Drag to draw the hotspot area on the page.
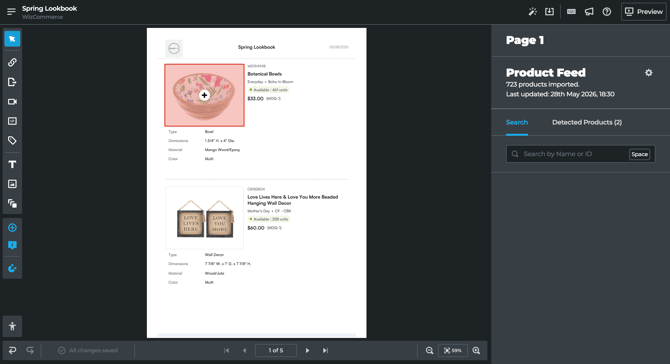
- Paste the embed code or URL of the external content in the right panel.
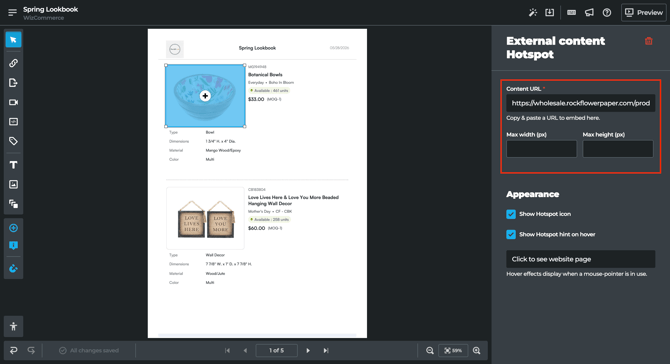
- Under Appearance, choose how the hotspot should display:
- Show Hotspot icon: Displays a visible icon over the hotspot area so buyers know it is clickable.
- Show Hotspot hint on hover: Shows a small hover label when a buyer moves their mouse over the hotspot.
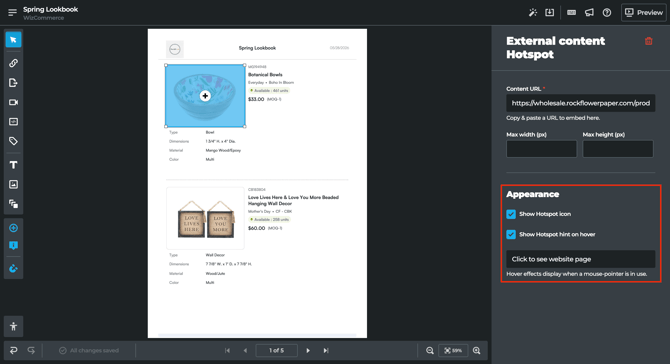
- Click outside the hotspot to save.
Note: Only use embed codes from trusted sources. External content loads inside the Lookbook and may not display correctly on all devices. Test the hotspot in Preview mode before publishing.
» Add a Product Hotspot
Tag an area on the page with a SKU so buyers can click to view product details and add to a cart.
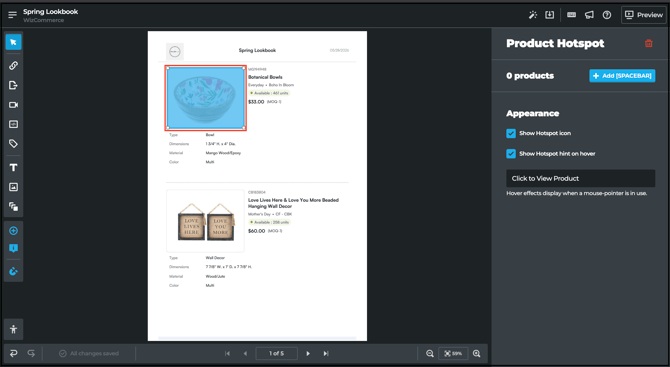
- Click the Product Hotspot tool in the left toolbar.
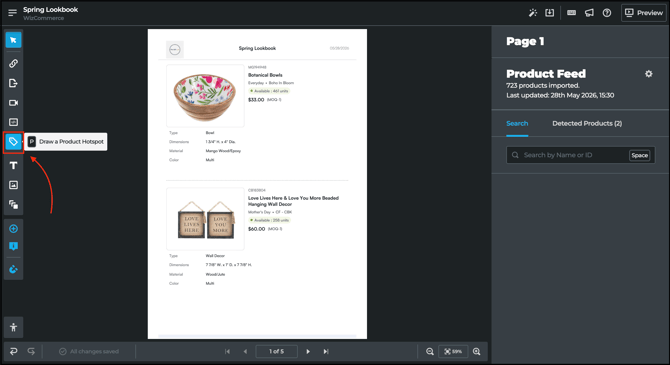
- Drag to draw the hotspot area over the product on the page.
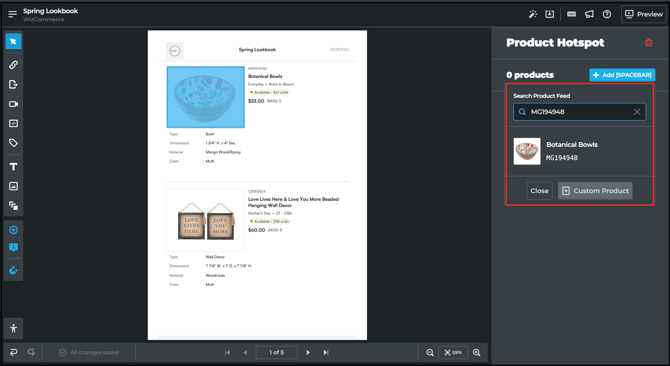
- In the right panel, search for the SKU under the Search tab.
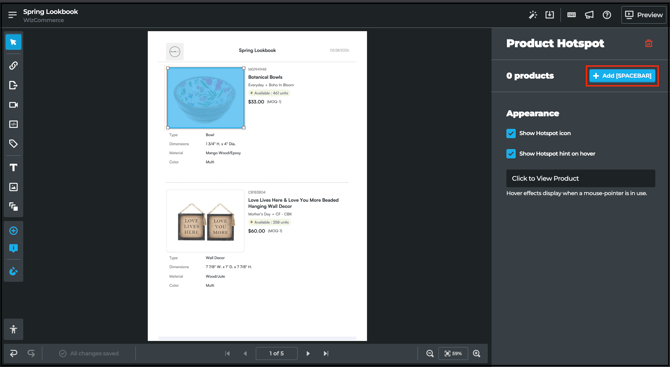
- Click the matching product. The hotspot auto-populates with product details from WizCommerce.
» Use Auto-tagging
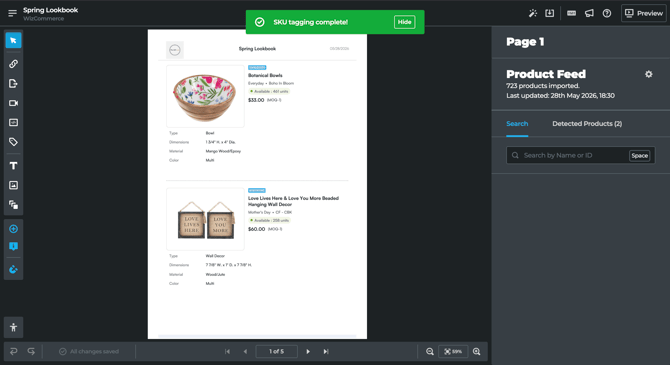
Let Publitas detect SKUs and links automatically across the Lookbook so you do not have to draw every hotspot manually.
- Open the page you want to auto-tag in the editor.
- Click the magic wand icon in the top bar to trigger detection.
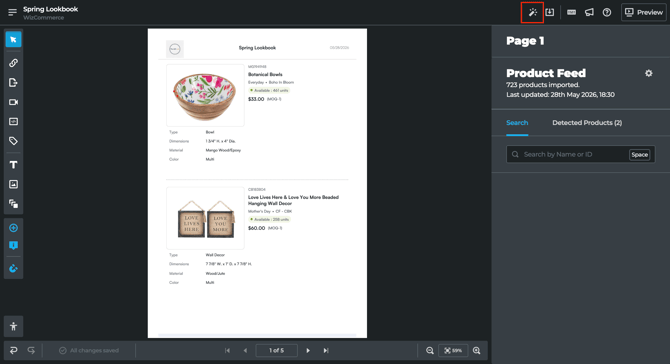
- Click on the SKU ID to open the Detected Products tab.
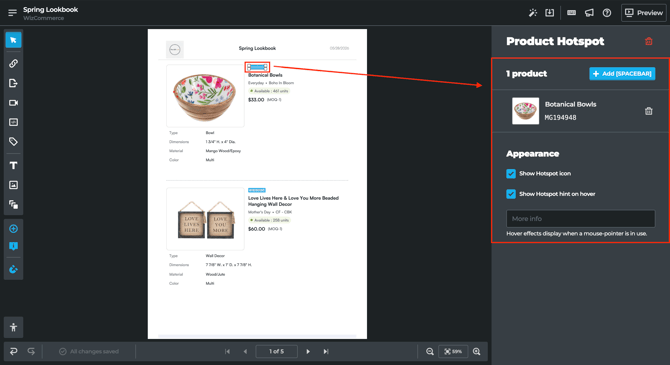
- Review each detected SKU and confirm or remove it as needed.
» Edit Text, Images, or Slide Shows
Update text and images directly on a page without re-uploading the catalog PDF.
- Click the Text, Image, or Slide Shows tool in the left toolbar.
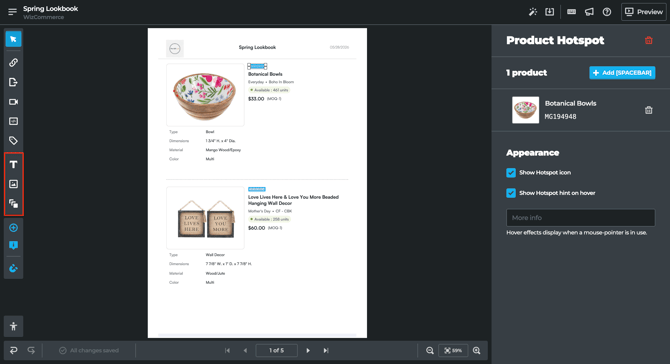
- Click on the area of the page you want to edit.
- Make your changes, type new text, replace the image, or add multiple images.
- Click outside the element to save.
» Preview the Lookbook
Open a live preview at any point to see exactly how sales representatives and buyers will experience the Lookbook.
- Click Preview in the top right of the editor.
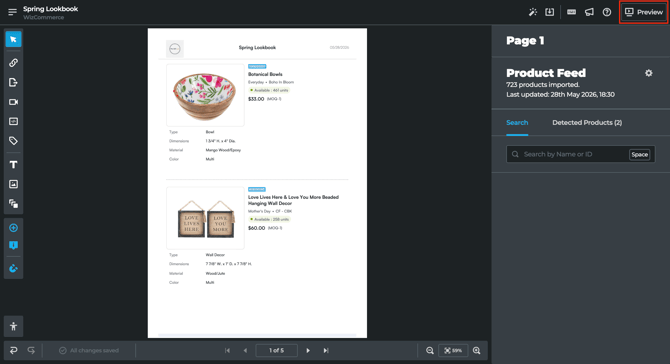
- The Lookbook opens in a new tab in preview mode.
- Click hotspots, navigate pages, and test the experience.
- Close the preview tab to return to the editor and continue editing.
Note:
- Publitas auto-saves your changes as you work. Once you see All changes saved at the bottom of the screen, your edits are stored.
- Publitas has additional features outside the WizCommerce workflow, such as analytics, lead capture, and custom branding. Visit the Publitas Help Center for documentation on advanced features.
FAQs
1. I tagged a SKU on a hotspot, but the product is not showing up. What do I do?
A. The SKU was likely added to WizCommerce after the last product sync to Publitas. Open Lookbook Management and click Push Products to send the latest SKUs to Publitas, then try tagging again. See the Manage Pages and Files in a Lookbook article for steps.
2. Do I need to save my changes manually in Publitas?
A. No. Publitas auto-saves your changes as you work. Look for the All changes saved indicator at the bottom of the editor to confirm.
3. Will hover labels appear when sales representatives use the Lookbook on an iPad?
A. No. Hover effects only apply when a buyer or sales representative is using a mouse. On touch devices, the hover hint will not appear. Keep the hotspot icon turned on if you want visual cues across all devices.
Not finding what you need? Contact our support team at help@wizcommerce.com