
Build a new Lookbook from an existing catalog PDF, add a Table of Contents, and publish it so sales representatives can use it on the iPad. Lookbooks are created and published in Publitas, a partner platform integrated with WizCommerce.
Platform: WizOrder │ Who is this for: Admin
To Get There: Left Navigation bar (WebPortal) > Lookbook Management
Table of Contents
| Sections | Topics |
| A | Create a Lookbook in WizCommerce |
| B | Upload Larger Catalogs Through Publitas |
| C | Add Table of Contents to Lookbook |
| D | Publish the Lookbook |
| E | FAQs |
Before You Begin
- You must have access to WizCommerce Lookbook Management.
- Your WizCommerce account must be connected to Publitas. Contact your Customer Success Manager if the integration is not yet enabled.
- Have your catalog ready as a PDF. Lookbooks are built from existing catalogs, not designed from scratch.
- Files larger than 50 MB must be uploaded directly through Publitas.
A. Create a Lookbook in WizCommerce
Use this method when your catalog file is under 50 MB. For larger files, see Section B.
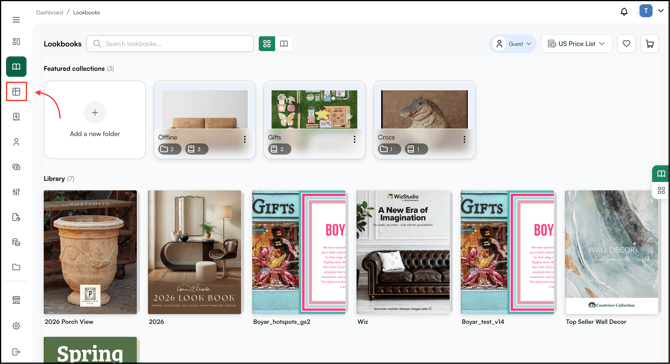
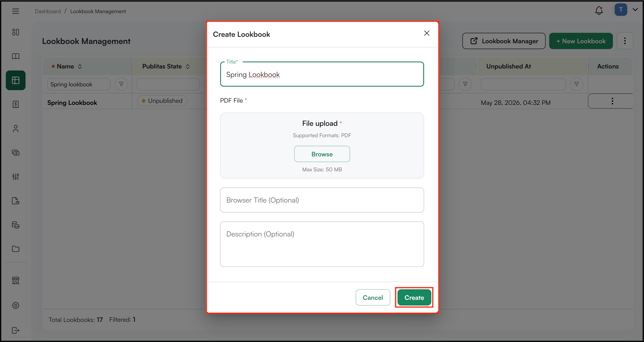
- Go to Lookbook Management.
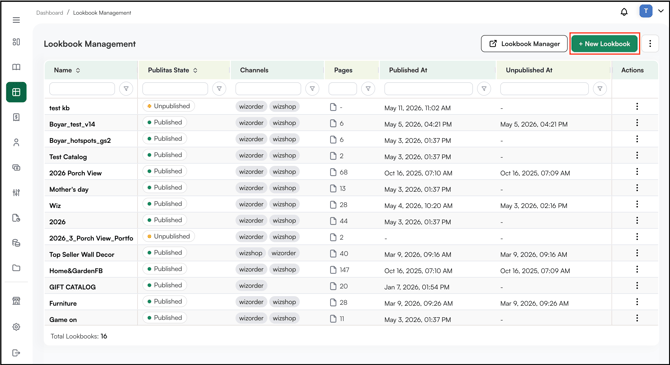
- Click + New Lookbook at the top of the page.
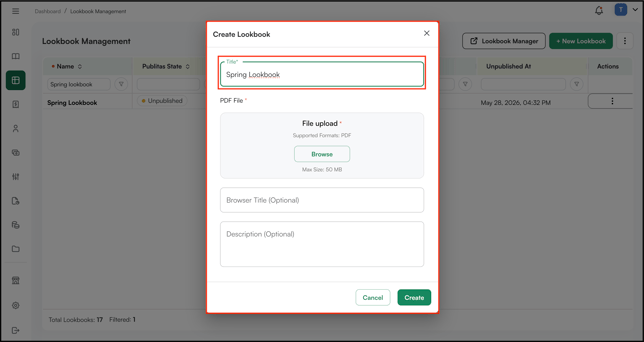
- Enter the Lookbook name.
- Upload the catalog PDF.
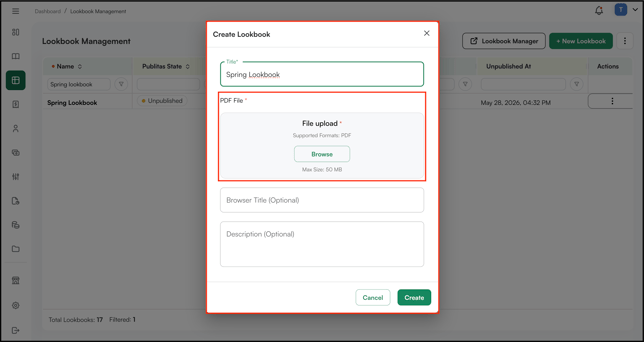
- Click Save. The catalog is uploaded and prepared for editing.
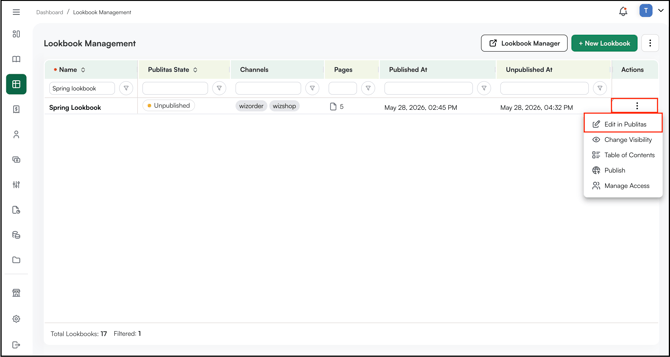
- Select Edit in Publitas to open the Lookbook in the Publitas editor.
Note: Publitas does not create catalogs from scratch, it only converts existing PDFs into interactive Lookbooks. If you don't have a catalog PDF ready, use WizCommerce's Catalog feature to generate one, then upload it here.
B. Upload Larger Catalogs Through Publitas
For catalog files over 50 MB, upload directly through Publitas and sync the Lookbook back into WizCommerce.
- Log in to your Publitas account.
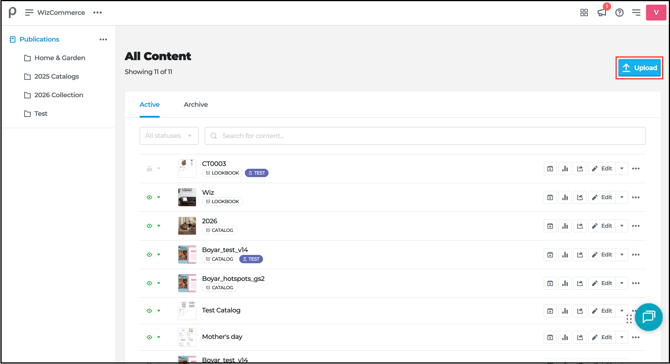
- Click Upload and select your catalog PDF.
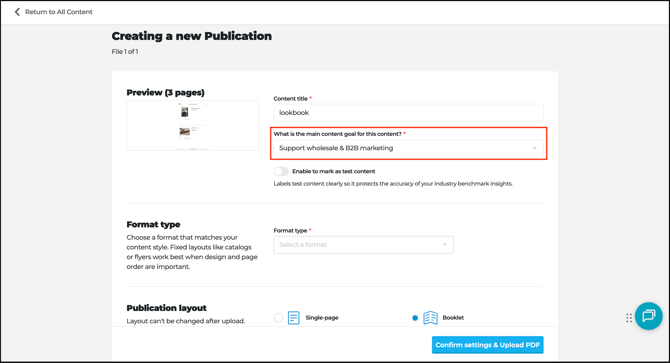
- Enter the Content title: Use a descriptive name, for example, Spring 2026 Catalog, since this is how the Lookbook will appear in WizCommerce after syncing.
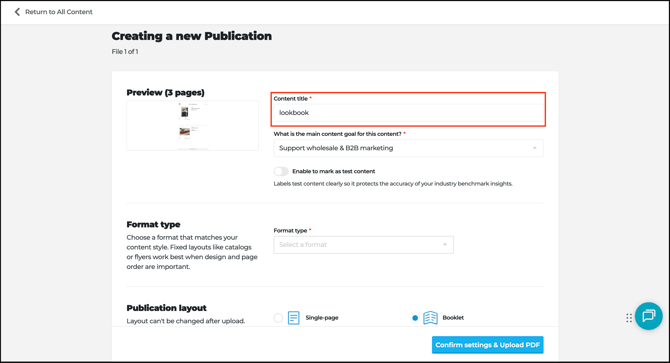
- Under Main content goal, select Support wholesale & B2B marketing from the drop down.
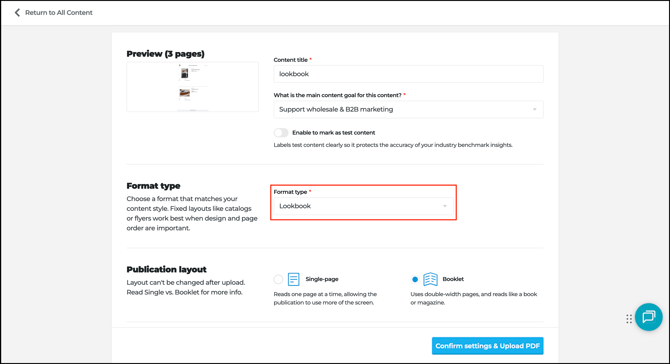
- Choose the Format type that matches your content:
- Catalog: Product-focused, fixed layout
- Flyer: Short-form, promotional
- Lookbook: Visual, collection-driven
- Magazine: Editorial style
- Brochure: Informational
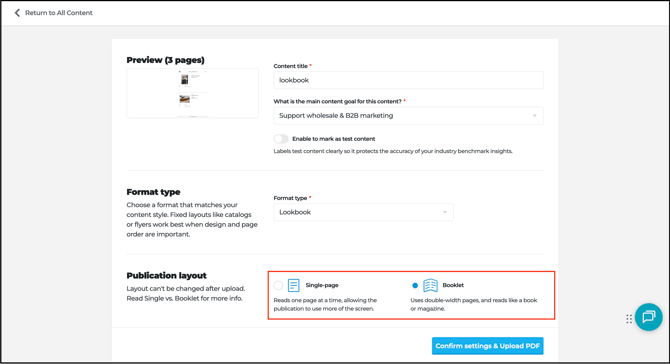
- Choose the Publication layout:
- Single-page: one page at a time. Best for flyers or short documents.
- Booklet: two pages side-by-side. Best for catalogs and Lookbooks where left and right page design matters.
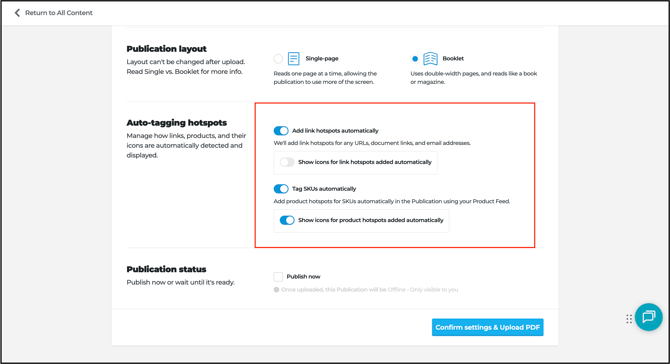
- Under Auto-tagging hotspots, choose what Publitas should detect automatically:
- Add link hotspots automatically: Turns URLs, document links, and email addresses in your PDF into clickable hotspots.
- Tag SKUs automatically: Scans the PDF for SKUs that match your WizCommerce product feed and creates product hotspots for them. This saves the most time during setup.
- Show icons for hotspots added automatically: Displays a visible icon over each auto-tagged link or product so buyers know it's clickable.
- Under Publication status, choose when the Lookbook should go live:
- Publish now (unchecked): Keeps the Lookbook offline and visible only to you. Recommended for WizCommerce Lookbooks so you can review and edit before syncing.
- Publish now (checked): Makes the Lookbook live in Publitas as soon as it finishes uploading.
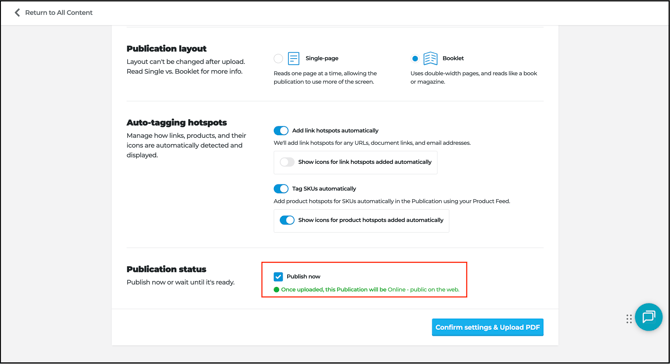
- Click Confirm Settings and Upload PDF.
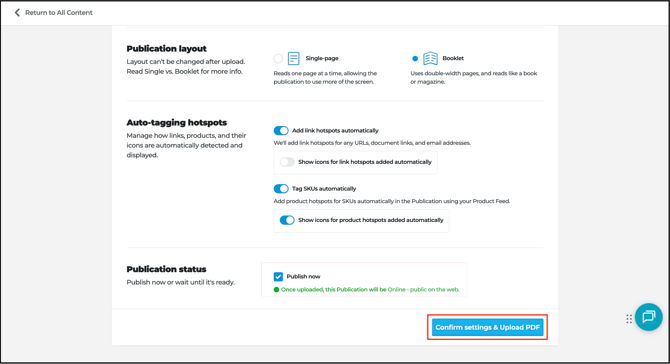
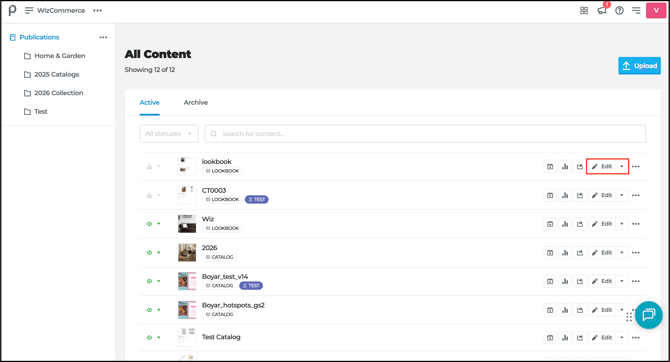
- Wait for the upload to finish, then click Edit to open the Publitas editor.
Note: Lookbooks published in Publitas don't sync to WizCommerce automatically. Once published you will need to sync the lookbook to make it available in WizCommerce.
C. Add Table of Contents to Lookbook
A Table of Contents acts as an index inside the Lookbook. Sales representatives and buyers can click any topic to jump directly to that page.
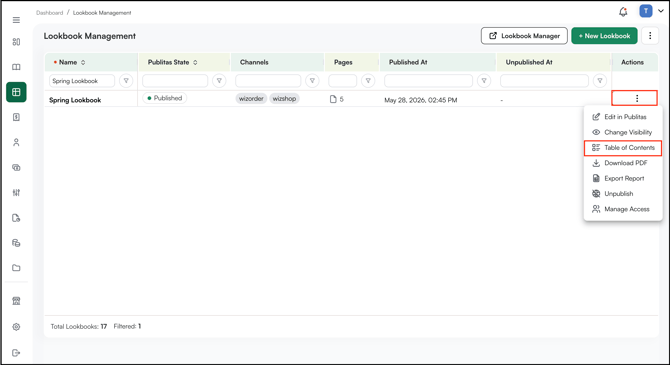
- From Lookbook Management (In WizOrder web portal), click the three-dot menu next to the Lookbook.
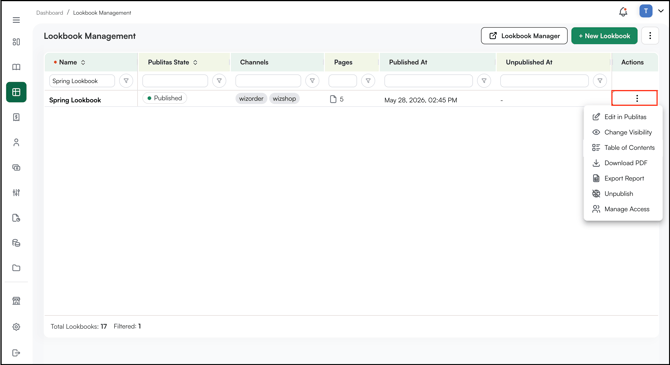
- Select Table of Contents.
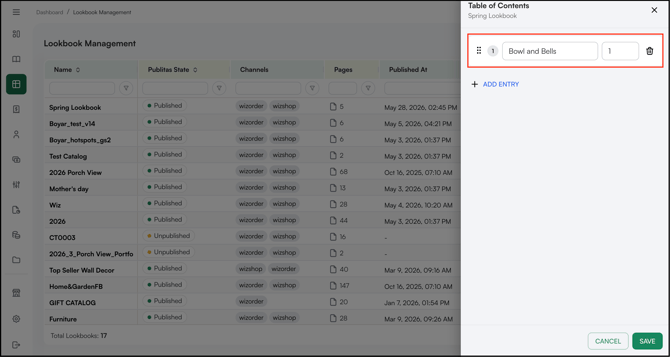
- Add each topic and link it to the corresponding page number.
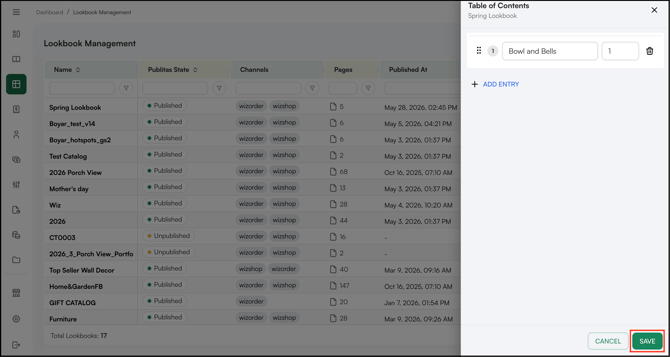
- Click Save.
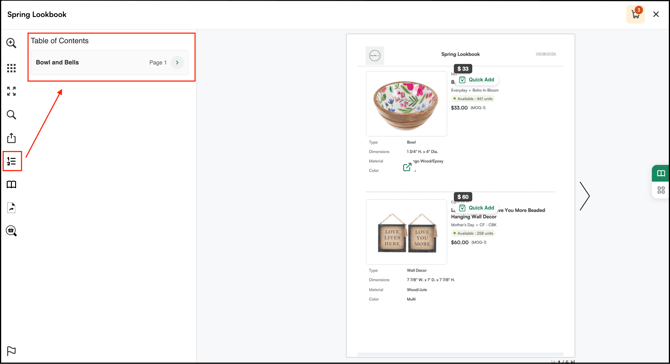
- The Table of Contents you added appears in the left navigation of the live Lookbook. Buyers and sales representatives can click any topic to jump straight to that page.
D. Publish the Lookbook
Once your Lookbook is ready, publish it from the Publitas dashboard to make it available for syncing into WizCommerce.
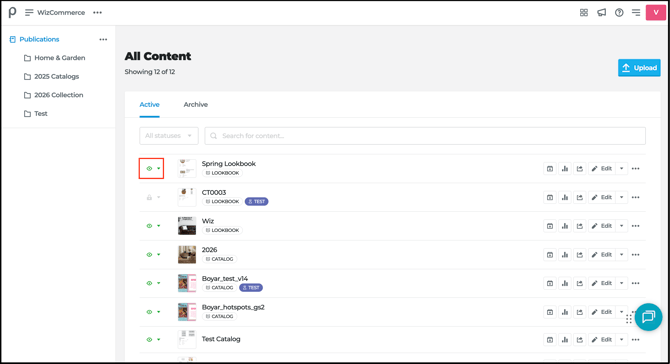
- Go to All Content in the Publitas dashboard.
- Find your Lookbook in the Active tab.
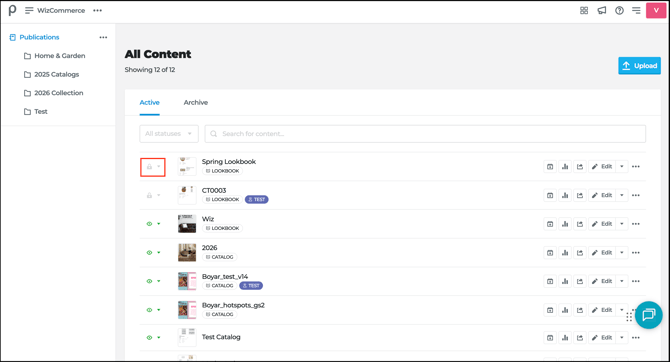
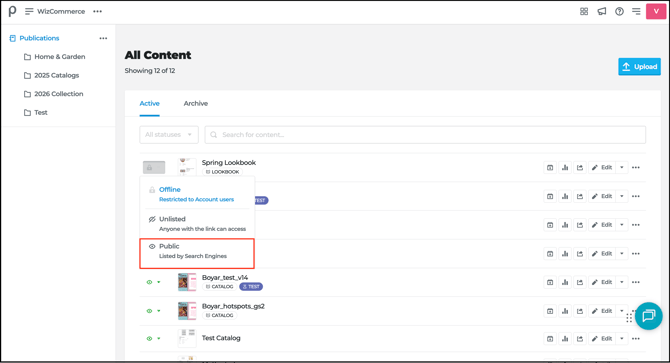
- Choose the visibility setting:
- Offline: the Lookbook is restricted to account users only. Use this while you are still editing or reviewing.
- Unlisted: anyone with the direct link can access the Lookbook. Use this for buyer-specific previews you don't want indexed publicly.
- Public: the Lookbook is listed by search engines and visible to anyone. Select this option to sync the Lookbook into WizCommerce.
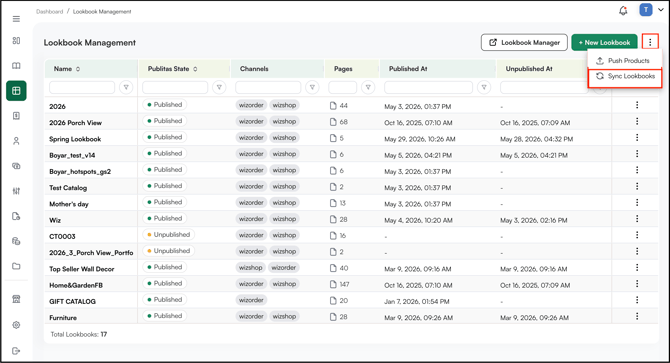
Sync the Lookbook to WizCommerce
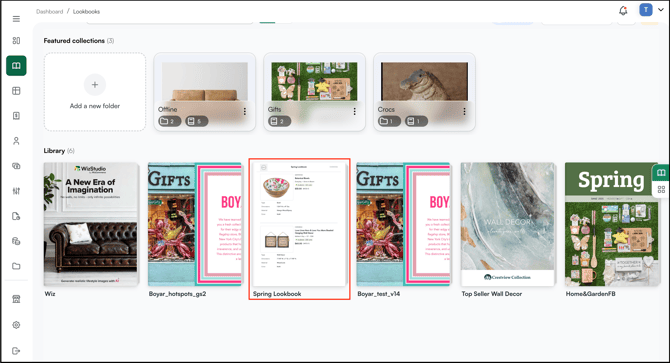
- Go to Lookbook Management in WizCommerce.
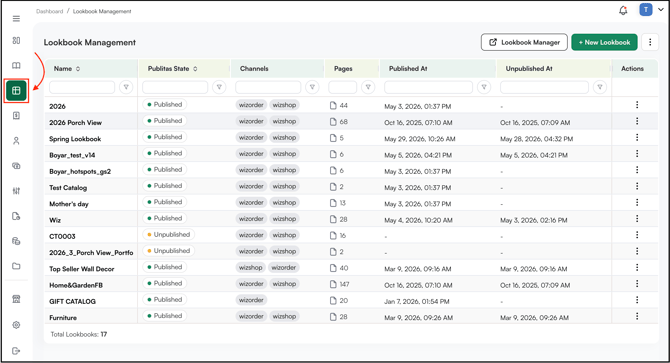
- Click the three-dot menu at the top of the page.
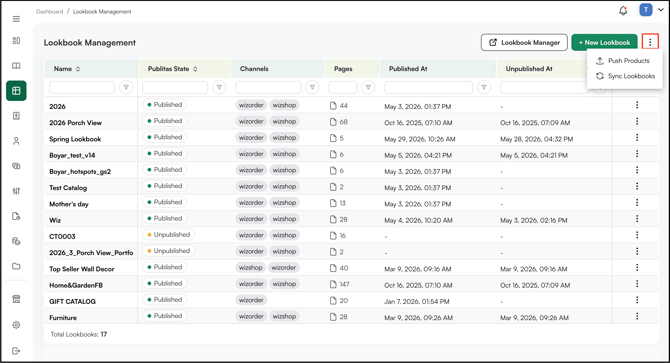
- Select Sync Lookbooks. Wait for the sync to complete, the Lookbook is now visible in WizCommerce.
Set Visibility in WizCommerce
- From Lookbook Management, click the three-dot menu next to the Lookbook.
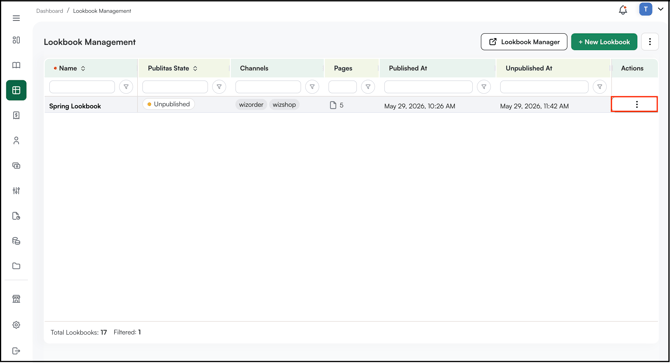
- Select one of the options:
- Published: The Lookbook is live and visible to sales representatives based on access settings.
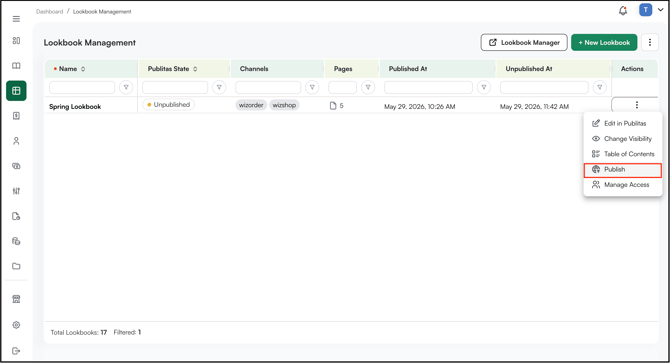
- Unpublished: The Lookbook is hidden from sales representatives but remains in your library.
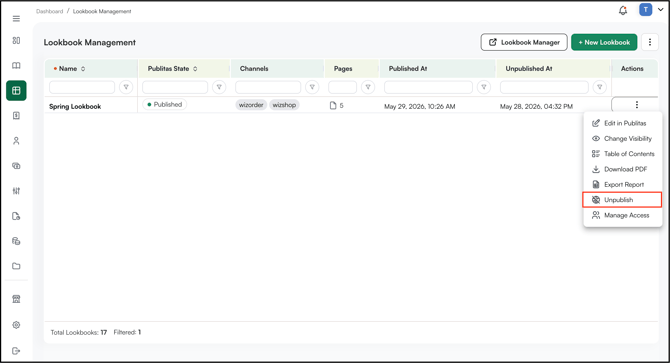
- Published: The Lookbook is live and visible to sales representatives based on access settings.
- In Publitas:
- In WizOrder:
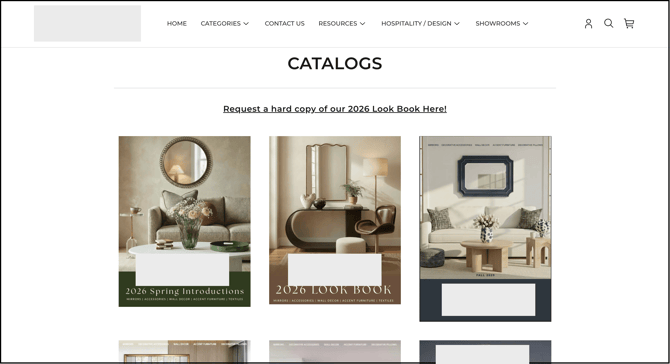
- In WizShop:
FAQs
1. My catalog is larger than 50 MB. How do I upload it?
A. Upload the catalog directly through Publitas instead of WizCommerce. Once the Lookbook is created in Publitas, sync it back into WizCommerce from Lookbook Management using the Sync Lookbooks option.
2. Can I build a Lookbook from scratch inside Publitas?
A. No. Lookbooks are built from existing catalog PDFs. Design your catalog first, then upload it to add interactive hotspots.
3. The Lookbook is showing as Public in Publitas but it's still not appearing in WizCommerce. What do I do?
Setting visibility to Public in Publitas makes the Lookbook eligible for syncing, but it does not pull it into WizCommerce automatically. Go to Lookbook Management in WizCommerce and run Sync Lookbooks from the three-dot menu to pull the Lookbook in.
4. Why is the Publish now box unchecked by default during upload?
When uploading a catalog through Publitas, Publish now is unchecked so the Lookbook stays offline and visible only to you. This is intentional, it gives you time to review the auto-tagged hotspots, edit pages, and add a Table of Contents before the Lookbook goes live. Once you are ready, change the visibility setting to Public from the Publitas dashboard.
Still need help? Reach out to our support team at help@wizcommerce.com.