Payment Workflows cover how and where payments are collected, managed, and tracked within WizCommerce, whether you're collecting a one-time payment, splitting across instalments, issuing a refund, or setting up recurring billing.
This article covers how to collect payments from the Orders, Customer, and WizPay tabs, process partial and split payments, issue refunds, set up pre-authorisations, and manage recurring payments.
Platform: WizOrder & WizPay | Who is this for: Admins & Sales Reps
To Get There: Sales > Orders > Open Order > Collect Payment
Table of Contents
Before You Begin
- Ensure you have the necessary access to collect or manage payments in WizCommerce.
- Have the customer's payment details ready before starting any payment flow.
- For refunds and pre-authorisations, access WizPay from the side navigation.
Note: Payment Terms are not enabled for WizShop by default. If you want to enable Payment Terms for WizShop, please contact our support team. This is a configuration setting and is not self-serve.
A. Where Can You Collect Payments?
Payments can be collected from three places in WizCommerce:
- Orders tab: Collect payment for a specific order directly from the order page
- Customer tab: Collect payment across multiple orders for the same customer in a single transaction
- WizPay tab: Access all payment transactions in one centralised location and collect payments without navigating through orders
B. Collect Payment from the Orders Tab
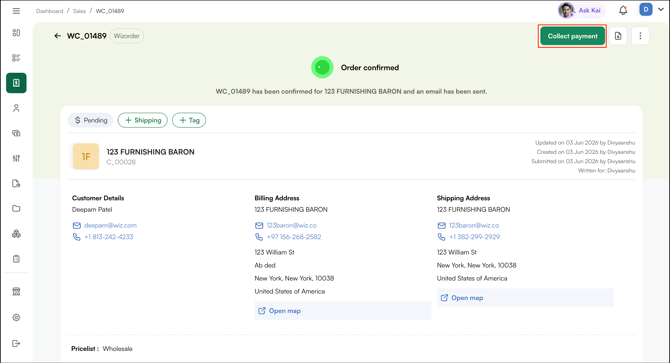
- Go to Sales → Orders and open the confirmed order.
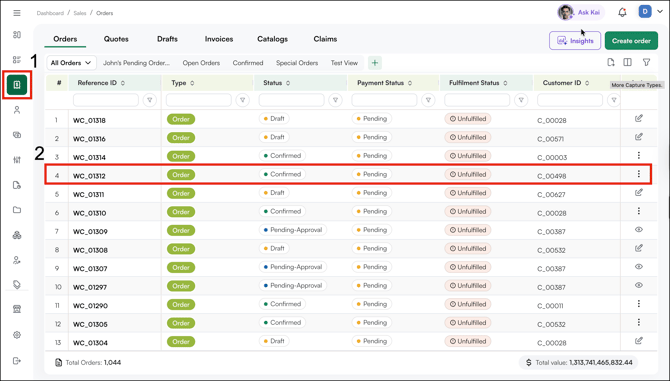
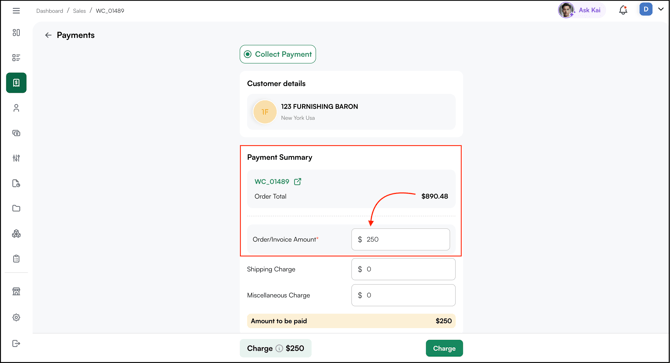
- Click Collect Payment above the order summary.
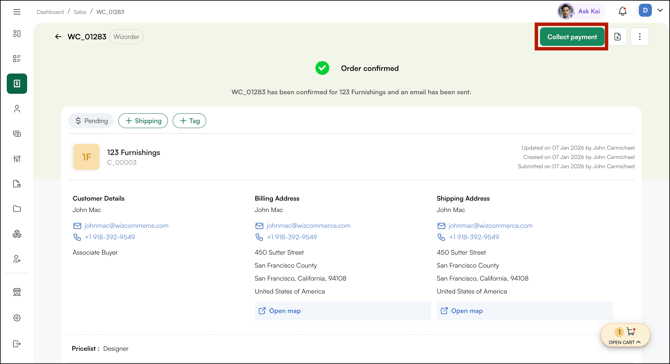
- The total order amount auto-populates. Adjust the amount if you're collecting a partial payment.
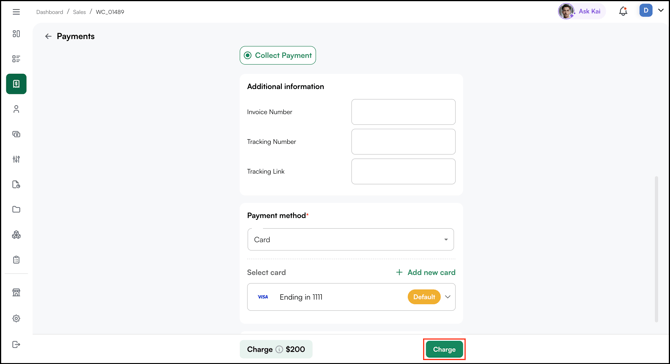
- Select your preferred payment method: Card, ACH, Offline, or Payment Link.
- Complete the payment flow for your chosen method.
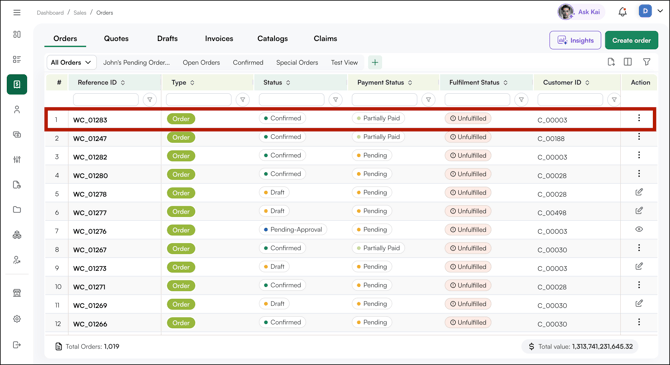
Once processed, the order status updates to Paid or Partially Paid depending on the amount collected.
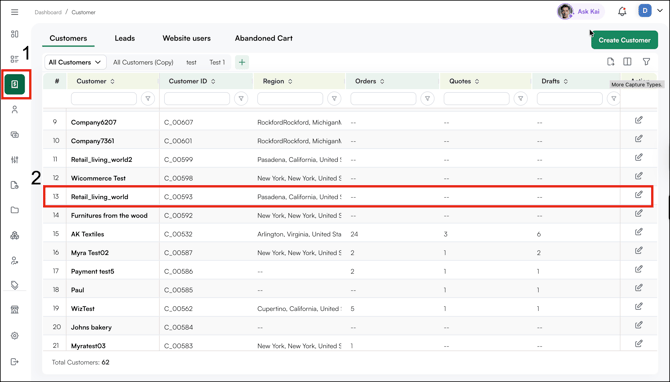
C. Collect Payment from the Customer Tab
Use this when a customer has multiple outstanding orders and you want to collect payment in a single transaction instead of processing each order separately.
- Go to the Customers tab from the side navigation.
- Click on the customer's name to open their profile.
- Click Collect Payment in the customer profile.
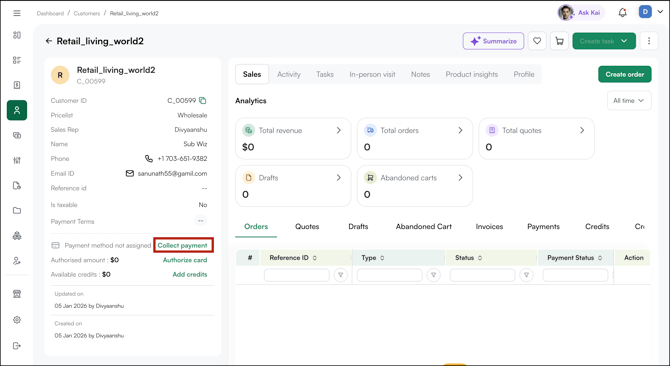
- Calculate the combined total across all outstanding orders and enter the amount manually.
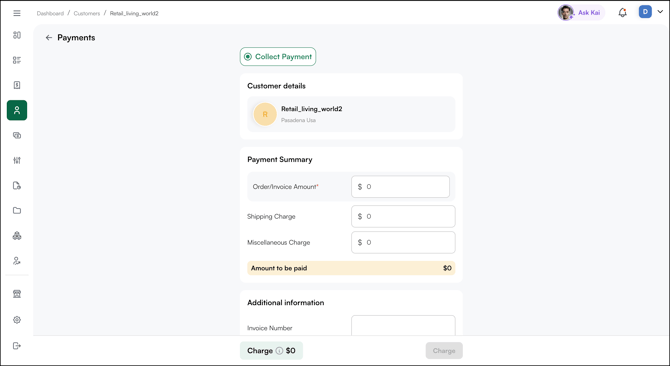
- Select your preferred payment method and complete the payment flow.
D. Collect Payment from the WizPay Tab
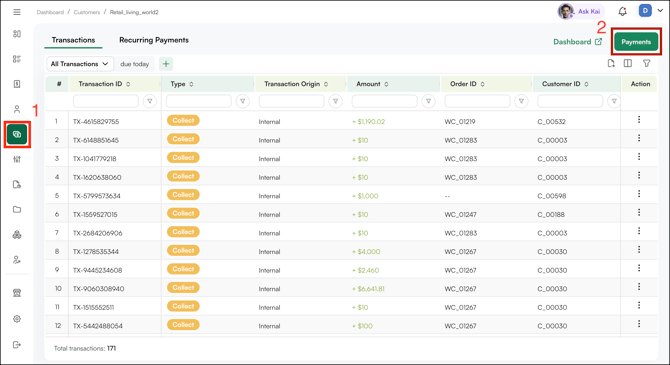
- Go to the WizPay tab from the side navigation.
- Select Payments.

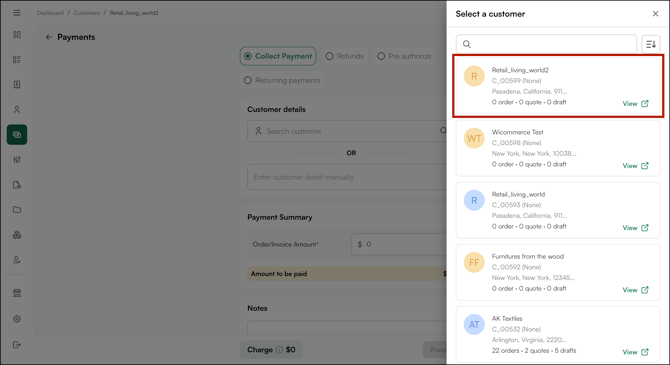
- Search for the customer by name or type it manually.
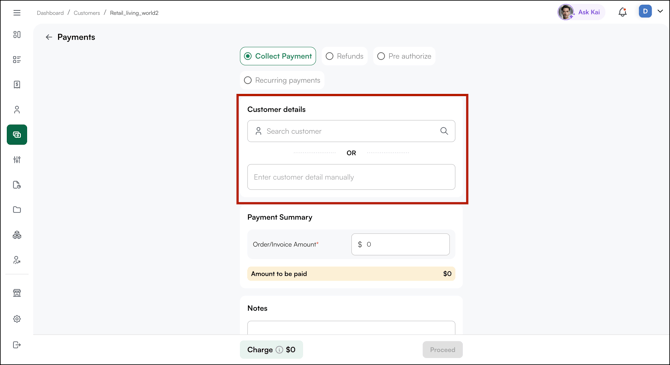
- Select the customer from the results.
- Follow the same payment flow as collecting from the Orders tab.
E. Collect Partial and Split Payments
WizCommerce lets you collect partial payments against an order — useful when collecting a deposit upfront with the balance due later.
- Open the order and click Collect Payment.
- Adjust the Payment Amount to the partial amount you're collecting — for example, 50% of the order total.
- Fill in the additional information, such as invoice number, tracking number, and tracking link. Then select a payment method and click Charge.
- Complete the payment flow. The order status updates to Partially Paid.
- When the remaining balance is due, repeat the process for the outstanding amount.
Note: Different payment methods can be used for each instalment — for example, ACH for the deposit and a credit card for the balance. Multiple payment links can also be sent for the same order at different times.
F. Collect Payment Against Invoice
You can also collect payment against an invoice created in your ERP.
A payment is linked to an invoice only when Payment Against Invoice is enabled while collecting the payment. Entering the invoice number in the Additional Info field is for reference only and does not create this association.
Best Practice: If you want the invoice in WizOrder to accurately reflect the Paid and Due amounts in sync with your ERP, follow this process:
- Authorize the customer's card.
- Create the invoice in your ERP for the associated order.
- Allow WizOrder to sync and pull in the associated invoice.
- Once the invoice is available in WizOrder, click Collect Payment.
- Collect the Payment.
Following this workflow ensures that the payment correctly links to the invoice, keeping the Paid and Due amounts accurate and consistent between your ERP and WizOrder.
G. Issue a Refund
Refunds can only be processed through the WizPay tab.
- Go to the WizPay tab from the side navigation.
- Click Payments and select the Refund option.
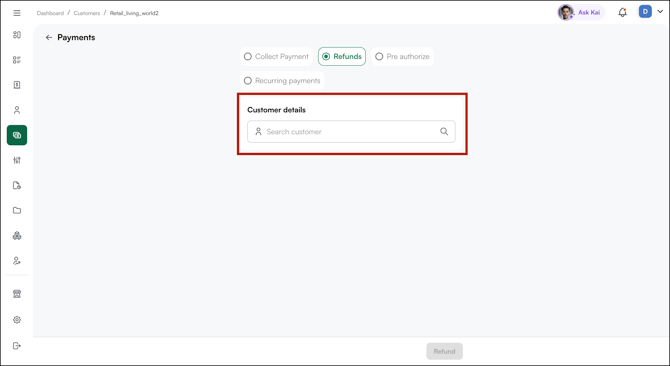
- Choose the customer from your customer list.
- Select the order you want to issue a refund for and click Next.
- Choose the specific products you're refunding. The refund amount is calculated automatically based on the selected items.
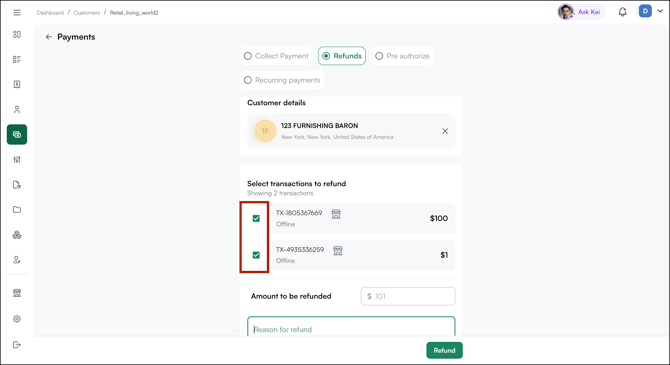
- Click Refund.
- Check Send Email Notification if you want to notify the customer.
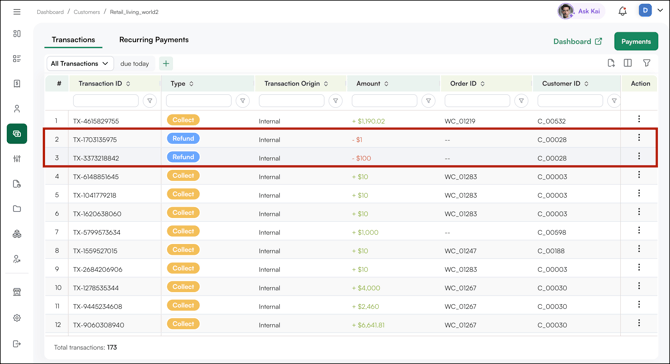
The transaction status changes to Refunded in WizPay → Transactions.
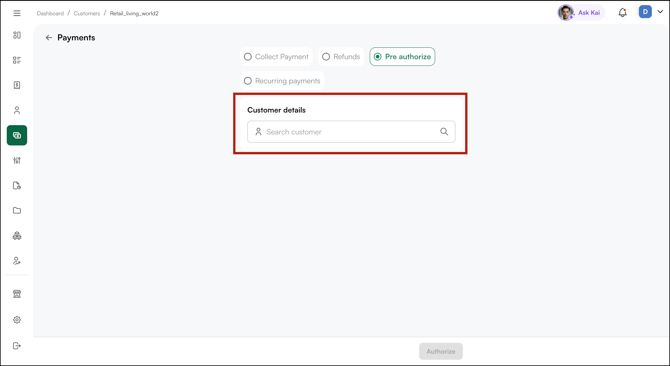
H. Pre-Authorization
Pre-authorisation lets you reserve a specific amount on a customer's card without charging it immediately. The amount is captured when you're ready to collect.
- Go to the WizPay tab from the side navigation.

- Select the Pre-Authorize option.
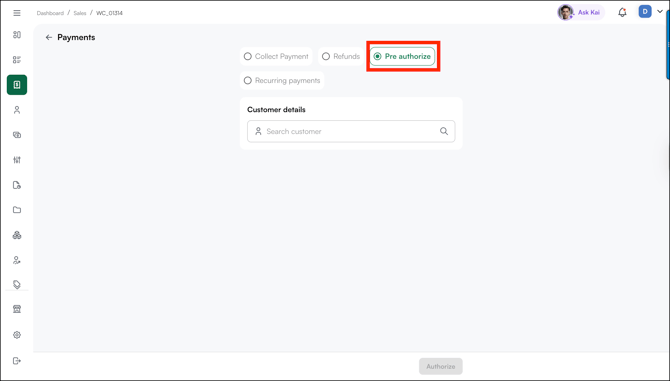
- Choose the customer you want to set a pre-authorisation for.
- Enter the amount to pre-authorise against the total order value.
- Map the amount to the customer's saved card.
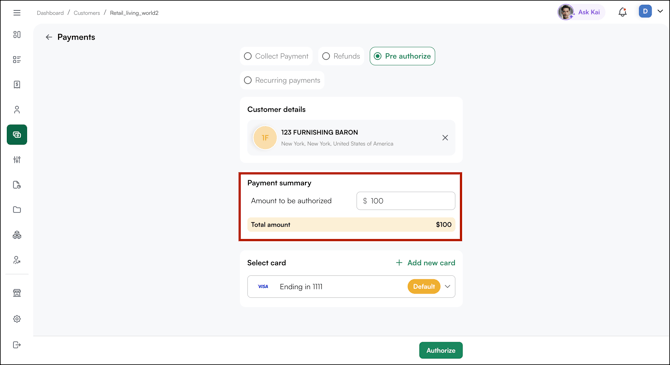
- Click Authorize.
I. Set Up Recurring Payments
Recurring payments automate regular payment collection — useful for subscription-based orders or agreed payment plans.
- Go to the WizPay tab from the side navigation.

- Select Recurring Payments.
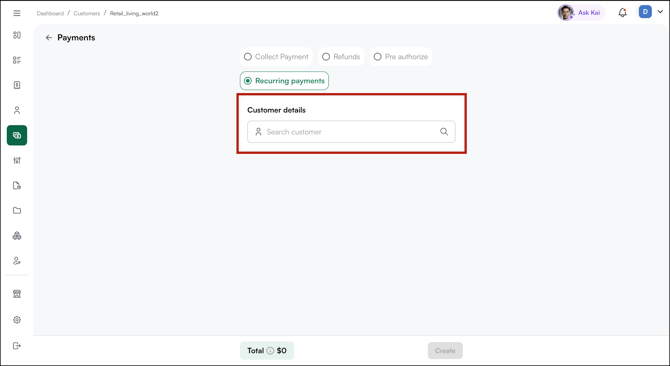
- Choose the customer from your customer list.
- Fill in the following details:
- Name: A label for the recurring payment (e.g., "Monthly Restocking – Retail Living")
- Amount: The payment amount per cycle
- Start Date: When payments should begin
- End Date: When payments should stop
- Frequency: Choose from daily, weekly, biweekly, monthly, bimonthly, quarterly, semiannual, or annual
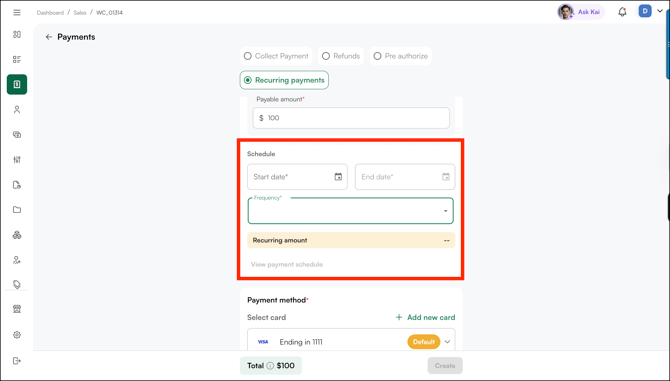
- Review the payment schedule and click Create.
The customer receives an email confirming the recurring payment setup. Automated reminder emails are sent before each charge.
J. Where Payments Appear
Once a payment is collected, it appears in three places:
- WizPay → Transactions: All transactions regardless of method — showing Transaction ID, payment type, amount, Order ID, customer, status, and date
- Order Detail – Payments Section: The full payment history for a specific order, including partial payments, the method used, and the running balance
- Finix Dashboard: Detailed settlement data including transaction fees, net amounts, and daily reconciliation
FAQs
1. Can I use different payment methods for different instalments on the same order?
A. Yes. Each partial payment can use a different method — for example, ACH for the deposit and a credit card for the balance. You can also send multiple payment links for the same order at different times.
2. Where can I see all payments collected across all orders?
A. Go to WizPay → Transactions. It shows all transactions regardless of payment method, including Transaction ID, payment type, amount, Order ID, customer, status, and date.
3. Can I collect payment against an invoice?
A. Yes, you can collect payment against an invoice, but a payment is linked to an invoice only when Payment Against Invoice is enabled while collecting the payment. Refer to Section F for details.
Still need help? Reach out to our support team at help@wizcommerce.com.