
Cart discounts activate when an order hits a set value, useful for volume incentives, seasonal promotions, or pushing buyers toward a higher spend, with the option to run a single fixed discount or stack multiple tiers that reward buyers the more they spend.
This article covers how to create and configure a cart discount, set customer and product eligibility, choose between fixed and tiered discount structures, and manage discount periods and usage limits.
Platform: WizOrder & WizShop | Who is this for: Admins
To Get There: Discount Engine > Cart Discount
Table of Content
| Sections | Topics |
| A | Set Up Cart Discount |
| B | Set Up Order Eligibility Criteria for Cart Discounts |
| C | Edit Cart Discount |
| D | Create a 0% or $0 Discount for Promotional Tracking |
| E | Stop Cart Discount |
| F | FAQs |
Before You Begin
- Ensure you have Admin access to WizOrder.
- If you plan to use customer or product segments, make sure these are already created before setting up the discount.
- Decide whether you want a fixed discount or a tiered structure before you begin.
- Promos can only be created using a % off or $ off value. These are the only two options available; a fixed/specific price per item cannot be set on a promo.
A. Set Up Cart Discount
To set up car discount:
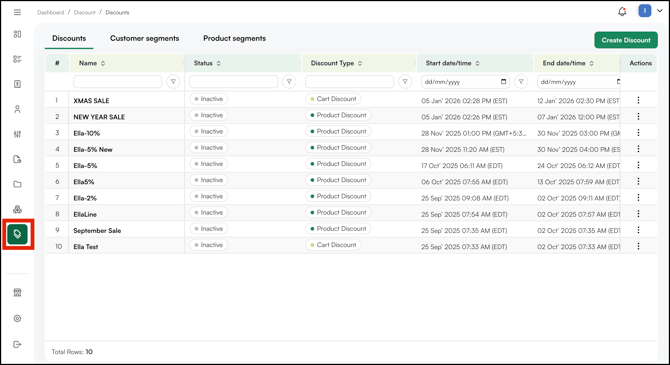
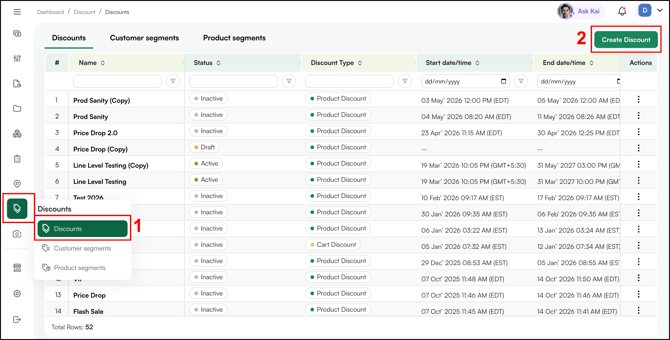
- Log in to your WizOrder web portal and go to Discount Engine in the navigation bar.
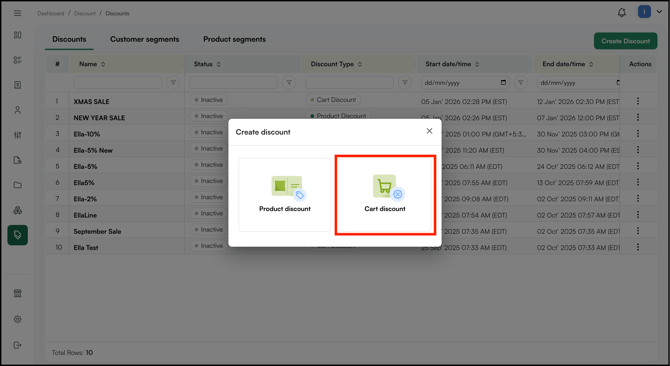
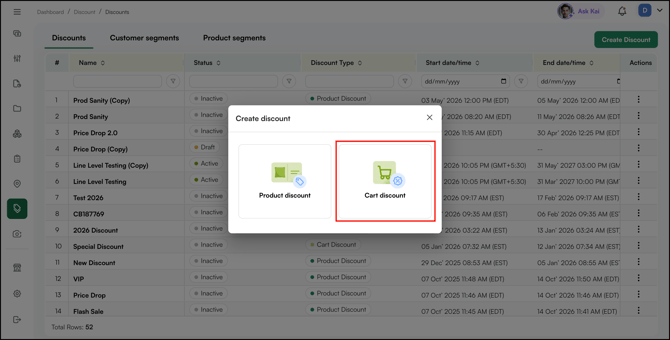
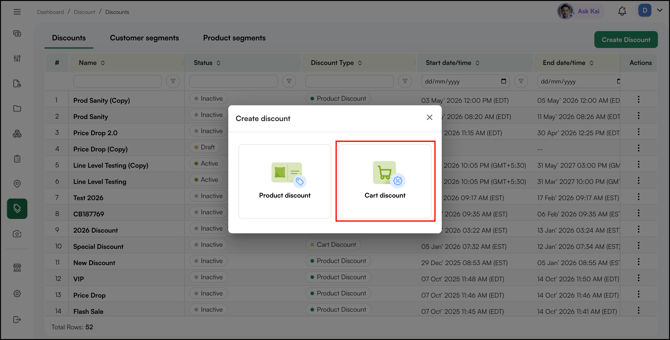
- Click Create Discount and select Cart Discount from the pop-up window.
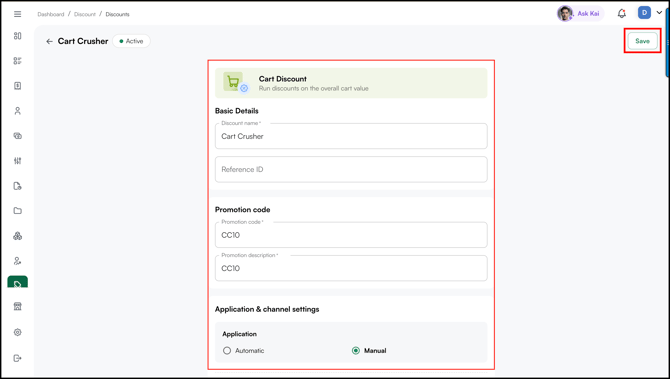
- Fill in the Basic Details:
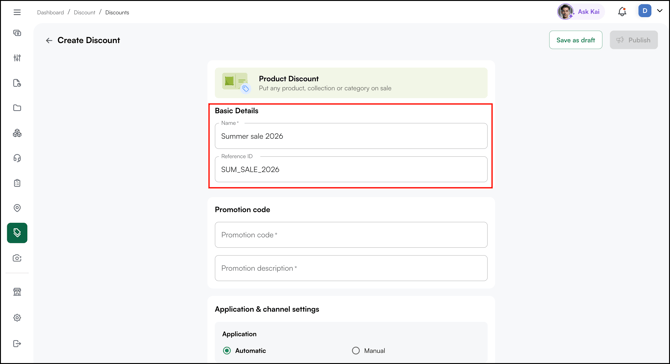
- Name: Enter a name for the contract (e.g., Summer sale 2026).
- Reference ID: Enter a unique reference ID to associate with this contract (e.g., SUM_SALE_2026).
- If you set the Type to Promotion Code, fill in the Promotion code details:
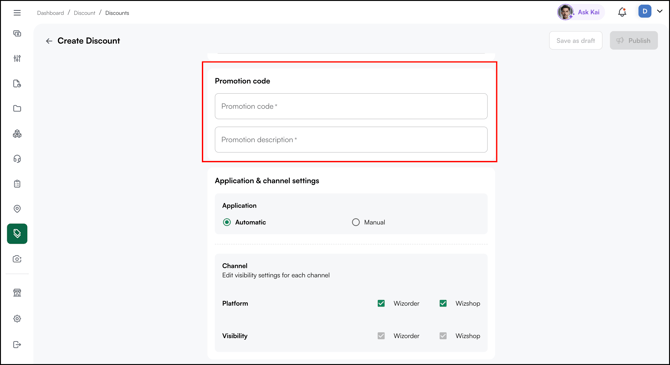
- Promotion code: Enter the code customers will apply to receive the discount.
- Promotion description: Add a short description of the promotion for internal reference.
- Set the Application parameter to either Automatic or Promotion Code:
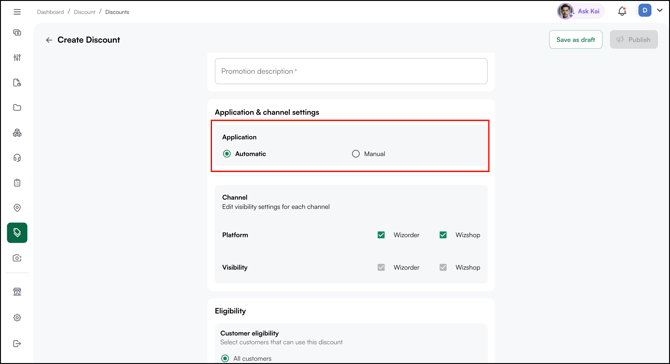
- Automatic: The contract price is applied on its own at order time for eligible customers, no code needed.
- Promotion Code: The price applies only when the customer enters the specific code you set.
- Under Channel, choose the platforms where this contract pricing should apply, WizOrder, WizShop, or both, by selecting the relevant Platform checkboxes.
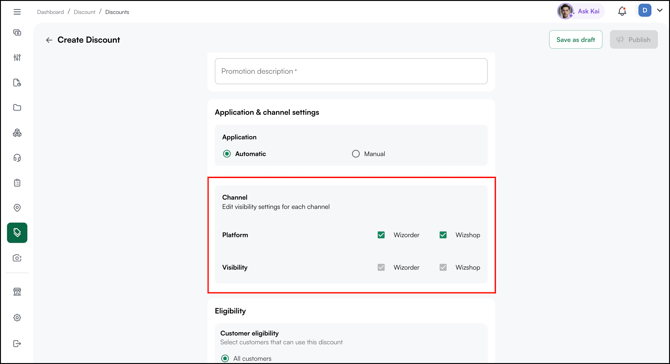
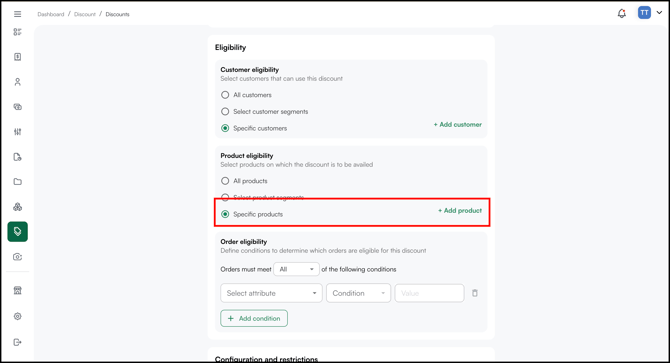
- Under the Eligibility section, define who the discount applies to and which products it covers:
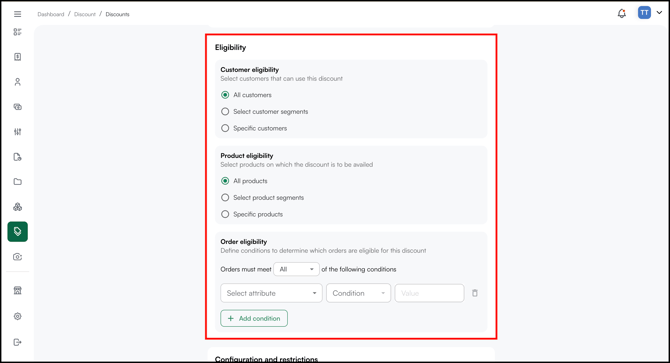
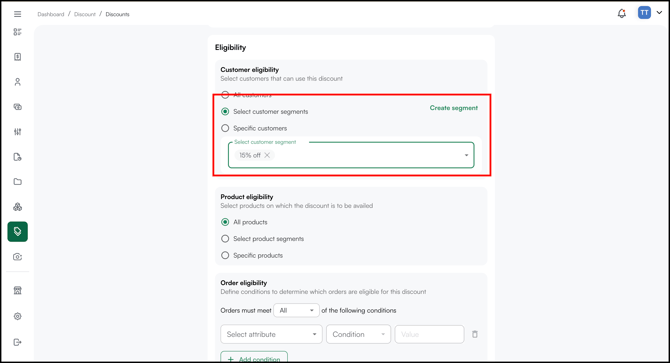
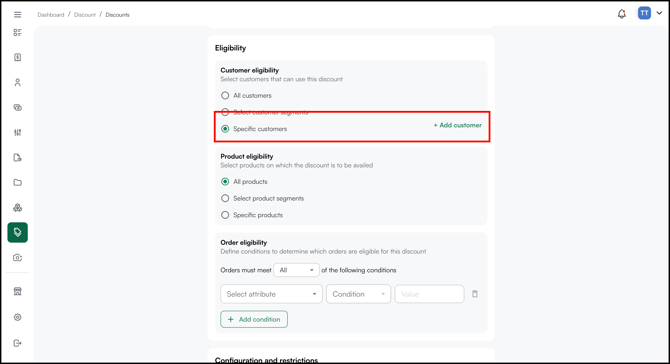
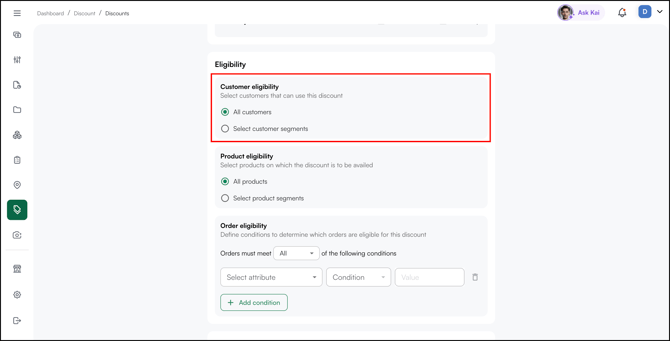
- Customer Eligibility: Select which customers can use this discount:
- All Customers: The discount applies to every customer in your account.
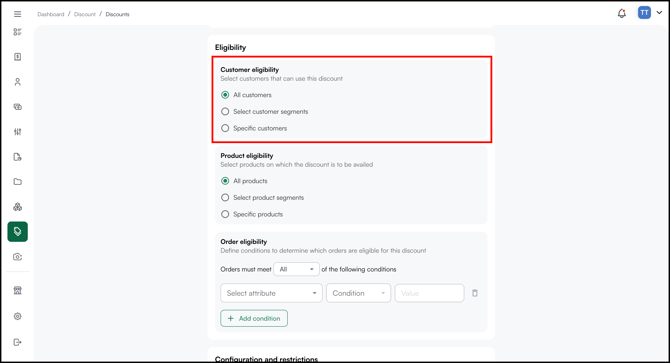
- Select Customer Segments: Restrict the discount to specific customer groups. Select this option to choose the segments you want to include.
- Specific Customers: Click + Add Customer to search and add the customer. You can also add multiple customers using Bulk Search functionality.
- All Customers: The discount applies to every customer in your account.
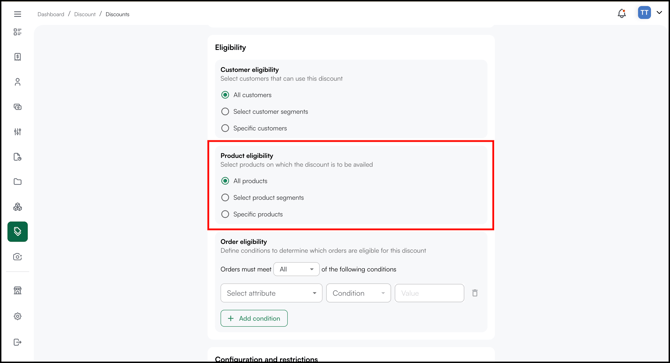
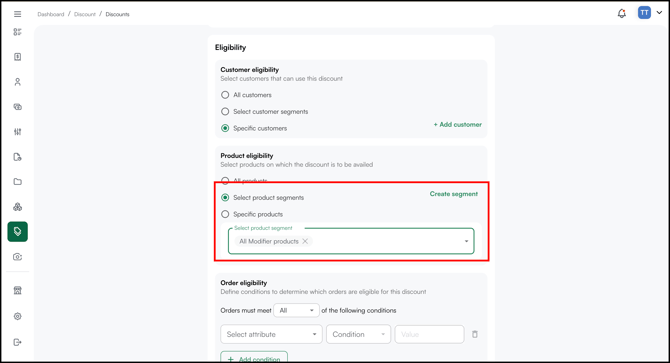
- Product Eligibility: Select which products the discount applies to:
- All Products: The discount applies to every product in your catalog.
- Select Product Segments: Restrict the discount to specific product groups. Select this option to choose the segments you want to include.
- Specific Products: Click + Add Customer to search and add the customer. You can also add multiple customers using Bulk Search functionality.
- All Products: The discount applies to every product in your catalog.
- Order eligibility: Lets you define which orders qualify for the discount. [Learn more]
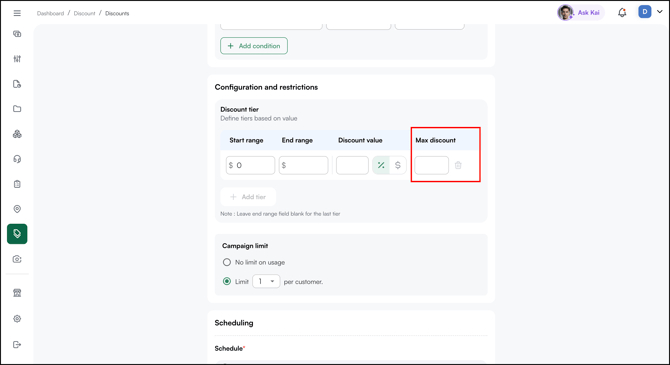
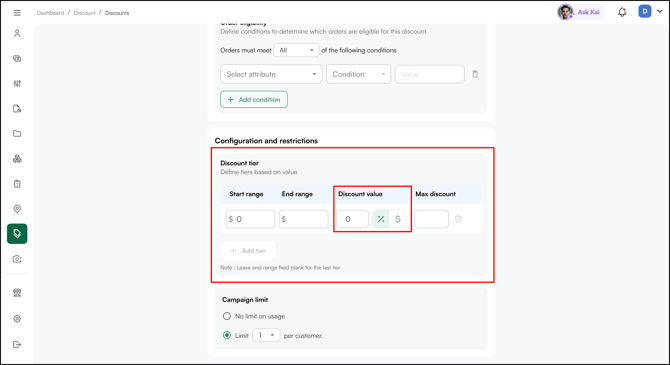
- Under Configuration and restrictions, set up the Discount tier to define discounts based on order value:
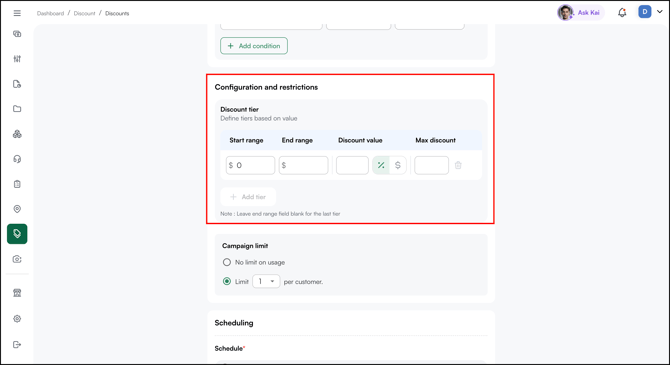
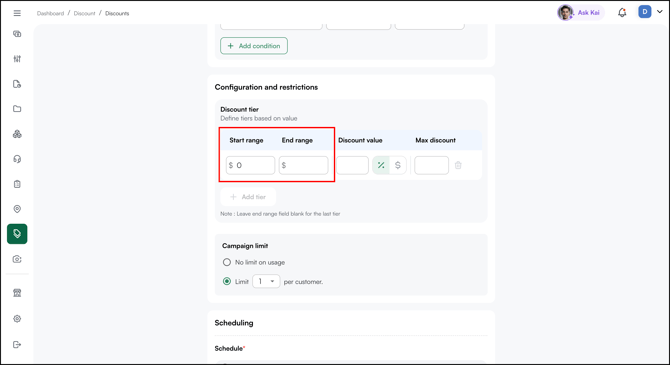
- Start range: The value at which the tier begins.
- End range: The value at which the tier ends. Leave blank for the last tier.
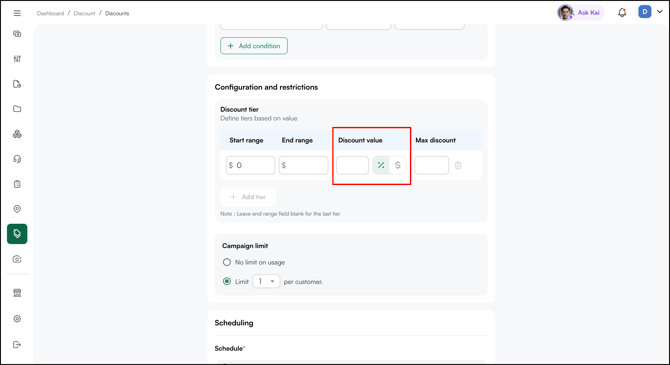
- Discount value: The discount to apply, set as a percentage (%) or fixed amount ($) using the toggle.
- Max discount: The maximum discount allowed for that tier. This applies only when you select the percentage (%) discount type.
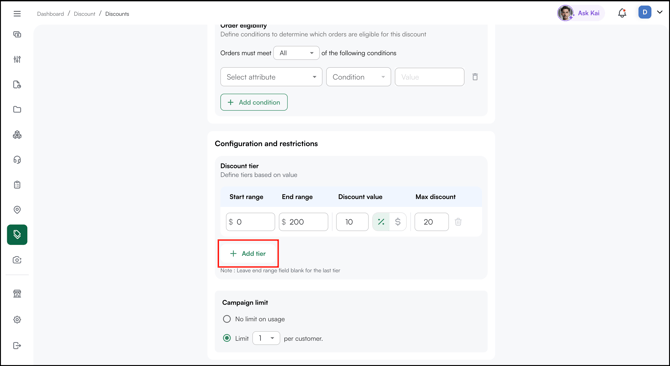
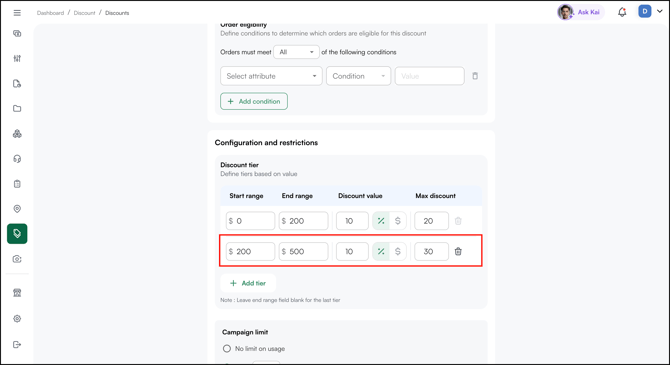
- Click + Add tier to add more ranges, or use the delete icon to remove one.
- Set the Discount Period: The campaign's start and end dates.
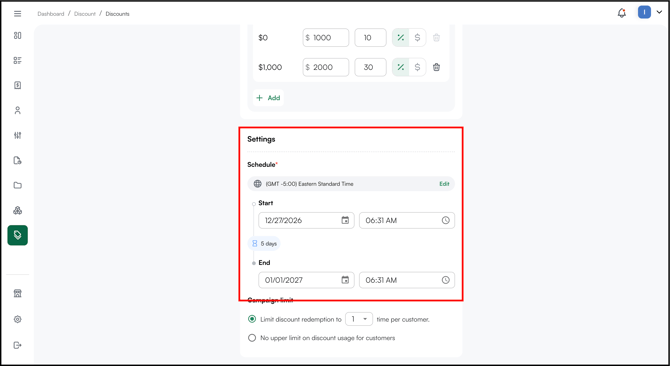
- Set the Campaign Limit, the maximum number of times a single customer can redeem the discount.
- Click Publish.
The cart discount appears in the Discount view table once published.
B. Set Up Order Eligibility Criteria for Cart Discounts
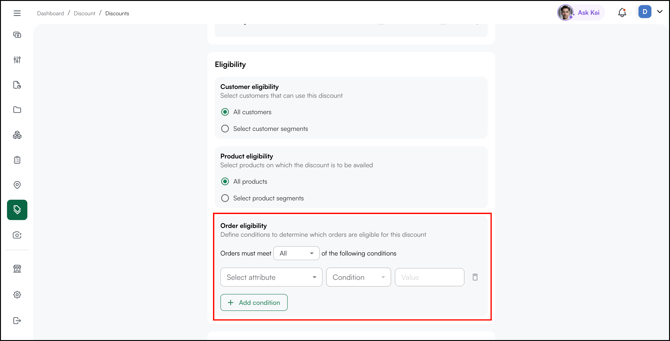
Control exactly when a cart discount appears by adding order-level conditions. If those conditions aren't met, the discount won't show, even if the customer and product eligibility both match.
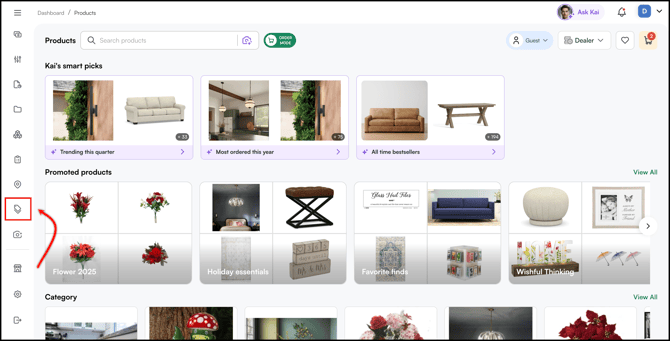
- Open Discount Engine from the left navigation bar.
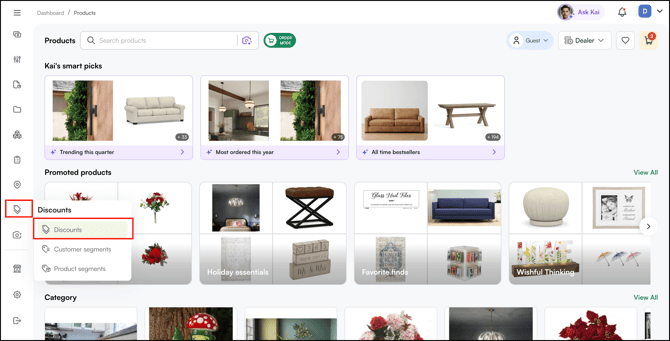
- Click on Discount.
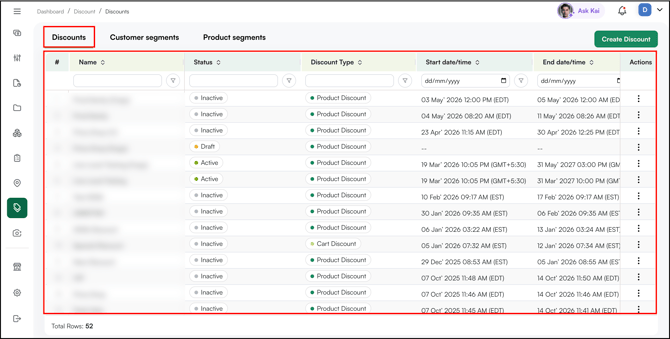
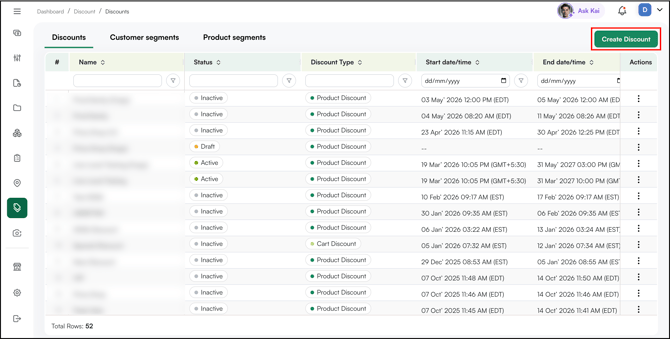
- On the Discount page, click Create Discount at the top right corner.
- Click on Cart Discount.
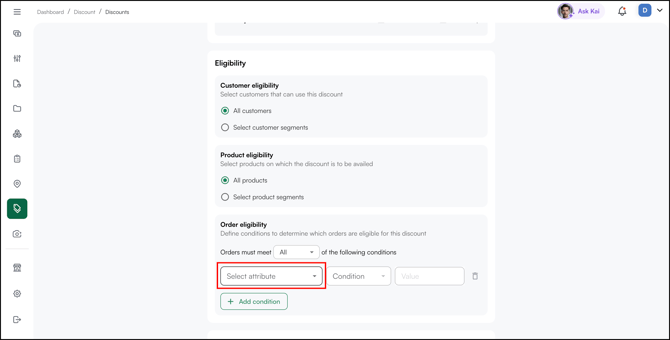
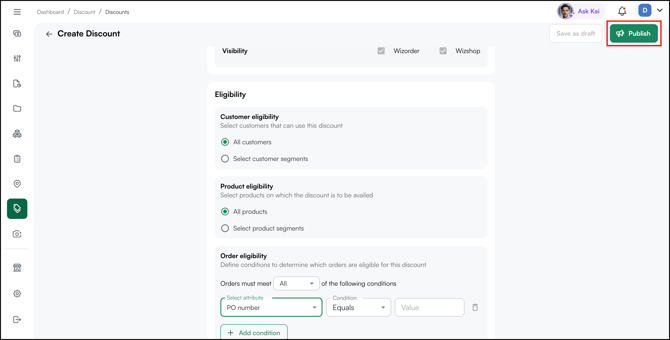
- In the Eligibility section, go to Order Eligibility.
- Choose whether the conditions run on All or Any:
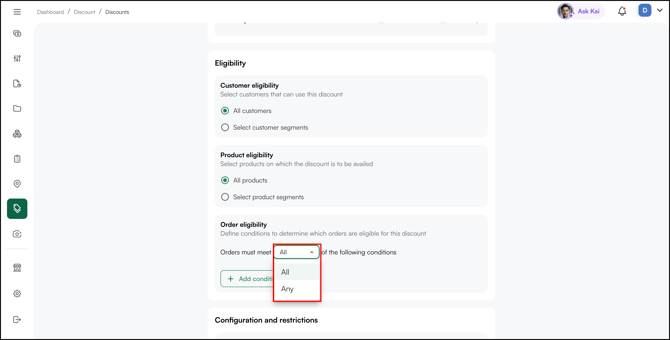
- All: Every condition must be met for the discount to apply
- Any: The discount applies if at least one condition is met
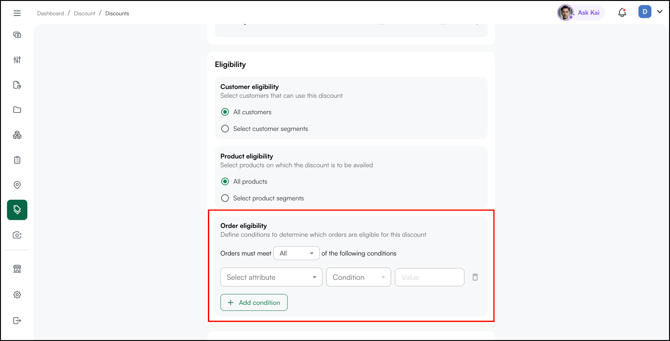
- Click + Add Condition to define when this cart discount applies, based on order attributes
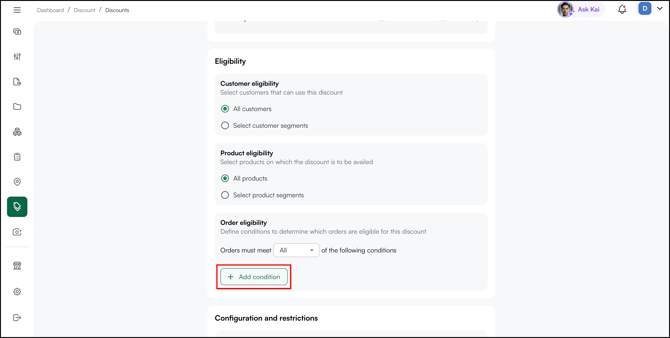
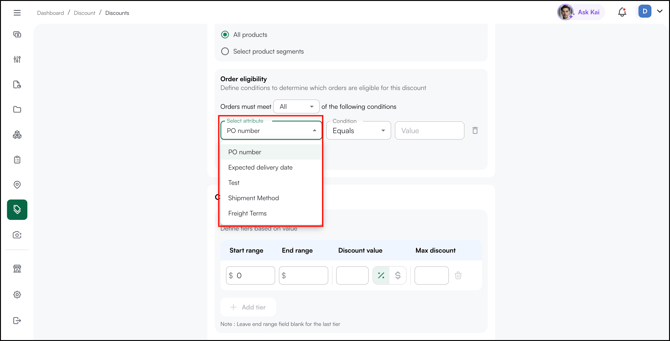
- Click the Select attribute and choose the order attribute you want to set a condition on, for example, PO number, Expected delivery date, Shipment Method, or Freight Terms.
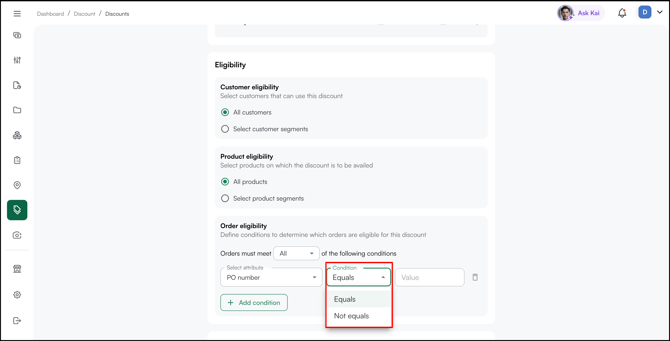
- Click the Condition dropdown and choose how the attribute should be matched. The available options depend on the attribute you picked:
- For text attributes like PO number: Equals or Not equals.
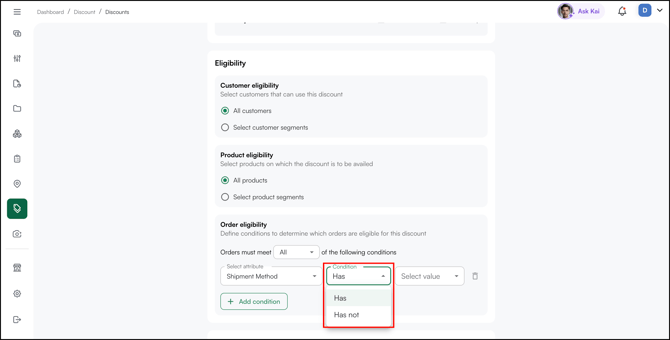
- For list attributes like Shipment Method: Has or Has not.
- For text attributes like PO number: Equals or Not equals.
- Add the value for each condition. For text attributes like PO number, type the value into the Value field. For list attributes like Shipment Method, select value and choose from the list (e.g., FedEx, UPS, USPS, DHL, Estes).
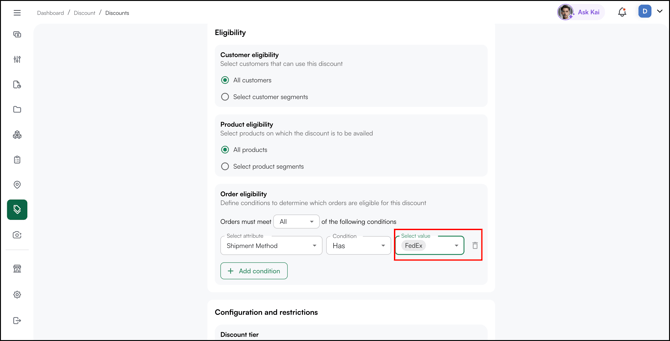
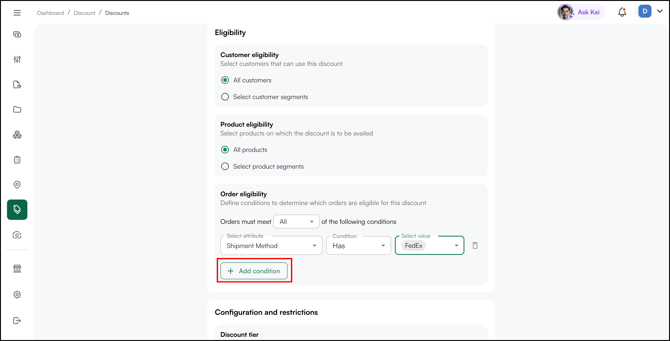
- To add another condition, click + Add Condition. A new condition row appears, joined to the previous one by an AND connector.
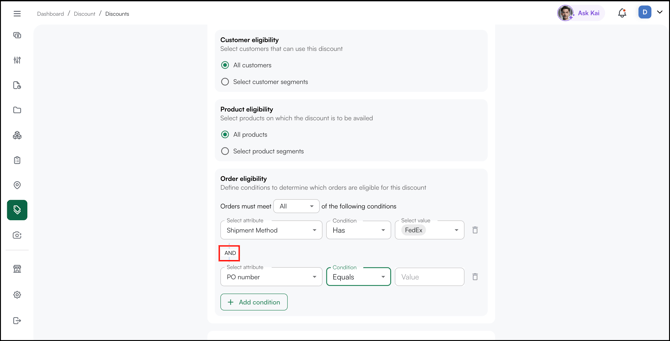
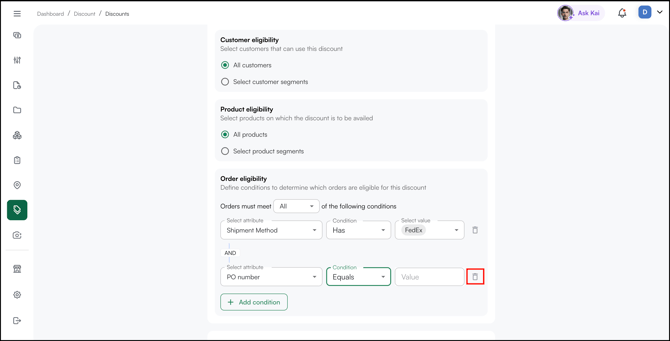
- Click the Delete icon to remove a condition.
- Click Publish to make the cart discount live.
Note: The Type setting controls how reps interact with the discount. If set to Automatic, the discount applies to the cart without any action from the rep, the updated price is shown directly. If set to Promotion Code, the rep must open Available Promotions in the cart and manually select it before it applies. Use Promotion Code when you want reps to decide whether to apply the discount on a per-order basis.
C. Edit Cart Discount
To edit cart discount:
- Go to Discount Engine → Discounts
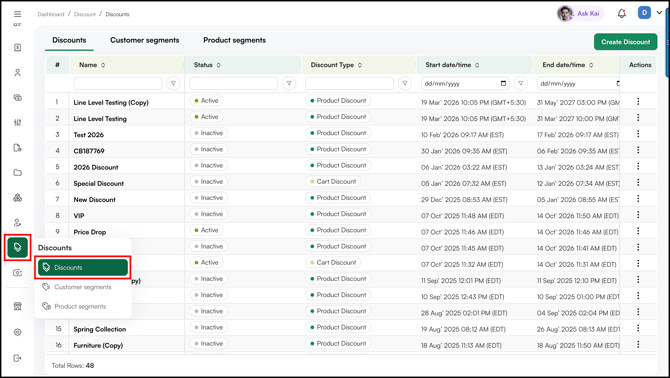
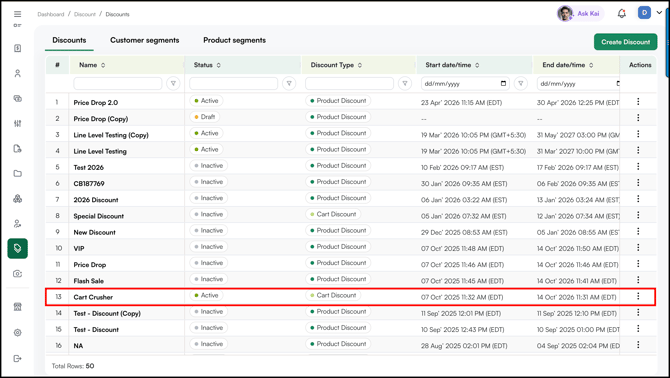
- Select the Discount (name) you want to edit.
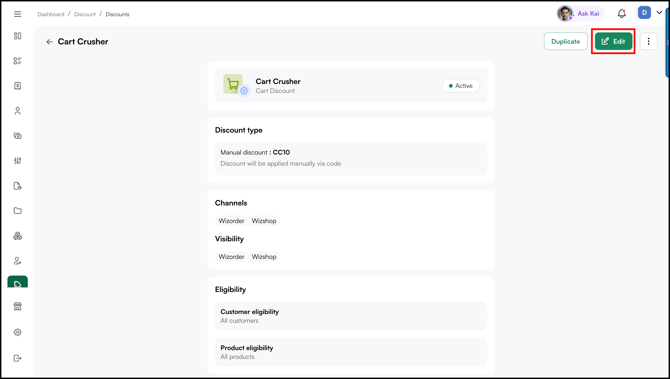
- Click Edit.
- Make the required changes and click Save.
D. Create a 0% or $0 Discount for Promotional Tracking
A 0% (or $0) discount does not lower the price. The buyer pays the same amount. It adds a "0% discount" label to every order that includes the selected products.
Use it when you have already lowered the base price of some products and want to measure whether that price change is bringing in more orders for those products. The label marks every order that includes them, so you can find those orders later and compare how the products are selling.
If you want the discount to actually reduce what the buyer pays, create a normal percentage or dollar discount instead.
- Go to Discounts Engine > Discount and click Create Discount.
- Choose a Cart Discount.
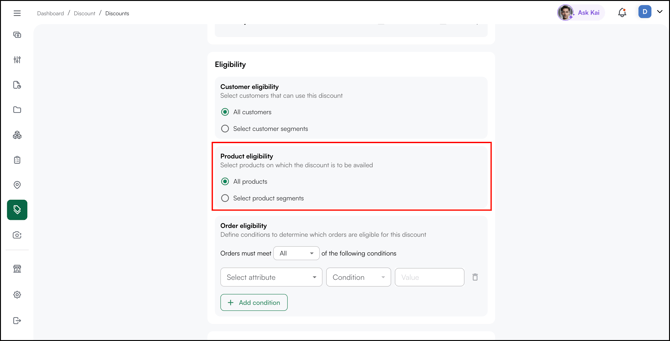
- Select the customer segment this applies to, the group of customers you want to track.
- Add the product segment that contains the products with the reduced sale price.
- Set order eligibility for the cart discount. This controls which orders the discount applies to.
- In the Discount tier table, type 0 in the Discount value column, then use the toggle to choose % or $.
- Publish the discount to make it live.
Note: Because the value is 0, the price the buyer pays does not change. The 0% label only helps you find these orders.
E. Stop Cart Discount
To cart cart discount:
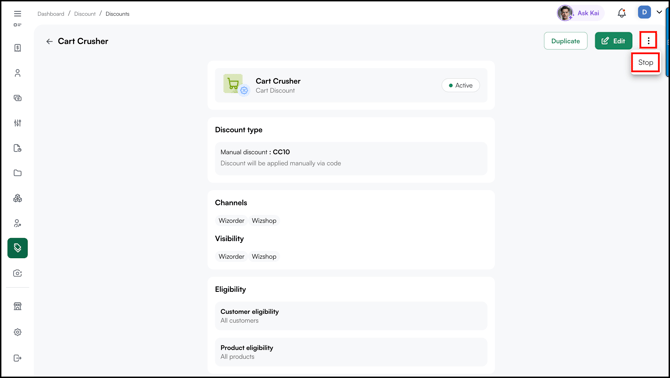
- Select the discount (Discount Name) you want to stop.
- Go to three-dot menu and click Stop.
FAQs
1. What is the difference between a Fixed Discount and a Tier Discount?
A. A Fixed Discount applies a single discount rate when the cart value meets a set threshold, for example, 10% off all orders over $500. A Tier Discount applies different rates based on the cart value range, for example, 10% off at $500, 20% off at $1,000, and 30% off at $2,000. Use tiers to reward buyers the more they spend.
2. Can I restrict a cart discount to specific customers or products?
A. Yes. Use the Eligibility section when setting up the discount. Select Customer Segments to limit the discount to specific customer groups, and Product Segments to limit it to specific product groups.
Still need help? Reach out to our support team at help@wizcommerce.com.