Categories are the permanent navigation structure of your product catalog, while collections are flexible merchandising groups for seasonal or promotional use. This article explains how to create, edit, nest, and delete both categories and collections, and how they appear to buyers.
Platform: WizOrder & WizShop | Who is this for: Admins
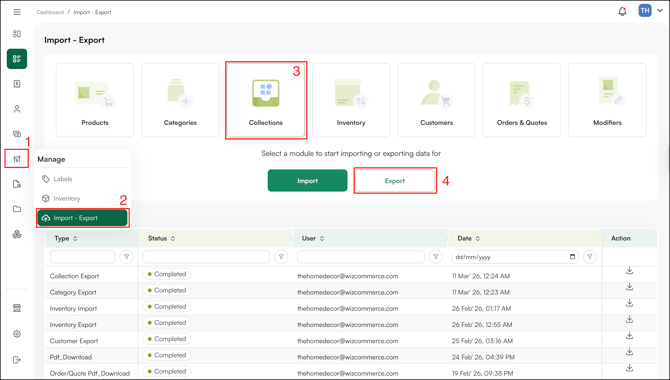
To Get There: Manage > Import and Export > Collection
Table of Contents
| Sections | Topics |
| A | Create a New Category or Collection |
| B | Assign Products to a Category or Collection |
| C | Add a Thumbnail Image to the Category/Collection |
| D | FAQs |
Before You Begin
- Make sure you have Admin access before making any changes.
- A newly created category or collection will not appear on the Product Listing Page until at least one product has been assigned to it.
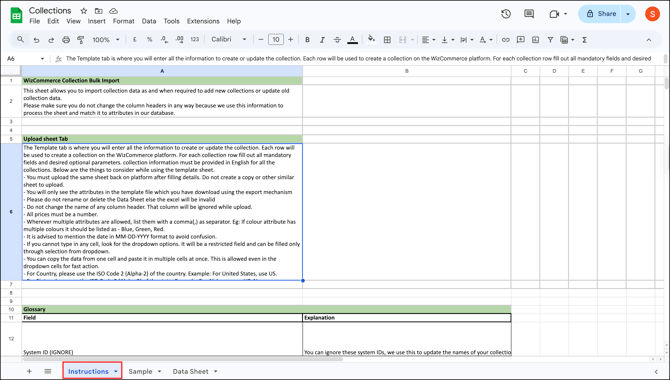
- If you are setting up categories or collections for the first time, review the Instructions tab in the exported sheet before making any edits.
A. Create a New Category or Collection
The workflow for adding a new category or collection is the same — we'll demonstrate using Collection.
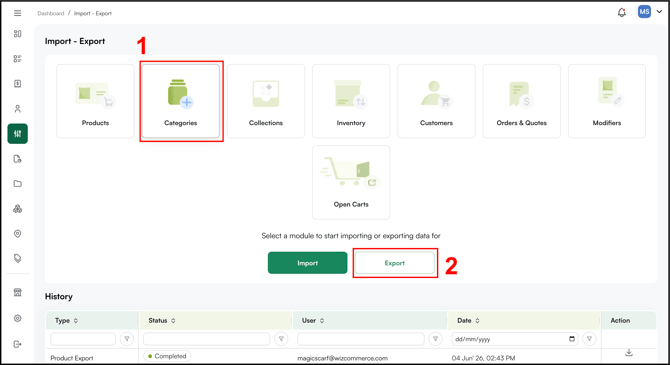
- Go to Manage → Import and Export.
- Click on Collection, then click Export.
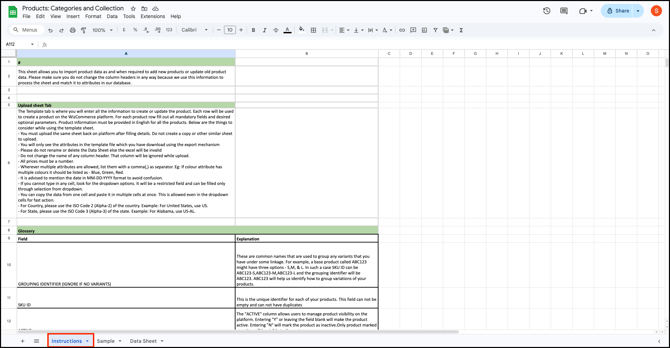
- Open the exported sheet and review the Instructions tab. It explains what each column means and is especially helpful if you are setting up categories or collections for the first time.
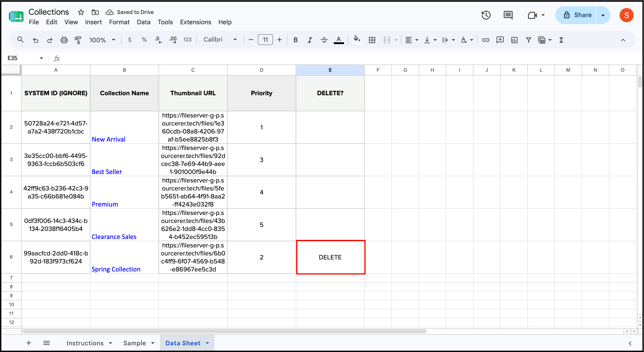
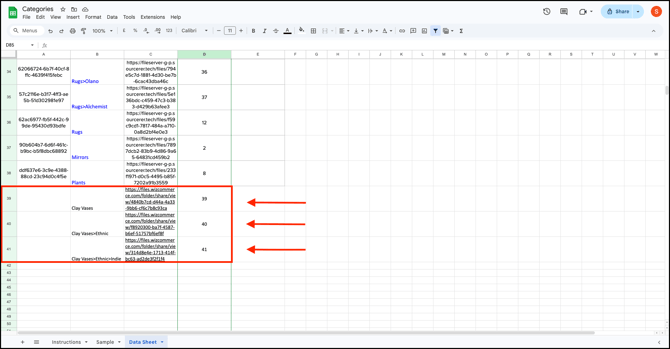
- Go to the Data Sheet tab. Add a new row for each new collection and fill in the following columns:
- Collection Name
- Public Image URL
- Hierarchy
- Save the completed sheet and upload it to apply your changes.
Note: Deleting a category works the same way as deleting a category. Go to Data Sheet > DELETE column, then type DELETE (in all caps) in the row of the category you want to remove. 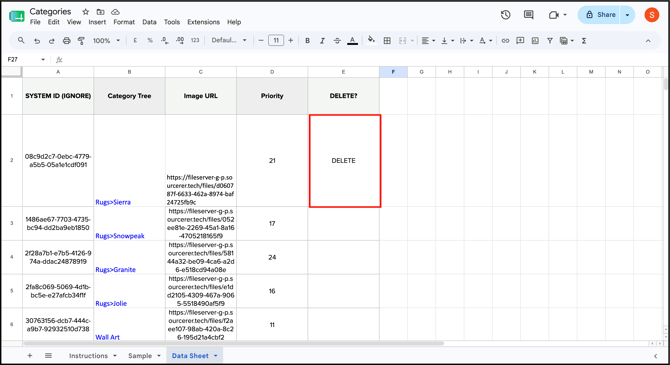
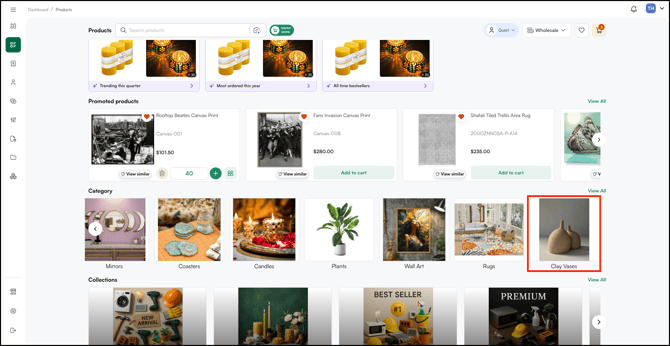
Once at least one product is assigned to the category or collection, it becomes available on the Product Listing Page in Sales Rep App (WizOrder) and the Online Storefront (WizShop).
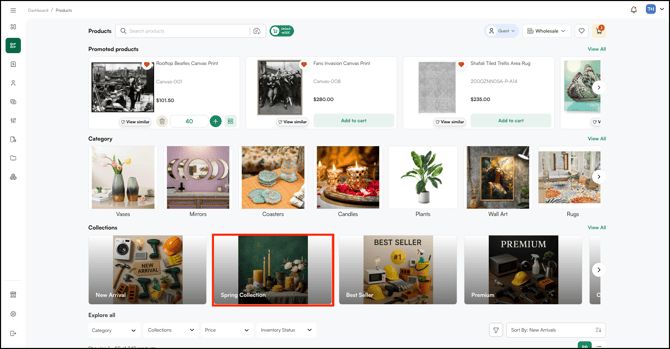
This is how it reflects after setting up the categories as described above.
B. Assign Products to a Category or Collection
The process for assigning products to a category or collection is the same — both are managed from the Classification tab on the product management page. You can do this individually or in bulk via Import and Export.
Individually from Product Management
- Go to Product Management.
- Find the product using the SKU ID or Name filter.
- Click on the product to open its details page.
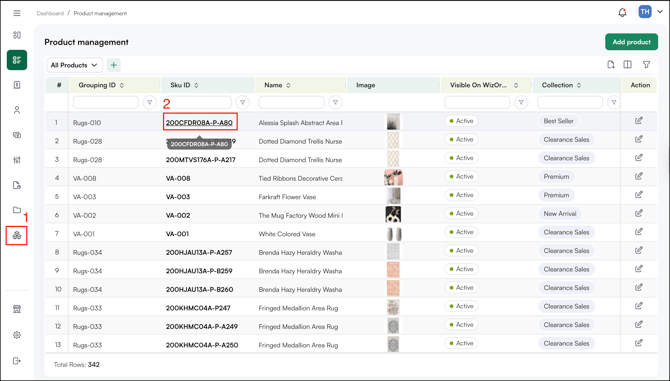
- Go to the Classification tab and click Edit.

- Click Add and select the collection you want to assign the product to.
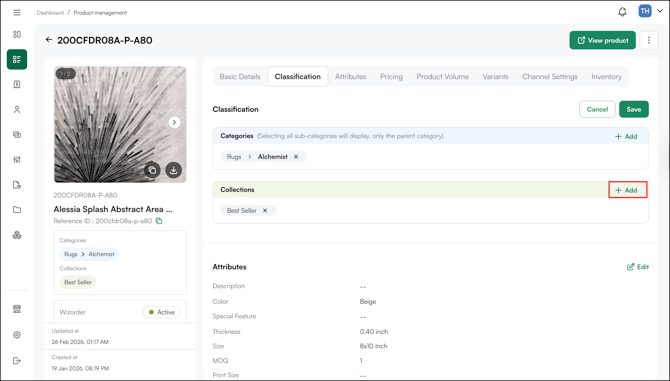
- Under Collections, select or remove the relevant collection.
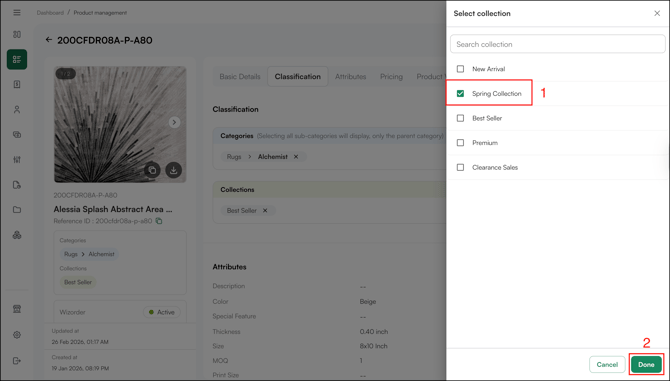
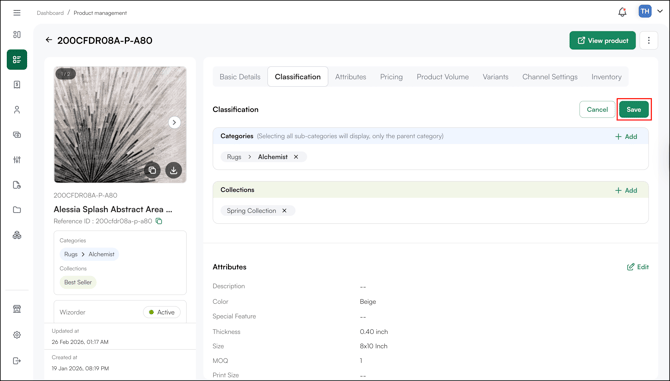
- Click Save to confirm.
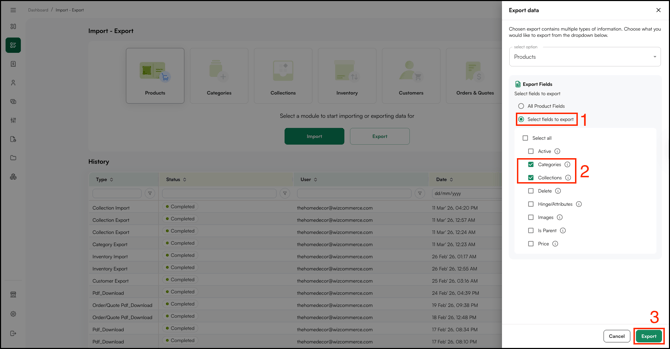
In Bulk via Import and Export
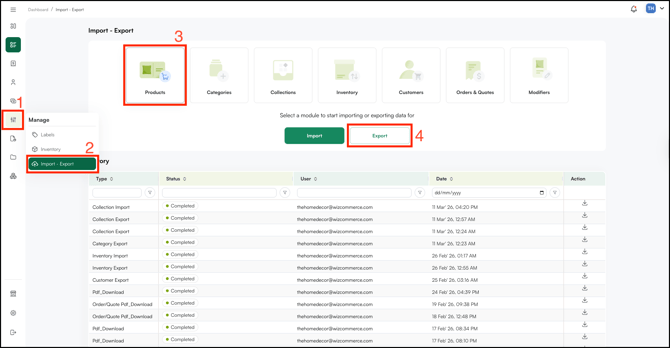
- Go to Manage → Import and Export.
- Click on Product, then click Export.
- Under Export Fields, click Select Fields to Export. Tick Categories, Collections, or both — depending on what you need to update.
- Open the exported sheet. If this is your first time using Import and Export, read the Instructions tab before making any changes.
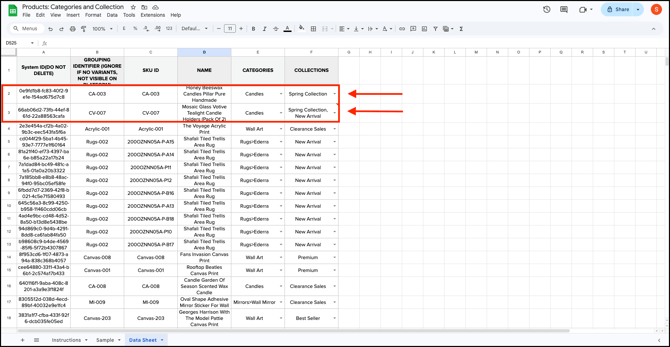
- In the Data Sheet tab, find the Collection column. Select the collection you want to assign to each product from the dropdown. To add a product to more than one collection, enter multiple collection names separated by a comma — for example, Spring Collection, New Arrivals.
- Save the completed sheet and upload it to apply your changes.
Note:
-
Use Import and Export when updating categories or collections across a large number of products at once. It's faster than updating products individually.
- If you make changes to a product in Product Management and then update it again through bulk import-export, the latest changes will override the previous ones.
C. Add a Thumbnail Image to the Category/Collection
Category and collection images are applied in bulk through the import sheet. The sheet needs a public URL for each image, so you first upload your images to Files to generate those URLs, then map them to the correct rows on import.
- Go to Manage → Import / Export
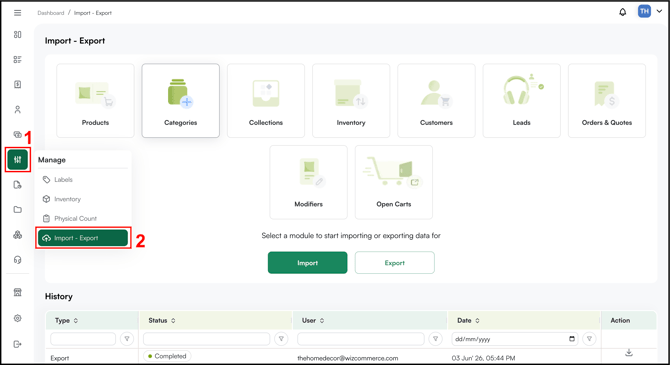
- From there go to Categories/Collections and click Export to download the current file.
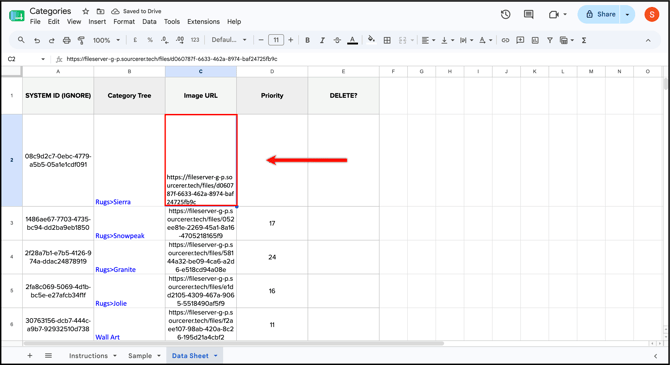
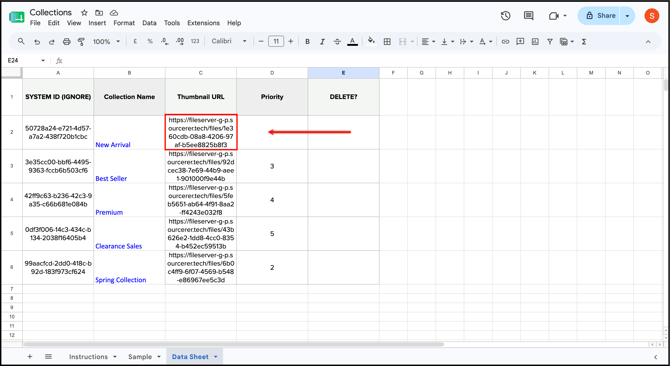
- Open the exported file and go to the Data Sheet tab. Find the Image URL column (for categories) or the Thumbnail URL column (for collections).
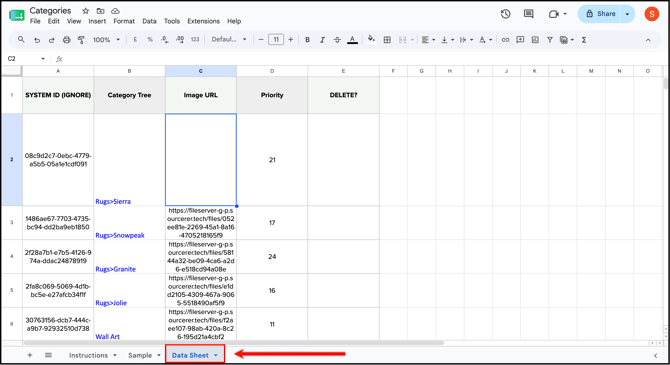
- Category Sheet (Image URL )
- Collection Sheet (Thumbnail URL )
- Category Sheet (Image URL )
- Save the updated file.
- Return to Import / Export → Categories/Collection and Import the saved file.
FAQs
1. Why isn't my new category or collection showing up on the Product Listing Page?
A. A newly created category or collection only appears on the Product Listing Page once at least one product has been assigned to it. Assign a product first and it will become visible.
2. Can a product belong to more than one collection?
A. Yes. When updating via Import and Export, enter multiple collection names in the Collection column separated by a comma — for example, Spring Collection, New Arrivals.
3. How do I control the order in which categories appear on the Product Listing Page?
A. Use the priority column in the Data Sheet. Lower numbers appear first. You can set priority independently at every level of the category hierarchy.
Still need help? Reach out to our support team at help@wizcommerce.com.