User Management is where admins control who can access the Sales Rep App (WizOrder), what they can see, and what they can do. This article covers how to add and configure new users (including setting customer, order, and pricelist access), how to create and edit roles, and how to set granular permissions at the action level.
Platform: WizOrder | Who is this for: Admins
To Get There: Settings > User Management
Table of Contents
| Sections | Topics |
| A | How to Access User Management |
| B | Finding Your Way Around |
| C | Users |
| D | Roles |
| E | FAQs |
Before You Begin
- Ensure you have access to Organizational Settings.
- If you are adding a new user, make sure the role you want to assign already exists under the Roles section. Create the role first if it doesn't.
- If a user needs access to a feature activated under Subscriptions (e.g., WizStudio), you must also grant access to that feature within the role, activating a subscription alone does not give users access automatically.
- When you create a new user, they receive an email prompting them to reset their password before logging in. Kindly follow the instructions in the email to set up a new password for your account.
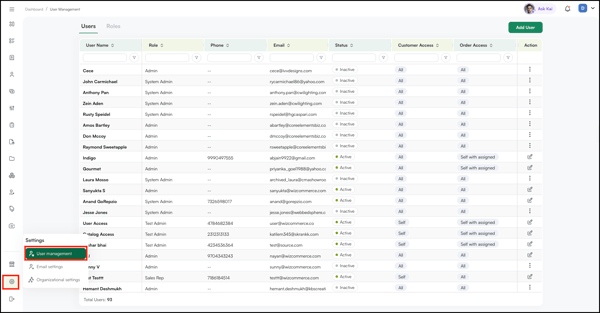
A. How to Access User Management
- Go to Settings from the left navigation.
- Click User Management to open the page, which displays two sections: Users and Roles.
Note: The Last Login At column shows when each user last signed in to WizCommerce. Use this to spot inactive users before audits, license reviews, or offboarding. A "--" means the user has never logged in.
B. Finding Your Way Around
User Management is organized into two sections:
- Users: Everyone who has or currently uses the platform, including sales reps and admins
- Roles: All roles set up in WizOrder, each with its own set of access permissions
C. Users
The Users section gives you a full view of everyone on your team. Each user row shows their contact information, the date they joined, and which customers they have access to.
For each user, you can manage:
- Customer Access: Which customers they can view
- Order Access: Which orders they can see and manage
- Pricelist Access: Which pricelists are available to them when creating orders
To update a user's access or role, use the Actions column on the far right of their row. You can also click the user's name to open their profile and make changes there.
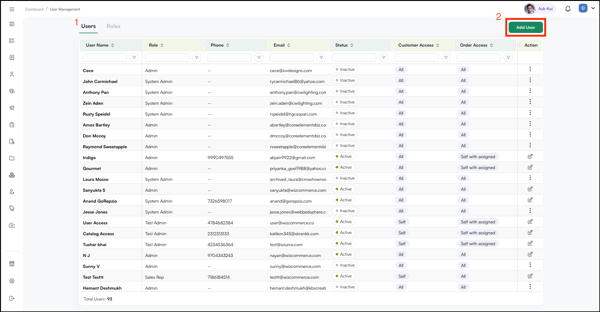
How to Add a User
- Go to Settings from the left navigation.
- Click User Management, then select the Users tab.
- Click Add User at the top of the page.
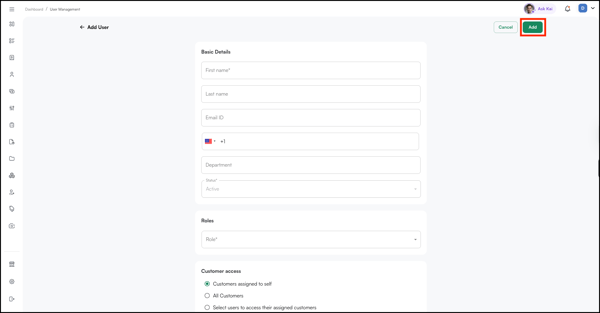
- The Add User form opens. Fill in the basic details:
- First Name (required)
- Last Name
- Email ID: the email address they'll use to log in
- Phone Number: include country code
- Department: e.g., Sales
- Status: set to Active by default. Deactivate at any time to remove access.
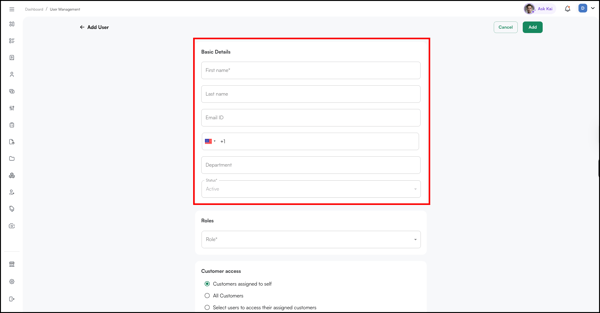
Assign a Role:
Under Roles, select the appropriate role from the dropdown. The role determines what this user can see and do within WizOrder, such as whether they have access to orders, customers, reports, and more.
Note: Make sure the role you're assigning already exists. If it doesn't, create it under the Roles tab first, then come back to add the user.
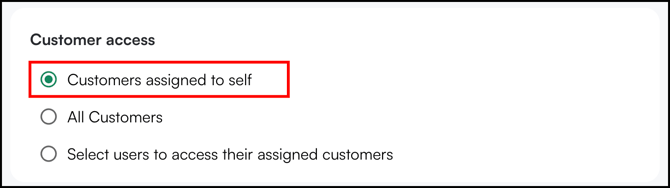
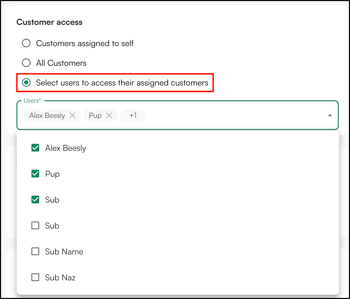
Set Customer Access:
Under Customer Access, choose one:
- Customers assigned to self: they can only see customers assigned to them
- All Customers: they can see every customer in the system
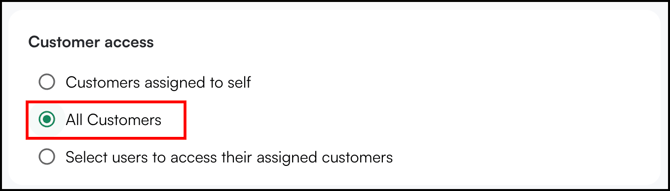
- Select users to access their assigned customers: they can see customers assigned to specific other users
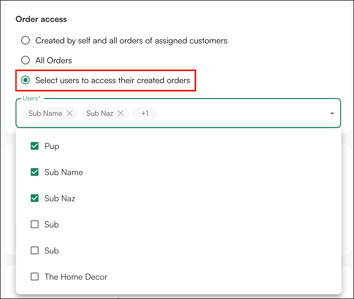
Order Access:
Under Pricelist Access, choose one:
- All Orders: Full access to every order
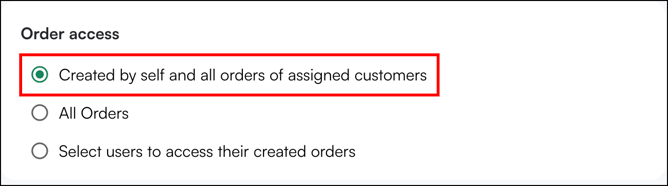
- Orders Assigned to Self: Access only to orders assigned to them
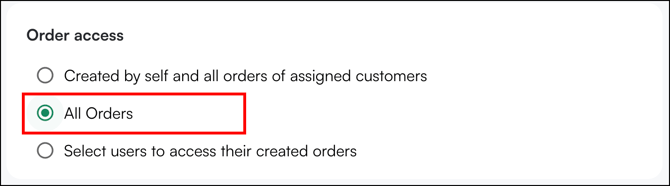
- Orders by Users: Access only to orders placed by specific users you select
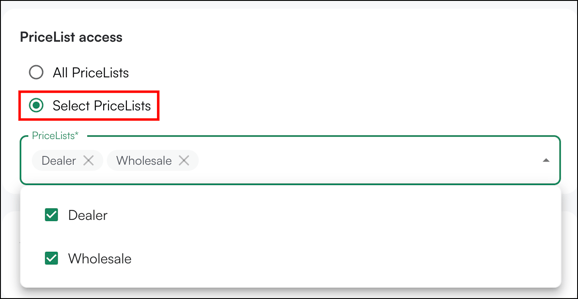
Set Pricelist Access:
Under Pricelist Access, choose one:
- All Pricelists: Full access to every pricelist

- Select Pricelists: access only to the specific pricelists you choose
Once all fields are filled in, click Add in the top right to create the user.
Note: Setting a user's status to Inactive removes their access immediately. If you need to reactivate them later, return to User Management and set their status back to Active. For accounts integrated with an ERP, update the user's status in your ERP first, WizCommerce will reflect the change at the next sync.
D. Roles
How to Create a New Role
- Click Create Role at the top of the Roles page.
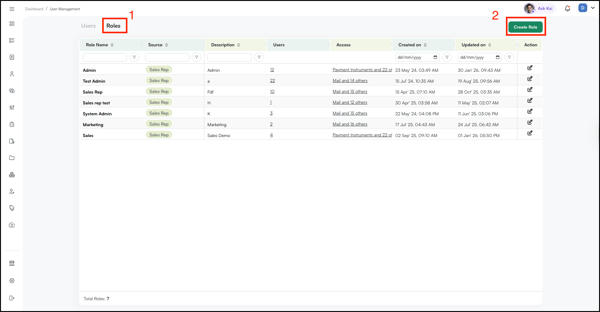
- Enter a Role Name and Description.
- Check the boxes for the permissions you want to grant, such as orders, customers, catalogs, and reports.
- Click Save. The new role appears in the Roles list and can be assigned to users.
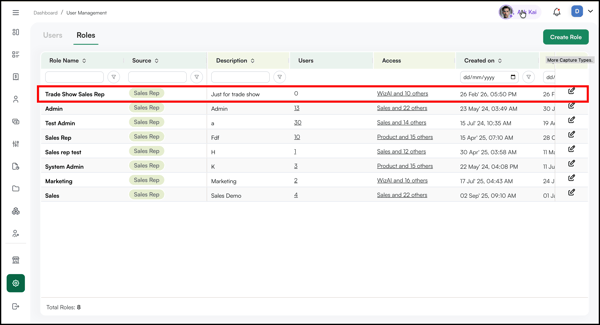
How to Edit an Existing Role
- Find the role you want to update (e.g., Sales Rep).
- Click the Edit icon in the Actions column on the right.

- Update the permissions as needed. Check to grant access whereas uncheck to revoke it. For more control, set access at the action level (e.g., allow view but not edit or delete).
- Click Save. Changes apply immediately to all users assigned that role.
Note: When you activate a feature under Subscriptions (e.g., WizStudio), you must also grant access to that feature within the relevant role. Activating a subscription alone does not give users access automatically.
FAQs
1. What's the difference between Users and Roles?
A. Users are the individual people on your team who access WizOrder. Roles are permission sets that define what each user can see and do. Every user must have a role assigned to them.
2. Can I change a user's role after they've been added?
A. Yes. Go to the Users tab, find the user, and click the Edit icon in the Actions column. You can update their role and access settings at any time.
3. Does a sales rep's password change when their login email is updated?
A. Yes, this happens when admin updates the sales rep's email address through User Management. They will receive a welcome email on their updated email address with an option to reset their password.
Still need help? Reach out to our support team at help@wizcommerce.com.