
Once your images are uploaded and processed, use the editor's panels — Edit with AI, Templates, Resize and Position, Background, and Shadows — to fine-tune how a single image looks before applying changes across the batch.
Platform: WizStudio | Who is this for: Marketing & Catalog Teams
Before You Begin
- Your images must already be uploaded and processed (background removed, reflections cleaned up, product straightened and padded) before you can edit them.
- Start with a single image to test templates, backgrounds, shadows, and framing before applying changes across the whole batch.
- Previewing and editing images doesn't use any credits. You are only charged when you download.
» Edit Generated Images
-
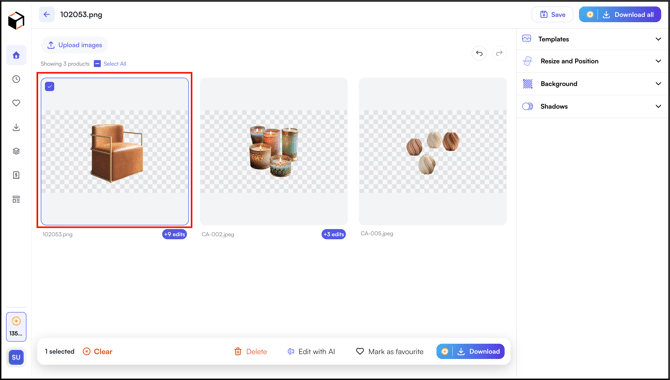
In the editor grid, click the image card you want to edit.
- Quick actions on hover: when you hover over any image card, four icons appear in the top right:
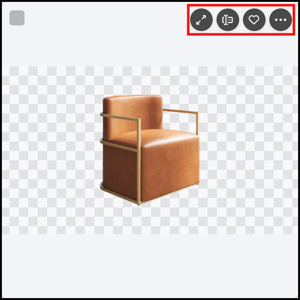
- Expand (↔): Open a larger preview of the image
- AI Edit: Apply AI-driven edits
-
- Mark as favourite (♡): Save this image to your favourites
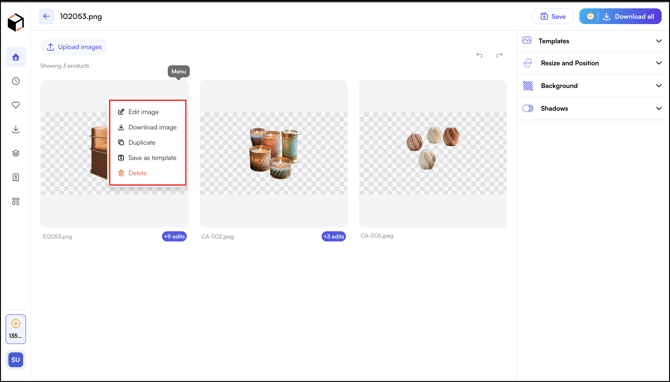
- Menu (⋮): Open a dropdown with Edit image, Download image, Duplicate, Save as template (appears under your template for future use), and Delete
» Edit With AI
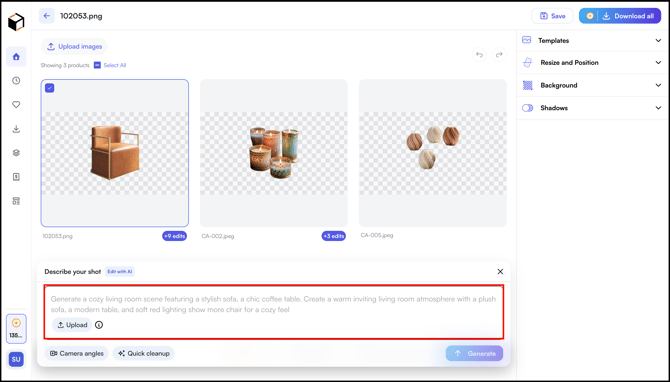
The Edit with AI feature lets you describe a new shot or scene in plain English, and the system generates AI-rendered versions of your product image. Use it for lifestyle scenes, alternative camera angles, or quick cleanup without manually configuring backgrounds and shadows.
- Type a prompt describing the scene, setting, lighting, or mood you want the AI to render (for example, "a cozy living room with warm lighting")
-
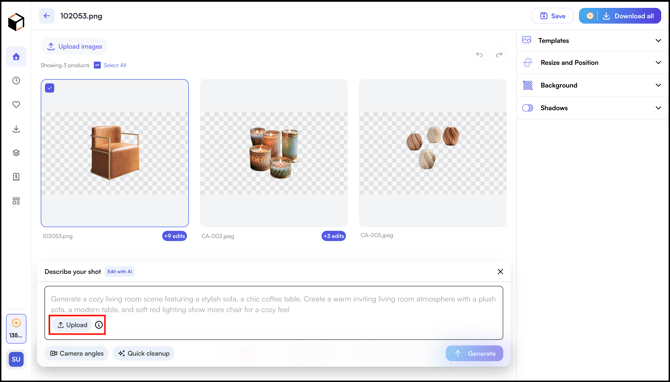
Click Upload to add a reference image for visual context.
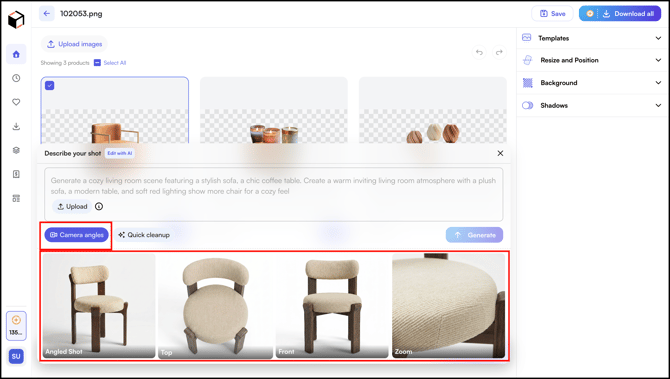
- Click Camera angles to generate the product from preset perspectives (Angled Shot, Top, Front, Zoom) without writing a prompt
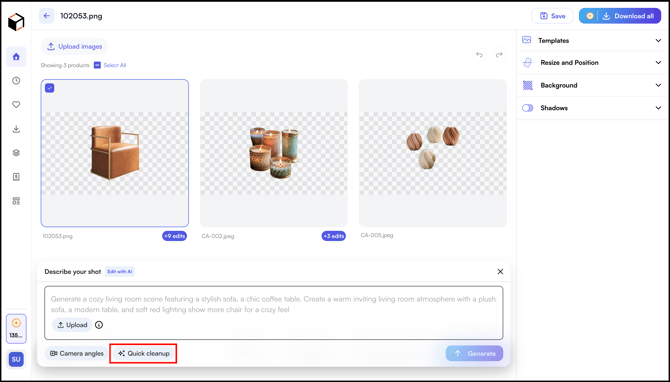
- Click Quick cleanup to apply AI-driven cleanup for minor imperfections like scratches or reflections.
- Click Generate to produce the AI-rendered output. Pick the one you want to keep, and it replaces the original image in your batch.
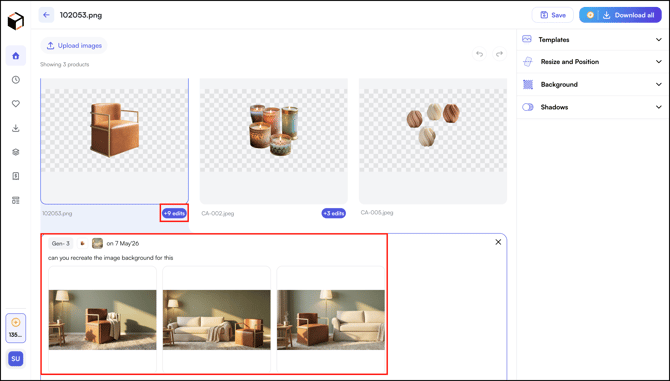
- To view all AI-generated results for a specific image:
- Click the blue button at the bottom right of the product card. The number on the button shows how many AI-generated results are available for that silo.
- Expand the image to preview it in a larger view
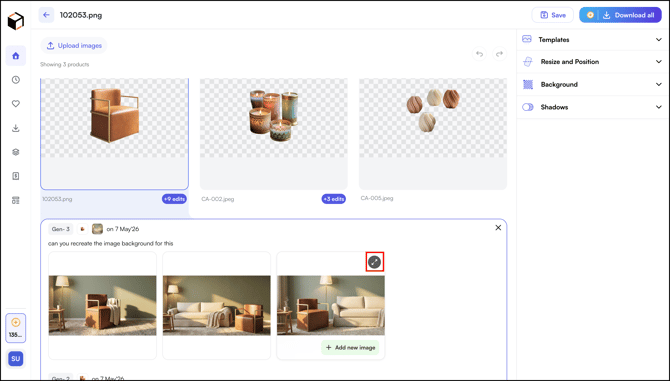
- Click +Add image to add it to the silo board
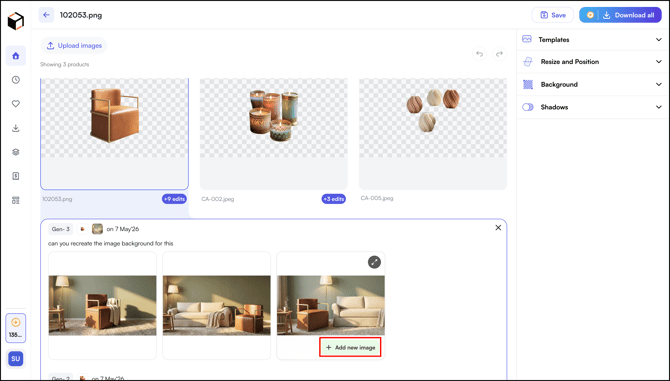
- Click the blue button at the bottom right of the product card. The number on the button shows how many AI-generated results are available for that silo.
» Apply a Template
Templates are pre-built combinations of background, shadow, and positioning you can apply in one click.
- Open the Templates panel on the right.
- Choose between two tabs:
- Studio template: WizStudio's built-in presets, including Classic Portrait White, Clean White Flat, Floating White Studio, Soft Blue Gradient, Grounded Gray Base, and Soft Shadow.
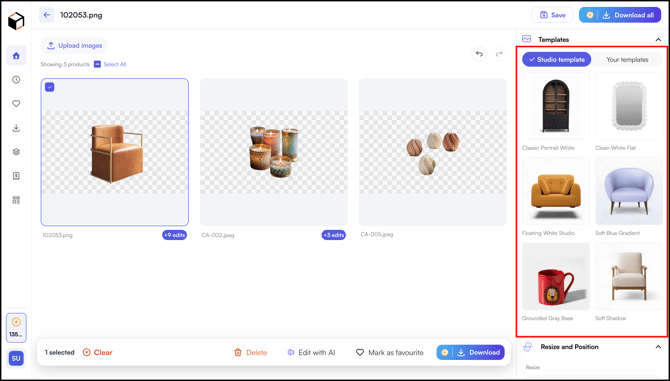
- Your templates: Templates you have saved from previous edits.
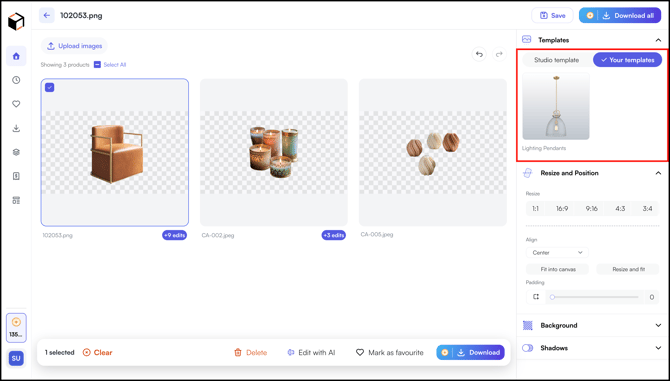
- Studio template: WizStudio's built-in presets, including Classic Portrait White, Clean White Flat, Floating White Studio, Soft Blue Gradient, Grounded Gray Base, and Soft Shadow.
- Click any template to apply it to the selected image or all images at once.
Note: Saved custom templates appear under Your templates and can be reused across future batches.
» Resize and Position
- Open the Resize and Position panel
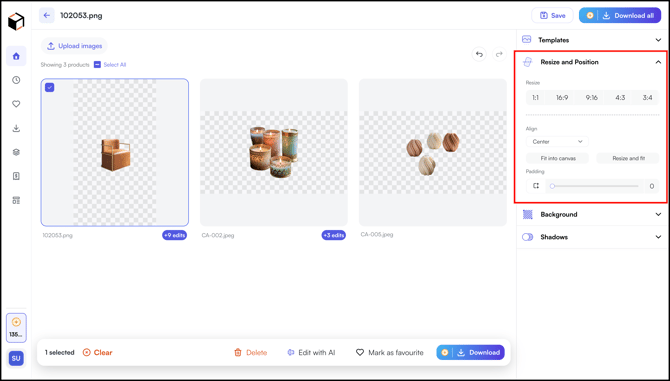
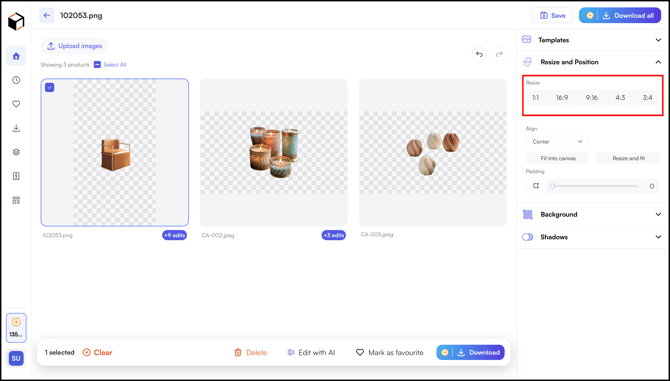
- Select an aspect ratio: 1:1, 16:9, 9:16, 4:3, or 3:4
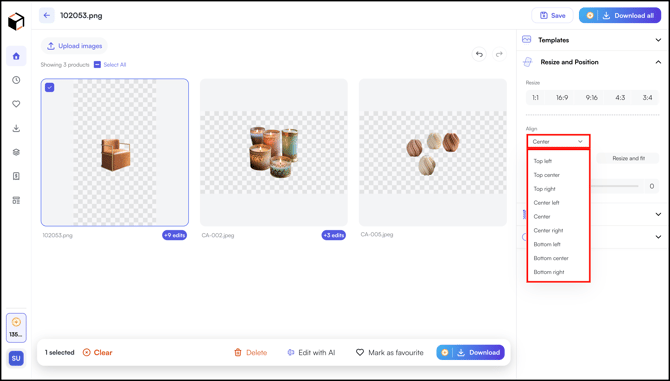
- Set the Align dropdown to position the product within the canvas (default is Center)
- Choose how the product fits the canvas:
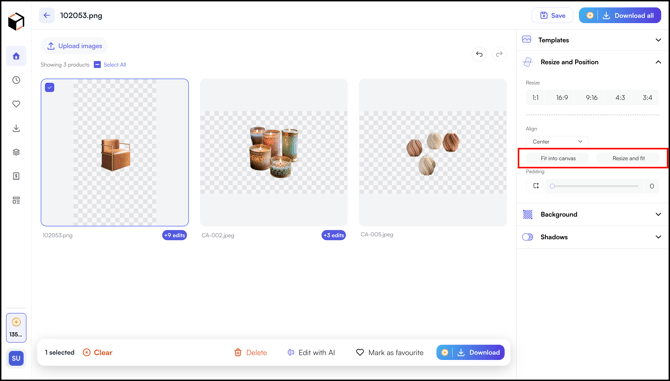
- Fit into canvas: keeps the product's original proportions and fits it inside the frame
- Resize and fit: scales the product to fill the frame
- Adjust the Padding slider to control the spacing between the product and the canvas edge.
» Set the Background
- Open the Background panel.
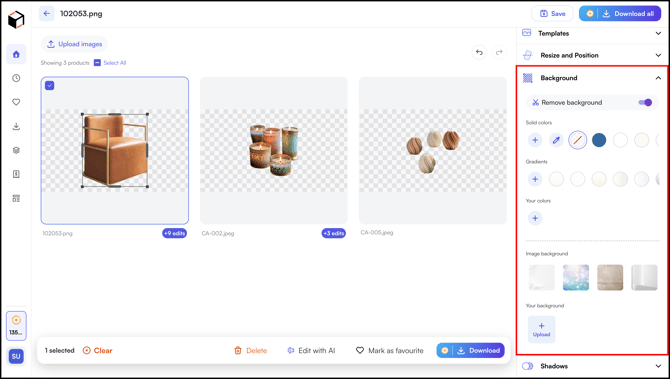
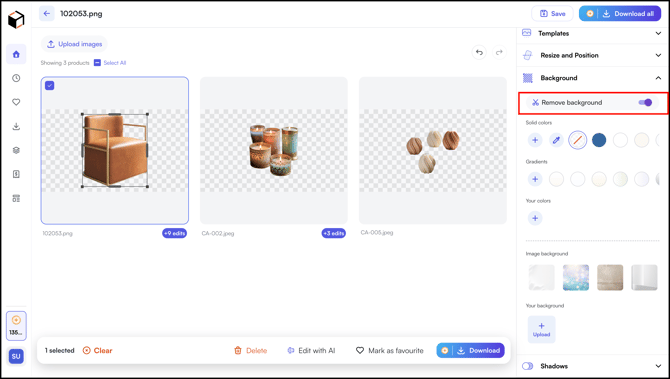
- Confirm the Remove background toggle is on. The system removes the original background automatically when the image is uploaded.
- Choose colored backdrop:
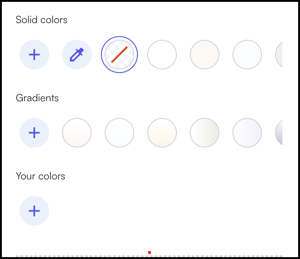
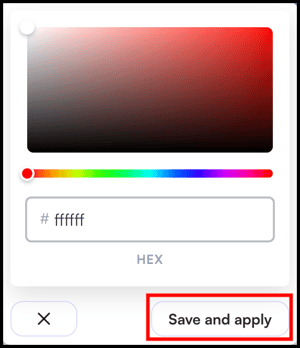
- Solid colors: Pick a preset, or click + to open the color picker. Use the spectrum, hue slider, or HEX code field, then click Save and apply.
- Gradients: Pick a preset, or click + to open the gradient picker. Choose a color from the spectrum or enter a HEX code, set the Gradient angle by selecting one of the four direction options, then click Save and apply to save the gradient for reuse, or Apply to use it without saving.
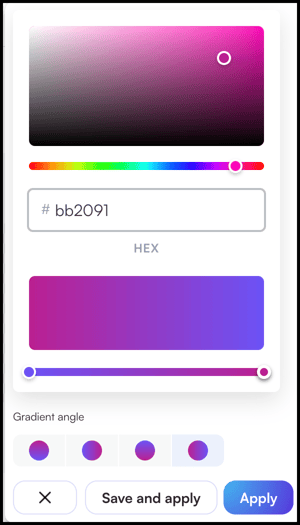
- Your colors: Create a color and use it for the selected silo or across silos
- Solid colors: Pick a preset, or click + to open the color picker. Use the spectrum, hue slider, or HEX code field, then click Save and apply.
- Choose an image backdrop
-
- Image background: Pick from preset backdrop images
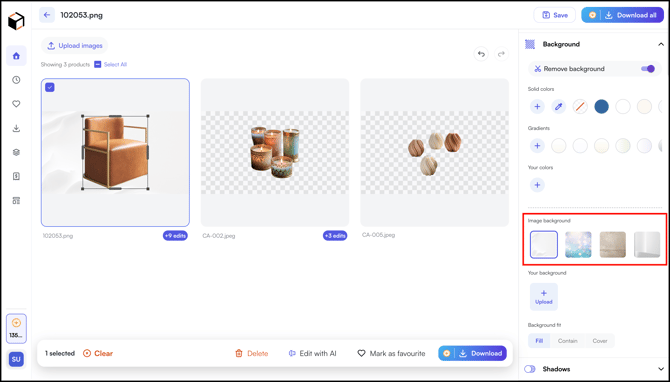
- Your background: Click Upload to choose and add a custom background image from your device.
- Image background: Pick from preset backdrop images
» Add Shadows
- Open the Shadows panel
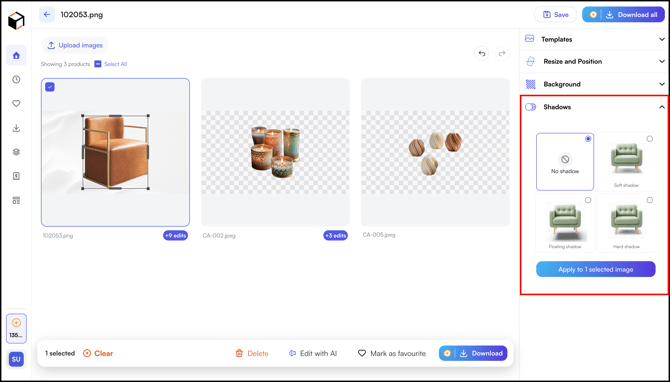
- Choose one of the four presets:
- No shadow: Keeps the product as it is, or removes any shadow presets if applied
- Soft shadow: A subtle, diffused shadow beneath the product
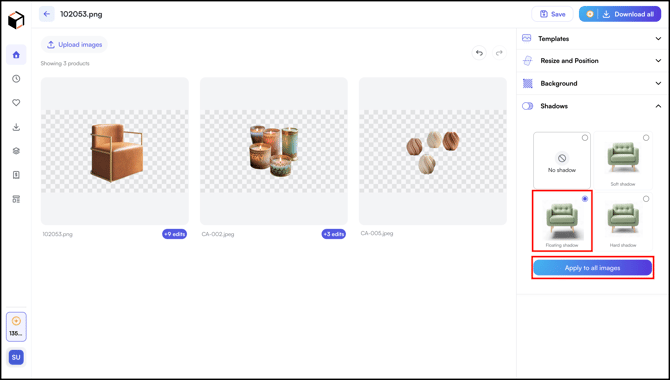
- Floating shadow: A shadow that gives the product the appearance of floating above the surface
- Hard shadow: A sharp, defined shadow with strong contrast
- Click Apply to all images to apply the same shadow across the whole batch.
» Related Article →
Still need help? Reach out to our support team at help@wizcommerce.com.